Table of Contents
Advertisement
Quick Links
WELCOME TO THE WORLD OF BARBEQUES GALORE OUTDOOR COOKING
INSTRUCTIONS FOR ASSEMBLY AND USE OF
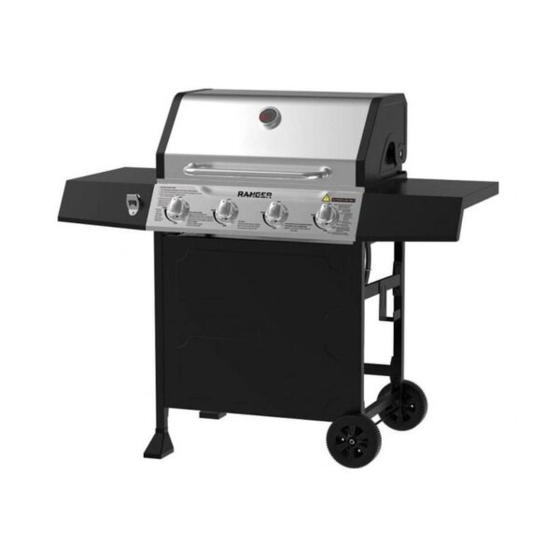
BARBEQUE MASTER 4B BBQ ON CART BARBEQUES
These instructions contain important information that needs to be followed for the safe assembly and use of your
new barbeque. Please read through carefully and completely prior to assembly.
Take care to remove all packaging materials and protective coatings from the barbeque
IMPORTANT: READ ALL OPERATING INSTRUCTION BEFORE LIGHTING.
By following these instructions for safe and easy operation, you will enjoy years of
satisfying, trouble free outdoor cooking. And when you're fully up and running, you can
visit your retailer for some great accessories and cooking tips to make your experience
even more rewarding. But first things first....
Page 1
Code: G4RANQ
For the safe use and enjoyment of your new barbeque.
For Code: G4RANQ
before first use.
Tools required:
1 x Phillips head screwdriver
1 x Adjustable spanner
1 x Pair pliers
Advertisement
Table of Contents

Subscribe to Our Youtube Channel
Summary of Contents for Ranger G4RANQ
- Page 1 WELCOME TO THE WORLD OF BARBEQUES GALORE OUTDOOR COOKING INSTRUCTIONS FOR ASSEMBLY AND USE OF BARBEQUE MASTER 4B BBQ ON CART BARBEQUES Code: G4RANQ For the safe use and enjoyment of your new barbeque. These instructions contain important information that needs to be followed for the safe assembly and use of your new barbeque.
- Page 2 Safety warnings HAZARDOUS FIRE OR EXPLOSION MAY RESULT IF THESE INSTRUCTIONS ARE IGNORED It is the consumer’s responsibility to see that the barbeque is properly assembled, installed, and taken care of. Failure to follow instructions in this manual could result in bodily injury and/or property damage. FOR YOUR SAFETY IF YOU SMELL GAS: 1.
- Page 3 Safety warnings (continued) Do not perform any servicing on the barbeque yourself. This includes internal adjustment of the regulator and gas valves. Servicing can only be carried out by authorised technicians. It is important that you install your barbeque exactly as described in these instructions. In particular: you should keep the barbeque clear of combustible material, and you should check for leaks whenever a new connection is made.
- Page 4 Where to put your barbeque This barbeque must only be used in an above ground, open air situation with natural ventilation, without stagnant areas, where gas leakage and products of combustion are rapidly dispersed by wind and natural convection. Any enclosure in which the appliance is used must comply with one of the following: (1) Any enclosure with walls on all sides, but at least one permanent opening at ground level,...
- Page 5 Where to put your barbeque (continued) A minimum clearance of 600mm from combustible constructions to the sides of the grill and 600mm from the back of the grill to Combustible constructions must be maintained. When used on the ground always place the appliance and cylinder on firm, flat, level ground. NEVER light the BARBEQUE with the HOOD in the closed position.
- Page 6 Contents list. Carefully unpack the carton and check all the parts: A. One Firebox & B. One C. One Hood D. Four Control E. One Left Side Hood Assembly Temperature Handle Knobs Shelf Gauge Assembly F. One Bottle G.
- Page 7 Contents list. Carefully unpack the carton and check all the parts: (continued) Z. One Hotplate TT. Two Wheels UU. One Bolt Pack VV. Two Rubber Cushions (spare) Bolt Pack includes: AA. Twenty M6*16mm BB. One M10 CC. Two M6 Screws Flange nuts Washers Before you start, check that you have all the contents as above.
-
Page 8: What You Need
Assembly instructions STEP 1: Attach LEFT Leg End Caps WHAT YOU NEED: One x Left Back Leg (J) One x Left Front Leg (K) Two x Leg End Caps (H) LF = LEFT FRONT LB = LEFT BACK Put Left Back Leg (J) and Left Front Leg (K) into Leg End Caps (H) as shown. -
Page 9: Step 4: Attach Wheels
Assembly instructions (continued) STEP 3: Attach RIGHT Side Beams and Drip Tray Support. WHAT YOU NEED: Two x M6*16mm screws (AA) One x Side Beam (R) (no holes) One x Drip Tray Support (N) One x Right Front Leg (L) ... - Page 10 Assembly instructions (continued) STEP 5: Attach Rear Beam WHAT YOU NEED: One x Rear Beam (P) Loosen Four pre-assembled M6*16mm screws (AA) from Left Back Leg (K) and Right Back Leg (M), leave the screw heads protruding ...
- Page 11 Assembly instructions (continued) STEP 7: Attach Firebox WHAT YOU NEED: Four x M6*16mm screws (AA) One x Firebox & Hood Assembly (A) This requires two people to lift and place the Firebox & Hood Assembly (A) onto the cart and firmly fasten with Four M6*16mm screws (AA) as shown.
-
Page 12: Step 10: Attach Left Side Shelf
Assembly instructions (continued) STEP 10: Attach Left Side Shelf WHAT YOU NEED: Six x M6*16mm screws (AA) One x Left Side Shelf (E) One x M6 Washer (CC) Attach Two M6*16mm screws (AA) into the upper two holes on Left Side Shelf (E). Leave the screw heads protruding approximately 5mm. - Page 13 Assembly instructions (continued) STEP 12: Attach Flame Tamers, Cooking Grates, Hotplate WHAT YOU NEED: Three x Flame Tamers (W) Two x Cooking Grills (XX) One x Hotplate (Z) Fit Three Flame Tamers (W), Two Cooking Grills (XX), One Hotplate (Z) into the firebox as shown.
- Page 14 Assembly instructions (continued) STEP 14: Attach Hose Ring Attach the Hose Ring to the Right Front Leg and fasten firmly using the pre-assembled Screw. CAUTION: Always secure the hose to the leg to keep the regulator & hose away from hot surfaces and accidental dripping hot grease.
- Page 15 Checking the gas type and supply Before assembling your barbeque, you should ensure your barbeque is suited to the type of gas which you are going to use. This is a low pressure barbeque and must only be used with propane gas only using the hose and regulator supplied.
- Page 16 Checking for gas leaks and connecting the gas Always keep the gas cylinder in an upright position. Always close the gas cylinder valve when the barbeque is not in use. Do not subject the gas cylinder to excessive heat. NEVER STORE YOUR GAS CYLINDER INDOORS. If you store your barbeque indoors, ALWAYS disconnect the gas cylinder first and store it safely outside.
-
Page 17: Lighting Instructions
Lighting and controlling the bbq LIGHTING INSTRUCTIONS After confirming there are no leaks: 1. Open the hood of the barbeque while lighting the main burners. 2. Turn all the control knobs clockwise to OFF position. 3. Connect the regulator to the gas bottle. Turn the gas supply ON at the gas cylinder. 4. - Page 18 Lighting and controlling the bbq (continued) Turning OFF: When you’ve finished cooking, leave the burner controls on HIGH for a maximum of five minutes to burn off excess grease from the flame tamers and other surfaces. To turn the barbeque off, it is best to turn OFF the gas cylinder first, and allow all the gas left in the hose to burn off.
- Page 19 Controlling flare up Flare-ups are caused by juices and oils from the food igniting in sudden bursts of flame that come up over the grill. A little bit of flare up as well as the resulting smoke is a good thing. It’s what gives barbequed food that unique outdoor flavour.
- Page 20 Covered cooking (continued) Cooking with the Hood Closed: Using the roasting hood traps heat, moisture and flavour that is normally lost on an open top barbeque. For covered cooking, there are two basic ways to cook: (A) Direct Cooking and (B) Indirect Cooking.
- Page 21 Covered cooking (continued) On this barbeque, half the burners on and half the burners OFF is usually the best setting for roasting. The roast on its rack in the drip pan is best positioned above the OFF burners. The roast may need to be rotated 180 degrees laterally half way through cooking to brown evenly.
- Page 22 Internal meat temperatures To obtain correct temperature use an instant-read meat thermometer in the thickest part of the flesh, careful not to touch any bone. Veal Beef Preference Meat Probe temperature Preference Meat Probe Temperature Rare not advised Rare 140ºF / 60ºC Medium 155ºF / 70ºC minimum safe temperature Medium 150ºF / 66ºC...
- Page 23 Cooking times (continued) Poultry Weight or Barbecuing Cut of Meat Approx. Cooking Time Thickness Method Chicken (whole) 2 kg Indirect 70-80 min Chicken (halved or quartered) 2 kg total Indirect 55-65 min Direct or 12-15 min (Direct) Chicken (breasts, boneless) 150 g ea Indirect 23-25 min (Indirect)
- Page 24 Care and maintenance Cleaning your barbeque: Your barbeque will look better and last longer if you keep it clean. Follow these simple steps. Shut down and disconnect the gas cylinder when cleaning the barbeque. The cooking surfaces: While the cooking surfaces are still hot, take a long handled brush and a scraper and remove remaining oil and food scraps.
- Page 25 Care and maintenance (continued) Storing Your Barbeque: Your barbeque is designed to be used outdoors. However, just like a car, you will prolong the life of the appliance if you store it out of direct exposure to the elements when not in use. This can be done in many ways: ...
-
Page 26: Troubleshooting Guide
Troubleshooting guide Problem Possible Cause Prevention / Solution Burner will not light No gas flow Check cylinder contents- refill Obstructed gas flow Check burners and hose Burner not over the valve Engage burner over the valve Spider webs in the burner Clean the burners Burner ports blocked Clean the burner ports... - Page 27 Exploded Drawing - Part List Page 27 ...
-
Page 28: Spare Part
Exploded Drawing - Part List QTY PER PART DESCRIPTION PART NO QTY PER BBQ SPARE PART CODE 1 Hood Assembly CP9155895 1 1 2 Hood Hinge CP9153244 2 2 3 Hood Handle Bezel 2 CP9153245 1 set 4 Hood Handle 1 5 Temperature Gauge Bezel 1 CP9155896 1 set 6 Temperature Gauge 1 7 Rubber Cushion CP9153090 ... - Page 29 QTY PER PART DESCRIPTION PART NO QTY PER BBQ SPARE PART CODE 27 Control Knob CP9155915 4 1 28 Knob Bezel CP9155924 4 1 29 Manifold & Gas Valve Assembly CP9155916 1 1 30 Control Panel CP9155917 1 1 31 Bottle Opener CP9153275 1 1 32 Left Side Shelf CP9155899 1 1 33 Spark Electrode ...
-
Page 30: Data Plate
Or visit us online at: www.barbequesgalore.com.au Barbeques Galore G.L.G. Australia Pty Ltd (ACN 001 185 002). Building A2, Campus Business Park, 350-374 Parramatta Road. Homebush NSW 2140AUSTRALIA Ph. 02 9735 4111 G4RANQ-SERIES 0520 Page 30 ...
Need help?
Do you have a question about the G4RANQ and is the answer not in the manual?
Questions and answers