Table of Contents
Advertisement
Quick Links
Advertisement
Table of Contents

Related Manuals for Baumatic I SL5 SS


Summary of Contents for Baumatic I SL5 SS
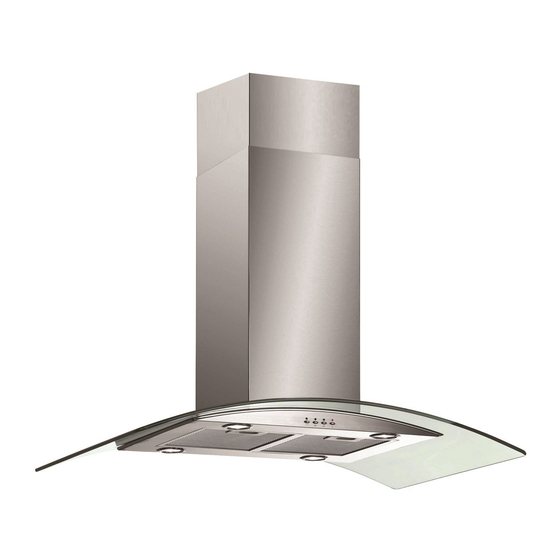
- Page 1 I SL5 SS 9 0 cm Gla ss isla n d cook e r h ood...
- Page 2 Use r M a n u a l for you r Ba u m a t ic I SL5 SS Cook e r H ood 9 0 cm Gla ss isla n d cook e r h ood in st a in le ss st e e l...
-
Page 3: Table Of Contents
Con t e n t s Pa ge Envir on m e nt a l n ot e I M PORTAN T SAFETY I N FORM ATI ON 5 – 7 Spe cifica t ion s of you r cook e r h ood Usin g you r Ba u m a t ic cook e r h ood 9 - 10 Before first use... -
Page 4: En Vi Ron M En Tal N Ote
EN VI RON M EN TAL N OTE N ot e : Be for e disca r din g a n old a pplia n ce , sw it ch off a n d discon n e ct it fr om t h e pow e r su pply. Cut off a n d r e n de r a n y plu g u se le ss. -
Page 5: I M Portan T Safety I N Form Ati On
I M PORTAN T SAFETY I N FORM ATI ON Your safet y is of t he ut m ost im port ance t o Baum at ic. Please m ake sure t hat you read t his inst ruct ion booklet be for e at t em pt ing t o inst all or use t he appliance. - Page 6 o The edges of t he cooker hood are sharp – be m indful of t his as you handle your appliance, especially during inst allat ion and cleaning. D O N OT CLEAN I N BEH I N D TH E GREASE FI LTERS! o I f t he room where t he cooker hood is t o be used cont ains a fuel burning appliance such as a cent ral heat ing boiler t hen it s flue m ust be of t he sealed or balanced flue t ype.
- Page 7 o Rem em ber t hat when in ext ract ion m ode, your cooker hood is rem oving air from your room . Ensure t hat proper vent ilat ion m easures are being observed. o N ot e t h a t it r e m ove s odou r s fr om you r r oom , n ot st e a m . o W a r n in g - Alw a ys e n su r e t h a t t h e cook e r h ood h a s be e n discon n e ct e d fr om t he pow e r su pply be for e ca r r yin g ou t a n y w or k...
-
Page 8: Spe Cifica T Ion S Of You R Cook E R H Ood
Spe cifica t ion s of you r cook e r h ood Con gr a t u la t ion s on pu r ch a sin g a Ba u m a t ic cook e r h ood! PROD UCT D I M EN SI ON S Height : 690 m m * –... -
Page 9: Usin G You R Ba U M A T Ic Cook E R H Ood
Usin g you r Ba u m a t ic cook e r h ood Be for e fir st u se I M PORTAN T: TH I S PROCESS M UST BE FOLLOW ED BEFORE TH E COOKER H OOD I S USED FOR TH E FI RST TI M E. -
Page 10: Cle A N In G You R Ba U M A T Ic Cook E R H Ood
= Light on/ off but t on I M PORTAN T: I D EALLY YOU SH OULD TURN ON YOUR H OOD TEN M I N UTES BEFORE YOU START TO COOK, OR AT TH E VERY LEAST W H EN YOU BEGI N COOKI N G. YOU SH OULD ALSO RU N YOUR H OOD FOR TEN M I N UTES AFTER YOU H AVE FI N I SH ED COOKI N G. -
Page 11: M A Int E Na Nce
Th e gr e a se filt e r s o Your cooker hood includes t wo grease filt ers which help t o absorb grease part icles t o prot ect your kit chen & furnit ure from greasy residues. o The m et allic filt ers m ay becom e inflam m able if t hey becom e sat urat ed wit h t his greasy residue. -
Page 12: Changing A Light Bulb
o Refit t he grease filt ers once it has dried. o I M PORTAN T: Le t t h e gr e a se filt e r s dr y t hor ou gh ly be for e r e fit t in g t h e m in t he cook e r h ood. Ch a n gin g a ligh t bu lb I M PORTAN T: BEFORE ATTEM PTI N G TO CH AN GE A LI GH T BULB, YOU M UST EN SURE TH AT YOU... -
Page 13: Fit T Ing T He Carbon Filt Er
o I M PORTAN T: Defect ive bulbs should be replaced im m ediat ely. o I f t he light s st ill do not work, m ake sure t hat t he bulbs are fit t ed properly int o t heir housings before you call for t echnical assist ance. -
Page 14: I Nst A Lla T Ion
3) Aft er insert ing t he front edge of t he carbon filt er int o t he slot on t he cooker hood. Lower t he back edge of t he carbon filt er, unt il it clicks int o place at t he rear of t he rect angular hole. -
Page 15: Elect Rical Connect Ion
Ele ct r ica l con n e ct ion YOUR COOKER H OOD I S I N TEN D ED FOR FI TTED AN D PERM AN EN T I N STALLATI ON . o The cooker hood’s power cable m ust be fit t ed upst ream from t he elect rical connect ion, using an om ni- polar swit ch wit h a cont act dist ance of at least 3 m m . -
Page 16: Before Beginning Inst Allat Ion
Be for e be ginning inst a lla t ion o Check t hat t he product purchased is of a suit able size for t he chosen inst allat ion area. I n addit ion check whet her t here is an elect rical socket available t hat will be accessible once t he hood is m ount ed. -
Page 17: Posit Ioning
Posit ion in g Height of t he appliance Tot al height of t he kit chen Height of t he workt op Dist ance bet ween t he hob and t he hood 9 cm = Height of t he hood canopy o To work out t he height of t he appliance, you need t o use t he following form ula: X = A –... -
Page 18: I Nst Alling Your Cooker Hood
I M PORTAN T: Alt hough t he m inim um height of t he appliance can be set at 690 m m . During t he inst allat ion process you will need t o m ove t he lower chim ney sect ion upwards, t o allow you t o at t ach t he m ain body of t he hood t o t he fram ework. -
Page 19: Supplied Inst Allat Ion Com Ponent S
Su pplie d in st a lla t ion com pon e n t s 1 ) Posit ion t he hanging plat e on t he ceiling and t hen m ark t he posit ion of t he screw holes. - Page 20 2 ) Fix t he angle bars t o t he hanging plat e, using t he 8 x M4 nut s and bolt s wit h m et al washers. 3 ) Ext end t he angle bars t o t he required height and t hen fix t hem in posit ion using t he 16 x M4 nut s and bolt s wit h m et al washers.
- Page 21 5 ) I f you are going t o be using t he hood in ext ract ion m ode, you should fit t he spigot for t he duct hose ont o t he m ain body of t he cooker hood, using t he 4 x M4 bolt s, 6 ) I f t he glass canopy has not been pre- assem bled by t he fact ory, t hen it should be...
-
Page 22: Ex T R A Ct Ion M Ode Or R E Cir Cu La T Ion M Ode
o Rem ove t he hanging hook and t hen slide t he lower chim ney sect ion downwards, unt il it rest s against t he m ain body of t he cooker hood. o Use a st ainless st eel cleaner and polish on t he st ainless st eel sect ions of t he appliance. -
Page 23: Tr Ouble Shoot Ing
Tr ou ble sh oot in g I M PORTAN T: I f you r cook e r h ood a ppe a r s n ot t o be ope r a t in g pr ope r ly, be for e con t a ct in g Ba u m a t ic Cu st om e r Ca r e , ple a se r e fe r t o t he ch e ck list be low . - Page 24 I M PORTAN T: I f you r a pplia n ce a ppe a r s n ot t o be ope r a t in g cor r e ct ly, t h e n you sh ou ld discon n e ct it fr om you r m a in s su pply a n d t h e n con t a ct Ba u m a t ic Cu st om e r Ca r e on t e le ph on e n u m be r ( 0 1 1 8 ) 9 3 3 6 9 1 1 .
-
Page 25: Cont A Ct De T A Ils
Un it e d Kin gdom Cze ch Re pu blic Baum at ic Lt d., Baum at ic CR spol s.r.o. Baum at ic Buildings, Am perova 495 6 Bennet Road, 46215, Librec Reading, Berkshire Czech Republic RG2 0QX Unit ed Kingdom + 420 800 185 263 Sa le s Te le ph on e...
Need help?
Do you have a question about the I SL5 SS and is the answer not in the manual?
Questions and answers