Table of Contents
Advertisement
Quick Links
Advertisement
Table of Contents

Subscribe to Our Youtube Channel
Related Manuals for Baumatic GEH6018


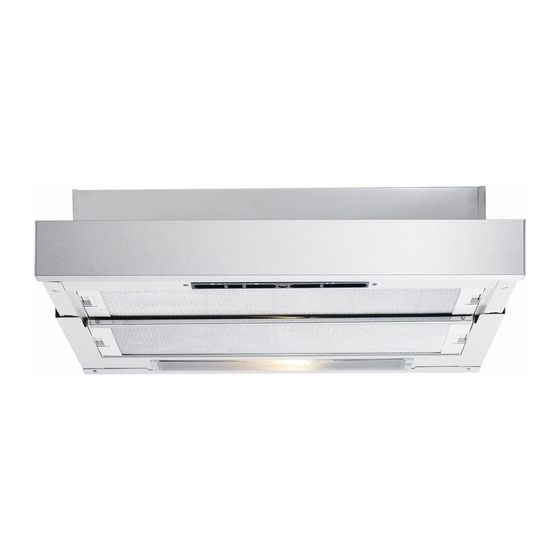
Summary of Contents for Baumatic GEH6018
- Page 1 User Manual for your GEH6018 Cooker Hood NOTE : This User Instruction Manual contains important information, including safety & installation points, which will enable you to get the most out of your appliance. Please keep it in a safe place so that it is easily available for future reference.
-
Page 2: Table Of Contents
CONTENTS YOUR COOKER HOOD’S SPECIFICATIONS ….……………..………….2 IMPORTANT SAFETY INFORMATION……………………………….…3-4 CARING FOR THE ENVIRONMENT…………………………………………5 USING YOUR COOKER HOOD…...6 MAINTAINING AND CLEANING YOUR COOKER HOOD ……….7-9 INSTALLATION INSTRUCTIONS ……………………….……...….10-11 ELECTRICAL CONNECTION……………10 INSTALLING THE COOKER HOOD……11 TROUBLESHOOTING ……………………………………………12 CONDITIONS OF GUARANTEE……………………………………………13 HT 10/10/06... -
Page 3: Your Cooker Hood's Specifications
Specifications of your GEH6018 Cooker Hood Congratulations on purchasing a Cooker Hood! To fully enjoy using your appliance long into the future, please firstly familiarise yourself with its specifications, safety advice and operational instructions included in this manual. You will also need this manual to ensure that your Cooker Hood has been installed properly. -
Page 4: Important Safety Information
Important Safety Information: Please Read this before installing & using. Any installation work must be DO NOT SET YOUR * NOTE - carried out by a qualified COOKER HOOD LESS THAN electrician or competent person. 600mm ABOVE YOUR COOKER! The hood must be installed in o When installed between accordance with the installation adjoining wall cabinets,... -
Page 5: Important Safety Information
Important Safety Information: Please Read this before installing & using. air from your room. Ensure that proper o Ensure the ducting for the extractor function Ventilation measures are has the same diameter as being observed. Note the outlet hole all the that it removes odours way through. -
Page 6: Caring For The Environment
fitted or if the filters are Do not attempt to use excessively greasy! the cooker hood if it is damaged in any way. Never flambé cook under Never attempt to use it this cooker hood . without the grease filters Environmental Note Note : Before discarding an old appliance, switch off and... -
Page 7: Using Your Cooker Hood
Using your Cooker Hood: To use your cooker hood: 1) Make sure it has been properly installed. 2) Find the CONTROL PANEL. It is located centrally on the hood’s front surface, on the underside of the unit. 3) The CONTROL PANEL contains two rows of switches. These perform separate functions. -
Page 8: Maintaining And Cleaning Your Cooker Hood
LIGHT ON/OFF switch – Slide the ‘C-1’ switch in figure above from ‘0’ to ‘1’. Cleaning your Cooker Hood: Before cleaning, always ensure that you have IMPORTANT: switched your cooker hood OFF at the omni-polar switch, set at the wall from the cable: Cleaning ... - Page 9 normal washing-up detergent. DO NOT USE A DISHWASHER TO ACHIEVE THIS. Maintenance - Cleaning the Anti-grease Filters Please Read this before installing & using. First remove the grille by pulling down on it. Undo the side catches. You can now clean the anti-grease filter grilles. ...
- Page 10 Let the filter grilles dry thoroughly before refitting them. Maintenance – Changing the Light Bulb and Carbon Filter Changing the LIGHT BULB Disconnect the hood from the power supply. Access the lamp area. Please note that you will have to take off the ...
-
Page 11: Electrical Connection
that the ‘X’ on the filter lines If your filter is different (i.e. up with the ‘Y’ on the is the Bayonet Circular- conveyor. Then turn insert type, clockwise. Reverse to Position the filter P in order dismount to cover the motor protection grille, ensuring INSTALLATION INSTRUCTIONS - Electrical Before installation and usage, read all the instructions and make sure that the... -
Page 12: Installation Instructions
The BLUE WIRE 2) The BROWN must be connected WIRE must be to the terminal connected to the marked ‘N’ terminal marked (Neutral), or ‘L’ (‘Live’), or coloured Black. coloured RED (Fig. 7 – at left ) INSTALLATION INSTRUCTIONS – installing your Cooker Hood The cooker hood must not ... -
Page 13: Troubleshooting
5 1 6 1 9 4 Troubleshooting If something has gone wrong with your Cooker Hood, checking against this chart might keep you from having to call for service. Symptom Solution Check that the hood is connected To the electricity supply. The cooker hood will not start! ... -
Page 14: Conditions Of Guarantee
Think Appliances will provide free of charge the parts required to repair the appliance during the warranty period, only if they are fitted by a qualified technician(for this phone Think appliances),for any... - Page 15 In the course of the work carried out it may be necessary to remove the appliance from its operating position. Whilst all reasonable care will be taken, Think Appliances cannot accept responsibility for damage sustained to any property whatsoever in this process.
- Page 16 If you have any further questions please contact Think Appliances Pty Ltd: SERVICE DEPARTMENT Phone: 1800 444 357 Fax: 1300 133 279 Email:service@thinkappliances.com SALES DEPARTMENT Phone: 1300 132 824 Fax: 1300 660 188 Web: www.thinkappliances.com...
Need help?
Do you have a question about the GEH6018 and is the answer not in the manual?
Questions and answers