Table of Contents
Advertisement
Quick Links
INSTRUCTION MANUAL
80LB (36kgs)
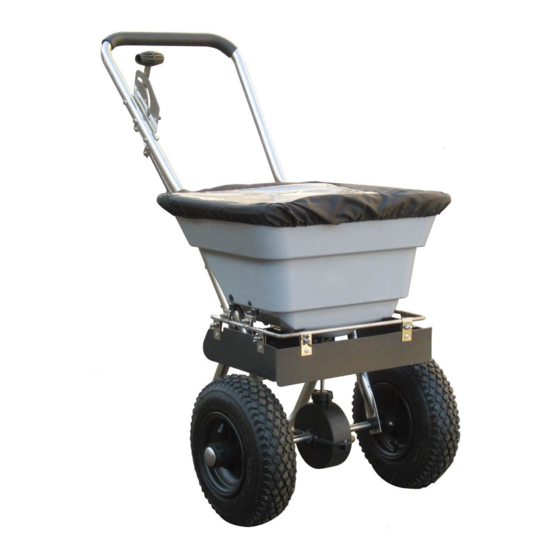
SALT SPREADER
Model No: THSS80 -- Product No: 1938116002
ASSEMBLY REQUIRED
SAVE THESE INSTRUCTIONS
SPARES & SUPPORT: 01793 333212
Please read & understand this manual, paying attention to the safety instructions, before use.
The manufacturer reserves the right to change the product specification and livery according to
continued product improvements.
Images used are for illustration purposes only
02/02/2017
Advertisement
Table of Contents

Subscribe to Our Youtube Channel
Summary of Contents for The Handy THSS80
- Page 1 INSTRUCTION MANUAL 80LB (36kgs) SALT SPREADER Model No: THSS80 -- Product No: 1938116002 ASSEMBLY REQUIRED SAVE THESE INSTRUCTIONS SPARES & SUPPORT: 01793 333212 Please read & understand this manual, paying attention to the safety instructions, before use. The manufacturer reserves the right to change the product specification and livery according to continued product improvements.
-
Page 3: Table Of Contents
CONTENTS SPECIFICATION IMPORTANT INFORMATION GENERAL SAFETY INSTRUCTIONS COMPONENTS ASSEMBLY MAINTENANCE OPERATION RATE SETTINGS PARTS DIAGRAM PARTS LIST WARRANTY ASSEMBLY IS REQUIRED This product requires assembly before use. See the “Assembly” section for instructions. Please check that all parts required for the assembly of this spreader are included. If for any reason you believe a part for the assembly is missing or damaged, please contact us. -
Page 4: Specification
SPECIFICATION The manufacturer reserves the right to change the product specification and livery according to continued product improvements. Model THSS80 Product Number 1938115002 Weight 10.4kg Capacity (Weight) 36kg Tyre Rating 2 Ply Tyre Maximum PSI 25psi (Do not exceed) IMPORTANT INFORMATION INTENDED USE The product is intended for spreading granular material for domestic gardens. - Page 5 moving parts. PROTECT THE ENVIRONMENT INSPECT YOUR MACHINE Take left over materials to an authorised Check all bolts, nuts & screws for tightness collection point or follow the stipulations in before each use, especially those securing the country where the machine is used. Do guards &...
-
Page 6: Components
COMPONENTS... -
Page 7: Assembly
ASSEMBLY STEP 1 Install the impeller onto the gearbox and axle assembly. Align the impeller with the hole on the axle, located nearest the gearbox. Insert M4x20 screw, through the side of the impeller and the gearbox axle. Tighten until secure. - Page 8 STEP 2 Attach the Wheel Assembly Frame to each side of the Gearbox Assembly and Fixing Connecting Rod, insert two bolts M6x35 into the fixing connecting rod through the Wheel Assembly Frame. Make sure the hole in the Gearbox Axle is on the RIGHT SIDE, when assembling, as shown. ...
- Page 9 STEP 3 Insert the Inner Axle Bushing into the Outer Axle Bushing and make sure they are tight. Install the right Wheel Assembly onto the right Axle using bolt M6x60 and lock nut M6, and then install the Cap onto the right Axle using a wooden or rubber hammer. ...
- Page 10 STEP 4 Attach the Upper Handle to the top of the Support Leg using four Hex bolts M6x40 and Lock Nuts M6. NOW GO BACK AND TIGHTEN ALL THE NUTS AND BOLTS STARTING WITH THE FIRST STEP. DO NOT OVER TIGHTEN.
- Page 11 STEP 5 Insert the cable wire into the adjustable handle hole. Put the cable into the slot of the pressure plate. Secure with the clamping plate and screw on with the M5x10 bolts. Insert the R pin into the hole on small wheel shaft.
- Page 12 STEP 6 Attach four Flat Washers Ø6 to four Hex Bolts M6x30 Insert into the hopper, Add the Spacer Bushes, then attach the Deflector Assembly to the bottom of the hopper. Fasten the bolts with four Lock Nuts M6. 1.
-
Page 13: Maintenance
MAINTENANCE LUBRICATE Maintenance spray or multi-purpose grease can be applied to the wheel axle prior to long-term storage. Oiling is not necessary. GEARBOX DO NOT open the gearbox. The gears are permanently lubricated at the factory and do not need lubricating. -
Page 14: Rate Settings
RATE SETTINGS Our spreaders are designed to spread dry, powdered or granulated materials thinly and evenly over reasonably smooth surfaces. Ensure that the material is dry and free-running. If in doubt pass it through a sieve with 3mm mesh to remove lumps. ... -
Page 15: Parts Diagram
PARTS DIAGRAM NOTE: Parts Lists are supplied for information purposes only, not all parts are stocked individually & we recommend you contact our Spares Team on 01793 333212 for expert advice. -
Page 16: Parts List
PARTS LIST Ref Part No. Description Qty Ref Part No. Description TH178-1 Carriage Bolt M6x25 31 TH178-31 Axle End Cover TH178-2 External-tooth Washer Ø8 32 TH178-32 Inner Axle Bushing TH178-3 Gauge and Lever Assembly 33 TH178-33 Outer Axle Bushing TH178-4 Adjust Handle Pole 34 TH178-34 Gear Box &... - Page 17 GJ HANDY & CO LTD USER WARRANTY POLICY Users Statement of Warranty Each new machine is warranted against defective material or assembly of material under normal usage. The warranty applies to the original purchaser and covers faulty parts and the labour involved in replacing and repairing those parts, which are of original manufacture.
- Page 18 GJ HANDY & CO LTD USER WARRANTY POLICY Not covered by this warranty a) The warranty policy does not cover any depreciation or damages caused by ordinary wear, rusting or corrosion, lack of correct maintenance or operation, misuse, abuse, lack of transportation or accident.
-
Page 20: Tel: 01793 333212
For spares or support of your handy product, please contact us: Tel: 01793 333212 (Mon – Fri 8.00am to 5.30pm excl. Bank Holidays) Email: customerservice@handydistribution.co.uk To see our range of garden machinery & equipment visit: www.thehandy.co.uk Making gardening easier & affordable since 1938 Distributed by Handy Distribution, Murdock Road, Dorcan, Swindon, SN3 5HY...


Need help?
Do you have a question about the THSS80 and is the answer not in the manual?
Questions and answers