SEON Explorer TX8 User Manual
Mobile dvr
Hide thumbs
Also See for Explorer TX8:
- Maintenance and troubleshooting manual (50 pages) ,
- User manual (72 pages) ,
- Installation and configuration manual (66 pages)
Table of Contents
Advertisement
Quick Links
Advertisement
Table of Contents

Subscribe to Our Youtube Channel
Related Manuals for SEON Explorer TX8


Summary of Contents for SEON Explorer TX8
- Page 1 *700-0117* DVR Firmware Version 2.0 Document Part Number 700-0158 R004...
- Page 2 Hard disk drive TCP/IP Transmission Control Protocol/ Internet Protocol H.264 H.264 video compression Universal Serial Bus Infrared Universal Time Coordinated Finding Information Online You can find more information about Seon Design Inc. as well as its products and services at www.seon.com.
-
Page 3: Table Of Contents
Contents Chapter 1 Introduction 1.1. Overview - - - - - - - - - - - - - - - - - - - - - - - - - - - - - - - - - - - - - - - - - - - - - - - - - - - - - - - - - - - - 1–1 1.2. - Page 4 5.2. Troubleshooting the Explorer TX8 - - - - - - - - - - - - - - - - - - - - - - - - - - - - - - - - - - - - - - - - - - 5–2...
-
Page 5: Overview
Trackball mouse, on page 1–6 DVR Video Configuration Playback and Archiving, on page 1–7 1.1. Overview This section introduces the product features of the Explorer TX8 Plus Mobile Digital Video Recording (DVR) System. The Explorer TX8 DVR integrates with the optional Smart-Reach Mobile wireless technology and works with optional vMax Commander and vMax View video management software for on-board video data management. -
Page 6: Tx8 Dvr Product Features
Introduction 1.2. TX8 DVR Product Features The Explorer TX8 has the following product features: • supports up to 8 video channels and 8 audio channels • records up to 15 frames per second (FPS) at 720 × 480 D1 resolution on all video channels simultaneously •... -
Page 7: Recording Capacity For Dvr Hard Drive Storage
Introduction 1.2.1. Recording Capacity for DVR Hard Drive Storage The Explorer TX8 uses H.264 video compression to maximize the recording time on the DVR hard drive. The amount of recorded video varies, depending on the FPS, resolution (horizontal x vertical pixel count), number of cameras being recorded, and picture quality settings. -
Page 8: Front Panel Features
Introduction 1.2.3. Front Panel Features Figure 1-2 shows the front panel features followed by a short description. For a full description of the features, see DVR Operation, on page 2–1. Figure 1-2 Front Panel Item Feature Feature DVR hard drive Requires the DVR Hard Drive key to unlock and remove the DVR. -
Page 9: Back Panel Features
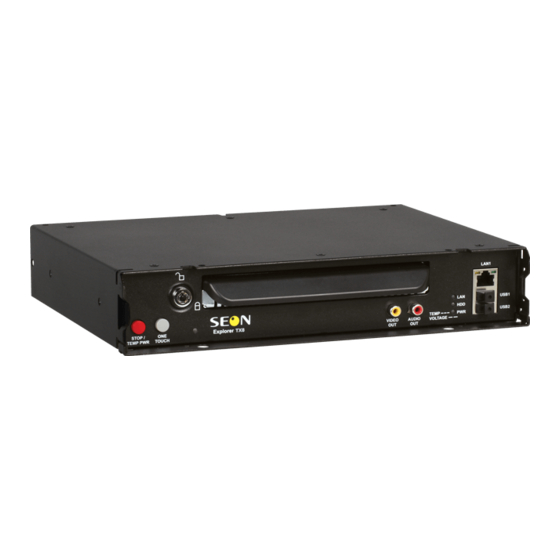
VIDEO OUTPUT Configurable video output for viewing video, BNC connector SIGNALS Adapter harness connector for speed, diagnostic, and signal inputs. GPS connector. Do not use For Seon use only. POWER Power input connector for connecting the power harness. 700-0158 R004 1–5... -
Page 10: Trackball Mouse
Introduction 1.2.5. Trackball mouse Figure 1-4 Trackball Mouse Pointing Device Table 1-2 Trackball Mouse Features To do this… Item Select the highlighted menu option by pressing the middle button. Select the highlighted menu option by pressing the left button with your thumb. •... -
Page 11: Dvr Video Configuration Playback And Archiving
Introduction 1.3. DVR Video Configuration Playback and Archiving Here is an introductory overview of the configuration, playback, and archiving methods available on the TX8. The TX8 DVR content can be accessed and archived in four ways: • locally via OSD and portable video monitor. See DVR Operation, on page 2–1. •... - Page 12 Introduction 1–8 700-0158 R004...
- Page 13 DVR Operation HAPTER DVR Operation This This chapter provides information and procedures for operating the Explorer TX8. chapter contains the following sections: Remove and Replace the DVR Hard Drive, on page 2–2 Search, Playback, and Archive Video, on page 2–2 vMax View and HDD Dock, on page 2–3...
-
Page 14: Remove And Replace The Dvr Hard Drive
DVR Operation 2.1. Remove and Replace the DVR Hard Drive The DVR has a removable hard drive that is contained in a drive tray. A hard drive lock secures the cartridge during operation. Use the hard drive key to lock and unlock the hard drive. -
Page 15: Vmax View And Hdd Dock
DVR Operation 2.3. vMax View and HDD Dock The HDD Dock is provided with vMax View software to accommodate the TX8 drive. The HDD Dock uses AC power and a USB3 connector to the PC. To access video from the drive using vMax View: 1. -
Page 16: On-Screen Display Access
Portable Video Monitor Figure 2-2 Mouse and Monitor Connected to DVR When the DVR starts up, the Seon Explorer TX8 splash screen appears briefly before the DVR enters live view. Figure 2-3 TX8 Splash Screen During recording and live viewing, the screen information is dynamic and can include the items shown in Figure 2-4 and described in Table 2-1. - Page 17 DVR Operation Table 2-1 On-Screen Display Information Feature Description Camera 1 to Camera 8 Camera titles, maximum 8 characters each. Main_Title Main title of the DVR, maximum 32 characters. HD Size Formatted size of the DVR hard drive, in gigabytes (GB). HD Used Percentage of recorded video on the DVR hard drive.
-
Page 18: Playback Menu Access
DVR Operation 2.4.1. Playback Menu Access Use the Playback menu to search, playback, and archive video directly from the DVR hard drive. To access the playback menu from the OSD: 1. In the OSD view, right-click the live view to access the Main Menu and click Playback. - Page 19 DVR Operation Table 2-2 Playback Tool Bar Items Tool Bar Icon Description Start of clip/End of clip Click to set the start of clip and the end of clip points for archiving. See Using the Archive Function, on page 2–11. Search Click to search by Date, Time, Alarm, Signals, or System Event.
-
Page 20: Using The Search Function
DVR Operation 2.4.2. Using the Search Function The TX8 includes a powerful search function that lets you quickly find recorded information by Date and Time, Alarm, Signals, or System Events. To view the Search menu: 1. From the playback tool bar, click on the Search icon. - Page 21 DVR Operation Table 2-4 DVR Event Descriptions Event Description Event Description Alarm n Off Limit exceeded in Z- Almn Off GSN Z- Alarm n On Limit exceeded in Z+ Almn On GSN Z+ Excessive speed occurred Ignition off EXSpeed Fan fault Ignition on Crossed GPS Fence DVR changes to live mode...
- Page 22 DVR Operation Figure 2-9 Event List 3. From the Event List, select the required item. 4. Click Play to review the video. Note the time when the event occurs and which camera captures the event details. Figure 2-10 Playback View 2–10 700-0158 R004...
-
Page 23: Using The Archive Function
DVR Operation 2.4.3. Using the Archive Function An archive dialog box lets you specify the start and end date and time of the video clip to be archived to a USB memory device. To view the Archive menu: 1. From the playback tool bar, click on the Archive icon. -
Page 24: Copy To Usb
DVR Operation 2.4.4. Copy to USB To copy video files to a USB memory device: 1. Insert a USB memory device into the USB port on the DVR front panel. 2. In the Playback tool bar, click the archive icon to display the Archive screen. -
Page 25: Using One-Touch Download
USB port. One-Touch download is available when the DVR is on and in live, playback, or record mode. Video is downloaded in the Seon proprietary format and can be viewed and archived with the vMax View application. See the vMax View User Guide, 700-0137. - Page 26 DVR Operation Figure 2-14 One-Touch Progress When transfer is complete, the on-screen display closes. 5. Remove the USB drive. 6. To power off the DVR immediately, press STOP/TEMP PWR for five seconds. The DVR will power off immediately. 2–14 700-0158 R004...
-
Page 27: System Requirements
vMax Web Operation HAPTER vMax Web Operation This chapter provides information on using vMax Web to access the TX8 DVR for viewing live and recorded video and archiving recorded video. This chapter contains the following sections: System Requirements, on page 3–1 Accessing vMax Web, on page 3–2 vMax Web User Interface, on page 3–4 vMax Web Live Tab, on page 3–5... -
Page 28: Accessing Vmax Web
Ethernet connection or using Seon Smart reach wireless access to view, playback, and archive video as well as configure the DVR. Follow the setup instructions in the Explorer TX8 DVR Install and Setup Guide, document number 700-0157. To access vMax Web 1. - Page 29 vMax Web Operation 5. At the prompt, enter the user name and password, as shown in Figure 3-2. vMax Web DVR Login Prompt Figure 3-2 The default user name is Admin. The default password is 11111111. Login data can be edited in the DVR Configuration > Network> User Levels menu.
-
Page 30: Vmax Web User Interface
vMax Web Operation 3.3. vMax Web User Interface The vMax Web interface is shown in Figure 3-4. Section 1 (on the left) has four menus. vMax Web opens with the Live tab selected and live video displaying. By default, vMax Web will stay active for 10 minutes after you last used it and then close the connection to the DVR. -
Page 31: Vmax Web Live Tab
To use the Live tab view 1. In the Select drop down menu, the Record2 video stream is selected. The Explorer TX8 DVR records two streams of video, one for low bandwidth remote viewing, and one with higher video speed, quality, and resolution settings for creating archives. -
Page 32: Vmax Web Configuration Tab
vMax Web Operation 3.3.2. vMax Web Configuration Tab The Configuration tab contains menus specific to DVR features and setting options. Features vary depending on the DVR model used. The vMax Web configuration menus are similar to the DVR OSD menus. See the TX8 DVR Installation and Configuration Guide, 700-0157 for specific details when configuring DVR function settings. -
Page 33: Vmax Web Playback Tab
vMax Web Operation 3.3.3. vMax Web Playback Tab Use the Playback tab to search and play recorded video from the DVR. The Playback tab is shown in Figure 3-7. Playback tab views, searching by Time or Event Figure 3-7 Table 3-2 Time Search Fields Menu Item Description Value [Default]... - Page 34 vMax Web Operation Table 3-3 Event Search Fields Menu Item Description Value [Default] Select Choose which recording stream to search. Record, [Record2] • With Record selected, high resolution video is available for archiving. • With Record2 selected, low resolution video is available for faster searching and remote playback.
-
Page 35: Search Video From Time Point Or Event Marker
12 display buttons. 2. In the Select drop down menu, select the Record or Record2 video stream. The Explorer TX8 DVR records two streams of video, one for low bandwidth remote viewing, and one with higher video speed, quality, and resolution settings for creating archives. - Page 36 vMax Web Operation To Search Video from an Event Marker 1. Select Event in the Search By drop down menu. The Event Type and Event Filter menus appear, as shown in Figure 3-7. 2. From the Event type menu, select an event type. 3.
- Page 37 vMax Web Operation 6. From the list that appears in the View area, select an event and click Play. Windows may request to download an Active X control. Playback Event Search Results Figure 3-8 7. On the Playback tab area, use the play, pause, fast forward or reverse (up to 32x speed) controls to locate the video loss event.
-
Page 38: Vmax Web Archive Tab
vMax Web Operation 3.3.1. vMax Web Archive Tab To archive the specific recorded video, select the Archive tab as shown in Figure 3-9. Archive tab Figure 3-9 Table 3-5 Archive Tab Fields Menu Item Description Value [Default] Select Choose which recording stream to search. [Record], Record2, Telemetry (Do •... -
Page 39: Archive Segmentation
To Archive Video Segments 1. In the Select drop down menu, select the Record or Record2 video stream. The Explorer TX8 DVR records two streams of video, one for low bandwidth remote viewing, and one with higher video speed, quality, and resolution settings for creating archives. - Page 40 vMax Web Operation 3–14 700-0158 R004...
- Page 41 Configuration Uploads, on page 4–3 USB Memory Device to DVR Configuration Upload, on page 4–3 Uploading Configuration Files to DVR via vMax Web, on page 4–7 For complete configuration settings and menu options, see the Explorer TX8 Install and Setup Guide, 700-0157. 700-0158 R004...
-
Page 42: Firmware Updates
The firmware version is displayed on the top right corner of every menu. The firmware update must be obtained from Seon Design. To install a firmware update, a USB memory device must be formatted by a Windows®-based computer using the FAT file format. -
Page 43: Configuration Uploads
2. Copy the configuration file at the root of the USB memory device folder. For USB uploading, the configuration file name can have no more than four Important: characters. Example: *TX8.seon. 3. Power up the DVR using the vehicle ignition. 4. Connect the portable video monitor and USB mouse. - Page 44 DVR Firmware and Configuration Uploads 7. In the System Settings menu click Program Update. Figure 4-3 Program Update Menu 8. From the Load Configuration menu, select the file to upload. Figure 4-4 Program Update Menu The Load Configuration drop down list displays only the ten most recent Important: configuration files on the USB drive.
- Page 45 DVR Firmware and Configuration Uploads 9. From Include Network, select whether or not to overwrite the existing DVR network settings with the new configuration settings. The default setting of NO keeps your existing network settings. CAUTION: DVR Communication Disruption Risk Avoid unintentionally changing the DVR network settings when uploading a new configuration.
- Page 46 DVR Firmware and Configuration Uploads CAUTION: Risk of Network Settings Loss Configurations uploaded to the DVR from a USB device do not get written to the DVR until it powers down and restarts. If anyone edits the DVR settings locally after this configuration is uploaded but before the DVR is restarted, the settings uploaded from a USB device will be lost.
-
Page 47: Uploading Configuration Files To Dvr Via Vmax Web
DVR Firmware and Configuration Uploads 4.2.2. Uploading Configuration Files to DVR via vMax Web To remotely install a configuration update, the configuration file (received from Seon or created and saved from a DVR in your network) must be on a computer with network access to the DVR and with Internet Explorer 8 or 9 (32 bit version only) to access vMax Web. - Page 48 DVR Firmware and Configuration Uploads 7. Select the Configuration tab and click the System icon. Figure 4-12 vMax Web System Settings 8. In the Program Update Settings area, if necessary, select the Include Network Settings check box to overwrite the existing DVR network settings with the new configuration settings.
- Page 49 For consistency, Seon recommends that the configuration upload file name Important: should be kept to four characters maximum (****.seon) in the event that the file needs to be loaded to the DVR from the USB port. The DVR USB upload interface supports only four characters in the file name.
- Page 50 DVR Firmware and Configuration Uploads 14. When the progress bar shows the update is 100% complete, click OK. Figure 4-18 Loading Complete 15. In the Titles/Display menu, update the text in the Main_Title field. Figure 4-19 Titles and Display Menu 16.
-
Page 51: Chapter 5 Maintenance And Service
Replacing the fan Seon recommends that the fan filter is checked for excess dirt on a regular basis, and is replaced when filter the filter restricts airflow. Failure to replace a blocked filter may result in the DVR shutting down on a hot day due to inadequate air circulation. -
Page 52: Troubleshooting The Explorer Tx8
Maintenance and Service 5.2. Troubleshooting the Explorer TX8 The Explorer TX8 is designed for high reliability of operation. If you have any problems with your system, however, read this chapter. If you cannot resolve the issue, contact Customer Service at Seon Design. See the TX8 DVR Installation and Configuration Guide, 700-0157, for menu details. -
Page 53: Appendix A Specifications
Specifications This appendix provides the product specifications for the Explorer® TX8 Mobile Digital Video Recording (DVR) System. Note: Specifications are subject to change without notice. A.3. Explorer TX8 Video Input/Output 75 Ohm NTSC video Video Resolution 720 × 480, 720 × 240, or 360 × 240 pixels Video Compression H.264... -
Page 54: Advanced Smart-Temp
Playback Speed Image-by-Image, 1×, 2×, 4×, 8×, 16×, 32×, step USB Memory Device USB 2.0 compatible A.3.3. Explorer TX8 Front Cover, Cable Cover Main Enclosure 18 GA cold rolled steel (CRS), powder coated black paint Door Lock Industrial cam lock, keyed alike. -
Page 55: Legal Notice
Design Inc. that are the property of their respective owners. They are used in this User Manual for identification purposes only. User Manual Revision This is the R004 revision for this User Manual and is copyright, March 2014 of Seon Design Inc. All rights reserved. Exclusion of Liability... - Page 56 L–2...
-
Page 57: Seon Design Inc.® Product Warranty
Seon reserves the right to refund the purchase price or to issue a credit only in lieu of replacement. Seon may use new or refurbished replacement parts for repairing its products, at its sole and arbitrary discretion. -
Page 58: Disclaimer
Provisions Applicable to American Customers For those customers whose mailing address is in the United States, Seon’s offer and any agreement of sale resulting therefrom shall be governed by and construed in accordance with the internal and domestic laws of the State of WASHINGTON without giving effect to the conflict of laws rules thereof. - Page 59 RETURN AUTHORIZATION (RA) NUMBER. Seon will only be responsible for the cost of ground freight. Any additional costs for express modes of freight will be paid by the purchaser of the Extended Warranty Product.
- Page 60 Seon Design Inc.® Product Warranty W–4 700-0158 R004...
- Page 62 Seon Design Inc. Unit 111, 3B Burbidge Street Coquitlam, BC Canada V3K 7B2 Telephone 604.941.0880 Toll Free Telephone 1.877.630.7366 604.941.0870 Toll Free Fax 1.866.664.3677 Email sales@seon.com Web site www.seon.com 700-0158 R004 Printed in Canada...
Need help?
Do you have a question about the Explorer TX8 and is the answer not in the manual?
Questions and answers