Advertisement
Quick Links
INSTALLATION MANUAL
Level of Difficulty
Moderate
This is the second of two manuals
This is the second of two manuals
required to complete this installation.
required to complete this installation.
The first manual is included with
The first manual is included with
your mounting brackets.
your mounting brackets.
Parts List
1
Driver / left ActionTrac
™
powered running board
1
Passenger / right ActionTrac
powered running board
Attachment hardware is supplied with the
mounting brackets. Hardware quantities will
vary depending on the vehicle application.
Tools Required
Ratchet
Drill
Socket set
Drill bit set
Zip ties
Level
Torque Specifications
M6 bolt
3 ft-lbs.
M8 bolt
7 ft-lbs.
M10 bolt
16 ft-lbs.
M12 bolt
28 ft-lbs.
1/4" bolt
3 ft-lbs.
5/16" bolt
7 ft-lbs.
3/8" bolt
16 ft-lbs.
7/16" bolt
20 ft-lbs.
1/2" bolt
28 ft-lbs.
Use above torque setting unless otherwise noted
Weight Capacity
650 lbs.
Weight capacity is static and
limited to bracket weight ratings
ARIESAUTOMOTIVE.COM
WARNING
Improper electrical installation may result in personal injury. Unless
you are familiar with the installation and handling of electrical systems,
have this step performed by someone who has that familiarity.
CAUTION
If the step fails to actuate completely (open or closed), do not attempt to force the step open or
close. Applying force in this condition will damage the product and void your warranty. Refer to
the troubleshooting guide on the last page of the instruction manual to resolve potential issues.
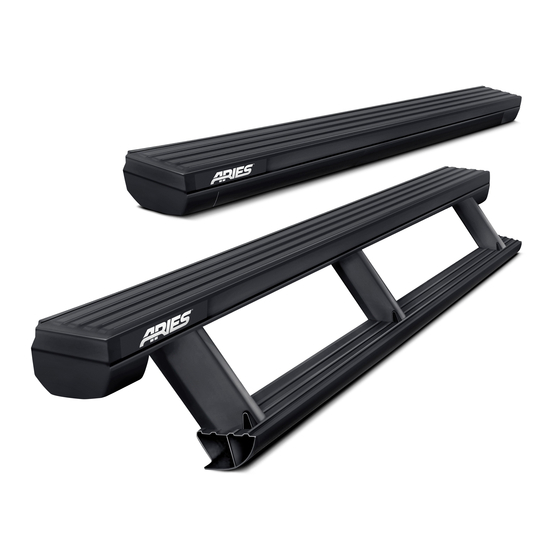
Product Photo
™
Notes and Maintenance
Before you begin installation, read all instructions thoroughly.
Proper tools will improve the quality of installation and reduce the time required.
No maintenance required on waterproof harness or water-resistant motors.
If mud or dirt is built up on the steps, simply spray them off and let them air dry.
Mild automotive detergent may be used to clean the product. Do not use dish detergent, abrasive
cleaners, abrasive pads, wire brushes or other similar products that may damage the finish.
Periodic inspection of all wires and connections should be
performed to ensure there is no visible damage or loose connections.
Refer to the table to the left when securing hardware during the
installation process to help prevent damage to the product or vehicle.
Product Registration
CURT Group stands behind our products with industry leading warranties.
You can help us continue to improve our product line and help us understand
your needs by registering your purchase by visiting:
warranty.curtgroup.com/surveys
At CURT Group, customer is king. We value your feedback and we use that information to make
improvements on our products. Please, take a minute and let us know how we are doing.
•
NEED ASSISTANCE?
•
877.287.8634
Front
•
3025183-INS-RB
•
PAGE 1
3025183
Rear
Advertisement

Summary of Contents for Aries ActionTrac
- Page 1 Applying force in this condition will damage the product and void your warranty. Refer to the troubleshooting guide on the last page of the instruction manual to resolve potential issues. Parts List Driver / left ActionTrac ™ Product Photo...
- Page 2 Step 1 With the driver-side brackets installed, take the driver-side running board and insert T-rails into the slot as shown. Position each T-rail as close to the mounting bracket location as possible. Note: The number of mounting brackets may vary based on application. Use one T-rail per bracket.
- Page 3 Step 4 At this time, adjust the running board to the desired location. With the running board in position, it is recommended to tighten all brackets to the boards first, followed by the vehicle connections.vv Tighten all hardware to the recommended torque specifications listed in the table on the first page.
- Page 4 Step 8 With the steps functioning properly, re-install all trim panels, carpet and other removed items. Congratulations on the installation of your new ARIES ActionTrac powered running boards. ™ With the running boards installed, periodic inspections should be performed to ensure all mounting hardware remains tight.
-
Page 5: Troubleshooting
TROUBLESHOOTING Condition Possible Cause Possible Solutions Additional Information Power switch is off Confirm that the main power switch is in the on position and has power. Poor battery Confirm the positive and negative connection connection on the battery are secure. Fuse is blown Confirm that the fuse is plugged in and not blown.


Need help?
Do you have a question about the ActionTrac and is the answer not in the manual?
Questions and answers
What is the measurement from the door sill and the top of the fixed step and the top of the movable step? Specifically for a stock 2015 ram 1500 Laramie longhorn crew cab.
My steps are 2-3 years old now and they now are not retracting completely and locking into stowed position. I’ve had vehicle battery replaced as a potential culprit - problem persists. Are there any travel adjustments or has my motor going bad? Steps are 3048321.