HunterDouglas LiteRise Installation Operation Care
Horizontal blinds standard cordlock, operable specialty shapes
Hide thumbs
Also See for LiteRise:
- Installation manual (28 pages) ,
- Installation and care instructions (5 pages) ,
- Operating systems (32 pages)

Subscribe to Our Youtube Channel
Related Manuals for HunterDouglas LiteRise


Summary of Contents for HunterDouglas LiteRise
- Page 1 Installation Operation Care • • Horizontal Blinds Standard Cordlock, Operable Specialty Shapes, LiteRise , SimpleLift , and ™ ® UltraGlide Operating Systems ®...
-
Page 2: Table Of Contents
CONTENTS GETTING STARTED Product View — Standard Cordlock and Operable Specialty Shapes ......1 Product View — LiteRise , SimpeLift , and UltraGlide ..........2 ™ ® ® Tools and Fasteners Needed ....................3 Unpack the Blind .......................3 INSTALLATION Installation Overview .......................4 Mount the Installation Brackets — Inside or Ceiling Mount ..........5 Mount the Installation Brackets —... -
Page 3: Getting Started
GETTING STARTED Product View — Standard Cordlock and Operable Specialty Shapes End Bracket Spacer Block Bracket Shim (Optional) Bracket Intermediate Bracket Intermediate Bracket Spacer Block (If Required) End Bracket Valance Spacer Block Bracket 2" or 4" Extension Brackets (Optional) Valance Splice (If Required) Corner Clips for Valance Returns... -
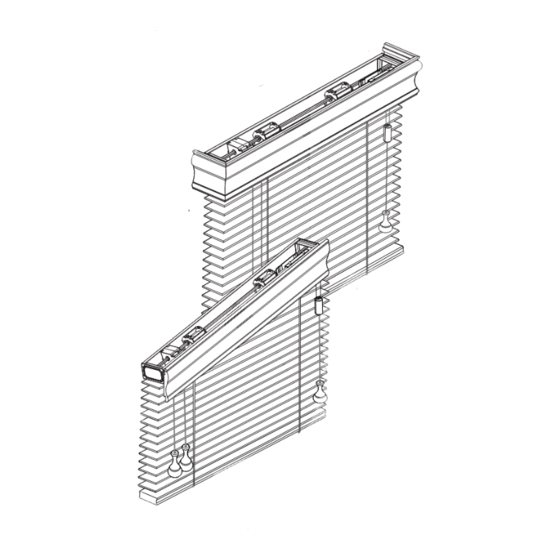
Page 4: Product View - Literise
GETTING STARTED Product View — LiteRise , SimpleLift , and UltraGlide ™ ® ® End Bracket Spacer Block Bracket Shim (Optional) Bracket Intermediate Bracket Intermediate Bracket Spacer Block (If Required) Valance End Bracket Spacer Block Bracket 2" or 4" Extension... -
Page 5: Tools And Fasteners Needed
GETTING STARTED Thank you for purchasing Hunter Douglas horizontal blinds. With proper installation, operation, and care, your new blinds will provide years of beauty and performance. Please thoroughly review this instruction booklet and the enclosed packing list before beginning the installation. Tools and Fasteners Needed Ballpoint pen ■... -
Page 6: Installation
INSTALLATION Installation Overview Two end brackets are used to mount horizontal blinds. ■ Wider blinds also require one or two intermediate brackets, as shown in the tables below. Intermediate Bracket Bracket 2" and 2 " Wood ⁄ Alternative Wood Blinds 2"... -
Page 7: Mount The Installation Brackets - Inside Or Ceiling Mount
INSTALLATION Mount the Installation Brackets — Inside or Ceiling Mount Bracket Shims (Optional) One Shim Bracket shims are used to gain clearance for valance Folded Over clips with inside or ceiling mounts. One shim for each end bracket and two shims for each intermediate Intermedi bracket are included. - Page 8 INSTALLATION Use a ⁄ " drill bit to drill holes for the mounting screws. ■ Attach the end brackets using the screws provided. ■ IMPORTANT: The front edges of the end brackets must align. NOTE: For blinds with 2 ⁄ "...
-
Page 9: Mount The Installation Brackets - Outside Mount
INSTALLATION Mount the Installation Brackets — Outside Mount To attach the end brackets, a flat vertical surface of at least 1 ⁄ " is required. Mark the End Bracket Locations Mark where the ends of the headrail will be located. ■... - Page 10 INSTALLATION Attach the end brackets using two screws ■ through diagonal holes. If using spacer blocks, use #6 screws ➤ long enough for a secure installation ⁄ " long screw is recommended). IMPORTANT: The tops of the end brackets must align. CAUTION: The rear of the end brackets or spacer blocks must be flush against a flat mounting surface.
- Page 11 INSTALLATION Extension Brackets (Optional) Attach 2" or 4" extension brackets to the mounting surface in the same locations where the end brackets and intermediate brackets would be attached. Use the provided screws to mount each extension bracket. ■ IMPORTANT: The tops of the end brackets and intermediate bracket(s) must align. Attach the installation brackets to the extension brackets using the screws and nuts ■...
-
Page 12: Install The Blind
INSTALLATION Install the Blind Adding Projection to the Valance The magnetic valance clips have a projection adjustment feature. By pulling the clips outward, the clips can provide an additional ⁄ " projection. The clips offer two projection positions. When the clips are fully compressed, the narrowest projection ⁄... - Page 13 INSTALLATION Twist the clip until it is straight with the clear ■ tabs at the top of the valance. There are at least two clips per valance. ➤ For valances narrower than 36", position clips 5 ⁄ " in from the ends of the valance. For valances 36"...
- Page 14 INSTALLATION Attach the Corner Clips (If Required) Mitered Edges Meet If the valance came with returns, connect the returns to the valance using the corner clips provided. Valance Notch The notches on the back of the valance and valance returns fit into the grooves of the corner clips. Valance Slide one end of each clip onto the back of the ■...
- Page 15 If your headrail end brackets do not have adjustable ■ tabs, bend the tabs on the headrail end locks to adjust headrail tightness (for LiteRise blinds only). ® Close the End Brackets Push the cover down until it snaps over the locking ■...
-
Page 16: Complete The Installation
INSTALLATION Open the End Brackets (If Necessary) To open the end brackets, insert a flat blade screwdriver ■ between the bottom of the cover and the quick release tab, and twist. You can also push up on the bottom of the end bracket to ➤... - Page 17 INSTALLATION Attach the Valance with Magnetic Valance Clips to the Headrail Align the valance to the headrail. ■ Hold the valance securely from the front side with both hands. ■ Position the clips to the top-front lip of the headrail until it is ■...
- Page 18 INSTALLATION To mount the hold-down brackets, first fully lower the blind. Align the hold-down brackets ■ with the pins in the bottom rail. Use the first slot with the 2 ⁄ " slat size. ➤ Use the second slot with the 2" slat size. ➤...
-
Page 19: Operation
Hold the single cord to the outside to lock ■ the blind in position. Raising and Lowering the Blind — LiteRise Operating System ® IMPORTANT: Whenever raising or lowering the blind, the slats must be in the open position. - Page 20 OPERATION Raising and Lowering the Blind — SimpleLift Operating System ™ IMPORTANT: The slats must be in the open position when raising or lowering the blind. To Raise the Blind: Grasp the bottom rail near the center with one hand while balancing the bottom rail with ■...
- Page 21 OPERATION Raising and Lowering the Blind — UltraGlide Operating System ® For smooth operation, keep the wand or cord close to the slats when raising and lowering the blind. Do not pull the wand or cord away from the blind. IMPORTANT: The slats must be in the open position when raising or lowering the blind.
-
Page 22: Troubleshooting
OPERATION Troubleshooting If your blind is not operating correctly: First review the guide that came with your control device. ■ Refer to the following troubleshooting procedures for specific solutions for your blind. ■ If questions remain, please contact Hunter Douglas Consumer Support at 1-888-501-8364. Problem The blind will not fit into the installation brackets. - Page 23 OPERATION Problem When hanging, the slat pack appears to be shifted toward the cordlock side of the unit, particularly in an inside mount installation. Solution Slide the headrail in the end brackets in the opposite direction of the skew and adjust the tabs in the end brackets to maintain the position of the unit. This will center the slat pack in the window.
- Page 24 OPERATION Problem blinds only: The blind is hard to raise or lower, or will not raise UltraGlide ® or lower. Solution To Raise: Be sure the pull wand or cord is being pulled straight down and close to the blind. °...
-
Page 25: Care
CARE Removing the Blind (If Necessary) Fully raise the blind. ■ To remove the valance with magnetic valance clips, see page 15. ■ To remove the valance with universal valance clips, see page 15. ■ Push up on the bottom of the end bracket to release the locking tab, see page 14. ■... -
Page 26: Child Safety
CHILD SAFETY WARNING For more safety information, call 1-800-997-2389. Window Blind Cord Can STRANGLE Your Child. ■ Children can climb furniture to reach cords. Move crib and furniture away. ■ Keep all cords out of children’s reach. ■ Cord Connector This component acts as a stopper to prevent inner cords from being ■... -
Page 27: Cord Cleats
CHILD SAFETY Cord Cleats Hunter Douglas offers cord cleats and we recommend their use. Attach two cord cleats 6" to 12" apart at a height where they will be out of ■ the reach of children. Take into account that a child may stand on furniture attempting to reach the cords. - Page 28 If you are not thoroughly satisfied, simply contact Hunter Douglas at (888) 501-8364 or visit hunterdouglas.com. In support of this policy of consumer satisfaction, we offer our Lifetime Limited Warranty as described below.
Need help?
Do you have a question about the LiteRise and is the answer not in the manual?
Questions and answers
where is the locking tap screw on the 1 inch aluminum mini blinds