
Related Manuals for pottery barn kids Castle Loft Bed


Summary of Contents for pottery barn kids Castle Loft Bed
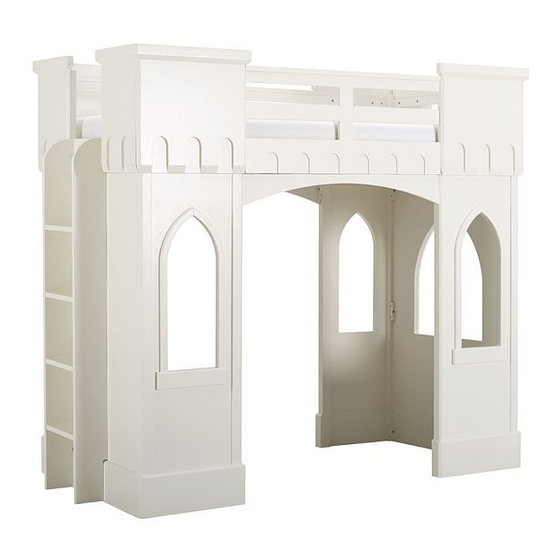
- Page 1 pottery barn kids CASTLE LOFT BED ASSEMBLY INSTRUCTIONS www.potterybarnkids.com Date: 2013-Aug-06 Page 1 of 8 Rev: ...
- Page 2 DO NOT use bunk bed if any parts are missing or broken. • DO NOT use substitute parts. Contact Pottery Barn Kids for replacement parts and instructional literature if needed. • Follow the information on the warnings appearing on the upper bunk end structure and on the carton.
- Page 3 Important Safety Instructions: • Please read all instructions carefully before assembling. • For your safety, assembly by two or more adults is strongly recommended. • Keep instructions for future use. • Use only vendor supplied hardware to assemble. Using unauthorized hardware could jeopardize the structural integrity of the item.
- Page 4 Assembly Instruction Steps: 1. Attach Wooden Block (F) onto Stretcher (E) with wooden dowels and pre-drilled holes aligned. Slide a Spring Washer (T) and a Flat Washer (U) onto a Bolt (S). Insert the bolt with washers (T&U) from pre-drilled holes on the wooden block into metal insert pre-installed in Stretcher (E) and tighten with Allen Key (N).
- Page 5 4. Repeat Step 2 and 3 to assemble the remaining Left/Right Window Side Panel (C1&C2) and Stretcher (E) to Window End Panel (B) as shown. 5. Connect Valance (D) to the two assembled bases as shown below. Slide A Spring Washer (T) and a Flat Washer (U) onto Bolt (S).
- Page 6 6. Attach one Side Rail (H) to Upper Ladder End Panel (I) and Upper Window End Panel (J). Insert Large Bolts (O) into pre-drilled holes on the end panels from outside, as shown below. Place (6) Barrel Nut (V) onto corresponding openings on one Side Rail (H).
- Page 7 8. Attach Left/Right End Décor (L-1&L-2) onto Upper Ladder End Panel (I) and Upper Window End Panel (J) by aligning wooden dowels on the end décor to pre-drilled holes on Upper Ladder End Panel (I) and Upper Window End Panel (J). Slide a Spring Washer (T) and Flat Washer (U) onto Bolt (S). Insert (16) bolts with washers (T&U) from pre-drilled holes on upper end panels into metal inserts located on the end décor as shown below.
- Page 8 10. Attach Ladder (G) to the Ladder End Panel (A) and Upper Ladder End Panel (I) with wooden dowels and pre-drilled holes aligned. Insert (4) Bolt (R) with Washers (T&U) from pre-drilled holes on the Upper Ladder End Panel (I) into metal inserts located on top of the ladder. Insert (4) Bolt (R) with Washers (T&U) from pre-drilled holes on the Ladder End Panel (A) into metal inserts located on bottom of the ladder.
Need help?
Do you have a question about the Castle Loft Bed and is the answer not in the manual?
Questions and answers