Table of Contents
Advertisement
Quick Links
Advertisement
Table of Contents

Related Manuals for Duralloy 171 MULTIMIG


Summary of Contents for Duralloy 171 MULTIMIG
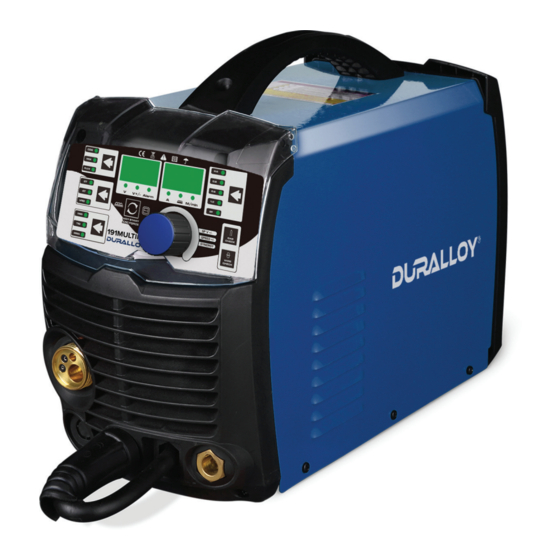
- Page 1 171 & 191 MULTIMIG OWNER’S MANUAL www.duralloy.net.au | 1300 369 456...
- Page 2 Machine fault: • The operator should keep the working piece insulating from • Consult this instruction manual. himself/herself. • Contact your local dealer or supplier for further advice. www.duralloy.net.au | 1300 369 456...
-
Page 3: General Description
Included items: • 171 & 191 MULTIMIG welder • Owner’s Manual MMA lead and holder Earth lead and clamp 3m MIG torch Gas Hose FC roller V roller Regulator www.duralloy.net.au | 1300 369 456... -
Page 4: Main Parameter
C, higher duty cycles have been obtained All tests on duty cycles have been carried out at 40 C with a 50%. So in practical working conditions the duty cycles will be much greater than those stated above. www.duralloy.net.au | 1300 369 456... - Page 5 21. Wire drive roller 22. Drive roller retainer 25. Torch trigger switch 27. Workpiece earth clamp 29. Conical gas nozzle/shroud 26. Torch “Euro” connector 28. Earth lead quick connector 30. Welding MIG 31. Shroud spring 32. MIG adapter www.duralloy.net.au | 1300 369 456...
-
Page 6: Installation
(18). matching drive roller (21) Clockwise will increase tension, anti-clockwise will decrease EARTH and welding tip (30) are tension. There is a numbered scale on the tensioner to TORCH LEAD fitted www.duralloy.net.au | 1300 369 456... - Page 7 Note: Since the arc of MIG welding is much stronger than that of MMA welding, please wear welding helmet and protective clothing. www.duralloy.net.au | 1300 369 456...
- Page 8 Polarity conversion line to Positive (+) Welding Output Terminal, This button cannot work in MMA or TIG mode. connect the earth clamp to Negative (-) Welding Output Terminal 5.1.5.7 Gas check: gas check function, the button cannot work in MMA or TIG mode. www.duralloy.net.au | 1300 369 456...
-
Page 9: Basic Welding Guide
The process is used to a lesser degree for welding stainless steel and for overlay work. www.duralloy.net.au | 1300 369 456... -
Page 10: Position Of Mig Torch
Do not pull the welding gun back when the arc is established. This will create excessive wire extension (stick-out) and make a very poor weld. The electrode wire is not energized until the gun trigger switch is depressed. The wire may therefore be placed on the seam or joint prior to lowering the helmet. www.duralloy.net.au | 1300 369 456... -
Page 11: Distance From The Mig Torch Nozzle To The Work Piece
For practicing MIG welding, secure some pieces of 16 or 18 gauge (0.06” 1.5mm or 0.08” 2.0mm) mild steel plate 6” x 6” (150 x 150mm). Use 0.030” (0.8mm) flux cored gasless wire or a solid wire with shielding gas www.duralloy.net.au | 1300 369 456... -
Page 12: Setting Of The Power Source
Capacity of the wire feed unit and Power Source • The amount of penetration required • The deposition rate required • The bead profile desired • The position of welding • Cost of the wire www.duralloy.net.au | 1300 369 456... - Page 13 The setting of the C0 flow volume The protection efficiency is the primary consideration. Besides, inner-angle welding has better protection efficiency than external-angel welding. For the main parameter, refer to the following figure. Option of C0 flow volume www.duralloy.net.au | 1300 369 456...
-
Page 14: Welding Parameters Table
The following parameter is available for reference. Parameter for butt-welding Parameter for flat fillet welding Parameter for fillet welding in the vertical position Parameter for Lap Welding www.duralloy.net.au | 1300 369 456... - Page 15 Keep the built-in fan working to bring down the temperature inside the welding machine. 4. Avoid electric shock. An earth terminal is available for this welding equipment. Connect it with the earth cable to avoid the static and electric shock. www.duralloy.net.au | 1300 369 456...
-
Page 16: Maintenance
Only when there is no abnormal phenomenon should the welding continue. If the machine is not used for a long time, put it into the original packing in dry condition. www.duralloy.net.au | 1300 369 456... -
Page 17: Daily Checks
CAUTIONS: Only the qualified technicians are authorized to undertake the repair and check task of this welding equipment in case of machine fault. 11.1. Power supply 11.2. Welding torch www.duralloy.net.au | 1300 369 456... - Page 18 171 & 191 MULTIMIG OWNER’S MANUAL 11.3. Wire feeder 11.4. Cables www.duralloy.net.au | 1300 369 456...
- Page 19 171 & 191 MULTIMIG OWNER’S MANUAL CONNECTION DIAGRAM OF THE MACHINE www.duralloy.net.au | 1300 369 456...
-
Page 20: Exploded Drawing
171 & 191 MULTIMIG OWNER’S MANUAL EXPLODED DRAWING www.duralloy.net.au | 1300 369 456... -
Page 21: Year Warranty
• Ancillary Equipment - 3 months The Obligation of Duralloy Industrial Supply under this warranty is limited to the circumstance set out above and is subject to: • The customer being able to provide proof of purchase of the relevant equipment. - Page 22 | 1300 369 456...
Need help?
Do you have a question about the 171 MULTIMIG and is the answer not in the manual?
Questions and answers