Table of Contents
Advertisement
Quick Links
Advertisement
Table of Contents
Troubleshooting

Related Manuals for College Park Espire Classic Plus


Summary of Contents for College Park Espire Classic Plus
- Page 1 Espire Elbow ™ Classic Plus, Classic, and Basic technical manual...
-
Page 2: Table Of Contents
TABLE OF CONTENTS 1 - System Overview 5 - Wrist Fabrication 1.1 Introduction 5.1 Wrist Options Overview 1.3 Pre-Installation Checklist 5.2 Output Wires for Terminal Devices (Classic Plus) 1.4 Technical Specifications 5.3 Quick Disconnect Wrists (Classic Plus) 1.2 Anatomy 5.4 Electronic Wrist Rotators 2 - Inputs (Classic Plus) (Classic Plus) 2.1 Input Overview... - Page 3 8 - Cable Mounting 8.1 Cable Mounting Overview 8.2 Setting Up the Cable Mounting 9 - Setting Up the Counterbalance or Spring Assist 9.1 Counterbalance and Spring Assist Overview 9.2 Counterbalance Adjustment 9.3 Spring Assist Adjustment 10 - Maintenance and Troubleshooting 10.1 Troubleshooting 11 - Intended Use and Safety 11.1 Troubleshooting...
-
Page 4: System Overview
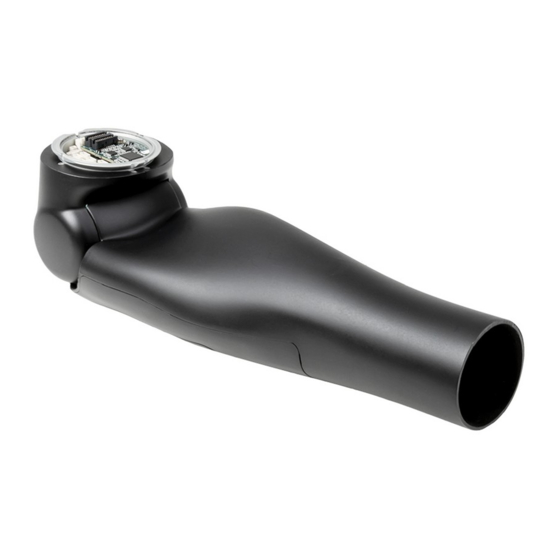
Product Description SECTION 1 - SYSTEM OVERVIEW Espire Classic Plus – Mechanical elbow with manual lock and forearm counterbalance for lift compensation. Body-powered elbow operation. Federal Law restricts that the Espire Elbow system is to be purchased, Includes provisions for myoelectric control of terminal devices. -
Page 5: Pre-Installation Checklist
1.2 ANATOMY 1.3 PRE-INSTALLATION CHECKLIST What’s in the box: Hardware ▪ Espire Elbow ▪ Lamination Dummy Lamination Collar ▪ Lamination Collar and ▪ Forearm Cable Lift Kit (optional) Clamp Ring Lamination Clamp (Clamp Ring) Instruction Manuals ▪ Espire Elbow Technical Manual – ▪... -
Page 6: Inputs (Classic Plus)
▪ Linear Transducers ▪ Touch Pads ▪ Switches (Single-State, Dual-State, Bump, etc) ▪ Other Items Not Listed (Contact College Park) *Not compatible with CPI A/C Electrodes with TruSignal Note: For an input to be compatible, the shape of the plug connector must match the receptacle on the input board. -
Page 7: Connecting Cables To The Input Board
CONNECTING CABLES TO THE INPUT BOARD Apply silicone grease to the plug connectors before inserting into the board. When attaching cables, note the proper orientation. The connectors are “keyed” or asymmetrical to assure proper alignment. The connector should plug in easily and is held in place with friction. Once the cables are attached, apply more silicone grease on top of the connectors to prevent moisture from entering receptacles. -
Page 8: Battery Installation (Classic Plus)
Battery Below Elbow Battery Location Battery Wire The Espire Classic Plus provides a compartment on the bottom side Charging Port of the elbow for housing other manufacturers’ batteries. Batteries can be installed in this compartment, providing the battery dimensions fit Battery Compartment without modifying the arm. -
Page 9: Charging Port/Power Button
3.2 CHARGING PORT/POWER BUTTON For below elbow locations, a charging port/power button can be mounted anywhere on the forearm. To prevent damage, avoid the grey shaded areas and seam lines when drilling holes. Attach the unit according to the manufacturer’s recommendations. Do not drill in shaded areas or on seam lines Example Location Espire Elbow Technical Manual | 6... -
Page 10: Measuring And Cutting Forearm
SECTION 4 - MEASURING AND CUTTING FOREARM 4.1 MEASURING THE FOREARM The Espire Elbow is available in two forearm lengths, Small (45 mm wrist) and Standard (50 mm wrist). Forearm measurement can be referenced from the center of the elbow. A removable sticker is applied to the forearm to reference the maximum cut area. MAX CUT AREA Dimension Measured From... -
Page 11: Protective Foam Insert (Classic Plus)
4.2 PROTECTIVE FOAM INSERT 4.3 CUTTING THE FOREARM TO LENGTH (CLASSIC PLUS) Measure the desired length of the forearm. Cut the forearm, preferably with a bandsaw. A foam insert is installed prior to shipping to protect the output wires and Continue with wrist fabrication. -
Page 12: Wrist Fabrication
(CLASSIC PLUS) SECTION 5 - WRIST FABRICATION Output wires will already be installed into the circuit board of the Espire Elbow Classic Plus. They can easily be retrieved from inside of the 5.1 WRIST OPTIONS OVERVIEW forearm and connected to the desired device. The wires will be color coded and simply need to be plugged into the appropriate terminal The Espire Elbow accommodates two wrist sizes. -
Page 13: Quick Disconnect Wrists (Classic Plus)
5.3 QUICK DISCONNECT WRISTS (CLASSIC PLUS) Wiring The hand-open, hand-close, and power output cables will plug into a single coaxial unit which fits through the center of the quick disconnect wrist. Plug the orange (hand-open) cable into the left plug labeled “2”, then plug the green (hand-close) cable into the right plug labeled “2”. -
Page 14: The Lamination Collar And Clamp Ring
The clamp ring is a two-piece assembly that is uniquely shaped to fit the SECTION 6 - THE LAMINATION profile of the Espire Elbow. When assembled to the elbow, the clamp COLLAR AND CLAMP RING screws will face posterior. 6.1 ORIENTATION OF THE LAMINATION COLLAR AND CLAMP RING Humeral Friction The lamination collar must be oriented properly relative to the patient... -
Page 15: Attaching The Lamination Collar To The Elbow
6.3 ATTACHING THE LAMINATION COLLAR 6.4 DETERMINING PROPER ORIENTATION TO THE ELBOW ON TEST SOCKET The lamination collar attachment to the socket must provide a clinically Disassemble the clamp ring by removing acceptable measurement from center axis of shoulder to center axis the fasteners. -
Page 16: Final Adjustment With The User
6.5 FINAL ADJUSTMENT WITH THE USER The humeral rotation is adjusted with a 2.5mm hex key that is supplied with the clamp ring. While the user is wearing the prosthesis, adjust the friction until it is most comfortable. This friction can be adjusted as needed. - Page 17 Espire Elbow Technical Manual | 14...
-
Page 18: Manual Lock
Caution: Complete removal of the manual lock cable can lead to SECTION 7 - MANUAL LOCK malfunction and injury to the user. 7.1 MANUAL LOCK OVERVIEW Note: The manual lock is not removable or field-serviceable. Do not attempt to disassemble or modify the unit. The Espire features a mechanical locking mechanism that can be locked or unlocked while under load, with a maximum support of 25 lbs. -
Page 19: Operating Manual Lock
7.2 OPERATING MANUAL LOCK Pull on the lock cable to engage/ disengage the lock. Lock response will vary by the amount of force applied. Standard Lock-Unlock A strong cable pull (clicking sound) disengages or re- engages the lock. Temporary Unlock A light cable pull (no click) unlocks the elbow joint temporarily. -
Page 20: Cable Mounting
SECTION 8 - CABLE MOUNTING Attach Cable Loop (or preferred cable anchor) Fold the leather cable loop and fasten 8.1 CABLE MOUNTING OVERVIEW together with the rivet. Align the cable loop to the hole. Attach Your preferred cable system can be with a 10-32 fastener and hand tighten. - Page 21 Espire Elbow Technical Manual | 18...
-
Page 22: Setting Up The Counterbalance Or Spring Assist
Adjustment Dial Location SECTION 9 - SETTING UP THE The adjustment dial can be installed on either the medial or lateral side COUNTERBALANCE OR SPRING ASSIST of the elbow and should be specified at the time of ordering. Medial placement is the typical location. 9.1 COUNTERBALANCE AND SPRING ASSIST The dial is identical for both counterbalance and spring assist. -
Page 23: Counterbalance Adjustment
9.2 COUNTERBALANCE ADJUSTMENT 9.3 SPRING ASSIST ADJUSTMENT Direction Adjustment Result Direction Adjustment Result Turn the dial backward to increase Supports more Turn the dial forward to increase Supports more the counterbalance weight. load on the elbow the spring assist weight. load on the elbow Note: Elbow cannot be over- Note: Elbow cannot be over-... -
Page 24: Maintenance And Troubleshooting
SECTION 10 - MAINTENANCE AND TROUBLESHOOTING 10.1 TROUBLESHOOTING Caution: The Espire Elbow should never be serviced while connected to the end-user. Ensure that the device is disconnected and powered off before any service or maintenance is performed. This device should never be serviced while in use. - Page 25 Espire Elbow Technical Manual | 22...
-
Page 26: Intended Use And Safety
No modifications on your Espire Elbow except those described in this information document are authorized. The Espire Elbow and damaged components may only be opened or repaired by certified College Park technicians. Note: Possible technical damage. Caution: Penetration of dirt and humidity Info: Basic information regarding this product. - Page 27 For maximum safety and convenience, faulty control or malfunction of the Espire Elbow, resulting in a risk College Park recommends that, at the very least, a specialist evaluate the of injury. The Espire Elbow was developed for everyday use and must need for any adaptations to the car (such as installing a steering fork).
- Page 28 Definitions of symbols used in this device and its packaging Caution: Unsupervised Use It is not recommended for children to operate this device without the Definition Source Symbol supervision of an adult. Use extreme caution around small children and Consult instructions for use. BS EN ISO 15223-1: household pets.
- Page 29 Symbol Definition Source Protection against solid foreign objects of IEC 60601-1, Table D.3, 12.5 mm diameter and greater, and protection Symbol 2 against vertically falling water drops when tilted up to 15 degrees. Medical device manufacturer. ISO 15223-1, Clause 5.1.1 China RoHS Mark I logo.
- Page 30 NOTES...
- Page 32 800.728.7950 | 586.294.7950 | college-park.com COLLEGE PARK INDUSTRIES, INC 27955 College Park Dr. Warren, MI 48088 USA EMERGO EUROPE Prinsessegracht 20, 2514 AP The Hague, Netherlands Australian Sponsor, EMERGO AUSTRALIA Level 20, Tower II, Darling Park, 201 Sussex Street, Sydney, NSW 2000 Australia MADE IN THE USA ©2019 College Park Industries, Inc.
Need help?
Do you have a question about the Espire Classic Plus and is the answer not in the manual?
Questions and answers