Table of Contents
Advertisement
Quick Links
Download this manual
See also:
User Manual
Advertisement
Table of Contents

Related Manuals for College Park Espire Elbow Hybrid


Summary of Contents for College Park Espire Elbow Hybrid
- Page 1 Espire Elbow ™ Pro and Hybrid technical manual...
-
Page 2: Table Of Contents
TABLE OF CONTENTS 1 - System Overview 4 - A/C Myoelectrodes with TruSignal Technology 1.1 Introduction 1.2 Anatomy 4.1 Electrode Overview 1.3 Pre-Installation Checklist 4.2 Electrode Kits 1.4 Technical Specifications 4.3 Electrode Placement 4.4 Myoelectric Input Labels 2 - Batteries and Charging 4.5 Electrode Installation Instructions 2.1 The Battery 5 - Axis Electronic Lock Actuator... - Page 3 7 - Wrist Fabrication 9 - Setting Up Counterbalance for Hybrid Version 7.1 Wrist Options Overview 7.2 Output Wires for Terminal Devices 9.1 Counter Balance Overview 7.3 Quick Disconnect Wrist Installation 9.2 Counter Balance Adjustment 7.4 Motion Control Standard 10 - Maintenance and Troubleshooting Electronic Wrist Rotator Installation 10.1 Troubleshooting 7.5 Ottobock 10S17 Electronic...
-
Page 4: System Overview
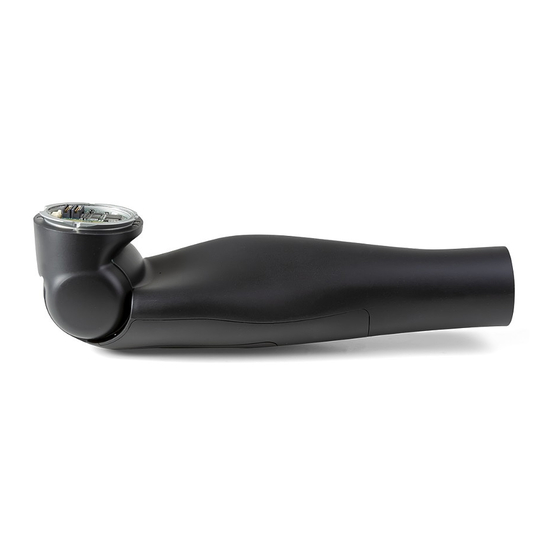
1.1 INTRODUCTION SECTION 1 - SYSTEM OVERVIEW Thank you for purchasing the Espire Elbow system from College Park Industries. The following pages will cover everything you need to know Federal Law restricts that the Espire Elbow system is to be purchased, about this system from setup to operation. -
Page 5: Anatomy
1.2 ANATOMY 1.3 PRE-INSTALLATION CHECKLIST What’s in the box: Sealing Cover Hardware ▪ Espire Elbow ▪ 2 Lithium-Ion Batteries ▪ iPad (optional after first ▪ Battery Charger with Adapter Lamination Collar elbow purchase) ▪ Selected Input Accessories Lamination Clamp Assembly ▪... -
Page 6: Technical Specifications
Powering on the Espire Elbow: Pairing Espire to iPad The Espire Elbow will emit a Bluetooth signal for 2 minutes after it is powered on, during which time it can be paired with the Espire Elbow iPad application. Once a Bluetooth connection is established, the LED Power Button indicator will display a blue light during the pairing. - Page 7 IP Rating DEVICE OPERATION – INTERNALLY POWERED Battery (removable) Smart Li-Ion Protected from touch by fingers and objects greater than 12 10.8 V, 3,000 mAh, 32 Wl millimeters. Protected from water spray less than 15 degrees Time to full charge 3.5 hours from vertical.
-
Page 8: Batteries And Charging
Elbow system. Pull Tab *based on average use during an 8-hour period Caution: Use only the College Park Industries manufactured Espire Elbow battery pack and the provided battery charger with the Espire Elbow system. Always follow the manufacturer’s instructions for proper removal of and replacement of battery pack. -
Page 9: Led Indicator
2.3 LED INDICATOR 2.4 BATTERY CHARGER The Espire Elbow is equipped with a state-of-charge indicator. This Espire Elbow systems are supplied with a Smart Charger for the indicator tells the user how much life is left in their current battery. The lithium-ion battery. -
Page 10: Charging The Battery
2.5 CHARGING THE BATTERY Charging the Espire Elbow Battery Place the charger on a flat, level surface away from sources of heat and moisture. Plug the A/C connector from the power supply into the back of the charger and connect the power supply to the main A/C supply using the cable supplied. If the battery you wish to charge is inside of the Espire Elbow, it must first be removed from the battery bay. - Page 11 Espire Elbow Technical Manual | 8...
-
Page 12: Inputs
CPI prior to delivery. ▪ D/C Cased Electrodes ▪ Switches (Single-State, Dual-State, Bump, etc) ▪ Remote Power Switches Items Not Listed: Contact College Park for customized cable and adapter options. 9 | Espire Elbow Technical Manual... -
Page 13: Input Connector Board
3.2 INPUT CONNECTOR BOARD Every Espire Elbow will be shipped with the configuration specified at the time of ordering. Dummy plugs will be placed into unused receptacles. The included overlay displays the function of each input. Your current setup can be viewed in the app under the diagnostics tab. The table below lists the location, the type of input that can be used, and its setup type. -
Page 14: Connecting Cables
3.3 CONNECTING CABLES Sealing the Input Board TO THE INPUT BOARD Apply a small amount of silicone grease at the perimeter seal When attaching cables, note the proper orientation. The connectors between the disc and the ring. are “keyed” or asymmetrical to assure proper alignment. The connector Line up the fastener holes on the disc to the mounting threads on the should plug in easily and is held in place with friction. - Page 15 Espire Elbow Technical Manual | 12...
-
Page 16: A/C Myoelectrodes With Trusignal Tm Technology
Cleaned A/C signal delivered to Espire microprocessor. Software in elbow amplifies the signal corresponding to the patient’s calibration. 4.1 ELECTRODE OVERVIEW SIGNAL College Park’s A/C electrodes are an effective and convenient way to CLEAN DELIVER AMPLIFY DETECTED increase signal resolution. These are the recommended electrode option, designed to work exclusively with the Espire Elbow;... -
Page 17: Electrode Placement
Example Part Number: Dome selection is based on the patient’s needs. Medium electrodes are most commonly used, however, if the patient has significant CP TLE 212 M - TruSignal AC Electrode Kit, 2 Site, 12 in, Medium Dome soft tissue over the myoelectric sites, the large electrodes are recommended. -
Page 18: Myoelectric Input Labels
4.4 A/C MYO INPUT LABELS Example: 2-Site Myo Setup Electrode Type Domes Location Input labels will be applied to the wires during the order fulfillment process to identify A/C myoelectrode sites and locations on the input Bicep Site 1 board. Tricep Site 2 away from... -
Page 19: Electrode Installation Instructions
4.5 ELECTRODE INSTALLATION INSTRUCTIONS Use a pair of wire snips to trim the post. Use an awl or other small tool with a sharp point to puncture the center of the The post should not protrude beyond the electrode location. snap when secured in place. -
Page 20: Axis Electronic Lock Actuator
5.2 ROUTING CABLES THROUGH THE SECTION 5 - SHOULDER JOINT AXIS ELECTRONIC LOCK ACTUATOR In the exoskeletal version, both input and output wires are routed through a channel between the yoke plate and the humeral plate. 5.1 ELECTRONIC LOCK ACTUATOR OVERVIEW Input wires travel from the input control (electrodes, switches, etc) to the The Axis Shoulder Joint is available with an electronic lock actuator in input connector board. -
Page 21: Outputs Located Above The Elbow
5.3 OUTPUTS LOCATED ABOVE THE ELBOW Output Receptacles on Input Connector Board - Top View BOARD LOCATION OUTPUT OPTION SETUP TYPE Shoulder Lock/Unlock 1 output Haptic Feedback Plug A B C D Espire Elbow Technical Manual | 18... -
Page 22: Measuring And Cutting Forearm
SECTION 6 - MEASURING AND CUTTING FOREARM 6.1 MEASURING THE FOREARM The Espire Elbow is available in two forearm lengths, Small and Standard. Forearm measurement can be referenced from either the center of the elbow or the back of the elbow. DIMENSIONS SMALL STANDARD... -
Page 23: Cutting The Forearm To Length
6.3 CUTTING THE FOREARM TO LENGTH Measure the desired length of the forearm. Cut the forearm, preferably with a bandsaw. Continue with wrist fabrication (section 8). Note: It is important to avoid subjecting the system to excessive vibration such as that caused by a carbide-tip saw blade or a sanding belt/disk. -
Page 24: Wrist Fabrication
7.2 OUTPUT WIRES FOR TERMINAL DEVICES SECTION 7 - WRIST FABRICATION Output wires will already be installed into the circuit board of the Espire 7.1 WRIST OPTIONS OVERVIEW Elbow. They can easily be retrieved from inside of the forearm and connected to the desired device. -
Page 25: Quick Disconnect Wrist Installation
7.3 QUICK DISCONNECT WRIST INSTALLATION MOTION CONTROL STANDARD ELECTRONIC WRIST ROTATOR INSTALLATION Lamination Ring If no wrist rotator is desired, a quick Note: The Motion Control Standard Electronic Wrist Rotator will only disconnect wrist can be installed using the fit the standard size Espire Elbow with 50mm wrist opening. lamination ring. -
Page 26: Ottobock 10S17 Electronic Wrist Rotator Installation
7.5 OTTOBOCK 10S17 ELECTRONIC WRIST Wiring ROTATOR INSTALLATION Plug the gray (wrist) output cable into the plug labeled “wrist” on the Motion Control Wrist Rotator. The curve of the 2-position socket connector should face inward toward the center of the wrist. Lamination Ring Plug the orange (hand-open) cable into The lamination ring needs only to be bonded into... - Page 27 Note: When using an Ottobock Wrist Rotator, the Bock 2-socket wrist plug must be connected to the left 2-socket connection point labeled “3” next to the plug supplying the wrist motor as shown below. If you connect it on the other side of the rotator, and a “hand”...
-
Page 28: The Lamination Collar And Clamp Ring
The clamp ring is a two-piece assembly that is uniquely shaped to fit the SECTION 8 - profile of the Espire Elbow. When assembled to the elbow, the clamp THE LAMINATION COLLAR AND screws will face posterior. CLAMP RING 8.1 ORIENTATION OF THE LAMINATION Humeral Friction COLLAR AND CLAMP RING Fasteners... -
Page 29: Attaching The Lamination Collar To The Elbow
8.3 ATTACHING THE LAMINATION COLLAR 8.4 DETERMINING PROPER ORIENTATION TO THE ELBOW ON TEST SOCKET Test the collar orientation by placing it under the user’s check socket with the orientation line facing posterior. Rotate the forearm in and out. Rotate the Place the lamination collar on top of the collar accordingly to adjust the amount of internal or external rotation. -
Page 30: Setting Up Counterbalance For Hybrid Version
9.2 COUNTERBALANCE ADJUSTMENT SECTION 9 - SETTING UP COUNTERBALANCE Direction Adjustment Result FOR HYBRID VERSION Turn the dial backward Supports more load on to increase the the elbow counterbalance weight 9.1 COUNTERBALANCE OVERVIEW The counterbalance assists in flexion and extension of the Espire Elbow. Different amounts of tension are necessary based on the elbow’s overall Turn the dial forward Supports less load on... - Page 31 Espire Elbow Technical Manual | 28...
-
Page 32: Maintenance And Troubleshooting
Espire Elbow All LED Indications SECTION 10 - Color Indicator Status MAINTENANCE AND TROUBLESHOOTING 4 Green Blinks Battery 100% Charged 3 Green Blinks Battery Less Than 75% 2 Green Blinks Battery Less Than 50% 10.1 TROUBLESHOOTING 1 Green Blink Battery Less Than 25% Yellow Solid Critically Low - Charge Battery Caution: The Espire Elbow should never be serviced while connected... - Page 33 Espire Elbow Technical Manual | 30...
-
Page 34: Intended Use And Safety
11.2 SAFETY SECTION 11 - INTENDED USE AND SAFETY Legend of Symbols 11.1 INTENDED USE Note: Possible technical damage. Info: Basic information regarding this product. Intended Use Statement The Espire Elbow is to be used exclusively for external prosthetic fittings Caution: Possible risk of accident or injury. - Page 35 The electrodes should be set to as low a sensitivity as possible. Elbow and damaged components may only be opened or repaired by If corresponding malfunctions occur repeatedly, please have the certified College Park technicians. electrode settings checked by your prosthetist. Caution: Penetration of dirt and humidity...
- Page 36 For maximum safety and convenience, should be exercised during use by patients having skin with decreased College Park recommends that, at the very least, a specialist evaluate the heat sensitivity. In case of overheating the performance of the Espire need for any adaptations to the car (such as installing a steering fork).
- Page 37 Caution: Risk of pinching where the elbow joint bends Warning: Using with Other Equipment Ensure that fingers and other body parts are not in this area when Use of this equipment adjacent to or stacked with other equipment bending the elbow joint. should be avoided because it could result in improper operation.
- Page 38 Complies with Standards Version ISO 10993-10 Biological evaluation of medical devices – Part 2010 Version 10: Tests for irritation and skin sensitization ISO 22523 External limb prostheses and external orthoses 2006 FCC Part 15 Radio Frequency – Requirements and test methods IEC 62133 Secondary cells and batteries containing 2017...
- Page 39 Definitions of symbols used in this device and its packaging Phenomenon & Standard Test Level Remarks Definition Source Symbol Radiated Emissions Group 1, Class B The Espire Elbow uses Consult instructions for use. BS EN ISO 15223-1: RF energy only for CISPR11 ed5.0 (with 2012 Reference no.
- Page 40 Symbol Definition Source Symbol Definition Source Temperature limit. ISO 15223-1 Subject to recycling under the Waste Disposal Environmental Protection Act. Administration, Reference no. 5.3.7 R.O.C.(Taiwan) Storage humidity range. ISO 15223-1 Reference no. 5.3.8 Note: Possible technical damage. Protection against solid foreign objects of IEC 60601-1, Table D.3, 12.5 mm diameter and greater, and protection Symbol 2...
- Page 41 NOTES...
- Page 42 NOTES...
- Page 44 800.728.7950 | 586.294.7950 | college-park.com COLLEGE PARK INDUSTRIES, INC 27955 College Park Dr. Warren, MI 48088 USA EMERGO EUROPE Prinsessegracht 20, 2514 AP The Hague, Netherlands Australian Sponsor, EMERGO AUSTRALIA Level 20, Tower II, Darling Park, 201 Sussex Street, Sydney, NSW 2000 Australia MADE IN THE USA ©2019 College Park Industries, Inc.
Need help?
Do you have a question about the Espire Elbow Hybrid and is the answer not in the manual?
Questions and answers