Table of Contents
Advertisement
Quick Links
www.lightemotion.com.au
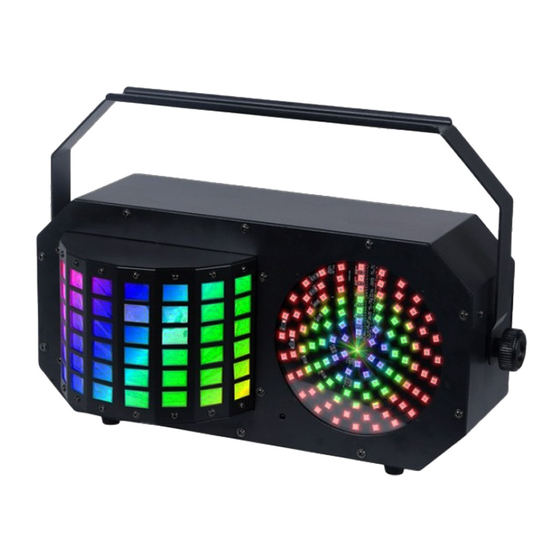
DERBY3
3-in-1 Entertainment Lighting Effect.
User's instruction manual
This manual contains important information about the safe installation and use of this product
Please read this instruction manual carefully before installing or operating
Please keep these instructions in a safe place for future reference
V1.01
Advertisement
Table of Contents

Related Manuals for Light Emotion DERBY3


Summary of Contents for Light Emotion DERBY3
- Page 1 DERBY3 3-in-1 Entertainment Lighting Effect. User’s instruction manual This manual contains important information about the safe installation and use of this product Please read this instruction manual carefully before installing or operating Please keep these instructions in a safe place for future reference...
-
Page 2: Table Of Contents
Contents 1. Safety Instructions 2. Installation 3. Features 4. Menu Operation 5. IR Remote Control 6. DMX Control 7. DMX Connections 8. DMX Address Setting 9. DMX Terminator 10. Cleaning and Maintenance 11. Technical Data 12. Warranty... -
Page 3: Safety Instructions
Introduction Thank you for the purchase of your DERBY3 3-in-1 Lighting Effect by Light Emotion. We are confident you will be satisfied with your purchase and enjoy many years of use from this Professional Light Emotion product. Please read these instructions carefully to ensure the product is well look after and used correctly to avoid any potential problems. -
Page 4: Installation
- Avoid direct eye exposure to the light source while it is on. 2. Installation: Caution: For safe mounting of this product, please read the following carefully. - Use a suitable clamp to attach to lighting stand, trussing or bar, together with safety chain. - When mounting the product, do not stand directly underneath the product - Always use a safety chain when mounting the product on stands, trussing or bars. -
Page 5: Menu Operation
4. Operation Because this light features a laser, there is the mandatory key operated laser safety switch on the rear of the unit. This is independent of the power on/off switch. The laser will not operate until the safety switch is placed into the on position using the included key. - Page 6 Default MENU UP/DOWN Function Value Addr 1-512 DMX Address setting 14Ch 14Ch 14 channel setting ChMd 2 channel setting Sh 1 Sh 7 1 Derby Only Show Sh 2 2 SMD LED Panel Only Show Sh 3 3 Laser Only Show ShNd Sh 4...
-
Page 7: Ir Remote Control
5. Infra Red remote control. Number Button Function Stand By Stand by Hold on 3-10 Show 1-Show 8 Show1-Show7 (Show 8 hold on) LED Colour LED colour select LED Random LED colour randomly Sound ON Sound on Laser Colour Laser colour select Laser Random Laser colour randomly Sound OFF... -
Page 8: Dmx Control
6. DMX Control Using DMX you can control each of the three effects built into this light individually. You can also use DMX to call upon built in programs and shows. This fixture has 2 DMX profiles – 2 and 14 channels modes. - Page 9 192-255 Large – small – large, speed up rate 0-127 Rotation angle select Laser pattern CH10 128-191 positive rotation speed rotation 192-255 Inverted rotation speed Laser pattern pan 0-127 Horizontal position CH11 position 128-255 Horizontal move, speed up rate CH12 Laser pattern tilt 0-127 Choose vertical position position...
-
Page 10: Dmx Connections
7. DMX-512 Control Connection Using a 3 pin XLR cable, you can connect the product to a DMX controller and then to other fixtures with 3 pin XLR inputs and outputs. When not using DMX, multiple fixtures can be connected together and operate under master/slave control. -
Page 11: Dmx Terminator
9. DMX-512 connection with DMX terminator A DMX terminator helps to reduce ‘noise’ on the DMX chain, and makes the light respond to control more accurately. It should be plugged in to the last fixture in any chain. For Terminator connections please see below: 10. -
Page 12: Warranty
We recommend you register your warranty online at www.industrygear.com.au. Purchased from:_________________________________________ Contact Details:_________________________________________ Date Purchased:_________________________________________ Invoice/Receipt Number:__________________________________ Copyright Light Emotion 2017. E&OE Exclusively imported by LSW Imports and Distribution PO Box 887, Kingsgrove, NSW, 2208 sales@lswonline.com.au www.lightemotion.com.au 1800 643 111 (within Australia)
Need help?
Do you have a question about the DERBY3 and is the answer not in the manual?
Questions and answers