Advertisement
Quick Links
Advertisement

Summary of Contents for Haltech Platinum Pro Plug-in
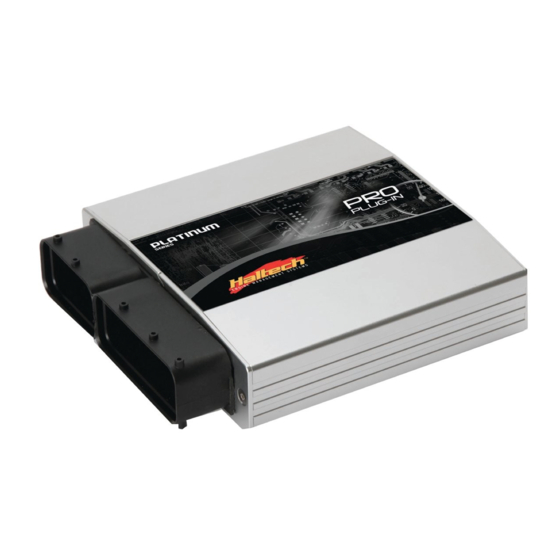
- Page 1 PLATINUM PRO PLUG-IN Hyundai Genesis BK Theta (HT055045) QUICK START GUIDE...
- Page 2 Proof of purchase, in the form of a bill of sale or receipted invoice, which indicates that the product is within the warranty period, must be presented to obtain warranty service. Lockin Pty Ltd trading as Haltech suggests that the purchaser retain the dealer’s dated bill of sale as evidence of the date of retail purchase.
- Page 3 • Loaded Basemap Your Platinum Pro Plug-in has been programmed with a basemap to suit a Hyundai Genesis running a Theta 2.0L standard engine with Key Start Option. Please ensure you load, modify and check the corresponding basemap for your application and calibrate the Electronic Throttle within ECU Manager software before attempting to start the vehicle.
- Page 4 ECU Installation To install your new Platinum Pro Plug-in to your Hyundai Genesis, please follow the procedures below. You will require the following tools Socket set with 10mm socket, • Haltech Mounting Kit • Locate your factory ECU. This will be located in the engine bay, near the firewall on the drivers side.
- Page 5 Using the Haltech mounting kit provided mount the Platinum Pro Plug-in ECU to the mounting bracket with the 4x captive nuts and screws as shown below. Figure 3 – Mounting bracket captive nut attachment and assembly Figure 4 – Platinum Pro Plug-in ECU mounted on...
- Page 6 Refer to the rear auxiliary connector section for more information. Figure 5 – Haltech optional Auxiliary Harness (#HT040003) Proceed to mount the Platinum Pro Plug-in ECU to the OEM mounting location on the vehicle. The Mounting bracket has been designed to fit the existing mounting holes, re-fit the 4 mounting bolts to secure.
- Page 7 Calibration of the Electronic Throttle Before trying to start the vehicle the Electronic throttle MUST be calibrated. Calibration of the throttle is achieved by using the Haltech ECU Manager ETC Calibration wizard located in the Advanced Tab within the Main setup page.
-
Page 8: Calibration Steps
Calibration Steps Step 1: 0% Accelerator Pedal Position ( APP ) Ensure that the accelerator pedal is NOT depressed and click the calibrate button Figure 8 – 0% APP Successful calibration display Step 2: 100% Accelerator Pedal Position ( APP ) Fully press the accelerator pedal. - Page 9 Step 3: Throttle Position Sensor 1 (TPS 1) Release the accelerator pedal to a non-pressed state. Ensure that all electronic throttles are connected and click calibrate to continue Figure 10 – TPS 1 Calibration Success Step 4: Throttle Position Sensor 2 (TPS 2) In Twin throttle applications the Electronic Throttle Calibration wizard will proceed to calibrate the TPS 2 automatically.
- Page 10 Figure 12 – Successful Calibration Indication With the engine started and running its time to tune. This is best achieved by your nearest engine tuner. See the listing of Haltech dealers on our website to find the one closest to you.
- Page 11 ECU Manager Software ECU Manager software is used for setup, calibration and diagnostics and can be found on the CD supplied with this unit or downloaded from the Haltech website www.haltech.com Minimum System Requirements Operating System: Windows 2000 SP4 / XP / Vista / Windows 7...
- Page 12 Help tab located at the top left of the screen ECU Manager File Extensions When ECU manager saves the map from the Haltech ECU, it saves the map with a Haltech specific file extension. The File extension can be broken down as follows: Example File : xxxx.hbktheta-111...
- Page 13 Rear Auxiliary Connector The Platinum Pro Plugin Series allows further expansion of your ECU by the Rear Auxiliary Connector. The Rear Auxiliary connector allows you access to: 1 Additional Digital Pulsed Input ( DPI ) • 2 Additional Digital Pulsed Outputs ( DPO ) •...
- Page 14 Digital Pulsed Input ( DPI ) Digital Pulsed Inputs are capable of accepting pulsed input information such as for a road speed sensor. These inputs measure the time periods between the pulses and can process this information to provide quantities such as road speed. One additional input can be connected using the Optional Rear Auxiliary Harness ( HT040003 ) Digital Pulsed Outputs ( DPO )
- Page 15 Simply connect the device directly to the 8 pin CAN connector on the rear of the ECU or connect using an optional Haltech CAN Hub (order as part # HT059990) if multiple expansion devices are required).
- Page 16 ECU Pinout Looking into ECU connector Figure 17 – Platinum Pro Plug-in Hyundai Genesis BK Theta...
- Page 17 Notes...
- Page 18 Notes...
- Page 20 HALTECH HEAD OFFICE: +612 9729 0999 FAX: +612 9729 0900 EMAIL: sales@haltech.com HALTECH US OFFICE: EMAIL: usa@haltech.com See the Haltech Website for your local authorized dealer. www.haltech.com Version 4...


Need help?
Do you have a question about the Platinum Pro Plug-in and is the answer not in the manual?
Questions and answers