Table of Contents
Advertisement
Advertisement
Table of Contents

Related Manuals for Daikin SkyAir RZR-P Series


Summary of Contents for Daikin SkyAir RZR-P Series
- Page 1 EDUS281120_a Cooling Only 60Hz Heat Pump 60Hz RZR-P, RZQ-P(9) series AMERICAS...
- Page 2 EDUS281120_a SkyAir Engineering Data 1. External appearance ...................3 1.1 Indoor unit ....................3 1.2 Outdoor unit....................4 2. Model name, power supply and nomenclature ...........5 2.1 Model name and power supply ..............5 2.2 Nomenclature ....................6 3. Specifications ....................7 3.1 Cooling Only....................
- Page 3 EDUS281120_a 12.1 Indoor unit ....................98 12.2 Outdoor unit....................102 13.Operation limits ..................104 14.Accessories.....................106 14.1 Indoor unit ....................106 14.2 Outdoor unit....................108 15.Center of gravity..................109 15.1 Indoor unit ....................109 15.2 Outdoor unit....................111 16.Installation of indoor unit .................113 16.1 FCQ18PAVJU / FCQ24PAVJU / FCQ30PAVJU / FCQ36PAVJU / FCQ42PAVJU ..................
- Page 4 EDUS281120_a External appearance 1. External appearance Indoor unit Ceiling mounted cassette type (Round flow) FCQ18PAVJU / FCQ24PAVJU / FCQ30PAVJU FCQ36PAVJU / FCQ42PAVJU Ceiling suspended type FHQ18PVJU / FHQ24PVJU / FHQ30PVJU FHQ36MVJU / FHQ42MVJU Wall mounted type FAQ18PVJU / FAQ24PVJU Ceiling mounted duct type FBQ18PVJU / FBQ24PVJU / FBQ30PVJU FBQ36PVJU / FBQ42PVJU RZR-P, RZQ-P(9)
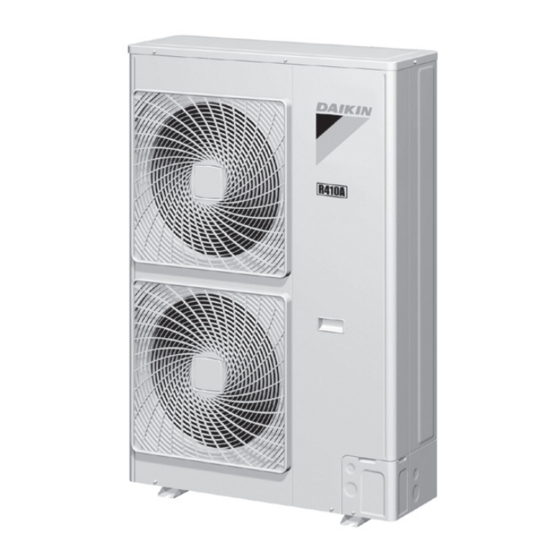
- Page 5 External appearance EDUS281120_a Outdoor unit RZR18PVJU / RZR24PVJU / RZR30PVJU RZQ18PVJU9 / RZQ24PVJU9 / RZQ30PVJU RZR36PVJU / RZR42PVJU RZQ36PVJU9 / RZQ42PVJU9 RZR-P, RZQ-P(9)
- Page 6 EDUS281120_a Model name, power supply and nomenclature 2. Model name, power supply and nomenclature Model name and power supply 2.1.1 Cooling Only Indoor unit Outdoor unit Power supply intake FCQ18PAVJU* RZR18PVJU FCQ24PAVJU* RZR24PVJU Ceiling mounted cassette type FCQ30PAVJU* RZR30PVJU (Round flow) FCQ36PAVJU* RZR36PVJU FCQ42PAVJU*...
- Page 7 Model name, power supply and nomenclature EDUS281120_a Nomenclature Indoor unit Standard compatibility symbol U: United States of America Power supply symbol VJ: 1 phase, 208/230 V, 60 Hz Indicates major design category Capacity indication in cooling 18: 18,000 Btu/h 24: 24,000 Btu/h 30: 30,000 Btu/h 36: 36,000 Btu/h 42: 42,000 Btu/h Refrigerant and Type Q: R410A, Heat pump or Cooling only Shape...
- Page 8 EDUS281120_a Specifications 3. Specifications Cooling Only, 3.1.1 FCQ / Ceiling mounted cassette type (Round flow) Indoor unit FCQ18PAVJU FCQ24PAVJU FCQ30PAVJU Model Outdoor unit RZR18PVJU RZR24PVJU RZR30PVJU Power supply 1 phase, 208/230V, 60Hz 1 phase, 208/230V, 60Hz 1 phase, 208/230V, 60Hz 1, 2 Cooling capacity Btu/h...
- Page 9 Specifications EDUS281120_a Ceiling mounted cassette type (Round flow), continued Indoor unit FCQ36PAVJU FCQ42PAVJU Model Outdoor unit RZR36PVJU RZR42PVJU Power supply 1 phase, 208/230V, 60Hz 1 phase, 208/230V, 60Hz 1, 2 Cooling capacity Btu/h 36,000 42,000 SEER (Rated) 17.5 16.0 EER (Rated) Btu/h-W 11.2 10.2...
- Page 10 EDUS281120_a Specifications 3.1.2 Ceiling suspended type Indoor unit FHQ18PVJU FHQ24PVJU FHQ30PVJU Model Outdoor unit RZR18PVJU RZR24PVJU RZR30PVJU Power supply 1 phase, 208/230V, 60Hz 1 phase, 208/230V, 60Hz 1 phase, 208/230V, 60Hz 1, 2 Cooling capacity Btu/h 18,000 24,000 30,000 SEER (Rated) 18.0 18.1 17.2...
- Page 11 Specifications EDUS281120_a Ceiling suspended type, continued Indoor unit FHQ36MVJU FHQ42MVJU Model Outdoor unit RZR36PVJU RZR42PVJU Power supply 1 phase, 208/230V, 60Hz 1 phase, 208/230V, 60Hz 1, 2 Cooling capacity Btu/h 36,000 40,500 SEER (Rated) 14.0 13.8 EER (Rated) Btu/h-W 10.2 Indoor unit FHQ36MVJU FHQ42MVJU...
- Page 12 EDUS281120_a Specifications 3.1.3 Wall mounted type Indoor unit FAQ18PVJU FAQ24PVJU Model Outdoor unit RZR18PVJU RZR24PVJU Power supply 1 phase, 208/230V, 60Hz 1 phase, 208/230V, 60Hz 1, 2 Cooling capacity Btu/h 18,000 24,000 SEER (Rated) 18.6 17.6 EER (Rated) Btu/h-W 12.7 10.2 Indoor unit FAQ18PVJU...
- Page 13 Specifications EDUS281120_a 3.1.4 Indoor unit FBQ18PVJU FBQ24PVJU FBQ30PVJU Model Outdoor unit RZR18PVJU RZR24PVJU RZR30PVJU Power supply 1 phase, 208/230V, 60Hz 1 phase, 208/230V, 60Hz 1 phase, 208/230V, 60Hz 1, 2 Cooling capacity Btu/h 18,000 24,000 30,000 SEER (Rated) 17.5 16.5 16.0 EER (Rated) Btu/h-W...
- Page 14 EDUS281120_a Specifications Indoor unit FBQ36PVJU FBQ42PVJU Model Outdoor unit RZR36PVJU RZR42PVJU Power supply 1 phase, 208/230V, 60Hz 1 phase, 208/230V, 60Hz 1, 2 Cooling capacity Btu/h 36,000 42,000 SEER (Rated) 17.5 16.0 EER (Rated) Btu/h-W 11.2 10.2 Indoor unit FBQ36PVJU FBQ42PVJU Color Galvanized steel plate...
- Page 15 Specifications EDUS281120_a Heat Pump 3.2.1 FCQ / Ceiling mounted cassette type (Round flow) Indoor unit FCQ18PAVJU FCQ24PAVJU FCQ30PAVJU Model Outdoor unit RZQ18PVJU9 RZQ24PVJU9 RZQ30PVJU Power supply 1 phase, 208/230V, 60Hz 1 phase, 208/230V, 60Hz 1 phase, 208/230V, 60Hz 1, 4 Cooling capacity Btu/h 18,000...
- Page 16 EDUS281120_a Specifications Ceiling mounted cassette type (Round flow), continued Indoor unit FCQ36PAVJU FCQ42PAVJU Model Outdoor unit RZQ36PVJU9 RZQ42PVJU9 Power supply 1 phase, 208/230V, 60Hz 1 phase, 208/230V, 60Hz 1, 4 Cooling capacity Btu/h 36,000 42,000 2, 4 Heating capacity Btu/h 40,000 47,000 3, 4...
- Page 17 Specifications EDUS281120_a 3.2.2 Ceiling suspended type Indoor unit FHQ18PVJU FHQ24PVJU FHQ30PVJU Model Outdoor unit RZQ18PVJU9 RZQ24PVJU9 RZQ30PVJU Power supply 1 phase, 208/230V, 60Hz 1 phase, 208/230V, 60Hz 1 phase, 208/230V, 60Hz 1, 3 Cooling capacity Btu/h 18,000 24,000 30,000 2, 3 Heating capacity Btu/h 20,000...
- Page 18 EDUS281120_a Specifications Ceiling suspended type, continued Indoor unit FHQ36MVJU FHQ42MVJU Model Outdoor unit RZQ36PVJU9 RZQ42PVJU9 Power supply 1 phase, 208/230V, 60Hz 1 phase, 208/230V, 60Hz 1, 3 Cooling capacity Btu/h 36,000 40,500 2, 3 Heating capacity Btu/h 37,500 39,500 SEER (Rated) 14.0 13.8 EER (Rated)
- Page 19 Specifications EDUS281120_a 3.2.3 Wall mounted type Indoor unit FAQ18PVJU FAQ24PVJU Model Outdoor unit RZQ18PVJU9 RZQ24PVJU9 Power supply 1 phase, 208/230V, 60Hz 1 phase, 208/230V, 60Hz 1, 3 Cooling capacity Btu/h 18,000 24,000 2, 3 Heating capacity Btu/h 20,000 26,000 SEER (Rated) 18.6 17.6 EER (Rated)
- Page 20 EDUS281120_a Specifications 3.2.4 Indoor unit FBQ18PVJU FBQ24PVJU FBQ30PVJU Model Outdoor unit RZQ18PVJU9 RZQ24PVJU9 RZQ30PVJU Power supply 1 phase, 208/230V, 60Hz 1 phase, 208/230V, 60Hz 1 phase, 208/230V, 60Hz 1, 4 Cooling capacity Btu/h 18,000 24,000 30,000 2, 4 Heating capacity Btu/h 20,000 27,000...
- Page 21 Specifications EDUS281120_a Indoor unit FBQ36PVJU FBQ42PVJU Model Outdoor unit RZQ36PVJU9 RZQ42PVJU9 Power supply 1 phase, 208/230V, 60Hz 1 phase, 208/230V, 60Hz 1, 4 Cooling capacity Btu/h 36,000 42,000 2, 4 Heating capacity Btu/h 40,000 47,000 3, 4 Heating capacity Btu/h 21,000 25,000 SEER (Rated)
- Page 22 EDUS281120_a Dimensions and service space 4. Dimensions and service space Indoor unit 4.1.1 FCQ (Ceiling mounted cassette type) FCQ18PAVJU RZR-P, RZQ-P(9)
- Page 23 Dimensions and service space EDUS281120_a FCQ24PAVJU / FCQ30PAVJU RZR-P, RZQ-P(9)
- Page 24 EDUS281120_a Dimensions and service space FCQ36PAVJU / FCQ42PAVJU RZR-P, RZQ-P(9)
- Page 25 Dimensions and service space EDUS281120_a 4.1.2 FHQ (Ceiling suspended type) FHQ18PVJU / FHQ24PVJU / FHQ30PVJU FHQ36MVJU / FHQ42MVJU RZR-P, RZQ-P(9)
- Page 26 EDUS281120_a Dimensions and service space 4.1.3 FAQ (Wall mounted type) FAQ18PVJU / FAQ24PVJU RZR-P, RZQ-P(9)
- Page 27 Dimensions and service space EDUS281120_a 4.1.4 FBQ (Ceiling mounted duct type) FBQ18PVJU RZR-P, RZQ-P(9)
- Page 28 EDUS281120_a Dimensions and service space FBQ24PVJU / FBQ30PVJU RZR-P, RZQ-P(9)
- Page 29 Dimensions and service space EDUS281120_a FBQ36PVJU / FBQ42PVJU RZR-P, RZQ-P(9)
- Page 30 EDUS281120_a Dimensions and service space Wired remote controller (Optional) BRC1E71 RZR-P, RZQ-P(9)
- Page 31 Dimensions and service space EDUS281120_a BRC2A71 RZR-P, RZQ-P(9)
- Page 32 EDUS281120_a Dimensions and service space Wireless remote controller (Optional) BRC7E83 (for FHQ) RZR-P, RZQ-P(9)
- Page 33 Dimensions and service space EDUS281120_a BRC7E818 (for FAQ) RZR-P, RZQ-P(9)
- Page 34 EDUS281120_a Dimensions and service space BRC4C82 (for FBQ) RZR-P, RZQ-P(9)
- Page 35 Dimensions and service space EDUS281120_a Outdoor unit RZR18PVJU / RZR24PVJU / RZR30PVJU RZQ18PVJU9 / RZQ24PVJU9 / RZQ30PVJU RZR-P, RZQ-P(9)
- Page 36 EDUS281120_a Dimensions and service space RZR36PVJU / RZR42PVJU RZQ36PVJU9 / RZQ42PVJU9 RZR-P, RZQ-P(9)
- Page 37 Dimensions and service space EDUS281120_a Installation service space RZR18PVJU / RZR24PVJU / RZR30PVJU RZQ18PVJU9 / RZQ24PVJU9 / RZQ30PVJU 3D064213A RZR-P, RZQ-P(9)
- Page 38 EDUS281120_a Dimensions and service space 3D064213A RZR-P, RZQ-P(9)
- Page 39 Dimensions and service space EDUS281120_a 3D064213A RZR-P, RZQ-P(9)
- Page 40 EDUS281120_a Dimensions and service space RZR36PVJU / RZR42PVJU RZQ36PVJU9 / RZQ42PVJU9 3D047381B RZR-P, RZQ-P(9)
- Page 41 Dimensions and service space EDUS281120_a 3D047381B RZR-P, RZQ-P(9)
- Page 42 EDUS281120_a Piping diagrams 5. Piping diagrams Indoor unit + Outdoor unit FCQ18PAVJU / FHQ18PVJU / FAQ18PVJU / FBQ18PVJU + RZR18PVJU / RZQ18PVJU9 FCQ24PAVJU / FHQ24PVJU / FAQ24PVJU / FBQ24PVJU + RZR24PVJU / RZQ24PVJU9 FCQ30PAVJU / FHQ30PVJU / FBQ30PVJU + RZR30PVJU / RZQ30PVJU RZR-P, RZQ-P(9)
- Page 43 Piping diagrams EDUS281120_a Indoor unit FCQ36PAVJU / FCQ42PAVJU FHQ36MVJU / FHQ42MVJU 4D024460F FBQ36PVJU / FBQ42PVJU 4D034245F RZR-P, RZQ-P(9)
- Page 44 EDUS281120_a Piping diagrams Outdoor unit RZR36PVJU / RZR42PVJU RZQ36PVJU9 / RZQ42PVJU9 3D065366A RZR-P, RZQ-P(9)
- Page 45 Wiring diagrams EDUS281120_a 6. Wiring diagrams Indoor unit FCQ18PAVJU / FCQ24PAVJU / FCQ30PAVJU FCQ36PAVJU / FCQ42PAVJU RZR-P, RZQ-P(9)
- Page 46 EDUS281120_a Wiring diagrams FHQ18PVJU / FHQ24PVJU / FHQ30PVJU FHQ36MVJU / FHQ42MVJU RZR-P, RZQ-P(9)
- Page 47 Wiring diagrams EDUS281120_a FAQ18PVJU / FAQ24PVJU RZR-P, RZQ-P(9)
- Page 48 EDUS281120_a Wiring diagrams FBQ18PVJU / FBQ24PVJU / FBQ30PVJU / FBQ36PVJU / FBQ42PVJU RZR-P, RZQ-P(9)
- Page 49 Wiring diagrams EDUS281120_a Outdoor unit RZR18PVJU / RZR24PVJU / RZR30PVJU RZQ18PVJU9 / RZQ24PVJU9 / RZQ30PVJU RZR-P, RZQ-P(9)
- Page 50 EDUS281120_a Wiring diagrams RZR36PVJU / RZR42PVJU RZQ36PVJU9 / RZQ42PVJU9 RZR-P, RZQ-P(9)
- Page 51 Wiring diagrams EDUS281120_a External connection diagram RZR18PVJU / RZR24PVJU / RZR30PVJU RZQ18PVJU9 / RZQ24PVJU9 / RZQ30PVJU FUSE / BREAKER FUSE / BREAKER C: 3D064230A RZR-P, RZQ-P(9)
- Page 52 EDUS281120_a Wiring diagrams RZR36PVJU / RZR42PVJU RZQ36PVJU9 / RZQ42PVJU9 FUSE / BREAKER FUSE / BREAKER C: 3D071667 RZR-P, RZQ-P(9)
- Page 53 Electrical characteristics EDUS281120_a 7. Electrical characteristics Indoor unit FCQ18PAVJU / FCQ24PAVJU / FCQ30PAVJU FCQ36PAVJU / FCQ42PAVJU Either a fuse or a circuit breaker is acceptable. C: 4D074049 RZR-P, RZQ-P(9)
- Page 54 EDUS281120_a Electrical characteristics FHQ18PVJU / FHQ24PVJU / FHQ30PVJU FHQ36MVJU / FHQ42MVJU FHQ18MVJU FHQ24MVJU 208V / 230V FHQ30PVJU FHQ36PVJU FHQ42PVJU Either a fuse or a circuit breaker is acceptable. C: 4D049333A RZR-P, RZQ-P(9)
- Page 55 Electrical characteristics EDUS281120_a FAQ18PVJU / FAQ24PVJU FAQ18PVJU 208V / 230V FAQ24PVJU Either a fuse or a circuit breaker is acceptable. C: 4D046466B RZR-P, RZQ-P(9)
- Page 56 EDUS281120_a Electrical characteristics FBQ18PVJU / FBQ24PVJU / FBQ30PVJU / FBQ36PVJU / FBQ42PVJU Either a fuse or a circuit breaker is acceptable. C: 4D074107 RZR-P, RZQ-P(9)
- Page 57 Electrical characteristics EDUS281120_a Outdoor unit RZR18PVJU / RZR24PVJU / RZR30PVJU RZQ18PVJU9 / RZQ24PVJU9 / RZQ30PVJU M i n i m u m M a x i m u m w h e n s t a r t i n g t h e c o m p r e s s o r . M a x i m u m f u s e g r o u n d...
- Page 58 EDUS281120_a Electrical characteristics RZR36PVJU / RZR42PVJU RZQ36PVJU9 / RZQ42PVJU9 M i n i m u m M a x i m u m w h e n s t a r t i n g t h e c o m p r e s s o r . M a x i m u m f u s e g r o u n d...
- Page 59 Safety devices list EDUS281120_a 8. Safety devices list FCQ18PAVJU / FCQ24PAVJU / FCQ30PAVJU / FCQ36PAVJU / FCQ42PAVJU 3D074050 RZR-P, RZQ-P(9)
- Page 60 EDUS281120_a Safety devices list FHQ18PVJU / FHQ24PVJU / FHQ30PVJU 3D049334A FHQ36MVJU / FHQ42MVJU 3D049334A RZR-P, RZQ-P(9)
- Page 61 Safety devices list EDUS281120_a FAQ18PVJU / FAQ24PVJU 4D047085B RZR-P, RZQ-P(9)
- Page 62 EDUS281120_a Safety devices list FBQ18PVJU / FBQ24PVJU / FBQ30PVJU / FBQ36PVJU / FBQ42PVJU 3D074108 RZR-P, RZQ-P(9)
- Page 63 Capacity tables EDUS281120_a 9. Capacity tables Cooling Only 9.1.1 FCQ18PAVJU + RZR18PVJU C o o l i n g C a p a c i t y 2 3 0 V – 6 0 H z Outdoor Air Temp. ° Indoor Air Temp.
- Page 64 EDUS281120_a Capacity tables FCQ30PAVJU + RZR30PVJU C o o l i n g C a p a c i t y 2 3 0 V – 6 0 H z Outdoor Air Temp. ° Indoor Air Temp. °FDB °FWB kBTUH kBTUH kBTUH kBTUH...
- Page 65 Capacity tables EDUS281120_a FCQ42PAVJU + RZR42PVJU C o o l i n g C a p a c i t y 2 3 0 V – 6 0 H z Outdoor Air Temp. ° Indoor Air Temp. °FDB °FWB kBTUH kBTUH kBTUH kBTUH...
- Page 66 EDUS281120_a Capacity tables 9.1.2 FHQ18PVJU + RZR18PVJU C o o l i n g C a p a c i t y 2 3 0 V – 6 0 H z ° Outdoor Air Temp. Indoor Air Temp. °FDB °FWB kBTUH kBTUH kBTUH kBTUH...
- Page 67 Capacity tables EDUS281120_a FHQ30PVJU + RZR30PVJU C o o l i n g C a p a c i t y 2 3 0 V – 6 0 H z Outdoor Air Temp. ° Indoor Air Temp. °FDB °FWB kBTUH kBTUH kBTUH kBTUH...
- Page 68 EDUS281120_a Capacity tables FHQ42MVJU + RZR42PVJU C o o l i n g C a p a c i t y 2 3 0 V – 6 0 H z Outdoor Air Temp. ° Indoor Air Temp. °FDB °FWB kBTUH kBTUH kBTUH kBTUH...
- Page 69 Capacity tables EDUS281120_a 9.1.3 FAQ18PVJU + RZR18PVJU C o o l i n g C a p a c i t y 2 3 0 V – 6 0 H z ° Outdoor Air Temp. Indoor Air Temp. °FDB °FWB kBTUH kBTUH kBTUH kBTUH...
- Page 70 EDUS281120_a Capacity tables 9.1.4 FBQ18PVJU + RZR18PVJU C o o l i n g C a p a c i t y 2 3 0 V – 6 0 H z ° Outdoor Air Temp. Indoor Air Temp. °FDB °FWB kBTUH kBTUH kBTUH kBTUH...
- Page 71 Capacity tables EDUS281120_a FBQ30PVJU + RZR30PVJU C o o l i n g C a p a c i t y 2 3 0 V – 6 0 H z Outdoor Air Temp. ° Indoor Air Temp. °FDB °FWB kBTUH kBTUH kBTUH kBTUH...
- Page 72 EDUS281120_a Capacity tables FBQ42PVJU + RZR42PVJU C o o l i n g C a p a c i t y 2 3 0 V – 6 0 H z Outdoor Air Temp. ° Indoor Air Temp. °FDB °FWB kBTUH kBTUH kBTUH kBTUH...
- Page 73 Capacity tables EDUS281120_a Heat Pump 9.2.1 FCQ18PAVJU + RZQ18PVJU9 C o o l i n g C a p a c i t y 2 3 0 V – 6 0 H z Outdoor Air Temp. ° Indoor Air Temp. °FDB °FWB kBTUH kBTUH...
- Page 74 EDUS281120_a Capacity tables FCQ24PAVJU + RZQ24PVJU9 C o o l i n g C a p a c i t y 2 3 0 V – 6 0 H z Outdoor Air Temp. ° Indoor Air Temp. °FDB °FWB kBTUH kBTUH kBTUH kBTUH...
- Page 75 Capacity tables EDUS281120_a FCQ30PAVJU + RZQ30PVJU C o o l i n g C a p a c i t y 2 3 0 V – 6 0 H z Outdoor Air Temp. ° Indoor Air Temp. °FDB °FWB kBTUH kBTUH kBTUH kBTUH...
- Page 76 EDUS281120_a Capacity tables FCQ36PAVJU + RZQ36PVJU9 C o o l i n g C a p a c i t y 2 3 0 V – 6 0 H z Outdoor Air Temp. ° Indoor Air Temp. °FDB °FWB kBTUH kBTUH kBTUH kBTUH...
- Page 77 Capacity tables EDUS281120_a FCQ42PAVJU + RZQ42PVJU9 C o o l i n g C a p a c i t y 2 3 0 V – 6 0 H z Outdoor Air Temp. ° Indoor Air Temp. °FDB °FWB kBTUH kBTUH kBTUH kBTUH...
- Page 78 EDUS281120_a Capacity tables 9.2.2 FHQ18PVJU + RZQ18PVJU9 C o o l i n g C a p a c i t y 2 3 0 V – 6 0 H z ° Outdoor Air Temp. Indoor Air Temp. °FDB °FWB kBTUH kBTUH kBTUH kBTUH...
- Page 79 Capacity tables EDUS281120_a FHQ24PVJU + RZQ24PVJU9 C o o l i n g C a p a c i t y 2 3 0 V – 6 0 H z Outdoor Air Temp. ° Indoor Air Temp. °FDB °FWB kBTUH kBTUH kBTUH kBTUH...
- Page 80 EDUS281120_a Capacity tables FHQ30PVJU + RZQ30PVJU C o o l i n g C a p a c i t y 2 3 0 V – 6 0 H z Outdoor Air Temp. ° Indoor Air Temp. °FDB °FWB kBTUH kBTUH kBTUH kBTUH...
- Page 81 Capacity tables EDUS281120_a FHQ36MVJU + RZQ36PVJU9 C o o l i n g C a p a c i t y 2 3 0 V – 6 0 H z Outdoor Air Temp. ° Indoor Air Temp. °FDB °FWB kBTUH kBTUH kBTUH kBTUH...
- Page 82 EDUS281120_a Capacity tables FHQ42MVJU + RZQ42PVJU9 C o o l i n g C a p a c i t y 2 3 0 V – 6 0 H z Outdoor Air Temp. ° Indoor Air Temp. °FDB °FWB kBTUH kBTUH kBTUH kBTUH...
- Page 83 Capacity tables EDUS281120_a 9.2.3 FAQ18PVJU + RZQ18PVJU9 C o o l i n g C a p a c i t y 2 3 0 V – 6 0 H z ° Outdoor Air Temp. Indoor Air Temp. °FDB °FWB kBTUH kBTUH kBTUH kBTUH...
- Page 84 EDUS281120_a Capacity tables FAQ24PVJU + RZQ24PVJU9 C o o l i n g C a p a c i t y 2 3 0 V – 6 0 H z Outdoor Air Temp. ° Indoor Air Temp. °FDB °FWB kBTUH kBTUH kBTUH kBTUH...
- Page 85 Capacity tables EDUS281120_a 9.2.4 FBQ18PVJU + RZQ18PVJU9 C o o l i n g C a p a c i t y 2 3 0 V – 6 0 H z ° Outdoor Air Temp. Indoor Air Temp. °FDB °FWB kBTUH kBTUH kBTUH kBTUH...
- Page 86 EDUS281120_a Capacity tables FBQ24PVJU + RZQ24PVJU9 C o o l i n g C a p a c i t y 2 3 0 V – 6 0 H z Outdoor Air Temp. ° Indoor Air Temp. °FDB °FWB kBTUH kBTUH kBTUH kBTUH...
- Page 87 Capacity tables EDUS281120_a FBQ30PVJU + RZQ30PVJU C o o l i n g C a p a c i t y 2 3 0 V – 6 0 H z Outdoor Air Temp. ° Indoor Air Temp. °FDB °FWB kBTUH kBTUH kBTUH kBTUH...
- Page 88 EDUS281120_a Capacity tables FBQ36PVJU + RZQ36PVJU9 C o o l i n g C a p a c i t y 2 3 0 V – 6 0 H z Outdoor Air Temp. ° Indoor Air Temp. °FDB °FWB kBTUH kBTUH kBTUH kBTUH...
- Page 89 Capacity tables EDUS281120_a FBQ42PVJU + RZQ42PVJU9 C o o l i n g C a p a c i t y 2 3 0 V – 6 0 H z Outdoor Air Temp. ° Indoor Air Temp. °FDB °FWB kBTUH kBTUH kBTUH kBTUH...
- Page 90 EDUS281120_a Capacity tables Capacity correction ratio RZR18PVJU / RZR24PVJU / RZR30PVJU RZQ18PVJU9 / RZQ24PVJU9 / RZQ30PVJU RZR-P, RZQ-P(9)
- Page 91 Capacity tables EDUS281120_a RZR36PVJU / RZR42PVJU RZR-P, RZQ-P(9)
- Page 92 EDUS281120_a Capacity tables RZQ36PVJU9 / RZQ42PVJU9 RZR-P, RZQ-P(9)
- Page 93 Fan Performances EDUS281120_a 10. Fan Performances FBQ18PVJU Fan Characteristics (Graph 2) Fan Characteristics (Graph 1) Notes: 1. The external static pressure (ESP) can be changed in 14 levels by the remote controller. 2. Fan Characteristics (Graph 1) show a fan characteristic at the time of maximum ESP, rating ESP, or minimum ESP.
- Page 94 EDUS281120_a Fan Performances FBQ30PVJU Fan Characteristics (Graph 2) Fan Characteristics (Graph 1) Notes: 1. The external static pressure (ESP) can be changed in 14 levels by the remote controller. 2. Fan Characteristics (Graph 1) show a fan characteristic at the time of maximum ESP, rating ESP, or minimum ESP.
- Page 95 Fan Performances EDUS281120_a FBQ42PVJU Fan Characteristics (Graph 1) Fan Characteristics (Graph 2) Notes: 1. The external static pressure (ESP) can be changed in 14 levels by the remote controller. 2. Fan Characteristics (Graph 1) show a fan characteristic at the time of maximum ESP, rating ESP, or minimum ESP.
- Page 96 EDUS281120_a Airflow Auto Adjustment Characteristics 11. Airflow Auto Adjustment Characteristics FBQ18PVJU Notes: 1. The auto airflow adjustment function can be used to offset a reduction in airflow. This function must be performed during installation and commissioning and will adjust the airflow to within ± 10% of the rated value. 2.
- Page 97 Airflow Auto Adjustment Characteristics EDUS281120_a FBQ30PVJU Notes: 1. The auto airflow adjustment function can be used to offset a reduction in airflow. This function must be performed during installation and commissioning and will adjust the airflow to within ± 10% of the rated value. 2.
- Page 98 EDUS281120_a Airflow Auto Adjustment Characteristics FBQ42PVJU Notes: 1. The auto airflow adjustment function can be used to offset a reduction in airflow. This function must be performed during installation and commissioning and will adjust the airflow to within ± 10% of the rated value. 2.
- Page 99 Sound Levels (Reference) EDUS281120_a 12. Sound Levels (Reference) 12.1 Indoor unit 12.1.1 Overall Location of microphone Location of microphone FCQ18PAVJU / FCQ24PAVJU FBQ18PVJU / FBQ24PVJU FCQ30PAVJU / FCQ36PAVJU FBQ30PVJU / FBQ36PVJU FCQ42PAVJU FBQ42PVJU 6.6ft (2m) 3.3ft (1m) 1.0ft (0.3m) 4.9ft (1.5m) 4.9ft (1.5m) dB(A) Notes:...
- Page 100 EDUS281120_a Sound Levels (Reference) FCQ30PAVJU FCQ36PAVJU FCQ42PAVJU RZR-P, RZQ-P(9)
- Page 101 Sound Levels (Reference) EDUS281120_a FBQ18PVJU FBQ24PVJU FBQ30PVJU FBQ36PVJU RZR-P, RZQ-P(9)
- Page 102 EDUS281120_a Sound Levels (Reference) FBQ42PVJU RZR-P, RZQ-P(9)
- Page 103 Sound Levels (Reference) EDUS281120_a 12.2 Outdoor unit 12.2.1 Overall Location of microphone Location of microphone RZQ18PVJU9 / RZQ24PVJU9 / RZQ30PVJU RZQ36PVJU9 / RZQ42PVJU9 RZR18PVJU / RZR24PVJU / RZR30PVJU RZR36PVJU / RZR42PVJU 3.3ft (1m) 4.9ft (1.5m) 4.9ft (1.5m) 3.3ft (1m) dB(A) Notes: 1.
- Page 104 EDUS281120_a Sound Levels (Reference) RZQ42PVJU9 RZR42PVJU 4D072769 RZR-P, RZQ-P(9)
- Page 105 Operation limits EDUS281120_a 13. Operation limits RZR18PVJU / RZR24PVJU / RZR30PVJU RZQ18PVJU9 / RZQ24PVJU9 / RZQ30PVJU NOTES: 1. These figures assume the following operation conditions, Indoor and outdoor units: Equivalent pipe length : 25 ft. Level difference : 0 ft. °...
- Page 106 EDUS281120_a Operation limits RZR36PVJU / RZR42PVJU RZQ36PVJU9 / RZQ42PVJU9 NOTES: 1. These figures assume the following operation conditions, Indoor and outdoor units: Equivalent pipe length : 25 ft. Level difference : 0 ft. ° 2. Operation can be extended to 0 F in cooling with use of the optional wind baffle.
- Page 107 Accessories EDUS281120_a 14. Accessories 14.1 Indoor unit 14.1.1 FCQ Optional accessories (For unit) Model Item FCQ18PAVJU FCQ24PAVJU FCQ30PAVJU FCQ36PAVJU FCQ42PAVJU Decoration panel BYCP125K-W1 Sealing member of air discharge outlet KDBH55K160F Panel spacer KDBP55H160FA Filter related Replacement long life filter KAFP551K160 Without T KDDP55B160 shape pipe...
- Page 108 EDUS281120_a Accessories 14.1.2 FHQ Optional accessories (For unit) Model Item FHQ18PVJU FHQ24PVJU FHQ30PVJU FHQ36MVJU FHQ42MVJU 1 Replacement long life filter Resin net KAF501DA160 C: 3D049335A Optional accessories (For controls) Model Item FHQ18PVJU FHQ24PVJU FHQ30PVJU FHQ36MVJU FHQ42MVJU Wired BRC1E71 1 Remote controller Wireless BRC7E83 2 Simplified remote controller...
- Page 109 Accessories EDUS281120_a 14.1.4 FBQ Optional accessories (For controls) Model Item FBQ18PVJU FBQ24PVJU FBQ30PVJU FBQ36PVJU FBQ42PVJU Wireless BRC4C82 (Note 3) 1 Remote controller Wired BRC1E71 2 Simplified remote controller BRC2A71 3 Remote sensor (For wireless remote controller) KRCS01-4B 4 Unified ON/OFF controller DCS301C71 4-1 Electrical box KJB212AA...
- Page 110 EDUS281120_a Center of gravity 15. Center of gravity 15.1 Indoor unit FCQ18PAVJU / FCQ24PAVJU / FCQ30PAVJU FCQ36PAVJU / FCQ42PAVJU Unit (in.) C: 4D070529A RZR-P, RZQ-P(9)
- Page 111 Center of gravity EDUS281120_a FBQ18PVJU / FBQ24PVJU / FBQ30PVJU / FBQ36PVJU / FBQ42PVJU Unit (in.) C: 4D065975A RZR-P, RZQ-P(9)
- Page 112 EDUS281120_a Center of gravity 15.2 Outdoor unit RZR18PVJU / RZR24PVJU / RZR30PVJU RZQ18PVJU9 / RZQ24PVJU9 / RZQ30PVJU Unit (in.) 4D064214A RZR-P, RZQ-P(9)
- Page 113 Center of gravity EDUS281120_a RZR36PVJU / RZR42PVJU RZQ36PVJU9 / RZQ42PVJU9 Unit (in.) 4D065352A RZR-P, RZQ-P(9)
- Page 114 EDUS281120_a Installation of indoor unit 16. Installation of indoor unit 16.1 FCQ18PAVJU / FCQ24PAVJU / FCQ30PAVJU / FCQ36PAVJU / FCQ42PAVJU SPLIT SYSTEM Air Conditioners Installation manual CONTENTS 1. SAFETY CONSIDERATIONS..................1 2. BEFORE INSTALLATION....................3 3. SELECTING INSTALLATION SITE ................6 4.
- Page 115 • Do not change the setting of the protection devices. If the pressure switch, thermal switch, or other pro- tection device is shorted and operated forcibly, or parts other than those specified by Daikin are used, fire or explosion may occur.
- Page 116 EDUS281120_a Installation of indoor unit • Refrigerant R410A in the system must be kept clean, dry, and tight. (a) Clean and Dry -- Foreign materials (including mineral oils such as SUNISO oil or moisture) should be prevented from getting into the system. (b) Tight -- R410A does not contain any chlorine, does not destroy the ozone layer, and does not reduce the earth’s protection again harmful ultraviolet radiation.
- Page 117 Installation of indoor unit EDUS281120_a 1. PRECAUTIONS • Be sure to read this manual before installing the indoor unit. • When selecting installation site, refer to the paper pattern. • This unit is suitable for installation in a household, commercial and light industrial environment. •...
- Page 118 EDUS281120_a Installation of indoor unit 3. OPTIONAL ACCESSORIES • The optional decoration panel and remote controller are required for this indoor unit. (Refer to Table 1, 2) (However, the remote controller is not required for the slave unit of a simultaneous operation system.) Table 1 Unit model Optional decoration panel...
- Page 119 Installation of indoor unit EDUS281120_a Points for explanation about operations The items with WARNING and CAUTION marks in the operation manual are the items per- taining to possibilities for bodily injury and material damage in addition to the general usage of the product.
- Page 120 EDUS281120_a Installation of indoor unit CAUTION • The indoor and outdoor units and the power supply wiring and remote controller wire must be installed at least 40in. away from any televisions or radios. This is to prevent interference with picture and sound reception.
- Page 121 Installation of indoor unit EDUS281120_a Installation is possible when ceiling opening dimensions is as follows • When installing the unit within the frame for fixing false ceiling. 33-7/8 (Unit: in.) (Opening dimension inside the flame for ceiling) Frame False ceiling ≥13/16 ≥13/16 33-7/8 –...
- Page 122 EDUS281120_a Installation of indoor unit 5. INDOOR UNIT INSTALLATION Installing optional accessories (except for the decoration panel) before installing the indoor unit is easier. However, for existing ceilings, install fresh air inlet component kit and branch duct before installing the unit. As for the parts to be used for installation work, be sure to use the provided accessories and specified parts designated by our company.
- Page 123 Installation of indoor unit EDUS281120_a <Ceiling work> (1-3)Adjust the unit to the right position for installation. (Refer to “4. PREPARATIONS BEFORE INSTALLATION-(1)”.) • Using the Installation guide (15) allows you to check the positions from the underside of the unit to the lower ceiling surface.
- Page 124 EDUS281120_a Installation of indoor unit CAUTION • Use a pipe cutter and flare suitable for the type of refrigerant. • Apply ester oil or ether oil around the flare section before connecting. • To prevent dust, moisture or other foreign matter from infiltrating the tube, either pinch the end or cover it with tape.
- Page 125 Installation of indoor unit EDUS281120_a Not recommendable but in case of emergency You must use a torque wrench but if you are obliged to install the unit without a torque wrench, you may follow the installation method mentioned below. When you keep on tightening the flare nut with a spanner, there is a point where the tightening torque suddenly increases.
- Page 126 EDUS281120_a Installation of indoor unit CAUTION CAUTION TO BE TAKEN WHEN BRAZING REFRIGERANT PIPING “Do not use flux when brazing refrigerant piping. Therefore, use the phosphor copper brazing filler metal (BCuP-2/B-Cu93P-710/795) which does not require flux.” (Flux has extremely harmful influence on refrigerant piping systems. For instance, if the chlorine based flux is used, it will cause pipe corrosion or, in particular, if the flux contains fluorine, it will damage the refrigerant oil.) •...
- Page 127 Installation of indoor unit EDUS281120_a • Make sure that heat insulation work is executed on the following 2 spots to prevent any possible water leak- age due to dew condensation. • Indoor drain pipe • Drain socket Metal Metal Large sealing pad (10) clamp (2) clamp (2) (accessory)
- Page 128 EDUS281120_a Installation of indoor unit WHEN ELECTRIC WIRING WORK IS FINISHED • Add approximately 1/4gal. of water slowly from the air outlet and check drainage flow. • Check drainage flow during COOL running, explained under ‘‘12. TEST RUN’’. • Refer to the figure on the following after checking the draining of water, and mount the thermal insulation material for drainage (14) and thermal insulate the drain socket.
- Page 129 Installation of indoor unit EDUS281120_a Power supply wiring terminal block Power supply single phase 208/230V Ground wire Ground terminal Control box cover Fig. 24 CAUTION Drain piping connections Do not connect the drain piping directly to sewage pipes that smell of ammonia. The ammonia in the sew- age might enter the indoor unit through the drain pipes and corrode the heat exchanger.
- Page 130 EDUS281120_a Installation of indoor unit English C: 3P161684-6K RZR-P, RZQ-P(9)
- Page 131 Installation of indoor unit EDUS281120_a [ PRECAUTIONS ] 1. Use round crimp-style terminals for connecting wires to the power supply terminal block. If unavailable, observe the following points when wiring. • Do not connect wires of different gauge to the same power supply terminal. (Looseness in the connection may cause overheating.) •...
- Page 132 EDUS281120_a Installation of indoor unit 10. Use a 90° elbow type of conduit with dimensions Fig. 27-1 to prevent it from hitting the swing motor hous- ing of decoration panel. Conduit <1-3/8 Conduit mounting ≥3/8 plate (17) Conduit mounting Fig. 27-1 plate (18) Remote Transmission...
- Page 133 Installation of indoor unit EDUS281120_a CAUTION • When clamping wiring, use the included clamping material to prevent outside pressure being exerted on the wiring connections and clamp firmly. When doing the wiring, make sure the wiring is neat and does not cause the control box cover to stick up, then close the cover firmly.
- Page 134 EDUS281120_a Installation of indoor unit 1. When using 1 remote controller (Normal operation) Power supply 208/230V Outdoor unit 1 ~ 60Hz Control box IN/D OUT/D Indoor unit Remote controller Fig. 29 2. When using 2 remote controllers Power supply 208/230V Outdoor unit 1~ 60Hz Control box...
- Page 135 Installation of indoor unit EDUS281120_a [ PRECAUTIONS ] 1. Do not ground the equipment on gas pipes, water pipes or lightning rods, or crossground with telephones. Improper grounding could result in electric shock. 9-3 Control by 2 remote controllers (controlling 1 indoor unit by 2 remote controllers) •...
- Page 136 EDUS281120_a Installation of indoor unit 9-4 Computerized control (forced off and on/off operation) (1) Wire specifications and how to perform wiring • Connect the input from outside to terminals T1 and T2 of the terminal block for remote controller. FORCED Input A Wire specification Gauge...
- Page 137 Installation of indoor unit EDUS281120_a 11. FIELD SETTING CAUTION When performing field setting or test run without attaching the decoration panel, do not touch the drain pump. This may cause electric shock. • Check that the outdoor unit has been wired properly. Make sure the control box covers are closed on the indoor and outdoor units.
- Page 138 EDUS281120_a Installation of indoor unit 11-4 Setting of air filter sign • Remote controllers are equipped with liquid crystal display air filter signs to display the time to clean air filters. • Change the SECOND CODE NO. according to “Table 5” depending on the amount of dirt or dust in the room. (SECOND CODE NO.
- Page 139 Installation of indoor unit EDUS281120_a 16.2 FHQ18PVJU / FHQ24PVJU / FHQ30PVJU SPLIT SYSTEM Air Conditioners Installation manual CONTENTS • Refrigerant gas is heavier than air and displaces oxygen. A massive leak could lead to oxygen depletion, espe- 1. SAFETY CONSIDERATIONS …………………………… 2 cially in basements, and an asphyxiation hazard could 2.
- Page 140 EDUS281120_a Installation of indoor unit • Before touching electrical parts, turn off the unit. • In a domestic environment this product may cause radio • Do not touch the switch with wet fi ngers. interference in which case the user may be required to Touching a switch with wet fi...
- Page 141 Installation of indoor unit EDUS281120_a ACCESSORIES Is the unit safely grounded? It may result in electric shock. Check the following accessories are included with your unit. Is wiring size according to The unit may malfunction or specifi cations? the components burn out. (2) Metal (3) Washer for Name...
- Page 142 EDUS281120_a Installation of indoor unit Make holes for suspension bolts, refrigerant and drain ∗ ∗ pipe, and wire. 1 3/16 or more 1 3/16 or more • Refer to the paper pattern for installation. • Select the location for each of holes and open the holes in the ceiling.
- Page 143 Installation of indoor unit EDUS281120_a (ii) NOTE If it raises too much, a hook stops catching • Use a hole-in anchor for existing ceilings, and a sunken insert, and falling out. Protection net sunken anchor or other fi eld supplied parts for new ceilings to reinforce the ceiling to bear the weight of the unit.
- Page 144 EDUS281120_a Installation of indoor unit When hanging the indoor unit main body, be sure to • Before refrigerant pipe work, check which type of refrig- use a level or a plastic tube with water in it to make sure erant is used. the drain piping is set either level or slightly tilted, in Proper operation is not possible if the types of refriger- order to ensure proper drainage.
- Page 145 Installation of indoor unit EDUS281120_a Table 3 Procedure for thermal insulation of gas-side pipe Pipe size Recommended arm length of tool Further tightening angle Insulation pipe cover (in.) (in.) Wind around the for gas pipe (6) φ3/8 pipe, beginning at 60 to 90 degrees Approx.
- Page 146 EDUS281120_a Installation of indoor unit Good Top plate Tilt down Wrong Do not lift Make sure there is no slack Top penetration lid Make sure it is not in the water This hole not using it. Cut out Fig. 18 (A figure from an inside bottom) Fig.
- Page 147 Installation of indoor unit EDUS281120_a • Keep in mind that it will become the cause of getting drain WIRING EXAMPLE AND HOW TO SET pipe blocked if water collects on drain pipe. THE REMOTE CONTROLLER HOW TO CONNECT WIRES ELECTRIC WIRING WORK CAUTION GENERAL INSTRUCTIONS •...
- Page 148 EDUS281120_a Installation of indoor unit • Use the specifi ed electric wire. Connect the wire securely to Refer to Fig. 27 the terminal. Lock the wire down without applying excessive Power supply Remote controller wire force to the terminal. (Tightening torque: 0.97 ft lbf ±10%) terminal block (2P) Transmission and transmission wire...
- Page 149 Installation of indoor unit EDUS281120_a 1. When using 1 remote controller for 1 indoor unit. (Normal operation) Decoration panel Power supply 208-230V Outdoor unit 60Hz Control box IN/D OUT/D (ii) Protection net Hook (ii) Indoor unit Remote controller Hook 2. When using 2 remote controllers for 1 indoor unit. (ii) Power supply 208-230V...
- Page 150 EDUS281120_a Installation of indoor unit 11-2 2 remote controllers control Wire specifi cation (Controlling 1 indoor unit by 2 remote controllers) Gauge AWG 18- • When using 2 remote controllers, one must be set to “MAIN” Length Max. 328 ft. and the other to “SUB”.
- Page 151 Installation of indoor unit EDUS281120_a If nothing is displayed in the remote controller, check the follow- Order Operation ing items before attempting a diagnosis based on the malfunc- Open gas side stop valve. tion code, as they might be a cause. •...
- Page 152 EDUS281120_a Installation of indoor unit Instantaneous overcurrent (outdoor) Possible fault or short circuit in the compressor motor. Electric thermal (outdoor) Possible electrical overload in the compressor or cut line in the compressor motor. Stall prevention (outdoor) Compressor possibly locked. Transmission malfunction between the outdoor control units' inverters (outdoor) Open-phase (outdoor) PC board temperature sensor malfunction (outdoor)
- Page 153 Installation of indoor unit EDUS281120_a 16.3 FHQ36MVJU / FHQ42MVJU SPLIT SYSTEM Air Conditioners Installation manual CONTENTS • Refrigerant gas is heavier than air and displaces oxygen. A massive leak could lead to oxygen depletion, espe- 1. SAFETY CONSIDERATIONS ..........2 cially in basements, and an asphyxiation hazard could 2.
- Page 154 EDUS281120_a Installation of indoor unit • Before touching electrical parts, turn off the unit. • In a domestic environment this product may cause radio • Do not touch the switch with wet fingers. interference in which case the user may be required to Touching a switch with wet fingers can cause electric shock.
- Page 155 Installation of indoor unit EDUS281120_a 2-1 ACCESSORIES Is the unit safely grounded? It may result in electric shock. Check the following accessories are included with your unit. Is wiring size according to The unit may malfunction or specifications? the components burn out. (2) Metal (3) Washer for Name...
- Page 156 EDUS281120_a Installation of indoor unit (2) Make holes for suspension bolts, refrigerant and drain ∗ ∗ pipe, and wire. 1 3/16 or more 1 3/16 or more • Refer to the paper pattern for installation. • Select the location for each of holes and open the holes in the ceiling.
- Page 157 Installation of indoor unit EDUS281120_a NOTE (ii) If it raises too much, a hook stops catching • Use a hole-in anchor for existing ceilings, and a sunken insert, and falling out. Protection net sunken anchor or other field supplied parts for new ceilings to reinforce the ceiling to bear the weight of the unit.
- Page 158 EDUS281120_a Installation of indoor unit (5) When hanging the indoor unit main body, be sure to • Before refrigerant pipe work, check which type of refrig- use a level or a plastic tube with water in it to make sure erant is used.
- Page 159 Installation of indoor unit EDUS281120_a Table 3 Procedure for thermal insulation of gas-side pipe Pipe size Recommended arm length of tool Further tightening angle (in.) (in.) Insulation pipe cover Wind around the for gas pipe (6) φ3/8 60 to 90 degrees Approx.
- Page 160 EDUS281120_a Installation of indoor unit Good Top plate Tilt down Wrong Do not lift Make sure there is no slack Top penetration lid Make sure it is not in the water This hole not using it. Cut out Fig. 18 (A figure from an inside bottom) Fig.
- Page 161 Installation of indoor unit EDUS281120_a • Keep in mind that it will become the cause of getting drain pipe blocked if water collects on drain pipe. ELECTRIC WIRING WORK CAUTION 8-1 GENERAL INSTRUCTIONS • Even if the control box lid is removed, pull the remote control- •...
- Page 162 EDUS281120_a Installation of indoor unit • Use the specified electric wire. Connect the wire securely to Refer to Fig. 27 the terminal. Lock the wire down without applying excessive Power supply Remote controller wire force to the terminal. (Tightening torque: 0.97 ft lbf ±10%) terminal block (2P) Transmission and transmission wire...
- Page 163 Installation of indoor unit EDUS281120_a 1. When using 1 remote controller for 1 indoor unit. (Normal operation) Decoration panel Power supply 208-230V Outdoor unit 60Hz Control box IN/D OUT/D (ii) Protection net Hook (ii) Indoor unit Remote controller Hook 2. When using 2 remote controllers for 1 indoor unit. (ii) Power supply 208-230V...
- Page 164 EDUS281120_a Installation of indoor unit 11-2 2 remote controllers control Wire specification (Controlling 1 indoor unit by 2 remote controllers) Gauge AWG 18- • When using 2 remote controllers, one must be set to “MAIN” Length Max. 328 ft. and the other to “SUB”. Contact that can ensure the minimum appli- External terminal MAIN/SUB CHANGEOVER...
- Page 165 Installation of indoor unit EDUS281120_a If nothing is displayed in the remote controller, check the follow- Order Operation ing items before attempting a diagnosis based on the malfunc- Open gas side stop valve. tion code, as they might be a cause. •...
- Page 166 EDUS281120_a Installation of indoor unit Instantaneous overcurrent (outdoor) Possible fault or short circuit in the compressor motor. Electric thermal (outdoor) Possible electrical overload in the compressor or cut line in the compressor motor. Stall prevention (outdoor) Compressor possibly locked. Transmission malfunction between the outdoor control units’...
- Page 167 Installation of indoor unit EDUS281120_a 16.4 FAQ18PVJU / FAQ24PVJU SPLIT SYSTEM Air Conditioner Installation manual CONTENTS 1. SAFETY CONSIDERATIONS ………………………………………………………………1 2. BEFORE INSTALLATION ……………………………………………………………………3 3. SELECTING INSTALLATION SITE …………………………………………………………5 4. INDOOR UNIT INSTALLATION ………………………………………………………………7 5. REFRIGERANT PIPING WORK ………………………………………………………… 10 6.
- Page 168 EDUS281120_a Installation of indoor unit DANGER • Do not ground the unit to water pipes, telephone wires or lightning rods as incomplete grounding could cause a severe shock hazard resulting in severe injury or death, and to gas pipes because a gas leak could result in an explosion which could lead to severe injury or death.
- Page 169 Installation of indoor unit EDUS281120_a (b) where corrosive gas, such as sulfurous acid gas, is produced. Corroding copper pipes or soldered parts may result in refrigerant leakage. (c) near machinery emitting electromagnetic waves. Electromagnetic waves may disturb the operation of the control system and result in a malfunction of the equipment.
- Page 170 EDUS281120_a Installation of indoor unit • For the installation of an outdoor unit, refer to the installation manual attached to the outdoor unit. • When using the wireless remote controller, refer to the installation manual attached to the wireless re- mote controller.
- Page 171 Installation of indoor unit EDUS281120_a FOR THE FOLLOWING ITEMS, TAKE SPECIAL CARE DURING CONSTRUCTION AND CHECK AFTER INSTALLATION IS FINISHED. Items to be checked after completion of work Items to be checked If not properly done, what is likely to occur Check Are the indoor and outdoor unit fi...
- Page 172 EDUS281120_a Installation of indoor unit • Where the wall is not signifi cantly tilted. • Where piping between indoor and outdoor units is possible within the allowable limit. (Refer to the installation manual of the outdoor unit.) • Install the indoor and outdoor units, power supply wiring and connecting wires at least 3.5ft. away from televisions or radios in order to prevent image interference or noise.
- Page 173 Installation of indoor unit EDUS281120_a INDOOR UNIT INSTALLATION • Use only accessories and parts which are of the designated specifi cation when installing. CAUTION • Install so that the unit does not tilt to either side or forward. • Do not hold the unit by the horizontal fl aps when lifting it. (This may damage the horizontal fl aps.) Open the piping through-hole.
- Page 174 EDUS281120_a Installation of indoor unit Remove the front panel and the service lid. (Refer to Fig. 5) < How to remove the front panel and service lid > (1) Open the front panel to the point where it stops. (2) Push the axes on either side of the front panel towards the center of the main unit and remove. (You can also remove it by sliding the front panel either to the left or right and pulling it forward.) (3) Remove the screw from the service lid and pull the handle forward.
- Page 175 Installation of indoor unit EDUS281120_a • Remove the drain plug, the insulation tube, and the drain hose from the drain pan and replace. (Refer to Fig. 8) • Connect the local refrigerant piping ahead of time, matching it to the liquid pipe and gas pipe marks en- graved on the installation panel (accessory) (1).
- Page 176 EDUS281120_a Installation of indoor unit Connect the piping. (See “5.REFRIGERANT PIPING WORK” and Fig. 10) Refrigerant piping Secure with vinyl tape. Drain hose Transmission wiring and remote controller wiring Transmission wiring and remote controller A arrow view Refrigerant piping wiring Conduit Seal with putty corking material.
- Page 177 Installation of indoor unit EDUS281120_a NOTE • Use a pipe cutter and fl are suitable for the type of refrigerant. • To prevent dust, moisture or other foreign matter from infi ltrating the tube, either pinch the end or cover it with tape.
- Page 178 EDUS281120_a Installation of indoor unit CAUTION • CAUTION TO BE TAKEN WHEN BRAZING REFRIGERANT PIPING “Do not use fl ux when brazing refrigerant piping. Therefore, use the phosphor copper brazing fi lter metal (BCuP) which does not require fl ux.” (Flux has an extremely negative effect on refrigerant piping systems.
- Page 179 Installation of indoor unit EDUS281120_a DRAIN PIPING WORK Install the drain piping. (Refer to Fig. 16) • The drain pipe should be short with a downward slope and should prevent air pockets from forming. • Watch out for the points in the fi gure 16 when performing drain work. Make sure the drain Drain hose Drain hose...
- Page 180 EDUS281120_a Installation of indoor unit CAUTION • Drain piping connections Do not connect the drain piping directly to sewage pipes that smell of ammonia. The ammonia in the sewage might enter the indoor unit through the drain pipes and corrode the heat exchanger. Keep in mind that it will become the cause of getting drain pipe blocked if water collects on drain pipe.
- Page 181 Installation of indoor unit EDUS281120_a WIRING EXAMPLE AND HOW TO SET THE REMOTE CONTROLLER HOW TO CONNECT WIRINGS • Conduit for power supply wiring Unscrew and remove the conduit mounting plate from the electric parts box. (Refer to Fig. 20) Fix a conduit to the plate with a lock nut and reattach them at original position.
- Page 182 EDUS281120_a Installation of indoor unit Power supply < Wiring clamp method > terminal block (3P) Clamp small (accessory) (5) Power supply wiring Ground terminal Ground wiring Insulating tube Transmission wiring Remote controller wiring Ground wiring Clamp small (accessory) (5) Insulating tube Power supply wiring Clamp small (accessory) (5)
- Page 183 Installation of indoor unit EDUS281120_a [ PRECAUTIONS ] Use round crimp-style terminals for connecting wires to the power supply terminal block. (Refer to Fig. 23) If unavailable, observe the following points when wiring. • Do not connect wires of different gauge to the same power supply terminal. (Looseness in the connection may cause overheating.) •...
- Page 184 EDUS281120_a Installation of indoor unit When using 1 remote controller for 1 indoor unit. (Normal operation) Power Supply 208-230V Outdoor unit 60Hz Control box IN/D OUT/D Indoor unit Remote controller When using 2 remote controllers for 1 indoor unit. Power Supply 208-230V Outdoor unit 60Hz...
- Page 185 Installation of indoor unit EDUS281120_a CONTROL BY 2 REMOTE CONTROLLERS (CONTROLLING 1 INDOOR UNIT BY 2 REMOTE CONTROLLERS) • When using 2 remote controllers, one must be set to “MAIN” and the other to “SUB”. MAIN/SUB CHANGEOVER Upper part of remote controller Insert a screwdriver into the recess between the...
- Page 186 EDUS281120_a Installation of indoor unit How to select FORCED OFF and ON/OFF OPERATION SECOND CODE NO. Mode No. • Turn the power on and then use the remote controller to select operation. • Set the remote controller to the fi eld set mode. For details, refer to the “HOW TO SET IN THE FIELD”, in the remote controller manual.
- Page 187 Installation of indoor unit EDUS281120_a SETTING AIR FLOWRATE INCREASE MODE • It is possible to raise set air fl ow (HIGH and LOW) from the fi eld. Change the SECOND CODE NO. as shown in Table 4 to suit your needs. (SECOND CODE NO.
- Page 188 EDUS281120_a Installation of indoor unit 16.5 FBQ18PVJU / FBQ24PVJU / FBQ30PVJU / FBQ36PVJU / FBQ42PVJU SPLIT SYSTEM Air Conditioners Installation manual CONTENTS • Do not ground units to water pipes, gas pipes, telephone wires, or lightning rods as incomplete grounding can 1.
- Page 189 (a) Where a mineral oil mist or oil spray or vapor is pro- those specified by Daikin are used, fire or explosion may duced, for example, in a kitchen. occur.
- Page 190 EDUS281120_a Installation of indoor unit BEFORE INSTALLATION [PRECAUTION] The accessories are required for the installation of the air con- • When moving the unit while removing it from the carton ditioner. Be sure to keep them until the installation work is com- box, be sure to lift it by holding on to the four lifting lugs pleted.
- Page 191 Installation of indoor unit EDUS281120_a OPTIONAL ACCESSORIES b. Items to be checked at time of delivery • These is one type of remote controller: wired. Items to be checked Check Are you sure the control box cover, air filter, air inlet grille, NOTE and air outlet grille are mounted? •...
- Page 192 EDUS281120_a Installation of indoor unit CAUTION (length: in.) Case 1 • Install the indoor and outdoor units, power supply wiring and Control box connecting wires at least 3.3 ft away from televisions or radios in order to prevent image interference or noise. (Depending on the radio waves, a distance of 3.3 ft may not be sufficient enough to eliminate the noise.) •...
- Page 193 Installation of indoor unit EDUS281120_a INDOOR UNIT INSTALLATION (2) Mount the canvas ducts to the air outlet and inlet so that the vibration of the air conditioner will not be transmitted to the 〈It may be easier to install accessories (sold separately) duct or ceiling.
- Page 194 EDUS281120_a Installation of indoor unit (1) Connect the piping. CAUTION • The outdoor unit is filled with refrigerant. • Use the level and check that the unit is installed horizontally. • When connecting or disconnecting piping to or from the (4-directions) unit, be sure to use a spanner and a torque wrench.
- Page 195 Installation of indoor unit EDUS281120_a Table 2 • Wrap the middle sealing material (7) around the insula- tion for fitting (4) and (5) for the joint (flare nut part). Recommended arm length of Pipe size Further tightening angle tool CAUTION φ...
- Page 196 EDUS281120_a Installation of indoor unit • Select the diameter of the concentrated drain piping to CAUTION suit the capacity of equipment connecting to the concen- • The drain piping will be clogged with water and water leakage trated drain piping (see the equipment design sheet). may result if the water is accumulated in the drain piping.
- Page 197 Installation of indoor unit EDUS281120_a DUCT WORK The drainage can be checked with the water level change in the drain pan through the water inlet. Pay the utmost attention to the following items and conduct the ductwork. CAUTION • Check that the duct will not be in excess of the setting range •...
- Page 198 EDUS281120_a Installation of indoor unit ELECTRIC WIRING WORK SPECIFICATIONS FOR FIELD SUPPLIED FUSE " 2 % ! + % 2 AND WIRE GENERAL INSTRUCTIONS Remote controller wiring • All field supplied parts and materials and electric works must Power supply wiring Transmission wiring conform to local codes.
- Page 199 Installation of indoor unit EDUS281120_a (2) Lay the wires in the control box through the wire inlet on the (3) Follow the instructions below, and lay the wires in the con- side of the control box. trol box. Lock nut Fix the wires with (Field supply) Transmission...
- Page 200 EDUS281120_a Installation of indoor unit (4) Put the control box cover, and wrap the wire sealing mate- 10-2 WIRING EXAMPLE rial (Small) (10) around the conduit so as to block the wire WARNING through holes. Install a ground fault circuit interrupter. Wire through holes The installation of a ground fault circuit interrupter is imperative for the prevention of electric shocks and fire accidents.
- Page 201 Installation of indoor unit EDUS281120_a 2. When using 2 remote controllers (2) Set the main/sub switch on one of the remote controller PCBs to sub. (Keep the switch of the other remote controller PCB set to main.) Power Supply Outdoor unit 208/230V 1 ~ 60Hz Control box...
- Page 202 If a closing • Consult your Daikin representative if there is any change in damper is installed in the air-conditioning system, the ventilation paths (e.g., the duct and air outlet) after the test make sure that the closing damper is opened.
- Page 203 Installation of indoor unit EDUS281120_a 12. TEST RUN Table 4 External Static FIRST SECOND Refer to the installation manual of the outdoor unit. Mode No. Pressure CODE NO. CODE NO. • The operation lamp of the remote controller will flash when a 0.20 inWG malfunction occurs.
-
Page 204: Table Of Contents
EDUS281120_a Installation of outdoor unit 17. Installation of outdoor unit 17.1 RZR18PVJU / RZR24PVJU / RZR30PVJU / RZQ18PVJU9 / RZQ24PVJU9 / RZQ30PVJU SPLIT SYSTEM Air Conditioners Installation manual CONTENTS DANGER 1. SAFETY CONSIDERATIONS ........... 1 • Refrigerant gas is heavier than air and replaces oxygen. 2. - Page 205 • Indoor units are for indoor installation only. Outdoor than those specifi ed by Daikin are used, fi re or explo- units can be installed either outdoors or indoors. sion may occur.
-
Page 206: Introduction
EDUS281120_a Installation of outdoor unit • This air conditioner is an appliance that should not be Technical specifi cations accessible to the general public. (∗<a> and ∗<b> in the table indicate the operating condition • The wall thickness of fi eld-installed pipes should be (shown in the left fi... -
Page 207: Before Installation
Installation of outdoor unit EDUS281120_a • If strong wind whose velocity is 11 mph or more blows Main components to the outdoor unit from the air outlet side, the air fl ow For main components and function of the main components, rate of the outdoor unit is reduced, the outlet air is refer to the Engineering Data Book. - Page 208 EDUS281120_a Installation of outdoor unit When two or more outdoor units are installed side Branch switch Branch switch and overcurrent and overcurrent by side protective device protective device • When an obstruction is present on the both sides Indoor unit Indoor remote controller (in.)
- Page 209 Installation of outdoor unit EDUS281120_a (B) When an obstruction is present on the air outlet side • When the upward area is open • When the upward area is open When one outdoor unit is installed individually When one outdoor unit is installed individually L>H When two or more outdoor units are installed side When two or more outdoor units are installed side...
- Page 210 EDUS281120_a Installation of outdoor unit When only two outdoor units are installed side by • When an obstruction is present also in the upward area side When one outdoor unit is installed individually The dimensional relationship between H, L and A is as shown in the table below.
-
Page 211: Cautions On Installation
Installation of outdoor unit EDUS281120_a (D) When outdoor units are stacked When two or more outdoor units are installed side When an obstruction is present on the air outlet by side side The dimensional relationship between H, L and A is as NOTE shown in the table below. -
Page 212: Refrigerant Piping Work
EDUS281120_a Installation of outdoor unit REFRIGERANT PIPING WORK Location Working period Protection method 1 month or more Pinch pipes CAUTION Outdoor Less than 1 month Pinch or tape pipes <To piping technician> Indoor Regardless of period • Make sure to open the stop valves after fi nishing the piping work. - Page 213 Installation of outdoor unit EDUS281120_a Cautions on connecting the connection piping Tightening Flare dimension Pipe size Flare shape (in.) torque (ft·lbf) A (in.) • When it is expected that water condensed in the stop valve will reach the indoor unit through the gap between the heat R0.016 φ3/8”...
- Page 214 EDUS281120_a Installation of outdoor unit • Vacuum drying - Use a vacuum pump which can evacuate • Charge the refrigerant to the liquid pipe in its liquid state. up to –14.6 psi or less. Since R410A is a mixed refrigerant, its composition changes [Procedure] Operate the vacuum pump for evacuation for if charged in a state of gas and normal system operation 2 hours or more using both liquid pipe and gas pipe until the...
-
Page 215: Electric Wiring Work
Installation of outdoor unit EDUS281120_a [Stop valve operation method] Stop valve operation Prepare hexagon wrenches (whose size is 4 mm and 6 mm). Cautions on handling the stop valve How to open the stop valve • The fi gure below shows the name of each part required in Insert a hexagon wrench into the valve stem, and turn the handling the stop valve. - Page 216 EDUS281120_a Installation of outdoor unit 〈Precautions when knocking out knockout holes〉 • Perform the electric wiring work in accordance with the “electric wiring diagram label”. • To punch the knockout hole, hit it with a hammer. Make sure to turn OFF the branch switch and overcurrent •...
- Page 217 Installation of outdoor unit EDUS281120_a CAUTION • After fi nishing the electric wiring work, confi rm that all the wirings are connected securely. Screw 〈〈Precautions when laying power wiring〉〉 (accessory) • Two electric wires of different thickness cannot be connected Lock nut Cover to the power terminal block.
-
Page 218: Checks After Completion Of Work
EDUS281120_a Installation of outdoor unit Transmission wiring connection procedure Piping size and heat insulation: Refer to “6-1 Selection of piping material”, “6-5 Heat • If an excessive force is applied while connecting a cable insulation of piping”. to the terminal block on the PC board, the PC board may Check of stop valve: be damaged. - Page 219 Installation of outdoor unit EDUS281120_a <Cautions on check operation> • In the check operation, the status of the outdoor unit is • If the air conditioner is started within about 12 minutes after checked, and incorrect wiring is checked for. the power of the indoor/outdoor unit is turned on, the H2P (1) •...
-
Page 220: Caution For Refrigerant Leaks
EDUS281120_a Installation of outdoor unit When a malfunction code is displayed in the remote When nothing is displayed in the remote controller controller • There might be a problem with the connection or transmis- (Check a malfunction code in the remote controller connected sion between the indoor unit and the remote controller. - Page 221 Installation of outdoor unit EDUS281120_a Pay a special attention to the place, such as a basement, etc. where refrigerant can stay, since refrigerant is heavier than air. Procedure for checking maximum concentration Check the maximum concentration level in accordance with steps 1 to 4 below and take whatever action is necessary to comply.
-
Page 222: Safety Considerations
Daikin are used, fire or explosion may occur. serious injury or death. • Do not ground units to water pipes, gas pipes, telephone wires,... -
Page 223: Introduction
Installation of outdoor unit EDUS281120_a • Heat exchanger fins are sharp enough to cut. • If the conventional refrigerant and refrigerator oil are mixed in To avoid injury wear glove or cover the fins when working R410A, the refrigerant may deteriorate. around them. -
Page 224: Before Installation
EDUS281120_a Installation of outdoor unit 2-3 Electrical specifications SELECTION OF INSTALLATION (∗<c> in the table indicates the operating condition (shown in the previ- LOCATION ous figure).) The refrigerant R410A itself is nontoxic, nonflammable and safe. If RZQ36PVJU9 RZQ42PVJU9 the refrigerant should leak however, its concentration may exceed Model RZQ30PVJU9 Precaution... - Page 225 Installation of outdoor unit EDUS281120_a (5) The inverter type air conditioner may cause noise in electric (2)When two or more outdoor units are installed side by side • When an obstruction is present on the both sides products. When selecting an installation location, keep sufficient dis- tance from the air conditioner unit and wiring to radios, per- sonal computers, stereos, etc.
- Page 226 EDUS281120_a Installation of outdoor unit (2)When two or more outdoor units are installed side by side (2)When two or more outdoor units are installed side by side L>H • When an obstruction is present also in the upward area (1)When one outdoor unit is installed individually •...
- Page 227 Installation of outdoor unit EDUS281120_a <Pattern 2> (2)When only two outdoor units are installed side by side When an obstruction on the air outlet side is lower than the outdoor unit (There is no restriction in the height of obstruction on the air inlet side.) •...
-
Page 228: Cautions On Installation
EDUS281120_a Installation of outdoor unit (E) When outdoor units are installed in rows (on the rooftop, etc.) • In the drain piping work, make sure that drainage is discharged (1)When one outdoor unit is installed in each row securely. (When routing the piping downward, check for water leakage.) Air outlet side 5 1/2 5 1/2... - Page 229 Installation of outdoor unit EDUS281120_a 〈Precautions when connecting the piping〉 NOTE • See the following table for flare dimensions. • When connecting the flare nuts, apply refrigerant oil to the inside of • Maximum piping length between the outdoor and indoor unit is 230ft. the flares and turn them three or four times at first.
- Page 230 EDUS281120_a Installation of outdoor unit • Vacuum drying - Use a vacuum pump which can evacuate up to Cautions on connecting the connection piping –14.6 psi or less. • Be careful not to let the field piping [Procedure] Operate the vacuum pump for evacuation for 2 hours or Liquid piping come into contact with the compres- more using both liquid pipe and gas pipe until the vacuum pressure...
-
Page 231: Electric Wiring Work
Installation of outdoor unit EDUS281120_a • If the outdoor unit is not in operation and the total amount cannot be [Stop valve operation method] charged, follow the procedures for additional refrigerant charge Prepare hexagon wrenches (whose size is 4 mm and 6 mm). shown below. - Page 232 EDUS281120_a Installation of outdoor unit 7-2 Routing power supply wiring and transmission CAUTION wiring <To electrician> Let the power supply wiring and transmission wiring with a conduit pass • Do not operate the air conditioner until the refrigerant piping work is through one of the knockout holes on the front or side piping cover, and completed.
- Page 233 Installation of outdoor unit EDUS281120_a 7-3 Power supply wiring connection procedure Terminal block (X2M) WARNING Transmission wiring (To X2M [TO IN/ D • Never connect power supply wiring to the terminal block for remote UNIT](F1, F2)) controller wiring as this could damage the entire system. Insulation tube (Small) Install a ground fault circuit interrupter.
-
Page 234: Checks After Completion Of Work
EDUS281120_a Installation of outdoor unit 7-4 Transmission wiring connection procedure CHECKS AFTER COMPLETION OF • If an excessive force is applied while connecting a cable to the WORK terminal block on the PC board, the PC board may be damaged. After completing the work, make sure to confirm the following Terminal block (X2M) items:... - Page 235 Installation of outdoor unit EDUS281120_a 9-1 Power on and check operation <Cautions on check operation> • If the air conditioner is started within about 12 minutes after the • Make sure to perform the check operation after installation. (If the air power of the indoor/outdoor unit is turned on, the H2P indicator lights conditioner is operated using the indoor remote controller without and the compressor does not run.
-
Page 236: Caution For Refrigerant Leaks
EDUS281120_a Installation of outdoor unit When a malfunction code is displayed in the remote controller When nothing is displayed in the remote controller (Check a malfunction code in the remote controller connected to the • There might be a problem with the connection or transmission indoor unit.) between the indoor unit and the remote controller. - Page 237 Installation of outdoor unit EDUS281120_a NOTE • Where a single refrigerant facility is divided into 2 entirely indepen- dent refrigerant systems then use the amount of refrigerant with which each separate system is charged. 2. Calculate a room volume (ft 3.
- Page 238 Be sure to follow these instructions and warnings. If you have any inquiries, please contact your local importer, distributor and/or retailer. Daikin, Daikin AC Absolute Comfort, and its design, VRV, REFNET, and Quaternity are trademarks of Daikin Industries, LTD. All rights reserved. Cautions on product corrosion 1.
Need help?
Do you have a question about the SkyAir RZR-P Series and is the answer not in the manual?
Questions and answers