Table of Contents
Advertisement
Quick Links
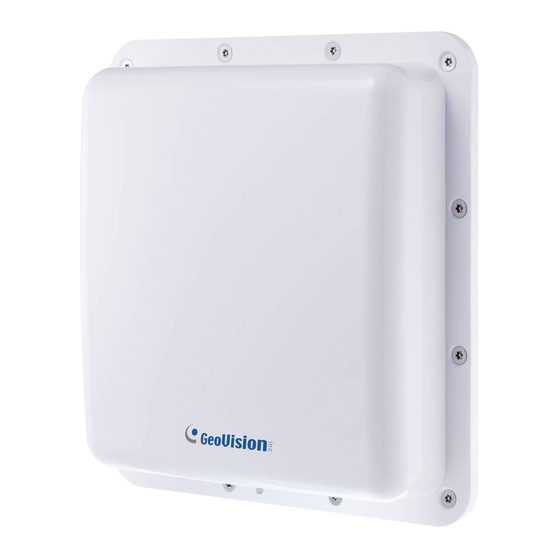
GV-AS1520 Controller
Quick Start Guide
Thank you for purchasing GV-AS1520 Controller. This guide is designed to assist the new user
in getting immediate results from the controllers. For advanced information on how to use
GV-AS1520, please refer to GV-AS1520 Controller User's Manual.
AS1520V210-QG-A
Advertisement
Table of Contents

Related Manuals for GeoVision GV-AS1520


Summary of Contents for GeoVision GV-AS1520
- Page 1 GV-AS1520 Controller Quick Start Guide Thank you for purchasing GV-AS1520 Controller. This guide is designed to assist the new user in getting immediate results from the controllers. For advanced information on how to use GV-AS1520, please refer to GV-AS1520 Controller User's Manual.
- Page 2 9F, No. 246, Sec. 1, Neihu Rd., Neihu District, Taipei, Taiwan Tel: +886-2-8797-8377 Fax: +886-2-8797-8335 http://www.geovision.com.tw Trademarks used in this manual: GeoVision, the GeoVision logo and GV series products are trademarks of GeoVision, Inc. Windows is a registered trademark of Microsoft Corporation. February 2019...
-
Page 3: Table Of Contents
1.3 LED Status and Beeper ..........2 2. Wiring ................3 3. Installation ..............9 3.1 Installing GV-AS1520 ............. 9 3.2 Installation Considerations ........... 12 4. Installing on a Network ..........19 4.1 Checking the Dynamic IP address ....... 20 4.2 Configuring the Static IP Address ........ -
Page 4: Introduction
1. Introduction Welcome to the GV-AS1520 Quick Start Guide. In the following sections, you will learn the installation basics for setting up a GV-AS1520. For the detailed instructions of use, see GV-AS1520 Controller User's Manual. The latest firmware together with all required software and documentation of GV-AS1520 can found from GeoVision website. -
Page 5: Wire Definitions
DO COM Gray IN1 (Sensor) Green DO NO1 (Gate) Purple IN2 (Not Functional) 1.3 LED Status and Beeper You can find the LED at the bottom of your GV-AS1520. Condition Beeper Boot completed Green Two long beeps Ready Green The e-tag is detected but... -
Page 6: Wiring
Use either a Power over Ethernet (POE) adapter or a power adapter to provide power to the GV-AS1520. IMPORTANT: GV-AS1520 can only accept PoE power supply or the DC power adapter as one power source. Connecting two power sources at the same time will cause damage to the unit. - Page 8 Wiring...
- Page 10 Wiring...
- Page 11 Each relay output (DO_NO1 ~ 4) can only support a maximum power consumption of 30V DC, 500mA. Connecting the PC Use TCP/IP to connect GV-AS1520 to a computer that allows you to access its Web interface and GV-ASManager if the computer is installed with GV-ASManager.
-
Page 12: Installation
3. Installation 3.1 Installing GV-AS1520 You can install the reader on a pole or a pillar. Two types of pole mounts are recommended, as indicated below. Note: Make sure the diameter of the pole is within 53 mm (0.17 ft). - Page 13 1. Secure the L-bracket with four screws (supplied) on the rear side of the UHF RFID Reader. L-bracket Screws x 4 Screws x 4 2. Secure the reader on a pillar or a pole using fixed-clamp and U-clip. U-clip Fixed-clamp...
- Page 14 Installation 3. Adjust the angle of the U-clip on L-bracket and secure the hexagon screw nuts. Adjust the angle Hexagon screw nuts 4. Here is an overview of the pole mount.
-
Page 15: Installation Considerations
3.2 Installation Considerations 1. Install the RFID reader with the antenna paralleled to the Tag for better reading results. The Tag receives signals and returns them to the Reader 2. Install the RFID Reader and Tag as shown below. Correct Misplaced... - Page 16 Installation 3. RFID Reader Installation Position Do not install RFID Reader near metal or the metallic substance will affect the electromagnetic field type. Recommended height to set RFID reader is 1.8 ~ 2.2 m (5.9 ~ 7.2 ft). The height should not be lower than the location of RFID Tag.
- Page 17 Keep any barrier away from the reading zone between RFID Reader and the Tag.
- Page 18 Installation 4. The RFID Reader must be installed at the same side of the Tag or at the nearest reading range to the Tag. Upper Installation Proper Improper Side Installation Proper Improper...
- Page 19 5. Recommended Tag Position Vehicles Place the tag on the front windshield or headlight, at the nearest reading range to the reader. When placing the Tag on the headlight, keep the Tag away from the metal body of the vehicle. If the car windshield glass contains metallic line, it will affect the reading range.
- Page 20 Installation Motorcycles Install the Tag on the front shield and at the closest range to the RFID Reader. If there is no front shield available, it is suggested to install the Tag on the plastic body of motorcycle at the closest range to the RFID Reader.
- Page 21 7. Notice When the installation is complete, examine and adjust the environment parameters again for better reading results. Reading range between RFID Reader and the Tag will be shortened on rainy days. When two or more RFID Readers are installed together, co-channel interference might occur.
-
Page 22: Installing On A Network
4. Installing on a Network You can install GV-AS1520 on a network and set up general settings and input device through its Web interface. Through the network connection, you can also connect GV-AS1520 to GV-ASManager for more comprehensive management. There are three ways to set up GV-AS1520 on the network. -
Page 23: Checking The Dynamic Ip Address
IP devices connected in the same LAN. Click the Name or Mac Address column to sort. Find GV-AS1520 with its MAC address, click on its IP address and select Web Page. When login dialog box appears, type the default ID and password... -
Page 24: Configuring The Static Ip Address
In the DHCP Client section, click Disable. Type the static IP address information, including IP Address, Subnet Mask, Default Gateway and Domain Name Server. Click Submit. When the setting is complete, the Status field will indicate Register Success. Then GV-AS1520 can be accessed with this fixed IP address. -
Page 25: Configuring Ddns Connection
IP address to a static domain name or device. For LAN connection, GV-localDDNS Server is provided. For Internet connection, two DDNS servers are supported: GeoVision DDNS Server and Dynamic Network Services Inc. (DynDNS). For details, see Configuring DDNS Connection, Chapter 4,...
Need help?
Do you have a question about the GV-AS1520 and is the answer not in the manual?
Questions and answers