
Related Manuals for pottery barn kids BLYTHE CARRIAGE BED TWIN


Summary of Contents for pottery barn kids BLYTHE CARRIAGE BED TWIN
- Page 1 BLYTHE CARRIAGE BED TWIN / FULL www.potterybarnkids.com Date: 2016-Jun.-03 Rev: Page 1 of 15...
- Page 2 Important Safety Instructions: • Please read all instructions carefully before assembling. • For your safety, assembly by two or more adults is strongly recommended. • Keep instructions for future use. • Use only vendor supplied hardware to assemble. Using unauthorized hardware could jeopardize the structural integrity of the item.
-
Page 3: Hardware Included
HARDWARE INCLUDED: (L)Allen Key with ball (M) Long Allen bolt (N) Medium Allen bolt (O) Short Allen bolt tip – 1x 5/16”x63mm – 8x 1/4”x63mm – 12x 1/4”x15mm – 24x (P) Spring Washer (Q) Flat Washer (R) Spring Washer (S) Flat Washer 5/16”... - Page 4 ASSEMBLY INSTRUCTION STEPS: 1. Remove the metal rods from (D) and (B) as shown below. Put the rods and machine screws aside for later use. Date: 2016-Jun.-03 Rev: Page 4 of 15...
- Page 5 Place (A) and (B) down on a soft, scratch-free surface such as a rug or carpet. 3. Thread (G) and (H) onto (A) and (B) in clockwise direction until tight, as seen in the illustration below. 4. Attach (T) to (A) and (B). Make sure to assemble (T) in the correct direction as seen in the illustration below.
- Page 6 Attach (C) to (A) and (B) as shown below. Do not fully tighten the bolts at this time. Tip: See Image A for ease of assembly. Image A 6. Attach E2 to (A &C) by aligning the pre-fixed wooden dowels on (E2) with the pre-drilled holes on (C).
- Page 7 7. Loosely tighten (E2) to (A), as seen in the illustration below. 8. Attach (E1) and (E2) to (A&C) by aligning the pre-fixed wooden dowels on (E1) and (E2) with the pre-drilled holes on (C). 9. Secure (E1) and (E2) as shown below. Do not fully tighten the bolts at this time. Date: 2016-Jun.-03 Rev: Page 7 of 15...
- Page 8 10. Secure the bottom part on (E1) & (E2) as shown below. *Tip: See Image A (Page 6) for ease of assembly. 11. Carefully attach (D) in between (A) and (B) by spreading (A) and (B) as shown below. 12. Secure (D) to (A) and (B). Do not over tighten the bolts. *Tip: See Image A (Page 6) for ease of assembly.
- Page 9 13. Secure (D) to (A) and (B), as shown below. Do not over tighten the bolts. 14. Check the alignment and fully tighten all bolts at this time. Do not over tighten. 15. Lay (F) in between side rail as shown below. 16.
- Page 10 17. Secure 4 pieces (K) (sold separately) to (E1) and (E2) as shown below. 18. Secure the rest 2 pieces (K) (sold separately) to (E1) and (E2) as shown below. Date: 2016-Jun.-03 Rev: Page 10 of 15...
- Page 11 19. Slot (I) to long metal rod, as shown below. : 2pcs 20. Carefully place (I) into the bed as shown below. Date: 2016-Jun.-03 Rev: Page 11 of 15...
- Page 12 21. Secure the long rods with machine screws removed from step #1, as seen in the illustration below. 22. When needed, tie the curtains (I) by (K) as shown below. Date: 2016-Jun.-03 Rev: Page 12 of 15...
- Page 13 Slot (J) to short metal rod, as shown below. : 1pc 24. Carefully place (J) into the bed as shown below. Date: 2016-Jun.-03 Rev: Page 13 of 15...
- Page 14 25. Secure the rod with machine screws removed from step #1, as seen in the illustration below. When needed, tie the curtain (J) by (K), as shown below. Date: 2016-Jun.-03 Rev: Page 14 of 15...
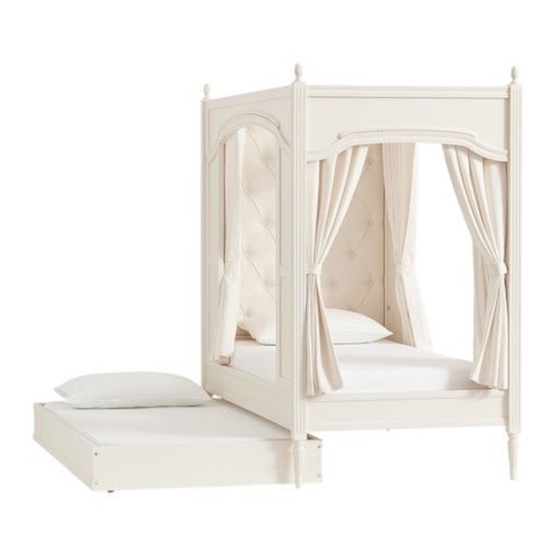
- Page 15 27. Assembly is now completed. Blythe Trundle (sold separately) Carefully slide Blythe Trundle underneath of the bed. Care Instructions: • Dust often using a clean, soft, dry and lint-free cloth. • Blot spills immediately and wipe with a clean, damp, cloth. •...
Need help?
Do you have a question about the BLYTHE CARRIAGE BED TWIN and is the answer not in the manual?
Questions and answers