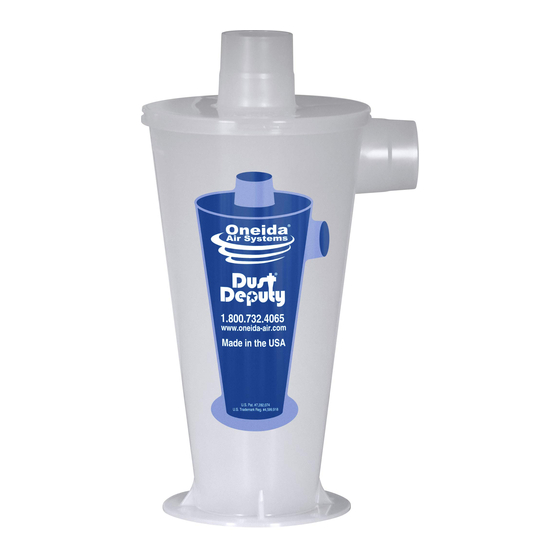
Summary of Contents for Oneida Air Systems Dust Deputy D.I.Y.
- Page 1 Dust Deputy D.I.Y. Dust Deputy D.I.Y. SD Dust Deputy D.I.Y. Plus Cyclone Separator # AXD001004 # AXD001004SD # AXD001004HE U.S. Pat. 6833016 RE40048 7282074 Appearance may vary slightly Rev: 11/26/2019 Doc. # ZBM000036DIYA...
-
Page 2: System Start-Up Information
8. Can be used for collecting non-flammable liquids. 9. Dispose of waste in a FIRE SAFE AREA. SOME DUSTS ARE HIGHLY FLAMMABLE OR Ÿ EXPLOSIVE. LEARN/ KNOW WHAT YOU ARE DEALING WITH. FOLLOW ALL LOCAL, STATE, FEDERAL & NFPA CODES AND GUIDE LINES. Oneida Air Systems... - Page 3 System Dimensions Nominal dimensions shown. Dimensions subject to slight variations in manufacturing. 6-3/4" 171 mm 8" 203 mm 2" O.D. 1-7/8" I.D. 51 mm O.D. 48 mm I.D. 13-1/2" 2" O.D. 343 mm 1-7/8" I.D. 51 mm O.D. 48 mm I.D. 9-3/4"...
- Page 4 You will need the following: • Air tight dust container and lid • Wet/Dry Vacuum • Power Drill • Vacuum Hose • 5/16" Drill Bit • Vacuum hose adapters • Hole Saw or reciprocating saw Oneida Air Systems...
- Page 5 System Contents (Cont.) oneida-air.com...
- Page 6 Gasket (B) and align all the holes. Secure Cyclone (A), Gasket (B) and lid together using six Bolts (C1), six Washers (C2), and six Whiz-Lock Nuts (C3) as shown in [FIG. 2]. Note: Thoroughly tighten hardware to eliminate air leaks. FIG. 2 Oneida Air Systems...
- Page 7 (at least a 90 mil side thickness) otherwise the container may collapse when in use. The larger the container, the sturdier the walls must be to prevent collapse. Oneida Air Systems has many container options available at oneida-air.com. FIG. 3...
- Page 8 Connect the Cyclone's (A) inlet (sideways facing port) to your dust producing tool with your vacuum's hose or ductwork. Connect Cyclone's outlet (upwards facing port) to your vacuum [FIG. 4] with hose or ductwork. To wet/dry vacuum To Tool FIG. 4 Oneida Air Systems...
- Page 9 Assembly Instructions (Cont.) If you did not purchase the DIY Plus (#AXD001004HE), continue to step 6. Attach one Elbow (E) to the top outlet of the Cyclone (A) and affix Hose (D) to the tapered end of the Elbow. Attach the other open end of Hose (D) to the second Elbow (E) and attach to the inlet of your wet dry vacuum.
- Page 10 Note: Any air leak in the lid or drum will affect separation performance. Make sure to check your dust drum frequently so you do not overfill it. Leak Point Leak Point Leak Point Leak Point FIG. 6 Oneida Air Systems...
- Page 11 Adding Cyclones to Improve Performance Attach in Series To Tools Increases particle efficiency and helps in very fine dust situations. Top View Attach in Parallel To Tools Same particle efficiency but increases the CFM. Top View 200 CFM 100 CFM 100 CFM Multiple Vacuums More CFM/airflow to larger...
- Page 12 An example of a plywood top that had a groove routed out of it to fit the bucket rim and accommodate the gasket. For mobility and additional stability, you can make a plywood platform to fasten your bucket to. We recommend 5 casters for the best stability. Oneida Air Systems...
- Page 13 Accessories 2" x 10' Wire Reinforced Vacuum Hose #AXD400000 • Crush-resistant, flexible hose with a smooth- wall inner lining that minimize air resistance. 2.5" Turnkey Hose Clamp #ACB360000 • Secures hose fitting in place to eliminate disconnects when pulling or flexing the hose. • Fits hoses and port sizes from 2"...
- Page 14 Tapered on one end for easy friction-fit hose connections. Viper Vacuum Scraper Paint Removal Tool #AXS001160B • Ergonomic hand scraping tool with high- textured grip and reversible, tungsten-carbide blade. • Hollow handle fits 1-1/4" to 1-1/2" vacuum hoses. Oneida Air Systems...
-
Page 15: Troubleshooting
Troubleshooting PROBLEM C AUSE SOLUTION Not separating well. Air leaks in the drum 1. Check for leaks between the lid and the dust drum. (Only a tiny amount of 2. Check for holes or leaks in the dust drum. dust should reach the 3. -
Page 16: Warranty Information
Limited Warranty – Activate online at oneida-air.com/warranty Oneida Air Systems®, Inc. (OAS) warrants the Dust Deputy for a period of 1 year, to the original purchaser from the date of purchase, unless otherwise specified. Items not manufactured by Oneida Air Systems are limited to their own manufacturer’s warranties. All electrical items such as magnetic starters, remotes, sensors, pumps, bin sensors, bag grippers, etc. - Page 17 LID MOUNTING TEMPLATE Dust Deputy Template FOR STANDARD 14" TALL DUST DEPUTY CYCLONES Use this template to prepare your lid for installation of the Dust Deputy. 1:1 SCALE. DO NOT ALTER DOCUMENT SIZE WHEN PRINTING oneida-air.com...
- Page 18 Oneida Air Systems...
- Page 19 oneida-air.com...
- Page 20 Regardless of where you purchased your Oneida Air Systems' product, if you have any questions or issues with missing / damaged parts, please call Oneida Air Systems first to let us help resolve your problem. We fully stand behind the quality of our products and place the utmost value on the satisfaction of our customers.


Need help?
Do you have a question about the Dust Deputy D.I.Y. and is the answer not in the manual?
Questions and answers