Table of Contents
Advertisement
Quick Links
Made In China
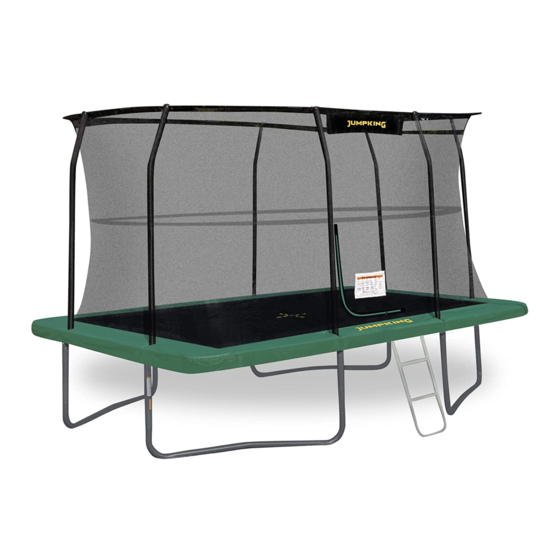
12ft x 17ft Rectangle Combo
Got a Problem building your trampoline?
Call us on 0344 800 4060 and we can help
Patent no: DE602006006495D1, EP1721640B1 and US7628731
WARNING: Read these assembly instructions carefully
before attempting to assemble or use this product. Keep
this user guide in a safe place for future reference.
User Guide
Advertisement
Table of Contents

Related Manuals for Jumpking 12ft x 17ft Rectangle Combo


Summary of Contents for Jumpking 12ft x 17ft Rectangle Combo
- Page 1 User Guide Made In China 12ft x 17ft Rectangle Combo Got a Problem building your trampoline? Call us on 0344 800 4060 and we can help Patent no: DE602006006495D1, EP1721640B1 and US7628731 WARNING: Read these assembly instructions carefully before attempting to assemble or use this product. Keep...
- Page 2 IMPORTANT INFORMATION . WARNING! ADULT SUPERVISION & GUIDANCE REQUIRED AT ALL TIMES. . Recommended age 6+ years. . No somersaults or flips - can cause serious injury. WARNINGS! . Only for domestic use. . Maximum user weight limit 140 kg. .
-
Page 3: Important Precautions
IMPORTANT PRECAUTIONS surface. 1 user allowed at any one time. This can result in serious injury to head, neck, arms or legs. JUMPING INSTRUCTIONS Fundamental Bounce Knee Drop Hand and Knee Drop Start bouncing from a standing Start from a standing position with Start bouncing from a standing your head erect and your eyes on the position, keeping your eyes on the... -
Page 4: Care And Maintenance
CARE & MAINTENANCE Regular care and maintenance of your trampoline is required. This will help prolong its life and reduce the possibility of injury. Neglecting this can lead to a risk for users. Inspect your trampoline before each use using the checklist below as a guide. Take particular care in doing this at the start of each season and at regular intervals. -
Page 5: What You Will Need
BUILDING YOUR TRAMPOLINE 1. This is a 2 person build. 2. Time for build is approximately 2 hours. 3. Choose a good location: (wood chippings, sand or grass). (7.3m) from ground level, away from wires, trees and other possible hazards. (2.5m) around sides, away from walls, fences, structures, tarmac and other hard surfaces and play areas. -
Page 6: Parts List
PARTS LIST Part Part Part Part Part Description: Description: Description: Description: Description: Top Tube with Top Tube Top tube L-Top tube L-Top tube extension D marking 2 pcs B 2 pcs C A marking D marking C marking 9 spring holes 9 spring holes 9 spring holes Quantity: 2... - Page 7 STEP 1 : ASSEMBLING THE FRAME You will need the following parts to complete section 1: L-Top tube L-Top tube A B marking C D marking 2 x Part 1 & 21: L tube with C D marking and T-Connector + Welded Tube (2xD). 2 x Part 2 &...
- Page 8 Important: The frame is held together under tension, so you may need to use some force to insert certain parts. Place your feet on the top tubes and grip the L Leg with both hands. Pull the L Leg unil it can be slotted into the T-Connector. Slot the end of the L Leg into the T-Connector.
- Page 9 STEP 2 : ASSEMBLING THE FRAME This step will require 2 people who must be wearing gloves. Slot two of the frame section together as shown in the diagram. Attach Part 6: Top tube with A D markings (10 spring holes) in between the T-connector+welded tube marked A and D.
- Page 10 STEP 3 : FITTING THE STITCHED BED This step will require 2 people who must be wearing gloves and protective eye wear. Lay the stitched bed (with the V-Rings) out, inside the frame of the trampoline with the warning labels facing upwards.
- Page 11 Attach a spring to the diagonal V-ring. Important: You will now need to use the spring tool to attach the spring to the frame. Hook the spring tool onto end of spring, and pull until the spring can be slotted into the spring slot on the top of the frame.
- Page 12 STEP 4 : FITTING THE FRAME PAD This step will require 2 people. Lay the frame pad - Part 11 out over the edge of the frame with the ties facing downwards. Please note the pad comes in 4 sections. Align the openings in the frame pad with the T-connector+welded tube's on the frame.
- Page 13 STEP 5 : FITTING THE ENCLOSURE TUBES Bottom enclosure tube You will need the following parts to complete step 5: - Part 12 8 x Bottom enclosure tubes Top enclosure tube - Part 13 8 x Top enclosure tubes 8 x Self tapping screws & washers - - Part 16 Self tapping screw and washer You will also need a cross-head screwdriver (not supplied).
- Page 14 Slot the bottom enclosure pole into the welded tube attached to the T-Connector. These are visible through the slots in the frame pad. Screw one of the self tapping screws through the slot in the tubing and into hole using the cross-head screwdriver.
- Page 15 STEP 6 : FITTING THE ENCLOSURE NETTING You will need the following parts to complete step 6: 2 x Black G3 poles - Part 14 (2 x Long Sections, 2 x Short Sections) Black G3 4 x G3 Connectors - Part 22 poles 1 x Enclosure netting - Part 15 Enclosure...
- Page 16 Attach the seven other exposed sections of the G3 rods to the other enclosure tubes in the order shown in the diagram. Ensuring the four corners of the G3 rods are in the exposed sections. The enclosure net is now and you have completed step 6.
- Page 17 STEP 7 : ATTACHING THE BOTTOM OF THE NET You will need the following parts to complete step 7: 8 x Cords - Part 17. . Tie one end of the cord around a V-ring on the bed of the trampoline. Push the outer end through a hole in the bottom of the netting.
- Page 18 USING THE TRAMPOLINE Before using your trampoline, check again that there is enough clearance around it. Maintain a clear space of 2.5 metres (8.2 feet) on all sides of the trampoline. Also check that the area is free from walls, structures, fences, tarmac and any other hard 2.5m surfaces and other play areas.
-
Page 19: Spare Parts
Spring tool (10 spring holes) Cap Connector Centre Leg 10mm Screws L Leg T-connector+welded tube (Ax2, Bx2, Cx2, Dx2) Manual For a full range of accessories and replacement parts call 0344 800 4060 or visit our web site at: www.jumpking.eu...
Need help?
Do you have a question about the 12ft x 17ft Rectangle Combo and is the answer not in the manual?
Questions and answers