
Related Manuals for Siko AG01


Summary of Contents for Siko AG01
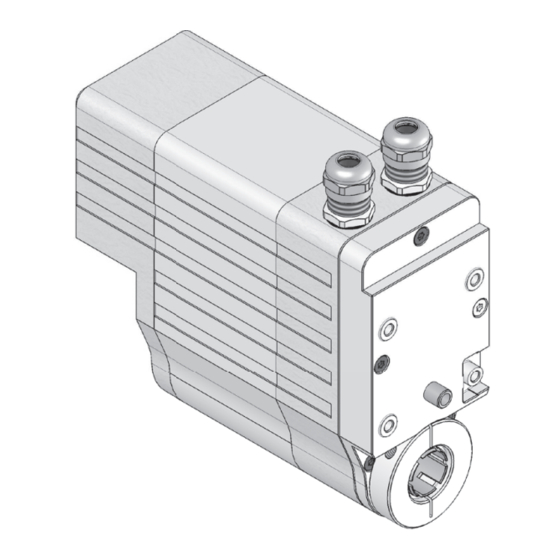
- Page 1 AG01 Stellantrieb Deutsch Originalmontageanleitung Seite 2 Actuator English Translation of the Original Installation Instructions page 24 201/20...
-
Page 2: Table Of Contents
5.4 Geber Potentiometrisch mit Messwandler MWU 6 Transport, Lagerung, Wartung und Entsorgung 7 Zubehör Anschluss-Stecker 7.1 Gegenstecker M9 gerade 7.2 Gegenstecker M9 inkl. Kabel 7.3 Gegenstecker M9 gewinkelt 8 Technische Daten 9 Einbauerklärung AG01 · Datum 10.09.2020 · Art. Nr. 81118 · Änd. Stand 201/20... -
Page 3: Dokumentation
Todesfolge, Sachschäden oder ungeplanten Gerätereaktionen führen können, sofern Sie die gegebenen Anweisungen missachten. Gefährdungen die zu schweren Körperverletzungen, Sachschäden oder WARNUNG ungeplanten Gerätereaktionen führen können, sofern Sie die gegebenen Anweisungen missachten. AG01 · Datum 10.09.2020 · Art. Nr. 81118 · Änd. Stand 201/20... -
Page 4: Zielgruppe
Geräte/Systeme gemäß den Standards der Sicherheitstech- nik in Betrieb zu nehmen, zu erden und zu kennzeichnen. 2.4 Grundlegende Sicherheitshinweise Explosionsgefahr GEFAHR ` Stellantrieb nicht in explosionsgefährdeten Zonen einsetzen. AG01 · Datum 10.09.2020 · Art. Nr. 81118 · Änd. Stand 201/20... -
Page 5: Identifikation
4 Installation 4.1 Mechanische Montage Ausfall Stellantrieb WARNUNG Verlust der Schutzart durch Verschleiß der Dichtringe im Kugellager und Radialwellendichtringe. ` Stellantrieb innerhalb der zulässigen Parameter (siehe Kapitel 8) betreiben. AG01 · Datum 10.09.2020 · Art. Nr. 81118 · Änd. Stand 201/20... - Page 6 1. Stellantrieb auf Welle schieben bis Drehmomentstütze ( oder ) auf Anschlag ist. 2. Klemmringschraube mit mind. 2.5 Nm, bzw. Gewindestift anzie- hen. 3. Schraube für Drehmomentstütze handfest anziehen. AG01 · Datum 10.09.2020 · Art. Nr. 81118 · Änd. Stand 201/20...
-
Page 7: Elektrische Installation
` Betriebsspannung gemeinsam mit der Folgeelektronik (z. B. Steue- rung) einschalten. ` Bei Ausgangsschaltung LD5 beträgt die max. Kabellänge 3 m. Bei Ver- längerung des Kabels (>3 m), muss eine Signalaufbereitung erfolgen. AG01 · Datum 10.09.2020 · Art. Nr. 81118 · Änd. Stand 201/20... - Page 8 Die Versorgung für den Stellantrieb ist ausreichend zu dimensionieren. Die ACHTUNG Stromaufnahme kann beim Beschleunigen kurzzeitig höher sein als der Nennstrom. Die Spannungswerte sind abhängig von der Geräteausführung und sind den technischen Daten in Kapitel zu entnehmen. AG01 · Datum 10.09.2020 · Art. Nr. 81118 · Änd. Stand 201/20...
-
Page 9: Anschlussbelegung E1
Abb. 5: Anschluss Messwandler Abb. 6: Anschluss Messwandler (MWI) Bürde gegen Masse (MWI) Bürde gegen +UB Folgeelektronik AG01 · Datum 10.09.2020 · Art. Nr. 81118 · Änd. Stand 201/20... -
Page 10: Anschlussbelegung Ex
Zubehör Gegenstecker und Kabelverlängerungen siehe Kapitel 7. Belegung Signal B +UB (verpolgeschützt) Signal 0 Signal A Signal /A Ansichtseite = Steckseite Signal /B Signal I AG01 · Datum 10.09.2020 · Art. Nr. 81118 · Änd. Stand 201/20... - Page 11 Ansichtseite = Steckseite Motor • Stift 4 pol. Zubehör Gegenstecker und Kabelverlängerungen siehe Kapitel 7. Belegung 1 + 2 3 + 4 Ansichtseite = Steckseite AG01 · Datum 10.09.2020 · Art. Nr. 81118 · Änd. Stand 201/20...
-
Page 12: Inbetriebnahme
• festen Sitz des Getriebes und der Hohlwelle. 5.1 Geber Inkremental Ausgangsschaltung OP, Gegentakt (Push-Pull), differentiell LD24, Leitungstreiber, differentiell AG01 · Datum 10.09.2020 · Art. Nr. 81118 · Änd. Stand 201/20... - Page 13 Es ist zu beachten, dass im Stillstand Impulse mit der max. Impulsfrequenz ACHTUNG (bedingt durch das interne Interpolationsverfahren) auftreten können. Abb. 7: Ausgangssignale A vor B; Drehrichtung e AG01 · Datum 10.09.2020 · Art. Nr. 81118 · Änd. Stand 201/20...
-
Page 14: Geber Potentiometrisch Ohne Messwandler
Potentiometer-Widerstand in einen Strom von 4 ... 20 mA umgewandelt. Es handelt sich um eine Zweileitertechnik. Der Messstrom dient gleichzei- tig zur Versorgung des Wandlers. Dieser Messbereich entspricht dem vom Kunden ausgewählten Überset- zungsbereich des Potentiometergetriebes. AG01 · Datum 10.09.2020 · Art. Nr. 81118 · Änd. Stand 201/20... - Page 15 5. Trimmpotentiometer Pe drehen, bis Endwert (20 mA) gemessen wird. 6. Gehäusedeckel wieder montieren. Die Schritte 3 bis 5 sind so lange zu wiederholen, bis die Werte austariert sind (iterativer Abgleich). AG01 · Datum 10.09.2020 · Art. Nr. 81118 · Änd. Stand 201/20...
-
Page 16: Geber Potentiometrisch Mit Messwandler Mwu
Widerstand 2 ... 10 KΩ gegen GND beschaltet werden, damit sich der Anfangswert 0 V einstellt. Die Ausgangslast sollte jedoch so dimensioniert sein, dass in der Endstellung (10 V) ein Ausgangsstrom von 15 mA nicht überschritten wird. AG01 · Datum 10.09.2020 · Art. Nr. 81118 · Änd. Stand 201/20... -
Page 17: Transport, Lagerung, Wartung Und Entsorgung
Hitze und Feuchtigkeit schützen. • Anschlüsse weder durch mechanische noch durch thermische Einflüsse beschädigen. • Vor Montage ist der Stellantrieb auf Transportschäden zu untersuchen. Beschädigte Stellantriebe nicht einbauen. AG01 · Datum 10.09.2020 · Art. Nr. 81118 · Änd. Stand 201/20... -
Page 18: Zubehör Anschluss-Stecker
5. Schirm kürzen und umlegen. 6. Schirmmanschette an Kabeldurchmesser anpassen, aufstecken und mit Schirm verlöten. 7. Buchseneinsatz anlöten und einschrauben, hierzu Druckschraube lösen. 8. Gewindering montieren. 9. Druckschraube festziehen. AG01 · Datum 10.09.2020 · Art. Nr. 81118 · Änd. Stand 201/20... -
Page 19: Gegenstecker M9 Inkl. Kabel
• Zubehör SIKO Art. Nr. "KV04S0" (4 pol. Motor). 7.3 Gegenstecker M9 gewinkelt Empfehlung ACHTUNG ` Litzenquerschnitt Leitungen 0.25 mm² / Kabeldurchlass: max. ø5 mm • Zubehör SIKO Art. Nr. "82247" (Buchse 4 pol. Motor). AG01 · Datum 10.09.2020 · Art. Nr. 81118 · Änd. Stand 201/20... - Page 20 Unterbrechung. 1. Druckschraube leicht aufdrehen. 2. Gewindering entfernen. 3. Kontakteinsatz leicht herausziehen und in gewünschte Winkelstel- lung (180° Schritte) verdrehen. 4. Kontakteinsatz montieren, Gewindering und Druckschraube auf- schrauben. AG01 · Datum 10.09.2020 · Art. Nr. 81118 · Änd. Stand 201/20...
-
Page 21: Technische Daten
Belastungsstrom 4.5 A 0.4 A ±10 % (20W-M) max. Belastungsstrom 0.44 A Anschlussart 2x M9 Steckverbinder 4-polig, 1x Stift; 3-polig, 1x Stift 2x M9 Steckverbinder 4-polig, 1x Stift; 8-polig, 1x Stift AG01 · Datum 10.09.2020 · Art. Nr. 81118 · Änd. Stand 201/20... - Page 22 EN 61800-3, C3 Störaussendung / Emission Schutzart IP63 (IP65 optional) EN 60529, bei montierten Gegen- steckern Schockfestigkeit 500 m/s , 11 ms EN 60068-2-27 Vibrationsfestigkeit ≤100 m/s , 5 ... 150 Hz EN 60068-2-6 AG01 · Datum 10.09.2020 · Art. Nr. 81118 · Änd. Stand 201/20...
- Page 23 Maschine in eine Maschine oder Anlage eingebaut wurde, die den Bestimmun- gen der EG-Maschinenrichtlinie 2006/42/EG entspricht und für die eine EG-Konformitäts- erklärung gemäß Anhang II A vorliegt. Buchenbach, den 05.07.2010 ppa. Andreas Wiessler (Dipl. Ing. (BA) Elektrotechnik, Qualitätsmanager) AG01 · Datum 10.09.2020 · Art. Nr. 81118 · Änd. Stand 201/20...
- Page 24 7 Accessory connector 7.1 Straight matting connector M9 7.2 Mating connector M9 straight inclusive cable 7.3 Right angle mating connector M9 8 Technical data 9 Declaration of Incorporation AG01 · Date 10.09.2020 · Art. No. 81118 · Mod. status 201/20...
-
Page 25: Documentation
Danger that may cause minor injury, property damage or unplanned device CAUTION reactions if you disregard the instructions given. Important operating information that may facilitate operation or cause NOTICE unplanned device reactions if disregarded including possible property damage. AG01 · Date 10.09.2020 · Art. No. 81118 · Mod. status 201/20... -
Page 26: Target Group
Bruising, rubbing, abrasing, seizing of extremities or clothes by touching during operation any rotating parts as for example clamping ring, torque support or hollow shaft. ` Install protective facilities to prevent people from getting access. AG01 · Date 10.09.2020 · Art. No. 81118 · Mod. status 201/20... -
Page 27: Identification
` Ensure a low shaft and angle offset between shaft and accommoda- Fig. 1 tion bore by applying appropriate manufacturing methods (see Tab. AG01 · Date 10.09.2020 · Art. No. 81118 · Mod. status 201/20... - Page 28 ( 2. Tighten the clamp ring screw by applying 2.5 Nm, or grub screw 3. Tighten hand-tight the screw for the torque support AG01 · Date 10.09.2020 · Art. No. 81118 · Mod. status 201/20...
-
Page 29: Electrical Installation
(e. g., control unit). ` With output circuit LD5 cable length is 3 meters max. In case of a cable prolongation (>3 m), signals must be refreshed by a repeater. AG01 · Date 10.09.2020 · Art. No. 81118 · Mod. status 201/20... - Page 30 The voltage values are a function of the device design and can be referred to in the technical data in chapter 8. AG01 · Date 10.09.2020 · Art. No. 81118 · Mod. status 201/20...
-
Page 31: Pin Assignment E1
Fig. 5: Connection instrument trans- Fig. 6: Connection instrument trans- former (MWI) load against mass former (MWI) load against +UB AG01 · Date 10.09.2020 · Art. No. 81118 · Mod. status 201/20... -
Page 32: Pin Assignment Ex
+UB (with polarity pro- tection) Signal 0 Signal A viewing side = plug-in side Signal /A Signal /B Signal I AG01 · Date 10.09.2020 · Art. No. 81118 · Mod. status 201/20... - Page 33 • Plug pin 4 pin. For mating connector and cable extension accessories see chapter 7. Designation 1 + 2 3 + 4 viewing side = plug-in side AG01 · Date 10.09.2020 · Art. No. 81118 · Mod. status 201/20...
-
Page 34: Commissioning
• secure actuator fixation on the hollow shaft. 5.1 Incremental encoder Output circuits OP, (Push-Pull), differential LD24, Line Driver, differential AG01 · Date 10.09.2020 · Art. No. 81118 · Mod. status 201/20... - Page 35 (due to the internal interpolation method). Fig. 7: Output signals A before B; sense of rotation e AG01 · Date 10.09.2020 · Art. No. 81118 · Mod. status 201/20...
-
Page 36: Encoder With Potentiometer Without Transducer
This measuring range corresponds to the transmission range of the poten- tiometer wich is given by the customer. AG01 · Date 10.09.2020 · Art. No. 81118 · Mod. status 201/20... - Page 37 5. Turn trim potentiometer Pe until end value (20 mA) is measured. 6. Mount the housing cover. The steps 3 to 5 are to be repeated until the values are balanced. AG01 · Date 10.09.2020 · Art. No. 81118 · Mod. status 201/20...
-
Page 38: Encoder With Potentiometer With Transducer Mwu
0 V to be set. However, the output load should be dimensioned so that an output current of 15 mA won't be exceeded in the end position (10 V). AG01 · Date 10.09.2020 · Art. No. 81118 · Mod. status 201/20... -
Page 39: Transport, Storage, Maintenance And Disposal
• Do not damage connections through mechanical or thermal impact. • Prior to installation inspect the actuator for transport damages. Do not install damaged actuators. AG01 · Date 10.09.2020 · Art. No. 81118 · Mod. status 201/20... -
Page 40: Accessory Connector
7. Solder and insert female contact (after releasing pressure screw). 8. Mount connection ring 9. Fix pressing srew AG01 · Date 10.09.2020 · Art. No. 81118 · Mod. status 201/20... -
Page 41: Mating Connector M9 Straight Inclusive Cable
7.3 Right angle mating connector M9 Advice NOTICE ` Strand cross-section of lines 0.25 mm² / cable feed-through: max. ø5 mm. • Accessory SIKO art. no. "82247" (socket contact 4 pin motor). AG01 · Date 10.09.2020 · Art. No. 81118 · Mod. status 201/20... - Page 42 2. Remove ring nut 3. Slightly pull out female contact and rotate to desired angular posi- tion (in steps of 180°). 4. Mount female contact; tighten ring nut and pressure screw. AG01 · Date 10.09.2020 · Art. No. 81118 · Mod. status 201/20...
-
Page 43: Technical Data
0.4 A ±10 % (20W-M) 0.44 A max. load current Type of connection 2x M9 plug connectors 4-pole, 1x pin; 3-pole, 1x pin 2x M9 plug connectors 4-pole, 1x pin; 8-pole, 1x pin AG01 · Date 10.09.2020 · Art. No. 81118 · Mod. status 201/20... - Page 44 Protection category IP63 (IP65 optional) EN 60529, with mating connec- tors mounted Shock resistance 500 m/s , 11 ms EN 60068-2-27 Vibration resistance ≤100 m/s , 5 ... 150 Hz EN 60068-2-6 AG01 · Date 10.09.2020 · Art. No. 81118 · Mod. status 201/20...
-
Page 45: Declaration Of Incorporation
Directive 2006/42/EC and if the EC Declaration of Conformity pursuant to Appendix II A is available for the machinery. Buchenbach, 05/07/2010 ppa. Andreas Wiessler (Dipl. Ing. (BA) Electrical Engineering, Quality Manager) AG01 · Date 10.09.2020 · Art. No. 81118 · Mod. status 201/20... - Page 46 AG01...
- Page 47 AG01...
- Page 48 SIKO GmbH Weihermattenweg 2 79256 Buchenbach Telefon/Phone + 49 7661 394-0 Telefax/Fax + 49 7661 394-388 E-Mail info@siko.de Internet www.siko-global.com Service support@siko.de...
Need help?
Do you have a question about the AG01 and is the answer not in the manual?
Questions and answers