
Related Manuals for ESP GUARDCAMDECO


Summary of Contents for ESP GUARDCAMDECO
- Page 1 GUARDCAMDECO: COMBINED WI-FI SECURITY CAMERA LED FLOODLIGHT SYSTEM PRODUCT MANUAL Web: europesecurity.eu Email: info@europesecurity.eu Tel: +31 (0) 541 352 952 Marconiweg 6 | 7591 HH | Denekamp (NL)
-
Page 2: Kit Content
KIT CONTENT For best system performance: iOS: iPhone5 / iPad2 / Mini iPad with iOS 7.0 or above. Android: 1.5G dual core processor dual core processor with 1G RAM or above. Storage: Class 10 memory card. Bandwidth: 1Mbps or above upload/download speed suggested. Web: europesecurity.eu Email: info@europesecurity.eu Tel: +31 (0) 541 352 952... -
Page 3: Installation Tips
For Android, the APP must be left running in the background to receive any service from the Door Station. ESP are unable to guarantee that every device will be compatible with any ESP product and software supplied. Speci c models of phone, tablet or other device, the hardware it contains, the service provider, the types of data services o ered and speci c phone / device plan will all a ect the performance of PC / mobile device for remote viewing. -
Page 4: Product Overview
PRODUCT OVERVIEW FRONT VIEW UNDERSIDE VIEW Web: europesecurity.eu Email: info@europesecurity.eu Tel: +31 (0) 541 352 952 Marconiweg 6 | 7591 HH | Denekamp (NL) -
Page 5: Device Installation
Disconnect power at fuse or circuit breaker before proceeding to the installation. Plug the N&L pole connector in to the junction box. The unit is double insulated, therefore does not require a earth/ground connection. Rear of GuardcamDECO base Web: europesecurity.eu Email: info@europesecurity.eu... - Page 6 DEVICE INSTALLATION (CONTINUED) 1. Fasten the junction box to the wall. Make sure that the UP sign is at the top. 2. Connect the power cable to the junction box. 3. Place the device securely on the junction box. 4. Fasten the screw by using the hex key provided. Web: europesecurity.eu Email: info@europesecurity.eu Tel: +31 (0) 541 352 952...
- Page 7 DEVICE INSTALLATION (CONTINUED) 5. Once completed, turn on the power from the breaker and the light/camera will power up. 6. The LED light will be at its full brightness when initial start due to the regulation. Adjust the brightness to prefer level once the camera has setup completed. 7.
-
Page 8: App Installation
Please download and install the “ESP GuardcamDECO” APP to the smart-phone/ tablet 1. Apply power to the GuardcamDECO, after 1 minute the unit will produce its own Wi-Fi hotspot. 2. Via the settings on the smart-phone/ tablet connect to the Wi-Fi hotspot, the SSID will begin HD-XXXXXX. - Page 9 APP INSTALLATION (CONTINUED) 9. The APP will now display the GuardcamDeco’s camera image; Please follow the additional steps to connect the device to the intended network. 10. Select the camera icon and then the setting option 11. Select the ‘Advanced’ setting and use the default Admin Password ‘123456’...
- Page 10 MAIN PAGE OVERVIEW The APP MAIN PAGE section o ers you an overview to access & manage di erent functions. MAIN PAGE The main page lists all registered devices. Tap the camera to enter Live-View. Add a device Access to; advanced settings, delete device & recorded le list Refreshes connections &...
- Page 11 SETTING and additional setup selection icons will appear. Tap to exit. 201959 201959 Access Advanced Setting Delete Device Event List: View and playback the list of motion triggered event(s) Web: europesecurity.eu Email: info@europesecurity.eu Tel: +31 (0) 541 352 952 Marconiweg 6 | 7591 HH | Denekamp (NL)
-
Page 12: Push Notification
To Enable; 1. Launch Settings from your Home screen. 2. Tap Noti cations. 3. Find & select ‘ESP GuardcamDECO’ 4. Adjust the noti cation settings, such as On/O , Sounds, Alert Display, etc. Note: It takes time for the changes to take e ect in iOS. - Page 13 LIVE VIEW / SNAPSHOT / EVENTS Set a PIN code when launching the APP. 1. Enable “Enable lock when starting” and enter your PIN code. 2. Con rm PIN code entered. Live View Tap to take snapshot image(s) of the video. The captured snapshots on the mobile device. Tap to turn ON/OFF the volume.
-
Page 14: Viewing Your Snapshots
VIEWING YOUR SNAPSHOTS For iOS Snapshots are named with the time stamp and saved into the Camera Roll location of the mobile device. For Android Snapshots will be named with the time stamp and saved into the Photo Gallery > snapshot folder mobile device. - Page 15 Playback When you record a video clip from your camera. You can pause/play the video during the playback, to deactivate/activate the audio function. Delete Tap the edit icon, then select the le(s) you would like to delete from list. Web: europesecurity.eu Email: info@europesecurity.eu Tel: +31 (0) 541 352 952 Marconiweg 6 | 7591 HH | Denekamp (NL)
- Page 16 Download Download the video le(s) in the EVENT LIST section. Tap the search icon, you can specify a date and time period to search for events. Then press the download icon to save the video clip into your device. Note: During the download process, system will stop both the live view and recording functions.
-
Page 17: Advanced Setting
ADVANCED SETTING The security code required to enter Advanced Setting for Admin Password system setting management Device Security Password The password required for remote access Time Zone Setup your time zone Wi-Fi Setting Manage your Wi-Fi Network Time Setup Setup the appropriate time zone Email Setting Setup your email account for E-mail alert Video Setting... -
Page 18: Basic Settings
BASIC SETTINGS Admin Password The Admin Password is a speci c security code for the administrator to change the advanced settings. The default admin password is 123456. Use this function to change the default admin password into your personal admin password. For the protection of your system con guration, every time you change the advanced settings, needing to enter the admin password. -
Page 19: Wifi Setting
WI-FI SETTING The Wi-Fi setting displays the connection and setup of the Wi-Fi function. “Manage Wi-Fi network” automatically scans the nearby network and shows the available Wi-Fi routers in the drop-down list/ Select the Wi-Fi network that your camera will connect to. Due to security concerns, it is highly recommended that you use the WPA/WPA2/ WPA2-PSK protocol for Wi-Fi network. -
Page 20: Video Settings
VIDEO SETTINGS This section allows you to con gure the video quality and environment mode. Video Quality The Video Quality setting section allows you to adjust the quality of the video streaming. Select better streaming image that allowing you to view high resolution image. Select HD video that allowing the video to display more smoothly (quality depend on local internet environment). -
Page 21: Sd Card Settings
SD CARD SETTINGS Formatting the memory card will ERASE all the data. Note: The system is optimized to class 10 memory card. Memory card with lower speci cation will decrease the recording and playback function e ciency. During format process, all recording & viewing will stop until format process completes. Overwrite SD Card This function will overwrite the oldest les when the micro memory card is full. -
Page 22: Troubleshooting
TROUBLE SHOOTING SOLUTION • Make sure your network supports the DHCP protocol. • Make sure the camera and your mobile device connect to the same Wi-Fi router for the rst setting. The APP can not found the camera • Make sure the Wi-Fi router is activated. •... - Page 23 TROUBLE SHOOTING (CONTINUED) SOLUTION • Make sure the SD card has been correctly inserted • Make sure the motion detection function has been enabled. (please refer to the Sensitivity Setting section). The APP cannot record any video clips • Please format the SD card when it is used for the rst time (please refer to the SD Card Format section) •...
-
Page 24: Production Specification
PRODUCTION SPECIFICATION Networking Parameter Wireless Technology IEEE 802.11 b/g/n Network Connection Ethernet (10/100 Base-T/Base -TX); Wi-Fi Network Protocols TCP/IP, UDP, SMTP, NTP, DHCP, ARP Simultaneous Viewers 3 concurrent sessions Security WPA /WPA2/WPA2-PSK (TKIP, 128 bit AES) Camera Parameter Image Sensor 2 Megapixel, 1/3”... - Page 25 BLACK VERSION Web: europesecurity.eu Email: info@europesecurity.eu Tel: +31 (0) 541 352 952 Marconiweg 6 | 7591 HH | Denekamp (NL)
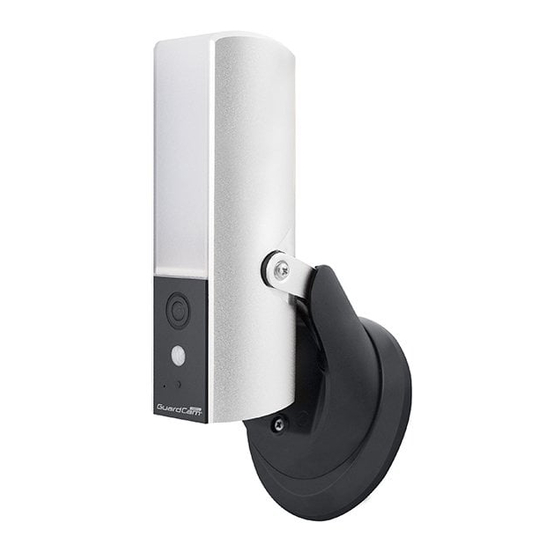
- Page 26 SILVER VERSION Web: europesecurity.eu Email: info@europesecurity.eu Tel: +31 (0) 541 352 952 Marconiweg 6 | 7591 HH | Denekamp (NL)
- Page 27 Web: europesecurity.eu Email: info@europesecurity.eu Tel: +31 (0) 541 352 952 Marconiweg 6 | 7591 HH | Denekamp (NL)
Need help?
Do you have a question about the GUARDCAMDECO and is the answer not in the manual?
Questions and answers