Table of Contents
Advertisement
Quick Links
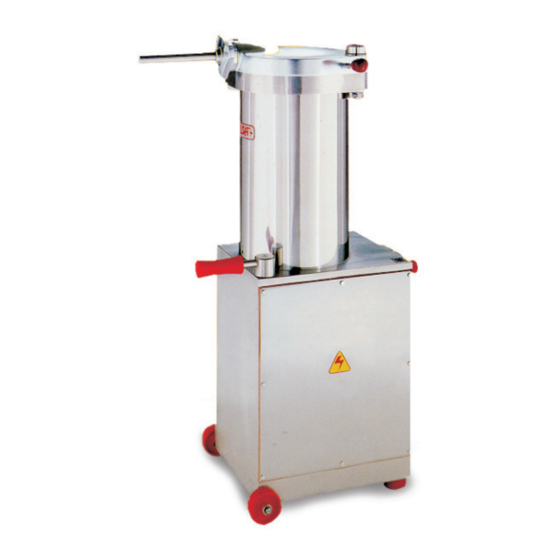
Sausage Stuffers
Models SS-ES-0015, 0020, 0026, 0031, 0042, 0052
Items *13743, *13744, *41708, *13745, 13746, *13750, 13752, 13751,
*13753, *41709, 13755, 13756, 13757, 13758, *13759, *17146
Instruction Manual
*
Revised - 08/28/2020
Toll Free: 1-800-465-0234
Fax: 905-607-0234
Email: service@omcan.com
www.omcan.com
Advertisement
Table of Contents

Related Manuals for Omcan SS-ES-0015 Series


Summary of Contents for Omcan SS-ES-0015 Series
- Page 1 Sausage Stuffers Models SS-ES-0015, 0020, 0026, 0031, 0042, 0052 Items *13743, *13744, *41708, *13745, 13746, *13750, 13752, 13751, *13753, *41709, 13755, 13756, 13757, 13758, *13759, *17146 Instruction Manual Revised - 08/28/2020 Toll Free: 1-800-465-0234 Fax: 905-607-0234 Email: service@omcan.com www.omcan.com...
-
Page 2: Table Of Contents
Table of Contents Model SS-ES-0015-PA / Model SS-ES-0015-PAM / Model SS-ES-0020-PA Model SS-ES-0020-PAM / Model SS-ES-0026-PA / Model SS-ES-0026-PAM Model SS-ES-0026-PAS / Model SS-ES-0026-PASM / Model SS-ES-0031-PAS Model SS-ES-0031-PASM / Model SS-ES-0042-PAS / Model SS-ES-0042-PASM Model SS-ES-0052-PAS / Model SS-ES-0052-PASM Section Page General Information... -
Page 3: General Information
If the package has suffered rough handling, bumps or damage (visible or concealed), please note it on the bill of lading before accepting the delivery and contact Omcan within 24 hours, so we may initiate a claim with the carrier. A detailed report on the extent of the damage caused to the machine must be filled out within three days, from the delivery date shown in the shipping documents. -
Page 4: Safety And Warranty
Si el paquete ha sufrido un manejo de poco cuidado, golpes o daños (visible o oculto) por favor anote en la factura antes de aceptar la entrega y contacte Omcan dentro de las 24 horas, de modo que podamos iniciar una reclamación con la compañia. - Page 5 Safety and Warranty electrical wiring or components of the machine. • Do not use the machine without having received previous instructions about its use, maintenance and safety devices from an experienced operator. • Read the instruction manual carefully before using the machine. •...
- Page 6 Changes in the nature of the food mixture if hygiene and cleaning instructions have not been followed. 1 YEAR PARTS AND LABOR WARRANTY Within the warranty period, contact Omcan Inc. at 1-800-465-0234 to schedule an Omcan authorized service technician to repair the equipment locally.
-
Page 7: Technical Specifications
Technical Specifications 33 LB. CAPACITY UNITS Model SS-ES-0015-PA SS-ES-0015-PAM 0.75 HP 1.75 HP Capacity 33 lbs. / 15 kgs. Electrical 208V/60/3 220V/60/1 110V/60/1 Weight 223 lbs. / 101.2 kgs. Item Number 13743 13744 41708 44 LB. CAPACITY UNITS Model SS-ES-0020-PA SS-ES-0020-PAM 0.75 HP 1.75HP... -
Page 8: Installation
Technical Specifications 92 LB. CAPACITY UNITS Model SS-ES-0042-PAS SS-ES-0042-PASM 2.5 HP Capacity 92 lbs. / 41.7 kgs. Electrical 208V/60/3 220V/60/1 Weight 527 lbs. / 239 kgs. Item Number 13757 13758 114 LB. CAPACITY UNITS Model SS-ES-0052-PAS SS-IT-0052-PASM 2.5 HP Capacity 114 lbs. - Page 9 Installation CONNECTING THE MACHINE Make sure the electrical characteristics of the machine (connection, voltage, and frequency) are suited to your power source. (These specifications are given in detail on the technical specifications sticker affixed to the machine itself; there is a tolerance of ±10% for voltage and of ±2% for frequency). If the specifications are compatible with your power source, refer to the OPERATING INSTRUCTIONS section below.
-
Page 10: Operation
Installation CHANGING THE VOLTAGE ON A MODELS (AUTOMATIC-CONTACTOR) MOTOR: Open the connection terminal box of the motor by unscrewing the four screws. Loosen the six small nuts on the connection terminals and place the plates in the correct position. CONTACTOR: will need to be replaced by a qualified technician to a new one of same voltage than power supply. - Page 11 Operation diameter and shortest length possible) on the lid, locking it in place by turning the triangular nozzle nut. Prepare the proper amount of casing. • Push the knee lever all the way forward to the piston raising position. Always push the knee lever firmly; do not use it as a speed control regulator.
-
Page 12: Maintenance
Maintenance CLEANING IMPORTANT: In order to avoid mechanical hazards during cleaning operations and piston dismantling, always open the lid completely when raising the piston. CLEANING INSTRUCTIONS To clean the outside of the machine use hot water and a mild cleanser. Do not use any abrasive products, especially those that could scratch warning stickers and labels. - Page 13 Maintenance barrel and screw the piston-locking bolt tight, making sure that the smaller gasket is properly placed. Raise and lower the piston, and tighten the piston locking bolt again, making sure it does not bend against the pressure of the lid. Grease the thread of the piston-locking bolt before replacing it; this will make future dismantling easier. When the machine is not in use, leave the piston head at the bottom of cylinder, where it will be submerged in hydraulic oil.
- Page 14 Maintenance During maintenance and inspection operations always follow the safety instructions in this manual. Mechanical breakdowns caused by inadequate or improper maintenance can lead to high repair costs as well as work stoppages; therefore, regular and adequate maintenance is indispensable. The safety and life of the machine depend on many factors, including proper maintenance.
- Page 15 Maintenance pressure at which the machine is run, the presence of humidity or residual water, etc. Normally it can last between 2.500 and 5.000 hours of service. If the oil loses viscosity, becomes impure, or turns a whitish color from having had water pumped into it, drain the oil by emptying the housing via the plug located at the bottom of the machine.
-
Page 16: Troubleshooting
Maintenance with that selected for the motor, that the motor is not functioning with only two phases, that there is enough hydraulic oil, that there is no oil leakage from the hydraulic screws or pipes, and that the oil filter is clean and unobstructed. - Page 17 Troubleshooting Piston moves up and down but The air holes located at the base Clean air holes. machine seems to lack power. of the barrel are obstructed. Piston and piston gaskets are dirty. Clean piston and piston gaskets. Voltage of power source is not Call an electrician to change motor compatible with voltage selected voltage.
- Page 18 Troubleshooting REFERENCE Item Number Model Number Description Manufacturer Model Number Sausage Stuffer 33 lbs. / 15 kgs. Capacity 13743 SS-ES-0015-PA Professional Automatic H15PA 0.75 HP / 559 W 220V/60/3 cQPSus Sausage Stuffer 33 lbs. / 15 kgs. Capacity 13744 SS-ES-0015-PAM H15PAM 1PH 220V Heavy Duty 1.75 HP / 1305 W 220V/60/1 cQPSus Sausage Stuffer 33 lbs.
-
Page 19: Parts Breakdown
Parts Breakdown Model SS-ES-0015-PA Model SS-ES-0026-PASM 13743 13753 Model SS-ES-0015-PAM Model SS-ES-0026-PASM 13744 41709 Model SS-ES-0015-PAM Model SS-ES-0031-PAS 41708 13755 Model SS-ES-0020-PA Model SS-ES-0031-PASM 13745 13756 Model SS-ES-0020-PAM Model SS-ES-0042-PAS 13746 13757 Model SS-ES-0026-PA Model SS-ES-0042-PASM 13750 13758 Model SS-ES-0026-PAM Model SS-ES-0052-PAS 13751 13759... - Page 20 Parts Breakdown Model SS-ES-0015-PA 13743 Model SS-ES-0015-PAM 13744/41708 Item No. Description Position Item No. Description Position Item No. Description Position Aluminum Lid with Horseshoe without Piston Aluminum with Sleeve without 36005 H200 36028 Gear Pump for H15 H223 36068 H244 Accessories for H15 O-Rings for H15 White Plastic Bushing 38/20/41mm (Lid...
- Page 21 Parts Breakdown Model SS-ES-0020-PA 13745 Model SS-ES-0020-PAM 13746 Item No. Description Position Item No. Description Position Item No. Description Position Aluminum Lid with Horseshoe without Seal Vellumoid 1625-1 for Pump Type O-Ring Int. Diam. 18.72/2.62 (Piston 36005 H200 31221 H224 36064 H245 Accessories for H20...
- Page 22 Parts Breakdown Model SS-ES-0026-PA Model SS-ES-0026-PAS 13750 13752 Model SS-ES-0026-PAM Model SS-ES-0026-PASM 13751 13753/41709 Item No. Description Position Item No. Description Position Item No. Description Position Aluminum Lid with Horseshoe without Hydraulic Cylinder DE0450800412G01 Stainless Steel Special Short Bolt M27 16536 H200 16513...
- Page 23 Parts Breakdown Model SS-ES-0031-PAS 13755 Model SS-ES-0031-PASM 13756 Item No. Description Position Item No. Description Position Item No. Description Position Stainless Steel Lid without Accessories Seal Vellumoid 1625-1 for Pump Type Piston Stainless Steel without O-Rings 36085 H200 31221 H224 36070 H244 for H31...
- Page 24 Parts Breakdown Model SS-ES-0042-PAS 13757 Model SS-ES-0042-PASM 13758 Item No. Description Position Item No. Description Position Item No. Description Position Stainless Steel Lid without Accessories Gear Pump 1L07 5IB01 R (from July 97 36086 H200 36029 H223 36079 Stainless Steel Bolt M36mm Lid for H42 H243 for H42 Shaft Coupling B) for H42...
- Page 25 Parts Breakdown Model SS-ES-0052-PAS 13759 Model SS-ES-0052-PASM 17146 Item No. Description Position Item No. Description Position Item No. Description Position Stainless Steel Lid without Accessories Seal Vellumoid 1625-1 for Pump Type Piston Stainless Steel without O-Ring 36087 H200 31221 H224 36072 H244 for H52...
-
Page 26: Electrical Schematics
Electrical Schematics Model SS-ES-0015-PA 13743 Model SS-ES-0020-PA 13745 Model SS-ES-0026-PA 13750 Model SS-ES-0026-PAS 13752 Model SS-ES-0031-PAS 13755 Model SS-ES-0042-PAS 13757 Model SS-ES-0052-PAS 13759... - Page 27 Electrical Schematics Model SS-ES-0015-PAM 13744/41708 Model SS-ES-0020-PAM 13746 Model SS-ES-0026-PAM 13751 Model SS-ES-0026-PASM 13753/41709 Model SS-ES-0031-PASM 13756 Model SS-ES-0042-PASM 13758 Model SS-ES-0052-PASM 17146...
-
Page 28: Notes
Notes... - Page 29 Notes...
- Page 30 Notes...
-
Page 31: Warranty Registration
Warranty Registration Thank you for purchasing an Omcan product. To register your warranty for this product, complete the information below, tear off the card at the perforation and then send to the address specified below. You can also register online by visiting: Merci d’avoir acheté... - Page 32 Since 1951 Omcan has grown to become a leading distributor of equipment and supplies to the North American food service industry. Our success over these many years can be attributed to our commitment to strengthen and develop new and existing relationships with our valued customers and manufacturers.
Need help?
Do you have a question about the SS-ES-0015 Series and is the answer not in the manual?
Questions and answers