Table of Contents
Advertisement
Quick Links
Advertisement
Table of Contents

Subscribe to Our Youtube Channel
Related Manuals for Vega Absolute TP-11


Summary of Contents for Vega Absolute TP-11
- Page 1 LORAWAN CONVERTER VEGA TP-11 User Manual www.vega-absolute.ru...
- Page 2 External devices connection was added Changes in the communication protocol: "Values of 10.01.2018 basic settings" bit field decoding table corrected Changes in parts “Contacts” and “Vega TP-11” tab”. An 19.06.2018 accuracy of current measurement added at the specification Communication period...
-
Page 3: Table Of Contents
“LoRaWAN settings” tab ................................. 19 «Vega TP-11» tab ..................................23 5 COMMUNICATION PROTOCOL ............................25 Converter TP-11 transmits the following types of packets .................... 25 Converter TP-11 receives packets of the following types ....................27 6 STORAGE AND TRANSPORTATION REQUIREMENTS ...................... 30 7 CONTENT OF THE PACKAGE .............................. -
Page 4: Introduction
Vega TP-11 / User Manual INTRODUCTION This manual is designated for Vega TP-11 device (hereinafter – device, converter) manufactured by Vega-Absolute LLC and provides information on powering and activation procedure, control commands and functions of the device. This manual is targeted at specialists familiar with installation work fundamentals for electronic and electrical equipment. -
Page 5: Description And Operation
Converter is an autonomic device and provides connected sensors with 24 V power via 4-20 mA interface. Vega TP-11 has two ‘open-drain’ outputs so it can be used as a control device. Also device has two security inputs. COMUNICATION AND DATA COLLECTION ALGORITHM The readings collecting from an external device with a configurable period from 5 minutes to 24 hours. -
Page 6: Functional
Configurator" via USB, also adjustable via LoRaWAN. FUNCTIONAL Vega TP-11 converter can be either of class A or class C (LoRaWAN classification) and has the following features: o Automatic change from A class to C class when powered from an external... -
Page 7: Marking
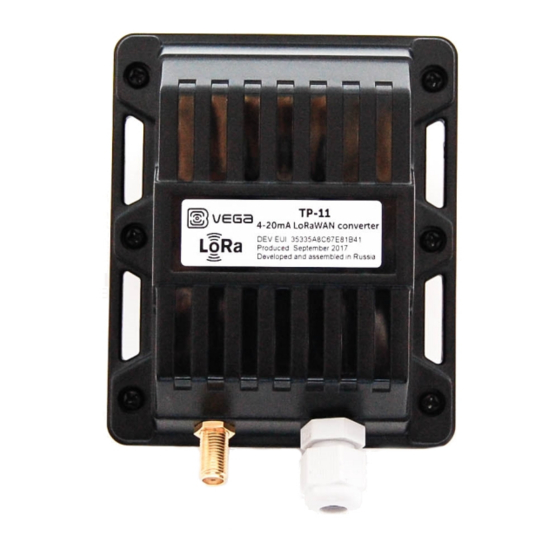
Vega TP-11 / User Manual MARKING Device marked with sticker that contain the next information: o Device model; o DevEUI; o Month and year of manufacture; o QR-code containing DevEUI for automatized count. Sticker located in three places – on device case, in factory certificate and on the packing box. -
Page 8: Specification
Vega TP-11 / User Manual 2 SPECIFICATION Main Current loop 4-20 mA interface Security inputs ‘Open-drain’ outputs USB-port mini-USB, type B Operating temperatures -40…+85 °С LoRaWAN AppEui by default 3032676174703131 LoRaWAN class A or С Quantity of LoRa channels Frequency band... -
Page 9: Operation
Vega TP-11 / User Manual 3 OPERATION CONTACTS Converter has 10 contacts, see table below: Contact Designation on the board Description OUT_2 Open-drain output 2 OUT_1 Open-drain output 1 +VPWR Power “+” Power “-“ 4-20 mA “-“ 4-20 mA “+”... - Page 10 Vega TP-11 / User Manual While security input connected the device monitors its state change (closure/unlocking or both of it – depend on the settings). Should the security input triggering, the device is activated and sends an alarm message to the network.
-
Page 11: Indication
Vega TP-11 / User Manual INDICATION There is a one red LED on the board. The indication is only used when the device is activated in the LoRaWAN network and when the operating modes are changed. LED on the board... -
Page 12: Initial Startup
Vega TP-11 / User Manual INITIAL STARTUP Vega TP-11 can be powered from either an external power source or built-in battery. To operate from the built-in battery, you must connect the battery connector to the power connector on the board. -
Page 13: External Devices Connection
Vega TP-11 / User Manual To transfer the device from the "Active" mode to the "Storage" mode, you can use the long press of the start button (more than 5 seconds). Before connecting the device to the network, make sure that its... -
Page 14: Connecting Via Usb
Vega TP-11 / User Manual CONNECTING VIA USB Vega TP-11 adjusted with the "Vega LoRaWAN Configurator" application (See part 4). Before connecting the device to the computer for the first time, you must install the driver for the COM port stsw-stm32102, which can be downloaded from iotvega.com. After running the executable file VCP_V1.4.0_Setup.exe, the installer window will appear:... -
Page 15: Vega Lorawan Configurator
Vega TP-11 / User Manual 4 VEGA LORAWAN CONFIGURATOR The "Vega LoRaWAN Configurator" application (hereinafter referred to as the configurator) is intended for setting up the device via USB. The configurator has two modes of operation - "Simple" and "Expert". In the "Simple"... -
Page 16: Connection To The Device
Vega TP-11 / User Manual The application window contains three tabs – device info, LoRaWAN settings and device settings. The language selection menu is in the upper right corner. CONNECTION TO THE DEVICE For the connection to the device, perform the following steps: 1. -
Page 17: Device Info" Tab
Vega TP-11 / User Manual After making the necessary changes to the settings, you should click the "Apply settings" button and only then disconnect from the device with the "Disconnect" button. “DEVICE INFO” TAB The "Device info" tab displays information about the device, its current status, and also the data needed to register the device in the LoRaWAN network. - Page 18 Vega TP-11 / User Manual Join network button - launch the LoRaWAN network connection procedure with the previously selected ABP or OTAA method. If the device is already connected to the network, reconnection procedure will occur. Link check (not displayed in the "Simple" mode) - when pressed, the device sends a special signal to the LoRaWAN network, in response to which the network informs it of the number of gateways that received this signal and the signal quality.
-
Page 19: Lorawan Settings" Tab
Vega TP-11 / User Manual “LORAWAN SETTINGS” TAB The "LoRaWAN Settings" tab allows you to configure various parameters of the LoRa network. Region - allows you to select one of installed frequency plans or specify a custom frequency plan. Custom frequency plan is EU-868 based. - Page 20 Vega TP-11 / User Manual This frequency band allows you to set up to 16 channels, as well as the frequency and speed of the second receiving window. The first three channels and the second receiving window parameters are mandatory. Without these parameters the custom frequency band will be considered empty Activation type –...
- Page 21 Vega TP-11 / User Manual Join accept delay 1 (not displayed in the "Simple" mode) – sets the time that the device will open the first receiving window to receive confirmation for the join request from the LoRaWAN network while OTAA mode active. The second window always opens after 1 second after the first.
- Page 22 Vega TP-11 / User Manual TX power (not displayed in the "Simple" mode) – the device RF transmitter power is adjusted to this value when sending packets to the LoRaWAN network. This option can be changed by the network server.
-
Page 23: Vega Tp-11" Tab
Vega TP-11 / User Manual «VEGA TP-11» TAB The “Vega TP-11” tab contains the settings of the connected device. Current state – displays the current parameters of the device - the internal temperature of the device, the battery level and the current LoRaWAN class. - Page 24 Vega TP-11 / User Manual When measurements are out of specified current value range the communication period still the same if parameter “Immediately send data when current is out of range” is not active. If that parameter is active and external power supplying, then the alarm message will be forming and sending during 2 minutes after the moment of current value measurements are out of specified range.
-
Page 25: Communication Protocol
Vega TP-11 / User Manual 5 COMMUNICATION PROTOCOL This part describes the TP-11 data exchange protocol with LoRaWAN network. In fields consisting of several bytes, the little-endian byte order is used CONVERTER TP-11 TRANSMITS THE FOLLOWING TYPES OF PACKETS 1. Packet with current readings from connected heat meter, sent regularly or by the request or by the one of “Reason of sending message”... - Page 26 Vega TP-11 / User Manual 2. Packet with data about state changes of the outputs OUT_1 or OUT_2 Size in bytes Field description Data type 1 byte Packet type, this packet == 5 uint8 1 byte Battery charge, % uint8 1 byte Output number (1 или...
-
Page 27: Converter Tp-11 Receives Packets Of The Following Types
Output ON for the time in seconds (1…255), (0 – uint8 forever ON). Upon receiving this package TP-11 will close the correspond output and transmits the packet with current readings. 3. Output off command send by application on LoRaWAN port 2... - Page 28 The package with settings sent to the device may not contain all the settings supported by the device, but only the part that needs to be changed. Table of ID of TP-11 parameters and these possible values ID of Description...
- Page 29 Vega TP-11 / User Manual 6 – 15 minutes 7 – 30 minutes Time zone, in minutes 2 bytes from -720 to 840 Current low threshold, in mA*100 2 bytes from 200 to 2500 Current high threshold, in mA*100 2 bytes...
-
Page 30: Storage And Transportation Requirements
Vega TP-11 / User Manual 6 STORAGE AND TRANSPORTATION REQUIREMENTS Vega TP-11 shall be stored in the original packaging in heated room at temperatures +5°С to +40°С and relative humidity less than 85%. The converter shall be transported in covered freight compartments of all types at any distance at temperatures -40°C to +85°C. -
Page 31: Content Of The Package
Vega TP-11 / User Manual 7 CONTENT OF THE PACKAGE Vega TP-11 device is delivered complete with: Converter Vega TP-11 – 1 pc. Antenna LoRa – 1 pc. Screw 3х16 – 6 pcs. Factory certificate – 1 pc. Revision 09 08 April 2020 –... -
Page 32: Warranty
Vega TP-11 / User Manual 8 WARRANTY The warranty period for the device is 5 years from the date of sale. The manufacturer is obligated to provide repair services or replace the failed device during the entire warranty period. The consumer undertakes to comply with the terms and conditions of transportation, storage and operation specified in this user manual. - Page 33 Vega TP-11 / User Manual vega-absolute.ru Operation Manual © Vega-Absolute LLC 2017-2020 Revision 09 08 April 2020 –...
Need help?
Do you have a question about the TP-11 and is the answer not in the manual?
Questions and answers