Table of Contents
Advertisement
PA26920A01
TDP43ME
Rev. 00 2-2012
CUTTER MODULE
OPERATION INSTRUCTIONS
© Panduit Corp. 2012
TO REDUCE THE RISK OF INJURY, USER
MUST READ INSTRUCTION MANUAL
Technical Support:
Panduit Corp. • ID Products Division
Website: www.panduit.com
Email: id-support@panduit.com
Cumming, GA
Tel: 800-777-3300 • Fax: 708-532-1811
EU Website:
Panduit Europe • EMEA Service Center
www.panduit.com/emea
Almelo, Netherlands
Tel: +31-546-580-452 • Fax: +31-546-580-441
EU Email:
Panduit Europe • West World Headquarters
emeatoolservicecenter
@panduit.com
Westgate, London
England Tel: 208-601-7200 • Fax: 208-601-7319
Advertisement
Table of Contents

Summary of Contents for Panduit TDP43ME-CUTTER
- Page 1 CUTTER MODULE OPERATION INSTRUCTIONS © Panduit Corp. 2012 TO REDUCE THE RISK OF INJURY, USER MUST READ INSTRUCTION MANUAL Technical Support: Panduit Corp. • ID Products Division Website: www.panduit.com Email: id-support@panduit.com Cumming, GA Tel: 800-777-3300 • Fax: 708-532-1811 EU Website: Panduit Europe •...
-
Page 2: Table Of Contents
TDP43ME CUTTER MODULE TABLE OF CONTENTS INSTALLING A GUILLOTINE CUTTER MODULE ON THE TDP43ME PRINTER: ......1 STEP 1. INSTALLING THE CUTTER MODULE ON THE PRINTER .......... 1 FOR XP INSTALLATIONS: ......................1 STEP 1. SETTING THE CUTTER CUSTOM COMMAND ............1 STEP 2. -
Page 3: Installing A Guillotine Cutter Module On The Tdp43Me Printer
TDP43ME CUTTER MODULE INSTALLING A GUILLOTINE CUTTER MODULE ON THE TDP43ME PRINTER: STEP 1. INSTALLING THE CUTTER MODULE ON THE PRINTER Follow the instructions included in the Cutter Module box to physically install the Cutter module on the front of the printer housing for any Operating System Installation. (XP, Vista, Windows7). NOTE: If the Printer Firmware version is “TDP43ME G3.0w6”... - Page 4 TDP43ME CUTTER MODULE In the PRINTING PREFERENCES window, click on the CUSTOM COMMANDS tab. Step 1.B In the CUSTOM COMMANDS window, click on the END down arrow and drag the mouse down to TEXT and release. Click on the ellipsis (three dots) button, the following window will pop up.
-
Page 5: Step 2. Setting The Cutter To Use Easy Mark On Xp Installations
TDP43ME CUTTER MODULE Click APPLY and then OK; and this window will disappear. Step 1.E Turn the printer on. The printer must now print something for the Custom Command to take effect. In the PROPERTIES window, click on PRINT TEST PAGE. The printer will print the test page. - Page 6 TDP43ME CUTTER MODULE Click on the Windows Start Button in the lower left corner of the screen. Click on PRINTERS and FAXES. Right click on the printer driver with the cutter attached. Drop down and click on the PRINTING PREFERENCES line. Click on the ADVANCED SETUP tab.
-
Page 7: For Windows7 Installations
TDP43ME CUTTER MODULE FOR WINDOWS7 INSTALLATIONS: STEP 1. SENDING THE CUTTER CUSTOM COMMAND The following steps will guide the installer in changing the cutter settings for correct cutter location on Firmware versions TDP43ME G3.0w6 or older. In START Menu, click on DEVICES and PRINTERS. - Page 8 TDP43ME CUTTER MODULE In the PRINTING PREFERENCES window, click on the CUSTOM COMMANDS tab. Step 1.C In the CUSTOM COMMANDS window, click on the END down arrow and drag the mouse down to TEXT and release. Click on the ellipsis (three dots) button, the following window will pop up.
- Page 9 TDP43ME CUTTER MODULE Click APPLY and then OK and this window will disappear. Step 1.F The printer must now print something for the Custom Command to take effect. In the Devices and Printers window, right click on the printer to be tested. Release the right mouse button on the PRINTER PROPERTIES line.
-
Page 10: Applications
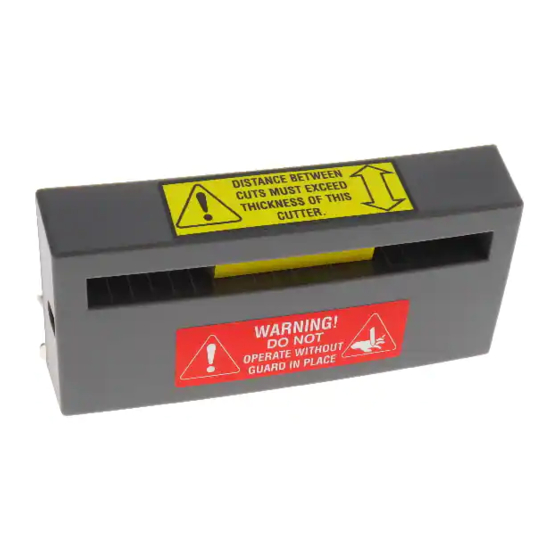
TDP43ME CUTTER MODULE STEP 2. SETTING THE CUTTER FOR EASY MARK USE ON WINDOWS7 APPLICATIONS: The following steps will instruct the user in the use of the TDP43ME Cutter module within the Easy Mark software program. NOTE: The distance between cuts should not be less than the depth of the cutter (1”). If this distance is less than 1”, the cut labels will not be ejected from the cutter module and can jam the cutter mechanism.


Need help?
Do you have a question about the TDP43ME-CUTTER and is the answer not in the manual?
Questions and answers