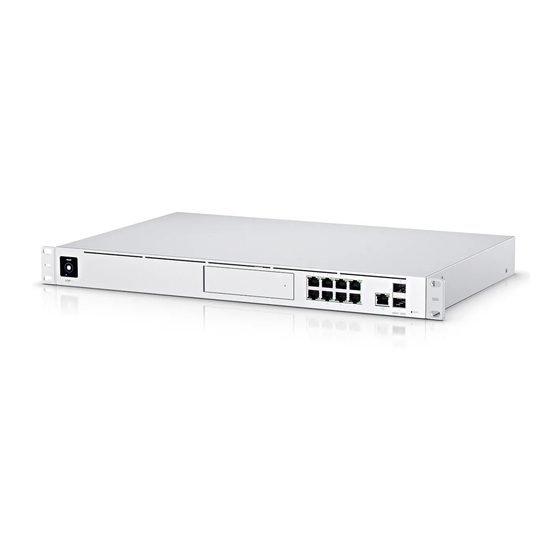
Ubiquiti UniFi Dream Machine Pro Quick Start Manual
All-in-one network appliance
Hide thumbs
Also See for UniFi Dream Machine Pro:
- Quick start manual (32 pages) ,
- Quick start manual (23 pages) ,
- Quick start manual (22 pages)

Subscribe to Our Youtube Channel
Related Manuals for Ubiquiti UniFi Dream Machine Pro


Summary of Contents for Ubiquiti UniFi Dream Machine Pro
- Page 1 Package Contents UniFi Dream Machine Pro Rack-Mount Brackets (Qty. 2) Bracket Screws (Qty. 8) Mounting Screws (Qty. 4) Cage Nuts (Qty. 4) Security Screw Create PDF in your applications with the Pdfcrowd HTML to PDF API PDFCROWD...
- Page 2 2.5" HDD Screws (Qty. 4) Power Cord Rubber Feet (Qty. 4) System Requirement Either of the following is required: iOS or Android™ Mobile Device with UniFi Network App Installed Web Browser: Google Chrome (Other browsers may have limited functionality) IMPORTANT: We strongly recommend using UPS backup and power regulation to prevent equipment damage due to stability issues with local AC power.
- Page 3 Touchscreen Display Bootup Animation Initializing. This indicates that you clicked Locate in the UniFi Location Animation Controller software. The software will also display the location of the device on the map. HDD LED Flashing White Indicates Read/Write Activity Steady Amber Indicates HDD Error RJ-45 Speed/Link/Activity LED (Ports 1 - 9) No Link...
- Page 4 SFP+ Speed/Link/Activity LED (Ports 10 - 11) No Link Link Established at 1 Gbps Green Flashing Indicates Activity Link Established at 10 Gbps White Flashing Indicates Activity HDD Bay Install a 3.5" or 2.5" HDD (not included) to use the device as an NVR for UniFi Protect.
- Page 5 SFP+ LAN (Port 11) The SFP+ port supports a 1/10G Ethernet connection. By default, it is set to DHCP Server with the fallback IP address, 192.168.1.1/24. Reset Button Resets to factory defaults. The device should be running after bootup is complete. Press and hold the Reset button for about 10 seconds until the display indicates that the device has reset itself.
- Page 6 We recommend that you protect your networks from harmful outdoor environments and destructive ESD events with industrial-grade, shielded Ethernet cable from Ubiquiti. For more details, visit: ui.com/toughcable Note: Although the cabling can be located outdoors, the UDM-Pro itself should be housed inside a protective enclosure.
- Page 7 Create PDF in your applications with the Pdfcrowd HTML to PDF API PDFCROWD...
- Page 8 Create PDF in your applications with the Pdfcrowd HTML to PDF API PDFCROWD...
- Page 9 Create PDF in your applications with the Pdfcrowd HTML to PDF API PDFCROWD...
- Page 10 Create PDF in your applications with the Pdfcrowd HTML to PDF API PDFCROWD...
- Page 11 Create PDF in your applications with the Pdfcrowd HTML to PDF API PDFCROWD...
- Page 12 Create PDF in your applications with the Pdfcrowd HTML to PDF API PDFCROWD...
- Page 13 Create PDF in your applications with the Pdfcrowd HTML to PDF API PDFCROWD...
- Page 14 Removing an 3.5" HDD Create PDF in your applications with the Pdfcrowd HTML to PDF API PDFCROWD...
- Page 15 Create PDF in your applications with the Pdfcrowd HTML to PDF API PDFCROWD...
- Page 16 Hardware Installation Create PDF in your applications with the Pdfcrowd HTML to PDF API PDFCROWD...
- Page 17 Create PDF in your applications with the Pdfcrowd HTML to PDF API PDFCROWD...
- Page 18 Create PDF in your applications with the Pdfcrowd HTML to PDF API PDFCROWD...
- Page 19 Connecting Power Create PDF in your applications with the Pdfcrowd HTML to PDF API PDFCROWD...
- Page 20 Create PDF in your applications with the Pdfcrowd HTML to PDF API PDFCROWD...
- Page 21 Connecting to the Internet For information about compatible fiber SFP modules, visit: ubnt.link/UniFi_SFP_DAC_Compatibility Create PDF in your applications with the Pdfcrowd HTML to PDF API PDFCROWD...
- Page 22 Create PDF in your applications with the Pdfcrowd HTML to PDF API PDFCROWD...
- Page 23 Create PDF in your applications with the Pdfcrowd HTML to PDF API PDFCROWD...
- Page 24 Connecting to the LAN Create PDF in your applications with the Pdfcrowd HTML to PDF API PDFCROWD...
- Page 25 Create PDF in your applications with the Pdfcrowd HTML to PDF API PDFCROWD...
- Page 26 Create PDF in your applications with the Pdfcrowd HTML to PDF API PDFCROWD...
- Page 27 Create PDF in your applications with the Pdfcrowd HTML to PDF API PDFCROWD...
- Page 28 Configuration You have the following options: Enable Bluetooth on your mobile device and use the UniFi Network app. Use a computer connected to the UDM-Pro on a LAN port. Go to “Chrome Instructions”. UniFi Network App Create PDF in your applications with the Pdfcrowd HTML to PDF API PDFCROWD...
- Page 29 Create PDF in your applications with the Pdfcrowd HTML to PDF API PDFCROWD...
- Page 30 3. Follow the on-screen instructions. Chrome Instructions Use the Chrome web browser to set up your device. 1. Ensure that your host system is on the same Layer 2 network as the UDM-Pro. 2. Launch the Chrome web browser and go to https://setup.ui.com Create PDF in your applications with the Pdfcrowd HTML to PDF API PDFCROWD...
- Page 31 3. Follow the on-screen instructions of the Setup Wizard. After you run the UniFi Setup Wizard, a login screen will appear for the UniFi Network Controller management interface. Enter the Username and Password that you created in the UniFi Setup Wizard. Then click Sign in. You can manage your network and view network statistics using the UniFi Network Controller management interface.
- Page 32 UDM-Pro Dimensions 442.4 x 43.7 x 285.6 mm (17.42 x 1.72 x 11.24") Weight 3.90 kg (8.60 lb) With Mount Brackets 3.99 kg (8.80 lb) Interfaces Networking (8) 10/100/1000 RJ45 LAN Ports (1) 10/100/1000 RJ45 WAN Ports (1) 1/10G SFP+ LAN Port (1) 1/10G SFP+ WAN Port Management Ethernet In-Band...
- Page 33 UDM-Pro Operating Temperature -10 to 40° C (14 to 104° F) Operating Humidity 5 to 95% Noncondensing Certifications CE, FCC, IC Safety Notices 1. Read, follow, and keep these instructions. 2. Heed all warnings. 3. Only use attachments/accessories specified by the manufacturer. WARNING: Do not use this product in location that can be submerged by water.
- Page 34 b. The equipment requires the use of the ground wire as a part of the safety certification, modification or misuse can provide a shock hazard that can result in serious injury or death. c. Contact a qualified electrician or the manufacturer if there are questions about the installation prior to connecting the equipment.
- Page 35 communications. Operations of this equipment in a residential area is likely to cause harmful interference in which case the user will be required to correct the interference at his own expense. This radio transmitter has been approved by FCC. ISED Canada CAN ICES-3(A)/NMB-3(A) This device complies with ISED Canada licence-exempt RSS standard(s).
- Page 36 This transmitter must not be co-located or operating in conjunction with any other antenna or transmitter. AVIS IMPORTANT Déclaration sur l’exposition aux rayonnements Cet équipement est conforme aux limites prévues pour l’exposition aux rayonnements dans un environnement non contrôlé. Lors de l’installation et de la mise en fonctionnement de l’équipement, assurez-vous qu’il y ait une distance minimale de 20 cm entre l’élément rayonnant et vous.
- Page 37 Country List BFWA (Broadband Fixed Wireless Access) members noted in blue Note: This device meets Max. TX power limit per ETSI regulations. The following apply to products that operate in the 5 GHz frequency range: Note: This device is restricted to indoor use only when operating in the 5150 - 5350 MHz frequency range within all member states.
- Page 38 © 2020 Ubiquiti Inc. All rights reserved. Create PDF in your applications with the Pdfcrowd HTML to PDF API PDFCROWD...
Need help?
Do you have a question about the UniFi Dream Machine Pro and is the answer not in the manual?
Questions and answers