Ubiquiti UniFi Dream Machine Pro Quick Start Manual
Hide thumbs
Also See for UniFi Dream Machine Pro:
- Quick start manual (32 pages) ,
- Quick start manual (39 pages) ,
- Quick start manual (23 pages)
Table of Contents
Advertisement
2/16/2021
Click for
Package Contents
Table of Contents
The following components will be required for:
HDD Installation: Components D or E
Rack Mounting: Components A, B, C, and F
Flat Surface Staging: Component G
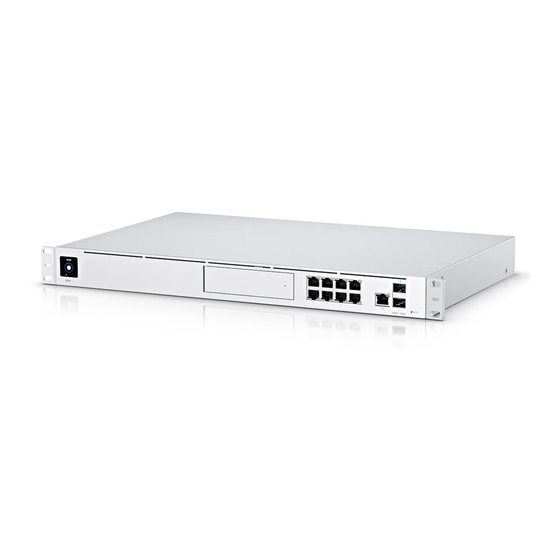
UniFi Dream Machine Pro
B- Mounting Screws (Qty. 4)
E- 2.5" HDD Screws (Qty. 4)
Hardware Overview
dl-origin.ubnt.com/qsg/UDM-Pro/UDM-Pro_EN.html
UDM-Pro Quick Start Guide
×
Power Cord
C- Nuts (Qty. 4)
F- Rack-Mount Brackets
UDM-Pro Quick Start Guide
A- Bracket Screws (Qty. 8)
(Qty. 2)
D- Security Screw
G- Rubber Feet (Qty. 4)
1/21
Advertisement
Table of Contents

Related Manuals for Ubiquiti UniFi Dream Machine Pro


Summary of Contents for Ubiquiti UniFi Dream Machine Pro
- Page 1 The following components will be required for: HDD Installation: Components D or E Rack Mounting: Components A, B, C, and F Flat Surface Staging: Component G UniFi Dream Machine Pro Power Cord A- Bracket Screws (Qty. 8) B- Mounting Screws (Qty. 4) C- Nuts (Qty.
- Page 2 2/16/2021 UDM-Pro Quick Start Guide UDM-Pro Quick Start Guide × Click for Table of Contents Touchscreen Display Bootup Animation A display message of "UDM-Pro is Starting..." This indicates that you clicked Locate in the UniFi Location Animation Controller software. The software will also display the location of the device on the map.
-
Page 3: Hard Disk Drive (Hdd) Installation
2/16/2021 UDM-Pro Quick Start Guide White Link Established at 10 Gbps UDM-Pro Quick Start Guide Flashing Indicates Activity × Click for HDD Bay Table of Contents Install a 3.5" or 2.5" HDD (not included) to use the device as an NVR for UniFi Protect. - Page 4 2/16/2021 UDM-Pro Quick Start Guide 1. Ensure that your UDM-Pro is fully powered down and unplugged prior to UDM-Pro Quick Start Guide installing your 2.5" or 3.5" HDD. 2. Press the right end of the HDD bay cover inward to unlatch it, then pull the ×...
- Page 5 2/16/2021 UDM-Pro Quick Start Guide UDM-Pro Quick Start Guide × Click for Table of Contents b. Fasten the security screw (D) into the aligned threading hole with a Phillips screwdriver until secure. c. Proceed to Step 5. dl-origin.ubnt.com/qsg/UDM-Pro/UDM-Pro_EN.html 5/21...
- Page 6 2/16/2021 UDM-Pro Quick Start Guide 4. Insert your 2.5" HDD into the mounting tray: UDM-Pro Quick Start Guide a. Position your 2.5" HDD inside the mounting tray so that the device's × Click for threading holes are aligned with those at the bottom of the tray. Table of Contents b.
-
Page 7: Hdd Removal
2/16/2021 UDM-Pro Quick Start Guide UDM-Pro Quick Start Guide × Click for Table of Contents HDD Removal: 1. Ensure that your UDM-Pro is fully powered down and unplugged prior to removing your HDD. 2. Open your UDM-Pro's front panel and pull out the HDD mounting tray. 3. -
Page 8: Installation Requirements
2/16/2021 UDM-Pro Quick Start Guide UDM-Pro Quick Start Guide × Click for Table of Contents Rack Mounting the UDM-Pro Installation Requirements Phillips screwdriver Standard-sized, 19" wide rack with a minimum of 1U height available For indoor applications, use Category 5 (or above) UTP cabling approved for indoor use. - Page 9 2/16/2021 UDM-Pro Quick Start Guide UDM-Pro Quick Start Guide × Click for Table of Contents 3. Align the front-facing holes of the rack-mount brackets with those of the wide rack's support legs. a. If your mounting rack's holes are circular, fasten two mounting screws (B) through the rack-mount bracket and the rack's support legs.
- Page 10 2/16/2021 UDM-Pro Quick Start Guide UDM-Pro Quick Start Guide × Click for Table of Contents Powering the UDM-Pro IMPORTANT! We strongly recommend connecting the UDM-Pro to an Uninterruptible Power Supply (UPS), or battery backup device, to prevent power instability issues and hardware damage that may result from relying on the local AC power of a standard outlet.
- Page 11 2/16/2021 UDM-Pro Quick Start Guide UDM-Pro Quick Start Guide × Click for Table of Contents Note: The UDM-Pro's voltage output range is 100-240 volts. Ensure that your power source can accommodate this, as well as any other devices sharing the UDM-Pro's power supply. Connecting the UDM-Pro to Your Internet Modem or Router 1.
- Page 12 2/16/2021 UDM-Pro Quick Start Guide UDM-Pro Quick Start Guide × Click for Table of Contents Connecting the UDM-Pro with a Fiber Internet Adapter 1. Connect one end of your fiber optic cable to your modem or router. 2. Remove the rubber plug from the SFP+ Internet port (Port 10 in the Hardware Overview table).
- Page 13 2/16/2021 UDM-Pro Quick Start Guide 3. Insert your SFP Fiber Module (or compatible third-party equivalent) into Port UDM-Pro Quick Start Guide × Click for Table of Contents 4. Connect the other end of your fiber optic cable to the SFP Fiber Module. Note: For more information about compatible fiber SFP modules, refer to Help Center...
- Page 14 2/16/2021 UDM-Pro Quick Start Guide Connecting Devices to the UDM-Pro via LAN Cable UDM-Pro Quick Start Guide Note: A LAN, or Local Area Network, connection will directly connect, or × "hard line," an individual device (e.g., laptop, game console, etc.) to your Click for UDM-Pro via a separate Ethernet cable.
- Page 15 2/16/2021 UDM-Pro Quick Start Guide UDM-Pro Quick Start Guide × Click for Table of Contents 3. Insert your SFP Fiber Module (or compatible third-party equivalent) into Port 4. Connect the other end of your fiber optic cable to the SFP Fiber Module. dl-origin.ubnt.com/qsg/UDM-Pro/UDM-Pro_EN.html 15/21...
-
Page 16: System Requirements
2/16/2021 UDM-Pro Quick Start Guide UDM-Pro Quick Start Guide × Click for Table of Contents Note: For more information about compatible fiber SFP modules, refer to Help Center article. Configuring and Connecting Devices to the UDM-Pro To finish setting up your UDM-Pro, please read UniFi - Set Up a Dream Machine Pro. -
Page 17: Safety Notices
2/16/2021 UDM-Pro Quick Start Guide UDM-Pro UDM-Pro Quick Start Guide Dimensions 442.4 x 43.7 x 285.6 mm (17.42 x 1.72 x 11.24") × Click for Weight 3.90 kg (8.60 lb) Table of Contents With Mount Brackets 3.99 kg (8.80 lb) Interfaces Networking (8) 10/100/1000 RJ45 LAN Ports... -
Page 18: Electrical Safety Information
2/16/2021 UDM-Pro Quick Start Guide Electrical Safety Information UDM-Pro Quick Start Guide 1. Compliance is required with respect to voltage, frequency, and current requirements indicated on the manufacturer’s label. Connection to a different power source than those × Click for specified may result in improper operation, damage to the equipment or pose a fire Table of Contents hazard if the limitations are not followed. - Page 19 2/16/2021 UDM-Pro Quick Start Guide UDM-Pro Quick Start Guide ISED Canada CAN ICES-3(A)/NMB-3(A) × Click for Table of Contents This device complies with ISED Canada licence-exempt RSS standard(s). Operation is subject to the following two conditions: 1. This device may not cause interference, and 2.
-
Page 20: Weee Compliance Statement
2/16/2021 UDM-Pro Quick Start Guide Nota: Este equipamento não tem direito à proteção contra interferência prejudicial e UDM-Pro Quick Start Guide não pode causar interferência em sistemas devidamente autorizados. × Click for CE Marking Table of Contents CE marking on this product represents the product is in compliance with all directives that are applicable to it. - Page 21 2/16/2021 UDM-Pro Quick Start Guide UDM-Pro Quick Start Guide × Click for Table of Contents © 2021 Ubiquiti Inc. All rights reserved. dl-origin.ubnt.com/qsg/UDM-Pro/UDM-Pro_EN.html 21/21...
Need help?
Do you have a question about the UniFi Dream Machine Pro and is the answer not in the manual?
Questions and answers