Keysight Technologies N9020A Installation Note
Signal analyzer
Hide thumbs
Also See for N9020A:
- Installation note (63 pages) ,
- Installation note (9 pages) ,
- Installation note (12 pages)
Advertisement
Quick Links
Keysight Technologies
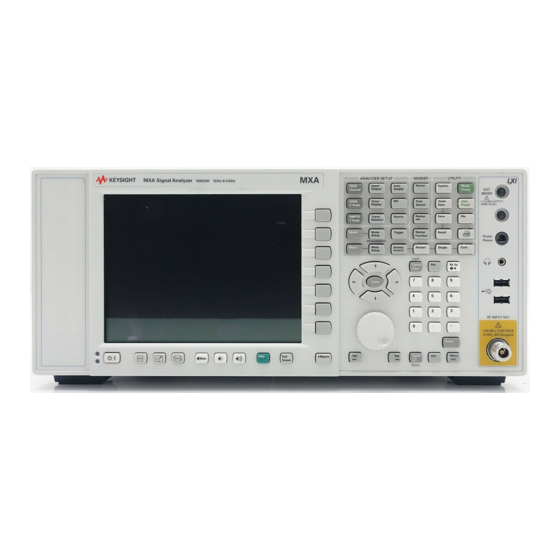
N9020A Signal Analyzer
Analog Baseband IQ Inputs (Option BBA) Retrofit Kit
Notice: This document contains references to Agilent.
Please note that Agilent's Test and Measurement
business has become Keysight Technologies. For
more information, go to
www.keysight.com
Installation Note
.
Advertisement

Related Manuals for Keysight Technologies N9020A


Summary of Contents for Keysight Technologies N9020A
- Page 1 Keysight Technologies N9020A Signal Analyzer Analog Baseband IQ Inputs (Option BBA) Retrofit Kit Notice: This document contains references to Agilent. Please note that Agilent’s Test and Measurement business has become Keysight Technologies. For more information, go to www.keysight.com Installation Note...
- Page 2 The information contained in this document is subject to change without notice. Keysight Technologies makes no warranty of any kind with regard to this material, including but not limited to, the implied warranties of merchantability and fitness for a particular purpose.
- Page 3 Option BBA, Analog Baseband I/Q Inputs Retrofit Kit Option BBA, Analog Baseband I/Q Inputs Retrofit Kit Products Affected: N9020A, MXA Signal Analyzer Serial Numbers: Option To Be Performed By: (X) Keysight Service Center (X) Personnel Qualified by Keysight ( ) Customer Estimated Installation Time: 2.0 Hours...
- Page 4 Instructions for the front frame replacement kit are located inside that kit. This procedure is used to retrofit Option BBA into the N9020A Signal Analyzer. Earlier vintages of analyzers had an LCD which uses slightly different mechanical parts. This installation note addresses both the LCD and LED displays.
-
Page 5: Installation Kit Parts List
1400-0249 Installation Note This note Probe tip BNC adapter 5063-2143 Cable 8120-2682 a.These items are only used if the analyzer has an LCD display. LCD’s were used on serial prefix < MY or SG5124 for the N9020A. Installation Note N9020-90189... - Page 6 Option BBA, Analog Baseband I/Q Inputs Retrofit Kit Tools Required — T-10 Torx Driver — T-20 Torx Driver — 5/16-inch torque wrench — 1/4-inch socket on 4 lb torque wrench — scissors or knife — diagonal cutters — USB storage device with > 2 GB free memory Before you disassemble the instrument, turn the power switch to Standby and unplug the instrument.
-
Page 7: Installation Procedure
Option BBA, Analog Baseband I/Q Inputs Retrofit Kit Installation Procedure If the instrument is placed on its face during any of the following procedures, be sure to use a soft surface or soft cloth to avoid damage to the front panel, keys, or input connector. - Page 8 Option BBA, Analog Baseband I/Q Inputs Retrofit Kit Figure 1 Benchtop Configuration Outer Case Removal 7. Proceed to the Front Frame Assembly Removal section to remove the front frame. Installation Note N9020-90189...
- Page 9 Option BBA, Analog Baseband I/Q Inputs Retrofit Kit Portable Instrument (Option PRC) Make sure any adapters on the front panel are removed. 1. Disconnect the instrument from ac power. 2. Refer to Figure 2. Using the T-20 driver, remove the four screws (1), two on each side, to detach the Bail Handle Assembly (2) from the front frame.
- Page 10 Option BBA, Analog Baseband I/Q Inputs Retrofit Kit Figure 3 Portable Instrument Outer Case Removal (Option PRC) Installation Note N9020-90189...
- Page 11 Option BBA, Analog Baseband I/Q Inputs Retrofit Kit Front Frame Assembly Removal VERY IMPORTANT (MUST READ) It is critical that the analyzer being upgraded has a compatible front frame for Option BBA. A compatible front frame will have a total of six screw holes on the left hand side of the analyzer, the same side where the two fans are located.
- Page 12 Option BBA, Analog Baseband I/Q Inputs Retrofit Kit Keysight Technologies uses the serial number information from the analyzer at the time of the upgrade order to determine if a front frame upgrade kit is required. 1. Refer to Figure 5. Using the T-10 driver, remove the eight screws (1), four on each side, to detach the front frame from the chassis.
- Page 13 Option BBA, Analog Baseband I/Q Inputs Retrofit Kit 2. Refer to Figure 6. Pull the front frame carefully away from the chassis. Remove the ribbon cable W1 from the A8 Motherboard. W1 may have locking springs on each side. Depress the spring on each side of the connector to remove from the motherboard.
- Page 14 Option BBA, Analog Baseband I/Q Inputs Retrofit Kit Top Brace and Reference Bracket Removal 1. Refer to Figure 7. To remove the top brace (1) and reference bracket (2), use the T-10 driver to remove the twelve panhead screws (3) (0515-0372), six on each side, attaching the braces to the chassis.
- Page 15 Option BBA, Analog Baseband I/Q Inputs Retrofit Kit Rear Panel Removal 1. Refer to Figure 8. Using the T-10 driver, remove the remaining eighteen screws (2) attaching the rear panel (1) to the chassis. The rear panel can now be removed. 2.
- Page 16 Option BBA, Analog Baseband I/Q Inputs Retrofit Kit RF Bracket Removal 1. Refer to Figure 9. Remove the RF bracket (1) by removing the remaining eight screws (2) using the T-10 driver. Figure 9 RF Bracket Removal Installation Note N9020-90189...
- Page 17 Option BBA, Analog Baseband I/Q Inputs Retrofit Kit L.O. Synthesizer Assembly Removal 1. Refer to Figure 10. Remove the cables W4 and W6 from the L.O. Synthesizer assembly (1) using the 5/16 inch wrench. 2. The L.O. Synthesizer assembly can now be unplugged from slot 5 on the motherboard by pulling up on the board and lifted out of the chassis.
- Page 18 Option BBA, Analog Baseband I/Q Inputs Retrofit Kit Front End Control Assembly Removal 1. Refer to Figure 11. Remove the ribbon cables W16, W17, and W18 and the wire harness W22 from the Front End Control assembly (1). W22 connects to J301, W18 connects to J103, W16 connects to J801 and W17 connects to J104.
- Page 19 Option BBA, Analog Baseband I/Q Inputs Retrofit Kit W4 and W5 Semi-rigid Cables Removal 1. Refer to Figure 12. Locate W4 and W5. If the part numbers on the cable labels are N9020-20155 and N9020-20156, you do not need to perform steps 2 - 4 and can skip to the IMPORTANT note on page 20.
- Page 20 Option BBA, Analog Baseband I/Q Inputs Retrofit Kit Replacement 1. Refer to Figure 13. Locate angled semi-rigid cable N9020-20156 (W4), supplied in the kit. Install this cable from A13J4, RF Front End Assembly and locate close to A14J740 L.O. Synthesizer Assembly, which was previously removed. Torque both ends to 10 inch-pounds using a 5/16-inch torque wrench.
- Page 21 Option BBA, Analog Baseband I/Q Inputs Retrofit Kit Notice in Figure 15 that the fan bracket is blocking part of the screw hole that will be used later to mount the BBIQ Interface Board. If the fan bracket resembles Figure 15, go to the “Fan Bracket”...
- Page 22 Option BBA, Analog Baseband I/Q Inputs Retrofit Kit Figure 14 Compatible Fan Bracket Figure 15 Incompatible Fan Bracket Installation Note N9020-90189...
- Page 23 Option BBA, Analog Baseband I/Q Inputs Retrofit Kit Fan Bracket Removal 1. Refer to Figure 16. Remove and discard the five screws (1) that attach the fan assembly to the chassis. Figure 16 Fan Assembly Removal 2. Unplug the fan wires from the motherboard. The fan assembly can now be lifted from the chassis.
- Page 24 Option BBA, Analog Baseband I/Q Inputs Retrofit Kit Figure 17 Fan Replacement Replacement 1. Locate eight new rivets, 0361-1272 supplied in the upgrade kit. 2. Locate the new fan bracket W1312-00133 supplied in the upgrade kit. 3. Position the fans on the work surface with the arrows pointing to the right and down as shown Figure 4.
- Page 25 Option BBA, Analog Baseband I/Q Inputs Retrofit Kit Option BBA Hardware Installation 1. Refer to Figure 18. Locate and install the N9020-60093 BBIQ Main Board into slot 4. Figure 18 Option BBA Main Board Installation Note N9020-90189...
- Page 26 Option BBA, Analog Baseband I/Q Inputs Retrofit Kit 2. Refer to Figure 19. Locate and install labels N9020-80036, “Remove Both Cables Before Lifting” on the top of each board extractor, both the right and left hand side. 3. Route ribbon cable 8121-1683 from the BBIQ Main board through the chassis side wall and out to the front of the instrument.
- Page 27 Option BBA, Analog Baseband I/Q Inputs Retrofit Kit Front End Control Assembly Replacement 1. Refer to Figure 11. Install the Front End Control assembly into slot 6 in the chassis securing with the ejector. 2. Reattach the ribbon cables W16, W17, and W18 and the wire harness W22 to the Front End Control assembly (1).
- Page 28 Option BBA, Analog Baseband I/Q Inputs Retrofit Kit RF Bracket Replacement 1. Locate coax cable 8121-1401 and cable labels in the kit. Figure 20 BBIQ Coax Cable Location 2. Label one end of the cable with marker 707 and the other end of the cable with marker 101. 3.
- Page 29 Option BBA, Analog Baseband I/Q Inputs Retrofit Kit Rear Panel Replacement 1. Refer to Figure 8. Place the rear panel (1) into position in the chassis. Replace the twenty screws (2) and (3) to attach the rear panel to the chassis. Torque to 9 inch-pounds. Top Brace and Reference Bracket Replacement 1.
-
Page 30: Installation
Option BBA, Analog Baseband I/Q Inputs Retrofit Kit LED Board and Overlay Installation If the MXA being upgraded had a compatible front frame, you will need to remove the blank label on the front frame by peeling it off. Then remove the filler plate by removing two screws with a T10 driver. - Page 31 Option BBA, Analog Baseband I/Q Inputs Retrofit Kit 2. Refer to Figure 23. Line up the holes and carefully attach the N9020-80013 overlay to the LED board. 3. Install the LED board with overlay attached (1) into the front frame. 4.
- Page 32 Option BBA, Analog Baseband I/Q Inputs Retrofit Kit 5. Refer to Figure 24. Line up and carefully attach the top overlay N9020-80014 over the lower overlay. 6. Press firmly down over the entire surface area of the top overlay. Figure 24 Overlay Alignment Installation Note N9020-90189...
- Page 33 Option BBA, Analog Baseband I/Q Inputs Retrofit Kit 7. Refer to Figure 25. Install the BBIQ Interface Board, N9020-60094 into the front frame passing the BNC connectors through the holes. 8. Secure the BBIQ Interface Board with two 0515-0372 screws (2). Torque to 9 in-lbs. Figure 25 BBIQ Interface Board Installation Installation Note N9020-90189...
- Page 34 Option BBA, Analog Baseband I/Q Inputs Retrofit Kit 9. Refer to Figure 26. Secure BBIQ Interface Board to the side of the front frame with a single 0515-1035 screw (1). Torque to 9 in-lbs. Figure 26 BBIQ Interface Board Side Screw Installation Installation Note N9020-90189...
- Page 35 Option BBA, Analog Baseband I/Q Inputs Retrofit Kit 10.Refer to Figure 27 Figure Figure 27 shows an LCD front frame. If you have an LCD front frame perform steps 11 to 27. Figure 28 shows an LED front frame. If you have an LED front frame skip steps 11 to 27 and continue with step 28.
- Page 36 Option BBA, Analog Baseband I/Q Inputs Retrofit Kit 11.Refer to Figure 29. Remove existing inverter screws (4). 12.Remove three adhesive backed cable clamps (5); two located on the pink and white wires and one located on the black wires and discard. 13.Cut one side of grommet 0400-0385 (2) and add to inverter wires in two locations.
- Page 37 Option BBA, Analog Baseband I/Q Inputs Retrofit Kit 16.Refer to Figure 30. Place Option BBA inverter shield bottom N9020-00011 (1) under the inverter board. 17.Slide grommets along the bottom shield inside the wire access slots (4). Carefully dress the pink and white inverter wires so they are not drawn too tight (3). 18.Line up the holes in the shield base and PC assembly with front frame assembly.
- Page 38 Option BBA, Analog Baseband I/Q Inputs Retrofit Kit 20.Refer to Figure 31. Align Option BBA inverter shield top N9020-00010 (1) with holes in bottom as shown. 21.Inspect to see that the wires are not pinched in both places where the wires go through the holes (2).
- Page 39 Option BBA, Analog Baseband I/Q Inputs Retrofit Kit 23.Refer to Figure 32. Connect the ribbon 8121-1683 to the BBIQ Interface Board, N9020-60094. 24.Install two N9020-20017 Hex screws (1) to secure the flex ribbon into the connector. Torque to 4 in-lbs with the ¼-inch socket. Figure 32 Inverter Ribbon Cable Installation Installation Note N9020-90189...
- Page 40 Option BBA, Analog Baseband I/Q Inputs Retrofit Kit 25.Refer to Figure 33. Cut the Vibration Mount 0460-2725 (1) supplied in the kit with scissors or a knife to fit the Core Bracket N9020-00012. 26.Position the Core Bracket over the ferrite core (2) that is on the flex ribbon cable. Figure 33 Vibration Mount Installation Installation Note N9020-90189...
- Page 41 Option BBA, Analog Baseband I/Q Inputs Retrofit Kit 27.Refer to Figure 34. Secure with two 0515-0372 screws (2). Torque to 9 in-lbs. Continue with step 33. Figure 34 Core Bracket Installation Installation Note N9020-90189...
- Page 42 Option BBA, Analog Baseband I/Q Inputs Retrofit Kit 28.Refer to Figure 35. Connect the opposite end of the flex ribbon cable 8121-1683 (1) from the BBIQ Main board to the BBIQ Interface board (2) as shown. Figure 35 BBIQ Ribbon Cable Installation 29.Use two N9020-20017 Hex shoulder screws (3) to affix the ribbon cable connector to the BBIQ Interface board connector.
- Page 43 Option BBA, Analog Baseband I/Q Inputs Retrofit Kit 30.Refer to Figure 36. Cut the Vibration Mount 0460-2725 (4) supplied in the kit with scissors or a knife to fit the Core Bracket N9020-00012 (5). Peel backing from the vibration mount material and install onto the core bracket.
- Page 44 Option BBA, Analog Baseband I/Q Inputs Retrofit Kit 32.Refer to Figure 37. Secure the Core Bracket (5) to the display bracket stand-offs with two 0515-0372 screws (8). Torque to 9 inch pounds. Figure 37 Core Bracket Installation 33.Plug the ribbon cable W1 into the motherboard. 34.Refer to Figure 5.
- Page 45 Option BBA, Analog Baseband I/Q Inputs Retrofit Kit Final Installation for Standard Instruments (Benchtop configuration, Figure 1 1. Refer to Figure 1. Carefully slide the instrument cover back onto the instrument from the rear of the analyzer, making sure not to damage any internal cables. The seam on the cover should be on the bottom of the instrument.
-
Page 46: Update Instrument Software
Option BBA, Analog Baseband I/Q Inputs Retrofit Kit Update Instrument Software You must update the instrument software after the upgrade to ensure that the FPGA code is properly updated in the new assemblies. The most current instrument software version can be downloaded at: http://www.keysight.com/find/mxa_software Update instructions are located at this website as well. -
Page 47: Verify Hardware Installation
Option BBA, Analog Baseband I/Q Inputs Retrofit Kit Verify Hardware Installation 1. Turn on the analyzer and wait for the instrument to fully boot up. 2. Verify the spectrum analyzer application loads and sweeps as expected. Press System, Show, Hard ware on the analyzer and verify that the Main board and the BBIQ Interface Board identify themselves as:... -
Page 48: Verify The Installation
Option BBA, Analog Baseband I/Q Inputs Retrofit Kit 7. The MXA will automatically consume the License File (this may take a few minutes). When the License File is consumed the Keysight License Manager will display a “Successful License Installation” message as shown in Figure Figure 39 Successful License Installation... -
Page 49: Adjustments And Performance Verification
If you require further assistance, please contact the Keysight support team. Online assistance: http://www.keysight.com/find/assist If you do not have access to the Internet, contact your local Keysight Technologies Sales and Service Office, or if in the United States, call 1-800-829-4444 (8 am - 8 pm ET, Monday - Friday). - Page 50 This information is subject to change without notice. © Keysight Technologies 2012-2015 Edition 1, May 2015 www.keysight.com...
Need help?
Do you have a question about the N9020A and is the answer not in the manual?
Questions and answers