Chapters
Table of Contents

Related Manuals for Daikin McQuay AGZ-D


Summary of Contents for Daikin McQuay AGZ-D
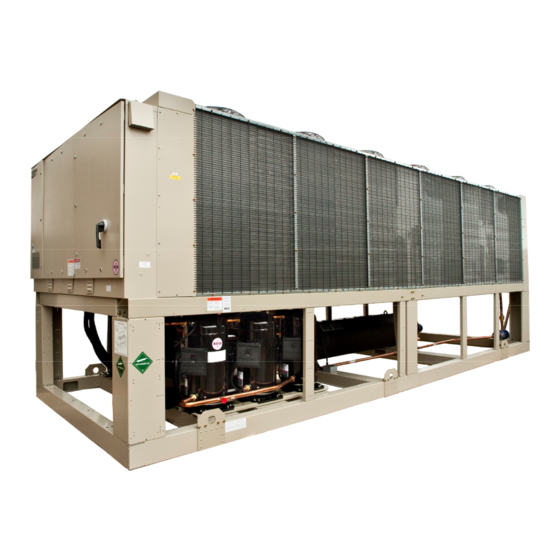
- Page 1 Operating and Maintenance Manual OMM 1087 Group: Chiller Part Number: OMM 1087 Effective: October 2011 Supercedes: October 2010 Air-Cooled Scroll Compressor Chiller AGZ-D 25 to 190 Tons 50 - 60-Hertz, R-410A Software Version 251699101...
-
Page 2: Table Of Contents
Table of Contents Unit Warning Alarms .........38 Introduction........3 Circuit Fault Alarms........38 Operating/Standby Limits......9 Circuit Events..........40 Circuit Warning Alarms ......41 Pressure Drop Curves......9 Events ..........41 MicroTech III Controller .....13 Unit Events ..........42 Controller Section Table of Contents ..13 Circuit Events..........42 Security............ -
Page 3: Introduction
Introduction General Description McQuay Air-Cooled Global Water Chillers are Other features include compressor crankcase complete, self-contained automatic heaters, an evaporator heater for chilled water refrigerating units. Every unit is completely freeze protection, , automatic compressor lead- assembled, factory wired, charged, and tested lag to alternate the compressor starting (except remote evaporator option). - Page 4 Ambient Air Temperature flow is slow and the minimum and maximum flow rates for the vessel are not exceeded. Limitations The recommended maximum change in water flow is 10 percent of the change per minute. Standard/High Ambient Panels The maximum operating ambient temperature When units are operated with flow rates less for standard units is 104F (40C).
- Page 5 Glycol Solutions The use of a glycol/water mixture in the evaporator to prevent freezing reduces system capacity and efficiency, as well as increase pressure drop. The system capacity, required glycol solution flow rate, and pressure drop with glycol may be calculated using Table 1. 1.
- Page 6 Table 4, Ethylene Glycol Factors for Models AGZ 140D to 190D Freeze Point % E.G. Capacity Power Flow -3.3 0.994 0.998 1.038 1.101 -7.8 0.982 0.995 1.063 1.224 -13.9 0.970 0.992 1.095 1.358 -21.7 0.955 0.987 1.134 1.536 -33.3 0.939 0.983 1.184 1.755...
- Page 7 Table 6, Capacity and Power Derates, Models AGZ 025D to 130D Fouling Factor Chilled Water Delta T Altitude 0.0001 (0.0176) 0.00025 (0.044) 0.00075 (0.132) 0.00175 (0.308) °F °C Cap. Power Cap. Power Cap. Power Cap. Power 0.978 0.993 0.975 0.991 0.963 0.987 0.940...
- Page 8 Table 7, Capacity and Power Derates, Models AGZ 140D to 190D Fouling Factor Chilled Water Delta T Altitude 0.0001 (0.0176) 0.00025 (0.044) 0.00075 (0.132) 0.00175 (0.308) °F °C Cap. Power Cap. Power Cap. Power Cap. Power 0.990 0.997 0.976 0.994 0.937 0.983 0.868...
-
Page 9: Operating/Standby Limits
automatic through the ambient sensing the evaporator is drained in the winter, the thermostat that energizes the evaporator heater disconnect switch to the evaporator heater must cable for protection against freeze-up. Unless not be open. Operating/Standby Limits Maximum standby ambient air temperature, 130F (55C) ... - Page 10 Figure 1, Evaporator Pressure Drops. See following page for curve cross-reference See following page for curve cross-reference and min/max flow rates. AGZ Water Pressure Drop 1000 Flow Rate (gpm) AGZ 025D through 190D OMM 1087...
- Page 11 Table 8, Curve Cross-Reference, Min/Nominal/Max Flows Minimum Flow Rate Nominal Flow Rate Maximum Flow Rate AGZ Unit Curve Evaporator Inch-Pound S.I. Inch-Pound S.I. Inch-Pound S.I. Ref. Type Model 025D 41.3 11.0 66.0 26.8 105.6 22.0 65.5 030D 47.4 14.3 75.8 11.7 34.9 121.3...
- Page 12 Figure 2, Typical Field Control Wiring AGZ 025D through 190D OMM 1087...
-
Page 13: Microtech Iii Controller
MicroTech III Controller Controller Section Table of Contents Overview........................14 Controller Inputs and Outputs..................14 Setpoints ........................16 Security ..........................20 Unit Control Functions ....................20 Unit Enable ........................21 Unit Mode Selection ......................22 Unit States........................22 Start Delays........................23 Evaporator Pump Control ....................24 Leaving Water Temperature (LWT) Reset/Target ............25 Unit Capacity Control....................26 Unit Capacity Overrides……………………………………………………………….27 Circuit Control Functions ....................29... -
Page 14: Overview
Overview The MicroTech® III controller’s state-of-the-art design not only permits the chiller to run more efficiently, but also can simplify troubleshooting if a system failure occurs. Every MicroTech IIII controller is programmed and tested prior to shipment to facilitate start-up. Operator-friendly The MicroTech III controller menu structure is separated into three distinct categories that provide the operator or service technician with a full description of :... - Page 15 Table 12, Digital Outputs Description Output Off Output On Evaporator Water Pump 1 Pump Off Pump On Alarm Indicator Alarm Not Active Alarm Active Circuit 1 Fan Output 1 Fan(s) Off Fan(s) On Circuit 1 Fan Output 2 Fan(s) Off Fan(s) On Circuit 1 Fan Output 3 Fan(s) Off...
-
Page 16: Setpoints
Digital Outputs Description Output Off Output On Compressor #2 Compressor Off Compressor On Compressor #4 Compressor Off Compressor On Compressor #6 Compressor Off Compressor On Circuit 2 Hot Gas Bypass SV Solenoid Closed Solenoid Open Circuit 2 Liquid Line SV Solenoid Closed Solenoid Open EXV Module 1 and 2... - Page 17 Unit Level Setpoints: Description Default Range Mode/Enabling Unit Enable Enable Disable, Enable Network Unit Enable Disable Disable, Enable Control source Local Local, Network Cool, Cool w/Glycol, Cool/Ice w/Glycol Available Modes Cool Ice, Test Network Mode Command Cool Cool, Ice Staging and Capacity Control Cool LWT 1 7°C (44.6°F) See Auto Adjusted Ranges, page 19...
- Page 18 Description Default Range High Condenser Pressure Unload 4137 KPA(600 PSI) 3241 to 4137 KPA (470 to 600 PSI) Evaporator Flow Proof 5 sec 5 to 15 sec Recirculate Timeout 3 min 1 to 10 min Evaporator Water Freeze 2.2°C (36°F) See section 5.1.1 Low OAT Start Time 165 sec...
- Page 19 Auto Adjusted Ranges Some settings have different ranges of adjustment based on other settings: Cool LWT 1, Cool LWT 2, and Network Cool Set Point Available Mode Selection Range Without Glycol 4.4 to 15.6 °C (39.9 to 60.1 °F) With Glycol -9.5 to 15.6 °C (14.9 to 60.1 °F) Evaporator Water Freeze Available Mode Selection...
-
Page 20: Security
Security All setpoints are protected using passwords. A four-digit password provides operator access to changeable parameters. Service level passwords are reserved for authorized service personnel. . Operator password: 5321 Entering Passwords Passwords are entered on the first screen on the unit controller, If the wrong password is entered, a message will temporarily appear stating this. -
Page 21: Unit Enable
Stage Up temperature = LWT target + Unit Capacity Control Band – (LWT target – 3.9°C) For applying unit capacity limits, an estimate of If the unit is configured for use with glycol, the total unit capacity is needed. Unit capacity will be compressor staging temperatures are calculated as based on the estimated circuit capacities. -
Page 22: Unit Mode Selection
Unit Mode Selection The operating mode of the unit is determined by request switches between cool mode and ice mode setpoints and inputs to the chiller. The Available if they are both available and the control source is Modes Set Point determines what modes of set to ‘network.’... -
Page 23: Power Up Start Delay
T1 - Off to Auto All of the following are required: Unit Enable = On No Unit Alarm A circuit is enabled to start If Unit Mode = Ice then Ice Delay not active T2 - Auto to Pumpdown Any of the following are required: ... -
Page 24: Evaporator Pump Control
Enum Status Conditions Off:Keypad Disable Unit State = Off and Unit Enable Set Point = Disable Off:Remote Switch Unit State = Off and Remote Switch is open Unit State = Off, Control Source = Network, and BAS Enable = Off:BAS Disable false Off:Unit Switch Unit State = Off and Unit Switch = Disable... -
Page 25: Lwt Target
T3 – Run to Off Requires all of the following Unit state is Off LWT is higher than the Evap Freeze set point or LWT sensor fault is active T4 – Start to Off Requires all of the following ... -
Page 26: Unit Capacity Control
Local COOL/ICE Cool Set Point 1 w/Glycol Local COOL/ICE Ice Set Point w/Glycol Network COOL COOL/ICE BAS Cool Set Point w/Glycol Network COOL/ICE BAS Ice Set Point w/Glycol Local ICE w/Glycol Ice Set Point Network ICE w/Glycol BAS Ice Set Point Leaving Water Temperature (LWT) Reset The base LWT target may be reset if the unit is in Cool mode and LWT reset is enabled via the set point. -
Page 27: Unit Capacity Overrides
The unit should shut down when evaporator LWT is less than the LWT target. Stage Up Delay A fixed stage up delay of one minute between compressor starts should be used in this mode. Staging Sequence This section defines which compressor is the next one to start or stop. In general, compressors with fewer starts will normally start first, and compressors with more run hours will normally stop first. - Page 28 Limit ≥ 83.3% Limit ≥ 17.3 mA 83.3% > Limit ≥ 66.7% 17.3 mA > Limit ≥ 14.7 mA 66.7% > Limit ≥ 50% 14.7 mA > Limit ≥ 12mA 50% > Limit ≥ 33.3% 12 mA > Limit ≥ 9.3 mA 33.3% >...
-
Page 29: Circuit Functions
Circuit Functions Definitions Refrigerant Saturated Temperature Refrigerant saturated temperature shall be calculated from the pressure sensor readings for each circuit. Evaporator Approach The evaporator approach shall be calculated for each circuit. The equation is as follows: Evaporator Approach = LWT – Evaporator Saturated Temperature Condenser Approach The condenser approach shall be calculated for each circuit. - Page 30 Transitions between these states are shown in the following diagram. T1 – Off to Preopen No compressors are running and any compressor on circuit is commanded to start (see unit capacity control) T2 – Preopen to Run 5 seconds has passed T3 –...
-
Page 31: Pumpdown Procedure
and unload alarms are disabled. The absolute limit Pumpdown Procedure for low evaporator pressure is enforced and the Pumpdown is performed as follows: low evaporator pressure alarm should trigger if the evaporator pressure drops below that limit. If multiple compressors are running, shut off When the Low OAT Start Timer has expired, if the appropriate compressors based on the evaporator pressure is greater than or equal to... -
Page 32: Condenser Fan Control
Stopping a Compressor A compressor should be turned off if any of the following occur: Unit capacity control logic commands it off An unload alarm occurs and the sequencing requires this compressor to be next off Circuit state is pumpdown and sequencing requires this compressor to be next off Cycle Timers A minimum time between starts of the compressor and a minimum time between shutdown and start of the compressor shall be enforced. - Page 33 Condenser Target A condenser target should be selected from the bands. Stages five through seven should all use setpoints based on the number of compressors on Stage Down Dead Band 4. the unit and the number of compressors running. When saturated condenser refrigerant...
-
Page 34: Exv Control
EXV Control Auto Control Any time the circuit is not in the run state, the Pressure set point. This is done by using another EXV position should be 0. The EXV control state PID function to control evaporator pressure to the should display that the EXV state is closed when maximum evaporator pressure. -
Page 35: Liquid Line Solenoid Valve
Liquid Line Solenoid Valve keep the circuit from entering a condition in which it is not designed to run. The liquid line solenoid output should be on when Low Evaporator Pressure the circuit state is either Pre-open or Run. This output should be off at all other times. - Page 36 For the auto reset occurrences, the alarm will reset automatically when the evaporator state is Run again. This means the alarm stays active while the unit waits for flow, then it goes through the recirculation process after flow is detected. Once the recirculation is complete, the evaporator goes to the Run state which will clear the alarm.
-
Page 37: Unit Problem Alarms
EXV Module 1 Comm Failure Trigger: Expansion Valve Type = Electronic and communication with the I/O extension module has failed. Action Taken: Rapid stop of circuit 1. Reset: This alarm can be cleared manually via the keypad or BAS command when communication between main controller and the extension module is working for 5 seconds or Expansion Valve Type = Thermal. -
Page 38: Unit Warning Alarms
Unit Warning Alarms External Event Trigger: External Alarm/Event input is open for at least 5 seconds and external fault is configured as an event. Action Taken: None Reset: Auto clear when digital input is closed. Bad Demand Limit Input Trigger: Demand limit input out of range and demand limit is enabled. For this alarm out of range is considered to be a signal less than 3mA or more than 21mA. - Page 39 Freezestat logic allows the circuit to run for varying times at low pressures. The lower the pressure, the shorter the time the compressor can run. This time is calculated as follows: Freeze error = Low Evaporator Pressure Unload – Evaporator Pressure Freeze time = For units equipped with 10 or more condenser fans (shell and tube type evaporator): 80 –...
-
Page 40: Circuit Events
No Pressure Change After Start Trigger: After start of compressor, at least a 7 KPA (1 PSI) drop in evaporator pressure OR 35 KPA (5.1 PSI) increase in condenser pressure has not occurred after 15 seconds. The actual alarm will not be triggered until the second occurrence. -
Page 41: Circuit Warning Alarms
Low Evaporator Pressure - Unload Trigger: This event is triggered if all of the following are true: circuit state = Run more than one compressor is running on the circuit evaporator pressure <= Low Evaporator Pressure - Unload set point for a time greater than half of the current freezestat time ... -
Page 42: Unit Events
Unit Events Unit Power Restore Trigger: Unit controller is powered up. Action Taken: none. Reset: none. Circuit Events Low Evaporator Pressure - Hold Trigger: This event is triggered if all of the following are true: circuit state = Run ... -
Page 43: Clearing Alarms
Action Taken: Stage off one compressor on the circuit every 10 seconds while condenser pressure is higher than the unload set point, except the last one. Inhibit staging more compressors on until the condition resets. Reset: While still running, the event will be reset if condenser pressure <= High Condenser Pressure Unload SP –... -
Page 44: Using The Controller
Using the Controller Figure 3, Unit Controller Alarm Button Menu Button Navigation Wheel Return Button Display The keypad/display consists of a 5-line by 22-character display, three buttons (keys) and a “push and roll” navigation wheel. There is an Alarm Button, Menu (Home) Button, and a Back Button. The wheel is used to navigate between lines on a screen (page) and to increase and decrease changeable values when editing. -
Page 45: Navigating
When the cursor is on a line the highlights will look like this: If line contains a changeable value> Evaporator Delta T= 10.0F If the line contains status-only information> Unit Status= Or a line in a menu may be a link to further menus. This is often referred to as a jump line, ... - Page 46 Navigation Mode When the navigation wheel is turned clockwise, the cursor moves to the next line (down) on the page. When the wheel is turned counter-clockwise the cursor moves to the previous line (up) on the page. The faster the wheel is turned the faster the cursor moves. Pushing the wheel acts as an “Enter”...
-
Page 47: Menus
Alarm Active and Alarm Log. Alarms are cleared from the Active Alarm link. Press the wheel to jump to the next screen. With the first line highlighted, press the wheel to enter edit mode. Rotate wheel until AlmClr is set to On, then press wheel to clear the alarms. Menus Screens with titles and contents are shown in leftmost column of Table 13. - Page 48 Enter PW Screen U-3 From Screen U-1 Quick Menu No password Operator Links to screen Unit Status Active Setpoint Evap Leaving Water Temp Evap Entering Water Temp Unit Capacity Network Limit Value Demand Limit Value Unit Mode Control Source Screen U-4 From Screen U-1 View/Set Unit No password...
- Page 49 Compressor 4 Cycle Time Remaining Compressor 5 Cycle Time Remaining Compressor 6 Cycle Time Remaining Clear Cycle Timers Screen U-7 From Screen U-1 Alarms No password Operator Links to screen Alarm Active U-30 Alarm Log U-31 Event Log U-32 Screen U-8 From Screen U-1, U-9, U-11 Scheduled Maintenance No password...
- Page 50 U-21 Modbus Setup AWM Setup U-22 Ctrlr IP Setup U-24 Alarm Active U-30 Alarm Log U-31 Scheduled Maintenance Manual Control Unit U-34 Manual Control Circuit 1 Cx-3 Manual Control Circuit 2 Cx-3 Screen U-12 From Screen U-1, U11 About Chiller No password Operator Links to screen...
- Page 51 Screen U-14 From Screen U-4, U11 Set-Up No password Operator Links to screen Available Modes Start Up DT Shut Down DT Max Pulldown Rate Stage Up Delay Stage Down Delay Start To Start Delay Stop To Start Delay Ice Cycle Delay External Fault Config Display Units Screen U-15...
- Page 52 Screen U-18 From Screen U-4, U-11 LON Setup No password Operator Links to screen Neuron ID Max Send Time Min Send Time Receive Heartbeat LON BSP LON App Version Screen U-19 From Screen U-4, U-11 BACnet IP Setup No password Operator Links to screen Apply Changes...
- Page 53 Screen U-21 From Screen U-4, U-11 Modbus Setup No password Operator Links to screen Response Delay Comm LED Time Out Modbus BSP Screen U-22 From Screen U-4, U-11 AWM Setup No password Operator Links to screen Apply Changes DHCP Actual IP Address Actual Mask Actual Gateway Given IP Address...
- Page 54 Screen U-25 From Screen U-4 Design Conditions No password Operator Links to screen Screen U-25 From Screen U-4 Design Conditions No password Operator Links to screen Cond Design Approach Unit Full Load Efficiency Unit Integrated Part Load Value Rated Capacity Screen U-26 From Screen U-4, U-11 Alarm Limits...
- Page 55 Screen U-30 From Screen U-7, U-9, U-11 Alarm Active No password Operator Links to screen Active Count Alarm Clear Active Alarm 1 … Active Alarm n Screen U-31 From Screen U-7, U-9, U-11 Alarm Log No password Operator Links to screen Log Count Log Clear Active Alarm 1...
- Page 56 Continued next page. Screen U-34 From Screen U-10, U-11 Unit Manual Control No password Operator Links to screen LWT Reset Signal Current Demand Limit Signal Current Unit Alarm Output State Evaporator Pump 1 Output State Evaporator Pump 2 Output State Screen U-35 From Screen U-11 Calibrate Circuit Sensors...
- Page 57 Continued next page. Screen Cx-2 From Screen U-9 Circuit x Status/Settings No password Operator Links to screen Evap Leaving Water Temp Evap Entering Water Temp Evap Approach Evap Approach @ Design Evaporator Pressure Evaporator Saturated Temperature Condenser Pressure Condenser Saturated Temperature Suction Temperature Suction Superheat Compressor 1/2...
- Page 58 Continued next page. Screen Cx-3 From Screen U-10, U-11 Circuit x Manual Control No password Operator Links to screen Test Fan Output 2 Test Fan Output 3 Test Fan Output 4 Test Fan Output 5 Test Fan VFD Speed Input/Output Values Circuit Switch Input State MHP Switch Input State Motor Protector Input State...
- Page 59 Screen Cx-6 From Screen Cx-1 Condenser No password Operator Links to screen Number of Fans Running Number of Fans Stage Up Error Stage Down Error Condenser Sat Temp Condenser Target VFD Target VFD Speed Stage On Dead Band 1 Stage On Dead Band 2 Stage On Dead Band 3 Stage On Dead Band 4 Stage Off Dead Band 1...
-
Page 60: Optional Low Ambient Fan Vfd
Number Of Starts Optional Low Ambient Fan VFD The optional VFD fan control is used for unit operation below 35F (2C) down to a minimum of -10F (-23C). The control looks at the saturated discharge temperature and varies the fan speed to hold the temperature (pressure) at the “target”... -
Page 61: Vfd Interface (Hmi)
VFD Interface (HMI) The HMI is located in the lower left-hand corner of the unit control panel. It is used to view data including fault and alarm information. No operator intervention on this control is required for normal unit operation. Table 14, Display Key Functions Table 15, Display Key Functions Display... - Page 62 LCD Display Table 16, Display Data Name Display Content Displayed when in Mode Selection. MODE Displayed when in Monitor Mode. MONITR VERIFY Indicates the Verify Menu Operation Mode Menus PRMSET Displayed when in Parameter Setting Mode. A.TUNE Displayed during Auto-Tuning. SETUP Displayed when in Setup Mode.
- Page 63 Table 17, Alarm Content State Content Display Illuminated When the drive detects an alarm or error When an alarm occurs Flashing When an oPE is detected When a fault or error occurs during Auto-Tuning Normal operation (no fault or alarm) Table 18, LO/RE LED and RUN LED Indictors Flashing Slowly Flashing Quickly...
- Page 64 Table 19, Types of Alarms, Faults, and Errors Type Drive Response When the drive detects a fault: • The digital operator displays text indicating the specific fault and the ALM indicator LED remains lit until the fault is reset. • The fault interrupts drive output and the motor coasts to a stop. • Some faults allow the user to select the stopping Faults method when the fault occurs.
-
Page 65: Recommended Periodic Inspection
Recommended Periodic Inspection WARNING Electrical Shock Hazard. Before servicing or inspection equipment, disconnect power to the unit.The internal capacitor remains charged after power is turned off. Wait at least the amount of time specified on the drive before touching any components. Table 21, Periodic Inspection Checklist Inspection Area Inspection Points... -
Page 66: Startup
Startup Pre Start-up The chiller must be inspected to ensure no components became loose or damaged during shipping or installation. Start-Up Refer to the MicroTech III Controller section beginning on page 13 to become familiar with its operation before starting chiller. There should be adequate building load (at least 50 percent of the unit full load capacity) to properly check the operation of the chiller refrigerant circuits. - Page 67 Extended 1. Front seat (close) both condenser liquid line service valves. 2. Put both circuit switches (PS1 and PS2) to the OFF position (Pumpdown and Stop position). 3. After the compressors have stopped, put System Switch (SW1) to the OFF position (emergency stop).
-
Page 68: Operation
4. Put both circuit #1 & #2 switches to the Pumpdown and Stop position. 5. Apply power to the unit. The panel Alarm Light will stay on until S1 is closed. Ignore the Alarm Light for the check out period. If you have the optional Alarm Bell, you may wish to disconnect it. 6. - Page 69 Pressure drop across the filter drier at full load conditions must not exceed 10 psig at full load. See page for maximum pressure drop at other load points. Replace the filter drier if the pressure drop exceeds maximum. WARNING Pump out refrigerant before removing end flange for replacement of core(s) to remove liquid refrigerant and lower pressure to prevent accidental blow off of cover.
- Page 70 The evaporator is protected with an electric resistance heater and insulated with 3/4" (19mm) thick closed-cell polyurethane insulation. This combination provides freeze protection down to -20°F (- 29°C) ambient air temperature. The water side working pressure is 363 psig (2503 kPa). Evaporators are designed and constructed according to, and listed by, Underwriters Laboratories (UL).
-
Page 72: Unit Maintenance
Unit Maintenance available at most air conditioning supply General outlets. Use caution when applying such On initial start-up and periodically during cleaners as they can contain potentially operation, it will be necessary to perform harmful chemicals. Care should be taken not to certain routine service checks. -
Page 73: Planned Maintenance Schedule
Liquid Line Sight Glass add charge to clear the sight glass. If subcooling is normal (15 to 20 degrees F) and The refrigerant sight glasses should be flashing is visible in the sight glass, check the observed periodically (a weekly observation pressure drop across the filter-drier. -
Page 74: Service
Service R-410A Avoid rough handling of cylinders and secure Refrigerant Terminology as appropriate. Cap when not in use. Bubble Point: The temperature/pressure where Do not overfill recovery cylinders or bubbles first appear when heat is added to a overcharge units. liquid refrigerant. -
Page 75: Refrigerant Charging
Use only filter driers designed for POE and Charging procedure. The units are factory- check pressure drops frequently. charged with R-410A. Use the following procedure if recharging in the field is Test for acid and color at least annually. necessary: Change filter driers if acid or high moisture (>... - Page 76 Special tools will be required due to higher refrigeration tubing only. Use nitrogen purge. refrigerant pressures with R-410A. Oil-less/hp Higher R-410A pressures and smaller molecule recovery units, hp recovery cylinders (DOT size make workmanship more critical. approved w/525# relief), gauge manifold 30”- R-410A must be charged from cylinder as a 250 psi low/0-800 psi high, hoses w/800 psi liquid unless entire cylinder is used.
-
Page 77: Liquid Line Solenoid Valve
Liquid Line Solenoid Valve The solenoid coil can be removed from the valve body without opening the refrigerant The liquid line solenoid valves that shut off piping after pumpdown. For personal safety, refrigerant flow in the event of a power failure shut off and lock out the unit power. -
Page 78: Agz-D Troubleshooting Chart
AGZ-D Troubleshooting Chart PROBLEM POSSIBLE CAUSES POSSIBLE CORRECTIVE STEPS Main switch. Close switch. Check electrical circuits and motor windings for shorts or grounds. Investigate for possible overloading. Fuse blown. circuit breakers open Replace fuse or reset breakers after fault is corrected. Check for loose or corroded connections. -
Page 80: Warranty Statement
PROBLEM POSSIBLE CAUSES POSSIBLE CORRECTIVE STEPS Oil hang-up in piping Review refrigerant piping and correct. Low oil level Check and add oil. Loose fitting on oil line Check and tighten system. Compressor Oil Level too high Adjust thermal expansion valve. Level Too High Or Insufficient water flow - Level too high Adjust flow. - Page 82 McQuay Training and Development Now that you have made an investment in modern, efficient McQuay equipment, its care should be a high priority. For training information on all McQuay HVAC products, please visit us at www.mcquay.com and click on training, or call 540-248-9646 and ask for the Training Department. Warranty All McQuay equipment is sold pursuant to its standard terms and conditions of sale, including Limited Product Warranty.
Need help?
Do you have a question about the McQuay AGZ-D and is the answer not in the manual?
Questions and answers