
Related Manuals for SIGLENT SPD3303C


Summary of Contents for SIGLENT SPD3303C
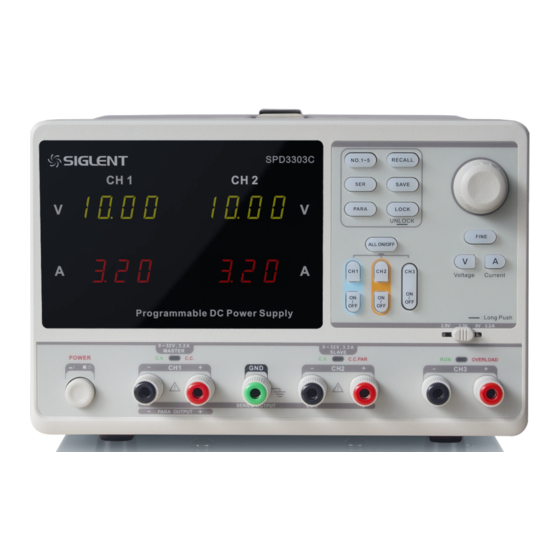
- Page 1 Service Manual SPD3303C Programmable DC Power Supply SM0503C-E01A 2017 SIGLENT TECHNOLOGIES CO., LTD...
-
Page 3: Guaranty And Declaration
Declaration SIGLENT products are protected by patent law in and outside of P.R.C. SIGLENT reserves the right to modify or change parts of or all the specifications or pricing policies at company’s sole decision. Information in this publication replaces all previously corresponding material. -
Page 4: General Safety Summary
Use Proper Fuse. Use only the specified fuse. Do Not Operate Without Covers. Do not operate this instrument with covers or panels removed. 2 SPD3303C Service Manual... - Page 5 Do Not Operate With Suspected Failures. If you suspect damage occurs to this instrument, have it inspected by qualified service personnel before further operation. Any maintenance, adjustment or replacement especially to the circuits or accessories should be performed by SIGLENT authorized personnel. Keep Product Surfaces Clean and Dry.
-
Page 6: Table Of Contents
Voltage Checking ......................... 27 Check the Main Board ......................29 Voltage Checking ......................... 29 Quick Guide for General Failures ..................30 Maintenance ..........................31 Maintain Summary ....................... 31 Repackaging for Shipment ....................31 Contact SIGLENT ......................... 32 4 SPD3303C Service Manual... -
Page 7: Specification
Current:± (0.5% of reading + 2digits) 20MΩor above (DC 500V) Insulation Case to terminal 30MΩor above (DC 500V) Case to AC line Operating Indoor ≤2000 m environment Elevation Environment temperature 0 ~ 40℃ ≤80% Relative humidity Ⅱ Installation level SPD3303C Service Manual 5... - Page 8 Pollution level Storage Environment temperature -10 ~ 70℃ ≤ 70% environment Relative humidity Power supply AC 100V/120V/220V/230V±10%, 50/60HZ Size 275mm x 225mm x 136mm Weight 7.5kg 6 SPD3303C Service Manual...
-
Page 9: Calibration
Accuracy specifications will remain valid only if adjustment is made at regular calibration intervals. Accuracy specifications are not valid beyond the1-year calibration interval. SIGLENT does not recommend extending calibration intervals beyond 2 years for any application. -
Page 10: Test Considerations
The acceptance test results should be compared against the specifications given in chapter “Specification”. After acceptance, repeat the performance verification tests at every calibration interval. If the instrument fails performance verification, adjustment or repair is required. 8 SPD3303C Service Manual... -
Page 11: Constant Voltage (Cv) Test
Constant Voltage (CV) Test 1. Set the DMM to measure DC voltage. Connect the DMM to the CH1(CH2) output of the SPD3303C as shown below. 2. Turn on CH1(CH2) and change the current setting value to 0.1A. 3. Set the instrument to each output value described in the table below, then verify the voltage readback value and measure the output voltage with the DMM.. -
Page 12: Constant Current (Cc) Test
1. Set the DMM to measure DC current. Set the DC Electronic Load to constant current mode and set the current value to 3.2A. Connect the DMM to the CH1(CH2) output of the SPD3303C as shown below. 2. Turn on CH1(CH2) and change the voltage setting value to 30V. -
Page 13: General Adjustment Procedure
General Adjustment Procedure The following explains how to adjust the SPD3303C power supply for optimum operating performance. Output Voltage Calibration which calibrates the output voltage accuracy. Output Current Calibration which calibrates the output current accuracy. Software Environment 1. Python Make sure you have installed Python 2.7 in your computer. -
Page 14: Output Current Calibration
Output Voltage Calibration 1. Connect the DMM, PC and SPD3303C generator as shown below: 2. Double click and run the script VoltageCalib.py prepared previously. Then Change the channel connection according to the prompt message. 12 SPD3303C Service Manual... -
Page 15: Output Voltage Calibration
Output Current Calibration 1. Connect the DMM, PC and SPD3303C generator as shown below: 2. Double click and run the script CurrentCalib.py prepared previously. Then Change the channel connection according to the prompt message. SPD3303C Service Manual 13... -
Page 16: Assembly Procedures
Assembly Procedures This chapter describes how to remove the major modules from the SPD3303C series generator. To install the removed modules or replace new modules, please follow corresponding operating steps in reverse order. Security Consideration Only qualified personnel should perform the disassembly procedures. -
Page 17: Disassembly Procedures
Remove the 2 PCS KM4 * 16 screw, handle fixed tablet (2 PCS) and handle. handle handle fixed tablet Step 2: Remove the metal plate Remove 6 PCS screw on two sides,then remove the metal cover plate. SPD3303C Service Manual 15... - Page 18 Metal cover plate Step 3: Remove the handle strut bone Removed 4 PCS screws as shown in the figure below, and remove the strut bone according to the direction indicated by the arrow. 16 SPD3303C Service Manual...
- Page 19 Step 4: Separate the front panel and the hardware components Remove 4 PCS screws and the cables between the front panel and hardware baseboard, remove the front panel and the power button. SPD3303C Service Manual 17...
- Page 20 PCS terminal can be removed; Remove 4 PCS screw between the metal front panel and plastic shell, then the metal front panel can be removed; Remove 6 PCS screw on key board, then the key board can be removed 18 SPD3303C Service Manual...
- Page 21 Main control board Knob Wave button cap Terminal SPD3303C Service Manual 19...
- Page 22 Metal front panel 20 SPD3303C Service Manual...
- Page 23 Key board board Step 6: Remove hardware components Remove 4 PCS screws and the cable between hardware rear pannel and hardware baseboard, then the hardware components can be removed SPD3303C Service Manual 21...
- Page 24 Step 8: Remove hardware main component Remove 10 PCS screws and the cables, then the small power board and power switch board can be removed; Remove the 8 PCS screws, then the transformer and floor mats can be removed. 22 SPD3303C Service Manual...
- Page 25 Transformer Power board Power switch board Note: To assemble the generator, please follow these same steps in reverse order. SPD3303C Service Manual 23...
-
Page 26: Troubleshooting
Troubleshooting The internal structure of the SPD3303C Power Supply consists of power board, main board and switching board, and they are linked through cables or connectors. This chapter explains the main checking procedures for these three boards by measuring the rated test points on them, thus to help you decide the reason for the failure you encounter while operating SPD3303C. -
Page 27: Power Board Drawing
Power Board Drawing Power Board mainly works on rectifiers. Please refer to the following drawing to quickly locate the test points on the analog board for easy resolution of the failures you encounter. SPD3303C Service Manual 25... -
Page 28: Main Board Drawing
Power Supply. It completes the GUI function, controlling and configuration function for power board as well as man-machine interaction. Please refer to the following drawing to quickly locate the test points on the main board for easy resolution of the failures you encounter. 26 SPD3303C Service Manual... -
Page 29: Check The Power Board
2. Make sure that the connectors on the power board are properly connected, then connect the SPD3303C to AC power and turn it on. Check if the voltage values at all test points are within the spec range using a digital multimeter. - Page 30 3 to 2 ±0.5 -15 VDC F101 Good? F201 Good? FUSE F301 Good? 28 SPD3303C Service Manual...
-
Page 31: Check The Main Board
2. Make sure that the connectors on the main board are properly connected, then connect the SPD3303C to AC power and turn it on. Check if the voltage values at all test points are within the spec range using a digital multimeter. -
Page 32: Quick Guide For General Failures
(4) Check if the power connector is properly connected to the main board and power board. (5) If the instrument still does not work normally, please contact SIGLENT. 2. The instrument starts up with a dark screen: (1) Check if the power connector is properly connected to the main board. -
Page 33: Maintenance
In no case shall SIGLENT be liable for indirect, special or consequential damages. Repackaging for Shipment If the unit needs to be shipped to SIGLENT for service or repair, be sure: 1. Attach a tag to the unit identifying the owner and indicating the required service or repair. -
Page 34: Contact Siglent
Contact SIGLENT SIGLENT TECHNOLOGIES CO., LTD Address: 3/F, NO.4 building, Antongda Industrial Zone, 3rd Liuxian Road, 68th District, Baoan District, Shenzhen, P.R. China Tel: 400-878-0807 E-mail: sales@siglent.com http: //www.siglent.com In North America: http://www.siglentamerica.com 32 SPD3303C Service Manual...
Need help?
Do you have a question about the SPD3303C and is the answer not in the manual?
Questions and answers