Advertisement
Advertisement
Table of Contents

Related Manuals for HandHeld ALGIZ RT10


Summary of Contents for HandHeld ALGIZ RT10
- Page 1 ALGIZ RT10 MANUAL www.handheldgroup.com...
- Page 2 FEDERAL COMMUNICATIONS COMMISSION This equipment has been tested and found to comply with the limits for a Class B digital device, pursuant to Part 15 of the FCC Rules. Operation is subject to the following two conditions: (1) this device may not cause interference, and (2) this device must accept any interference, including interference that may cause undesired operation of the device. IEEE 802.11b or 802.11g operation of this product is firmware‐limited to channels 1 through 11. These ...
- Page 3 RF exposure warning A separation distance of 10mm shall be maintained from the Human body in normal use. RF exposure information (SAR) This Rugged Tablet PC meets the government's requirements for exposure to radio waves. This Rugged Tablet PCis designed and manufactured not to exceed the emission limits for exposure to radio frequency (RF) energy set by the Federal Communications Commission of the U.S. Government. The exposure standard for wireless Rugged Tablet PC employs a unit of measurement known as the Specific Absorption Rate, or SAR. The SAR limit set by the FCC is 1.6W/kg. Tests for SAR are conducted ...
-
Page 4: Table Of Contents
Table of Contents Table of Contents5 1.888 2.888 2.1999 2.1.1 Barcode Scanner13 2.1.1414 2.1.3 Physical Layout14 3.171717 3.1 SIM Card Insertion17 3.2 SD Card Insertion18 3.3 Charging the Device18 4.191919 4.1 Power ON19 4.2 Audio Volume19 4.3 2020 4.4 2020 4.4.1 2121 4.5 2121 4.6 Lock Screen22 4.7 Quick Settings23 4.7.1.232323 4.7.2.232323 4.7.3.232323 4.7.4.242424 4.7.5.242424 4.7.6.242424 4.7.7.242424 4.7.8.242424 4.7.9.242424 4.7.10.242424 4.8 Send a SMS24 4.9 2424 4.10252525 4.11252525 4.12252525 4.13252525 4.14252525 Version 1.0 ... - Page 5 4.15252525 4.16252525 4.17252525 5262626 5262626 5.1.1272727 5.1.2303030 5.1.3313131 5.1.4323232 5.1.5333333 5.1.6353535 5.1.7353535 5.1.8353535 5.2363636 5.2.1363636 5.2.2414141 5.2.3414141 5.2.4414141 5.2.5414141 5.2.6424242 5.2.7424242 5.3434343 5.4444444 5.5454545 5.5.1 464646 5.5.2464646 5.5.3464646 5.5.4 Wallpaper46 5.5.5474747 5.6494949 5.7494949 5.7.1505050 5.7.2515151 5.7.3525252 5.8535353 5.8.1535353 5.8.2535353 5.9535353 Version 1.0 ...
- Page 6 5.9545454 5.10545454 5.11555555 5.11.1555555 5.11.2555555 5.11.3565656 5.11.4565656 5.11.5565656 5.11.6575757 5.11.7585858 5.12595959 6.595959 6.1 Internal Storage59 6.2606060 6.3606060 7616161 7.1616161 7.2616161 7.3616161 7.4616161 7.5616161 7.6616161 7.7616161 8626262 8.1626262 8.2626262 8.2.1626262 8.2.2646464 9.646464 9.1656565 106666666666 11676767 12676767 Version 1.0 ...
- Page 7 1. INTRODUCTION This guide covers the Algiz RT10 tablet, and optional accessories. The Algiz RT10 is a rugged tablet, designed for use by field personnel in demanding conditions. It integrates best ‐ in‐class connectivity with efficient computing and multimedia features. The tablet runs Android Pie 9 operating system, and comes pre‐installed with many Google applications, including Google Play. NOTE: The images in this guide may slightly differ from the actual screens that you see in the device. 2. REGULATORY The 15.203 antenna requirements 1) An intentional radiator shall be designed to ensure that no antenna other than that furnished by the responsible party shall be used with the device. Adherence ‐ In our design we are using customized antenna made of a carrier and conductive part (pogo spring pins) which makes contact with the antenna pads of PCB. This is not the standard type and hence any other antenna cannot be used in place of currently used antenna. This approach is applicable for both cellular as well as non‐cellular RF sections. The pictures of the customized antenna are available in the above section. 2) Further, this requirement does not apply to intentional radiators that must be professionally installed, such as perimeter protection systems and some field disturbance sensors, or to other intentional radiators which, in accordance with § 15.31(d), must be measured at the installation site. However, the installer shall be responsible for ensuring that the proper antenna is employed so that the limits in this part are not exceeded. 3) Adherence the antenna in our EUT (tablet) cannot to remove by a user as the antenna is fixed inside the unit. Removal of antenna requires the unit to be sent to service Centre where the professionally trained person removes/replaces/reworks the antenna if at all necessary. Version 1.0 ...
- Page 8 2.1 Device Specification The base specifications of the Algiz RT10 tablet are below: Parameters Description Snapdragon 820 CPU (APQ8096 SOC) Processor 64‐bit Quad Kryo core Adreno 530 3D Graphics @624MHz OS Android Pie 9 Application Compatibility 64 bit and 32 bit applications are supported 10.1” TFT display Display High‐brightness (600 nits) Touch Panel 10 point capacitive touch panel Chemically strengthened glass 10.1” widescreen 1920x1200 resolution IPS Panel with 600nits Brightness for outdoor condition Screen Quad‐band GSM, 3G, LTE. Voice calling support WWAN Data connectivity over 2G, 2.5G, 3G and LTE networks Sim Slot 1 Micro SIM slot ...
- Page 9 1 x USB 2.0 port 1 X RJ45 for Ethernet 10/100/1000 LAN 1 x USB 3.0 Data Connectivity and Power input Supports 1 x micro SD Slot 2x8 Pin Rear Docking Connector Connections 1 x 16 pin docking connector for LTE/GPS/WLAN Accelerometer, Three‐axis Gyroscope , E‐compass , Light sensor, Sensors Pressure sensor, SAR Sensor Audio 1 Noise cancelling microphone and Speaker Haptic Feedback Internal vibrator Accessibility Four user programmable hot‐keys Input Devices USB keyboard & mouse, BT keyboard & mouse Battery Hot‐swappable 7500mAH Li‐Polymer Battery Pack Two Multicolor LEDs, One Barcode scanner notification LED, Notification Vibration motor Operating ‐20 C to 50 C ( ‐4 F TO 122 ) MIL‐STD‐810G, Method 501.5/502.5 Procedure II, III ...
- Page 10 The Algiz RT10 is available as four SKUs: ALGIZRT10‐B‐EU This model supports the LTE bands prevalent in the European Union ALGIZRT10‐B‐EU‐BC Equivalent to the ALGIZRT10‐EU, with the barcode scanner module This model supports the LTE bands prevalent in the North American region ALGIZRT10‐B‐NA TABLE 2.1. LTE BAND SUPPORT NA Model GSM 850 and GSM1900 (GSM900 and GSM1800 roaming) UMTS B2, B4, B5 (B1 and B8 roaming) LTE B2, B4, B5, B13, B17 (B1 and B8 roaming) TABLE 2.1. LTE BAND SUPPOR Version 1.0 ...
-
Page 11: Barcode Scanner13
2.1.1 Barcode Scanner The Barcode scanner module is designed with support for 2D‐Imager N6603 from Honeywell. Detailed specifications are below: Scanner Engine Honeywell N6603 Version 1.0 ... - Page 12 Sensor Proprietary CMOS sensor with global shutter Imager Resolution 844 x 640 pixels Field of View Horizontal 42.4° degree, Vertical 33° degree Skew Tolerance +‐ 60 degrees Pitch Tolerance +‐ 45 degrees Roll Tolerance +‐ 360 degrees Focal Distance From front of engine: 7.64 in Aiming LED 610nm Green Linear LED Illumination LED 610nm White LED Input Voltage 3.3 VDC ± 5% TABLE 2.2. BARCODE DECODE RANGES As shown in the specifications, barcode scanning is tolerant to a wide range of orientations. Figure 2.1, Decoding skew illustrates the same measured on a 20 mil code 39 symbol at a distance of 5 inches. Note that tolerance for skew and pitch is reduced at the extreme ends of the working range. FIGURE 2.1. DECODING SKEW 2.1.2 Accessories The Algiz RT10 comes with the following accessories: 3.6‐6Vout/3A, 6‐9Vout/2A, 9‐12Vout/1.5A DC, Inter changeable plugs, Wall mount Version 1.0 ...
-
Page 13: Physical Layout14
USB cable Battery pack Quick Start Guide For best performance, we strongly recommend that you use only the supplied charger with this tablet. 2.1.3 Physical Layout Front Panel The front side of the device, shown in figure 2.1. “Front panel” is where the user interacts with the device. It consists of: Front Camera Light Sensor Mic Red & Green LED Display and Touch panel Finger Print Panel Barcode Indication LED Charging and Notification Indicator Power On / Off Barcode Key Programmable Key Version 1.0 ... - Page 14 Diagram – Figure 2.1 front panel Back Panel The back panel (shown in figure 2.2, “Back panel”) include the following items. Flash LED Rear Camera Rear Dock Speaker Mic Battery Pack Diagram – FIGURE 2.2. BACK PANEL Version 1.0 ...
- Page 15 Left Side Panel The left panel is shown in figure 2.3, “Left side Panel”. FIGURE 2.3. LEFT SIDE PANEL Right Side Panel The Right Panel of the device, shown in figure 2.4, “Right Side Panel” port cluster with below listed ports: Ethernet port USB A port TYPE C USB port HDMI port FIGURE 2.4, RIGHT SIDE PANEL Top Panel The device is configured with the optional barcode scanner module that can be seen on the Top panel. The top side of the device is shown in figure 2.5, “Top Panel” hosts the button panel Figure 2.5. TOP PANEL Bottom Panel The bottom Panel is shown in figure 2.6, “Bottom Panel”. Figure 2.6. BOTTOM PANEL Version 1.0 ...
-
Page 16: Sim Card Insertion17
3. DEVICE SETUP SIM Card Insertion ALGIZ RT10 Tablet support Single Nano SIM card. The SIM Card Slot are on Back side of the Tablet as shown in Figure 3.1, "SIM Card Slots". To insert the card: Power OFF the tablet Place the tablet on flat surface, with the screen facing down Remove the battery pack Insert the SIM Card You can see more details about inserted SIM cards in Device Setup. Se ngs → Networks & Internet → SIM cards Version 1.0 ... -
Page 17: Sd Card Insertion18
3.2 SD Card Insertion This tablet supports a single micro SD card for secondary storage. SD card slot is on back side of tablet, under the battery cover as shown in figure 3.2, “SD Card Slot”. Once SD card is inserted successfully, you can check its details in ‐ Se ngs → Storage → SD card 3.3 Charging the Device We recommend that you fully charge the battery prior to first use. A high power USB port is provided; we recommend that this is used to charge the device. When a charger is connected, the charging LED on the device gives a visual indicator of the state of charge: Green LED Green indicates that the battery is fully charged (100%) Red Solid LED Red Solid LED indicating Battery is charging In rare cases, during use, the battery may discharge to a very weak state. In such a state, when a user attempts to turn on the device using the power button, the device may not respond. To recover from this, connect the charger to the device. The LED will then glow red, and stay that way for a few minutes. The device will then boot into charging mode. Version 1.0 ... -
Page 18: Power On19
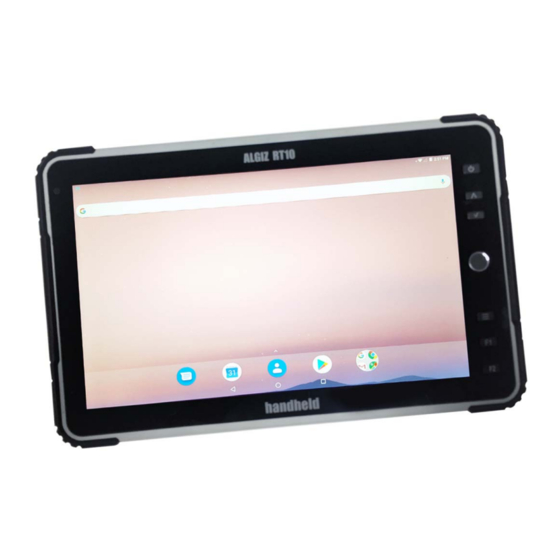
4. BASIC USAGE INSTRUCTIONS The Algiz RT10 runs Android Pie 9. The Algiz RT10 is packed with the same features you would expect in a feature‐rich tablet/smartphone. The device provides the intuitive Android user interface with no modifications. If you are already familiar with any Android device, then you will feel right at home using this device. The Algiz RT10 can be used in all screen orientations. However, the portrait and landscape orientations would be the preferable orientations for most applications. 4.1 Power ON To power ON the tablet, press and hold the power button for 3 seconds. The power button can also be used for other functions: When the tablet is ON, tap the power button to wake up the device or send it to sleep. The tablet uses minimum power when it is asleep When the tablet is ON, press and hold the power button to bring a menu of actions Restart Power Off In rare cases, if the tablet stops responding to any input for a long time, you can press and hold the power button for about 3 seconds to hard reset the tablet 4.2 Audio Volume Use volume buttons to control the audio volume of tablet. Pressing the volume buttons will pop up the volume indicator on top of the screen as shown in Figure 4.1, “Volume Indicator”. Figure 4.1. VOLUME INDICATOR 4.3 Initial Start up When the device is first powered on, it boots into the startup interface. This interface guides you step by step through the device setup process. You can configure the language of usage, time zone, date & time settings. At this time, the tablet also connects to the internet using any available data network via the SIM cards. If no network is available, then you get an option to connect to any available Wi‐Fi network. Optionally, you may also associate a Google account with the device at this time. Doing this is highly recommended. A Google account is required for using many pre‐installed Google applications like Gmail. A Google account is required for installing applications from the Google Play Store. Once you are through the setup process, then the device is ready to use. ... - Page 19 FIGURE 4.2. HOME SCREEN Version 1.0 ...
-
Page 20: Lock Screen22
4.4.1 Navigation Bar At the bottom of the screen, you will find the Navigation Bar with three soft buttons. The three buttons, in order are: The “Back Button” touching this generally takes you to the previous screen. The exact behavior may depend on the active application The “Home Button” touching this takes you to the home screen The "Recent Apps Button” touching this shows you the running applications. You may directly switch to another application by touching on it 4.5 Applications Screen This screen see FIGURE 4.3. ALL APPLICATIONS Shows the installed applications and allows you to start any application of your choice. Your device may have more apps installed than can be shown on the screen, swipe the screen left and right to navigate. Touch any app icon to start it. FIGURE 4.3. ALL APPLICATIONS If you are using an app frequently, then you may place it on home screen for quicker access. To move an app to the home screen: Touch and hold the application icon Select the screen by sliding the finger Lift the finger to drop the application If you want to remove an icon: Touch and hold the application icon Move the finger towards top‐left corner of screen Drop the application icon on "Remove" icon 4.6 Lock Screen The default lock screen of the device is shown in FIGURE 4.4. Lock Screen. When the device wakes up from Sleep, this screen becomes visible. FIGURE 4.4. LOCK SCREEN For ready reference, the lock screen shows the status of the SIM cards on the top. Version 1.0 ... -
Page 21: Quick Settings23
4.7 Quick Settings Common Settings may be quickly access using "Quick Settings". To access Quick Settings, simply swipe down from the top of the screen. From Quick Settings see figure4.5, “ Quick Settings”, you may change the screen brightness, connect to Wi‐Fi networks, Bluetooth devices and SIM networks, as well as control automatic screen rotations and other options. FIGURE 4.5. QUICK SETTINGS 4.7.1. Adjusting Screen Brightness In Quick Settings, drag the slider to set the screen brightness. 4.7.2. Control Wi‐ Fi Touch the Wi‐Fi icon to quickly enable/disable Wi‐Fi. Touch more settings to review related settings. 4.7.3. Control Bluetooth Touch the Bluetooth icon to quickly enable/disable Bluetooth. Version 1.0 ... -
Page 22: Send A Sms24
4.7.4. Do not disturb The “Do not disturb” tile allows you to control your phone's notifications. Tap on this tab and you will turn on Do not disturb and enter a menu allowing you to customize how undisturbed you want to be. 1. Total silence: Nothing will interrupt you 2. Alarms only: Any alarms you have set can disturb you 3. Priority only: Alarms can get through, but you can customize exactly what else should and shouldn’t disturb you 4.7.5. Airplane Mode Airplane mode disables all radios. One touch on the Airplane mode icon enables/ disables airplane mode. 4.7.6. Screen Auto‐ Rotate By default, the applications on the screen follow the orientation of the device. You may change this to force applications to lock to the current screen orientation (portrait/ landscape). 4.7.7. Location This option controls the location usage of applications. If this option is turned off, then Android apps & services do not get location data. 4.7.8. Flash Light The flashlight turns on the flash on the back of the Tablet so you can use it as a flashlight. 4.7.9. Cast Screen ... - Page 23 4.10 Configure Google Account A Google account is required for making the most use of many applications installed on the device. If you did not configure a Google account on startup, then you can add one from Settings | Accounts. 4.11 Useful Applications The ALGIZ RT10 ships with many useful applications. Please see Section “5.6 Applications”. 4.12 Install Applications Please use the Google Play application to install applications from the Google Play store. Note that a Google account is required for this. 4.13 Configure Hotkeys The Algiz RT10 has two user configurable hot keys. Each of the keys may be independently mapped to various functions. Please see Section 5.5, “user configurable hotkeys” for details. 4.14 Notifications Android applications use notifications to indicate to the user that some action is required. In general, two types of notifications are supported: Notifications in the user interface. These show up on the top of the screen. Users can see details by swiping down on the screen. Android supports rich notifications. Users may respond to notifications by touching. All active notifications can be dismissed as well with a single touch LED notifications: Some applications use LED notification lights to indicate to the user that some action is required. LED notifications are only visible when the device screen is off. A blinking blue LED indicates that a notification is active. Typically, this corresponds to incoming messages (SMS, email) 4.15 Scanning Barcodes If your table is equipped with the optional barcode module, then you may directly scan barcodes with the press of a Barcode scan button. The scanner can decode a wide range of barcode symbologies. Section 5.2.1, “Barcode” Shows how the scanner be configured to selectively scan specific symbologies. 4.16 Software Updates You may check for Software Updates to the tablet from Settings | About Tablet. ...
- Page 24 If you are planning to associate another Google account with the device after factory reset, then it is highly recommended that you remove the Google account before issuing the factory reset. SETTINGS . The Settings application can be used to connect to various networks, as well as configure the wide variety of options available. The Settings applications may be accessed from the application screen. Swiping down the screen and touching on the settings icon is a faster way to reach there. Many applications will have its own settings, which can accessed by using menu icon on top right corner. The Settings application groups controls under four categories, as below: Network & Internet Connected Device Apps & Notifications Battery Sounds Display Storage Security & Locations Accounts Google System 5.1 Network & Internet To perform network related settings, select respective option under Network & Internet settings as shown in FIGURE 5.1. NETWORK & INTERNET SETTINGS Version 1.0 ...
- Page 25 FIGURE 5.1. NETWORK & INTERNET SETTINGS 5.1.1 Wi‐ Fi To perform Wi‐Fi related settings select the "Wi‐Fi" option under Network & Internet option in settings as shown in FIGURE 5.2, “Wi‐Fi SETTINGS”. When the tablet is powered ON for the first time Wi‐Fi will be OFF as shown in FIGURE, “WI‐FI OFF”. To connect to Wi‐Fi network: Turn ON Wi‐Fi 2. Select a network from available list of networks shown in FIGURE 5.4, “AVAILABLE WI‐FI NETWORKS” 3. If a password is required to connect to the network, then you will be prompted to enter the password, as shown in FIGURE 5.5, “PASSWORD TO CONNECT” If the device is successfully able to connect to the network, then the network status is shown, as in in Figure 5.6, WI‐FI CONNECTED STATUS. Touching the connected Wi‐Fi network pops up all the properties of the network: IP address, Status, Signal strength, Link speed, Frequency and Security. You may perform operations like, add network, view saved networks, refresh by using menu icon on top right corner. You can check the current Wi‐Fi status from home screen by scrolling down from the top. FIGURE 5.2. WIFI SETTINGS FIGURE 5.3. WIFI OFF FIGURE 5.4. AVAILABLE WIFI NETWORKS FIGURE 5.5. PASSWORD TO CONNECT FIGURE 5.6. WIFI CONNECTED STATUS You can perform advanced operations under Wi‐Fi Preferences see FIGURE 5.7. WIFI Advanced Settings. FIGURE 5.7. WIFI Advanced Settings Version 1.0 ...
- Page 26 Turn on Wi‐FI automatically ‐> Wi‐Fi will turn back on near high‐quality saved networks, like your home network Open network notifications ‐> Notify when a high‐quality public network is available. Install Certificate ‐> Install Network certificates Wi‐FI Direct ‐> allows you to connect to other devices Mac address ‐> show you the MAC address of your Tablets Wi‐Fi network adapter IP Address ‐> show you the current IP address for your Wi‐Fi connection 5.1.2 Mobile Network Mobile Network shows the inserted SIM Network operator name. By tapping on Mobile network shows cellular network settings. Cellular Network settings contains see FIGURE 5.8. MOBILE NETWORK SETTINGS. FIGURE 5.8. Mobile Network Settings Mobile Data ‐> Enable/Disable Option (Access data using Mobile network) Data Roaming ‐> Enable/Disable Data Roaming (Connect to Data Services when roaming) Preferred Network type: Switch Modes of Networks to (4G/3G/2G, 4G only, 3G only, 2G only) Access point names ‐> To Edit/add the APN Network Operators ‐> To choose a network operator Version 1.0 ...
- Page 27 5.1.3 Data Usage Data Usage shows the complete data used by the devices. By tapping on Data Usage under network and internet shows Data used by different networks such as Data used by Mobile, Data Used by Wi‐fi network, Data used by Ethernet. See FIGURE 5.9. Data usage Settings. FIGURE 5.9. Data usage Settings Version 1.0 ...
- Page 28 5.1.4 HotSpot & tethering Hotspot and Tethering is used to Provide Internet to other devices through your mobile data connection. Hotspot & Tethering includes FIGURE 5.10. HOTSPOT & TETHERING SETTINGS USB Tethering ‐> You can share your Tablets Mobile data to other devices via USB Tethering Wi‐FI Hotspot‐> You can share your Tablets Mobile data to other devices via Wi‐Fi Hotspot You Can set up wifi hotspot by giving the network name, security (None, WPA2 PSK), password and by selecting the AP Band (2.4Ghz/5Ghz) • Bluetooth Tethering ‐>Share the Tablet’s Internet connection by Bluetooth Version 1.0 ...
- Page 29 5.1.5 Ethernet To connect to an Ethernet network, use the "Ethernet" option under Wireless & networks settings. The "Enable Ethernet" option shown in FIGURE 5.12. ETHERNET OPTIONS allows you to turn ON or turn OFF the Ethernet connection as needed. To Enable Ethernet you have to Reboot the Tablet. Figure 5.12 Ethernet Options FIGURE 5.13, “ETHERNET IP Assignments Settings The "Ethernet IP Assignment" option provides two methods of configuring the Ethernet port: Automatic IP address configuration using DHCP. This is on by default Static IP address You may directly assign the properties of the Ethernet port using "Static IP" option. To do this, you needs to have the following information handy: The IP address you wish to assign to the device The netmask of the network you are connecting to The IP address of the gateway The IP address of the DNS server All the IP addresses (interface address, gateway, DNS) are entered in dotted IP notation e.g. "192.168.100.152". The netmask needs to be entered in CIDR format, e.g. "20" is equivalent to "255.255.255.0". To configure the static IP: Change "Ethernet IP Assignment" option to "Static IP". Select "Static IP Settings" as shown in FIGURE 5.13, “ETHERNET IP Assignments Settings” Enter the values in Static IP configuration dialog as shown FIGURE 5.14. STATIC IP ...
- Page 30 Network Selection Policy The data networks on the tablet in order of priority are • Ethernet (highest) • Wi‐Fi • SIM based networks (lowest) Only one data network may be active on the tablet at a time. When a connection to any network of higher priority is available, then the lower priority networks are disabled automatically. As an example, when Wi‐Fi is enabled, it takes priority over 2G/3G/4G networks. Similarly when an Ethernet connection is established, it takes precedence over all other networks. 5.1.6 Mobile Plan ou can see the “Mobile Plan” under Network and Internet Option in Settings. Y 5.1.7 VPN You can see “VPN” Option under networks and Internet in Settings. By Selecting VPN you can also add VPN just by Selecting the ‘+’ Icon at the top corner of the Settings 5.1.8 Airplane Mode Airplane Mode option is available under network and internet in settings. By selecting the Network and Internet, you can Enable/Disable “Airplane. Version 1.0 ...
- Page 31 5.2 Connected Devices You can use device settings to set device properties such as Bluetooth, NFC, Android Beam, USB, Barcode, etc. 5.2.1 Bluetooth Bluetooth related settings are under the "Bluetooth" option under "Connected Devices" Settings, in connection Preferences as shown in FIGURE 5.16. BLUETOOTH SETTINGS. FIGURE 5.16. BLUETOOTH SETTINGS Version 1.0 ...
- Page 32 When the tablet is powered ON for the first time Bluetooth will be OFF as shown in FIGURE 5.17.BLUETOOTH OFF. FIGURE 5.17. BLUETOOTH OFF Prior to using a Bluetooth device, you need to pair the device with the tablet, as follows: 1. Turn on Bluetooth Select the devices from “Available device” list as shown in FIGURE 5.18. AVAILABLE DEVICE LIST Touch “Pair” on Bluetooth pairing request as shown in FIGURE 5.19. PAIR REQUEST Now, you can see the selected devices uner “Paired devices” list as shown in Figure 5.20. Paired devices list. You can do additional operations like renaming the device, Refresh, View all received files by touching menu icon on top‐right corner see FIGURE 5.21. BLUETOOTH SETTINGS MENU FIGURE 5.18. AVAILABLE DEVICE LIST FIGURE 5.19. PAIR REQUEST Version 1.0 ...
- Page 33 FIGURE 5.20. PAIRED DEVICE LIST Configurable Bluetooth Power Class The Bluetooth interface on the Algiz RT10 may be configured to run at two power levels: Class 2 operation. This is the default, and provides a short range of operation Class 1 operation. This is a high power mode, providing a longer range of operation NOTE: To make effective use of the higher power, both devices must operate in Class 1. FIGURE 5.22. SELECT BLUETOOTH POWER FROM BLUETOOTH SETTING To change the power class, select the "Bluetooth Power" menu option from Bluetooth configuration, as shown in FIGURE 5.22. SELECT BLUETOOTH POWER FROM BLUETOOTH SETTING. This option is available when Bluetooth is off; it is disabled when Bluetooth is on. The user can select the required power class as shown in FIGURE 5.23. SELECT POWER CLASS. Version 1.0 ...
- Page 34 FIGURE 5.23. SELECT POWER CLASS 5.2.2 NFC & Android Beam Near Field Communication technology is used to communicate between devices that are a few centimeters away from each other. NFC & Android Beam must be turned on for sharing between devices to work correctly. You can use NFC (Near Field Communication) to exchange data when your tablet touches another device. To exchange data using NFC: Turn ON NFC and Android beam on both devices Go to screen which contains information to exchange Move your tablet towards back of other device One a connection is established, you will hear a sound Touch screen to transfer the data 5.2.3 Cast By enabling wireless display option in Settings, you may mirror the tablet display onto another display that is connected to a Miracast dongle. 5.2.4 Prinitng This allows you to add Printer to the Tablet connected via USB Port. You can add Multiple Printer and Services to the Tablet and directly print any photos, Document, file directly on the Printer. 5.2.5 Barcode The barcode settings option allows you to enable/disable list of symbologies supported by barcode ...
- Page 35 5.3 Apps & Notifications By using Apps settings you can view and manage applications. Here you can view all the applications installed in your tablet. To view category vise like Downloaded, On SD card, running scroll from right to left. You can do following operations on a selected application as shown in FIGURE 5.25. APPLICATION INFORMATION Uninstall the application Stop the application forcefully Enable notifications App Details View permissions assigned for application Using the menu on top‐right corner you can: sort the application by size, reset app preferences and specify the install location (Internal storage or SD card) as shown in FIGURE 5.34, “APPS MENU”. You can also see the RAM used by running application under "Running" applications list as shown in FIGURE 5.35, “APPLICATION RAM USAGE” FIGURE 5.25. APPLICATION INFORMATION FIGURE 5.26. APPS MENU 5.4 Battery This option allows you to view the current battery status and usage as shown in FIGURE 5.27. BATTERY SETTINGS. It also shows the percentage of battery used by screen and other applications since last full charge. You can enable "Battery saver" option in menu. Using "Turn on automatically" option you can specify when battery saver should turn on automatically (at 5% battery, at 15% battery or never). To improve battery life, battery saver reduces your tablet performance. Battery saver turns off automatically when your tablet is charging. ...
- Page 36 5.5 Display The "Display" option under Device settings allows you to set below display properties for your tablet shown in FIGURE 5.28. DISPLAY SETTINGS. FIGURE 5.28. DISPLAY SETTINGS 5.5.1 Brightness level Adjust the slider to set the brightness level see FIGURE 5.29. BRIGHTNESS SETTINGS. FIGURE 5.29. BRIGHTNESS SETTINGS 5.5.2 Night Light Night light tints your screen amber. This makes it easier to lock your screen or read in dim light and may help you fall asleep more easily. 5.5.3 Adaptive brightness Enabling this option sets the brightness level of the screen appropriately for the available light. The adaptive brightness function uses a very low backlight level in pitch darkness, reasonable level in typical indoor office lighting, and maximum brightness while using the tablet outdoors ...
- Page 37 5.5.5 Sleep This sets the idle timeout after which the device goes to sleep. You may set a value between 15 seconds and 30 minutes as shown in FIGURE 5.30. “SLEEP TIME OPTIONS”. The “never” setting may be used when you do not want the screen to go to sleep automatically. This is typically used for benchmarking the device. Using this option can drain the battery faster than normal. If very long operation times are required, then we recommend that you keep the charger connected. ...
- Page 38 5.5.7 Screen Saver To control what happens when the phone is docked and/or sleeping. You can set clock, colors, and photo frame or photo table as daydream. Using menu you can specify when to daydream (while docked, while charging or either. Ambient Display 5.5.8 Tablet screen wakes up when Notification arrives. 5.5.9 Device theme Select the Device theme as Automatic (Based on wallpaper) or Light and Dark Device theme. 5.5.10 Touch Mode Select the Touch Modes as Hand/Rain or Glove/Pen Mode. Version 1.0 ...
- Page 39 Sounds This option allows you to control below sound and notification properties for your tablet (shown in FIGURE 5.31. SOUND SETTINGS) Media volume ‐ to set volume for media file such as videos, audio songs etc. by scrolling from left to right Alarm volume ‐ to set volume for alarm ring Notification volume ‐ to set volume for Notification Default notification ringtone ‐ to set ringtone for notification Default Alarm ringtone ‐ to set ringtone for Alarm Other sounds& Vibration ‐ to set enable sound for screen locking, Charging Sound and touch. You can also enable vibrate for touch FIGURE 5.31. SOUND SETTINGS Storage This option allows you to view and control the below storages supported by your Tablet. Version 1.0 ...
- Page 40 5.7.1 Internal Storage It displays total space allowed to store under internal storage, currently available space and list of all applications using internal storage with space used as shown in FIGURE 5.32. INTERNAL STORAGE SETTINGS FIGURE 5.32. INTERNAL STORAGE SETTINGS Version 1.0 ...
- Page 41 5.7.2 SD Card It displays total space allowed to use, currently available space in SD card.Eject SD card to unmount the SD card before removing it, to avoid data loss. Format SD card ‐ to remove all the data stored in the SD card. FIGURE 5.33. SDCARD STORAGE SETTINGS Version 1.0 ...
- Page 42 5.7.3 USB Storage It displays total space allowed to use, currently available space in USB storage. Eject USB storage ‐ to unmount the USB device before removing it, to avoid data loss. Format USB storage ‐ to remove all the data stored in the USB. FIGURE 5.34. USB STORAGE SETTINGS Version 1.0 ...
- Page 43 Security & location 5.8.1 Security Screen Lock You can use below options to manage the security on your tablet: Screen lock ‐ you can set Swipe, Pattern, PIN, Password or Finger Print to unlock the Tablet screen Finger Print – Touch the finger Print sensor to unlock your tablet Lock Screen preferences – Settings to show Notification contents, add users and Message on Lock screen Smart Lock ‐ you can set smart lock only when screen lock is set Encryption ‐ you can encrypt your accounts, settings, downloaded apps and their data, media and other files. After encrypting, you need to unlock the screen to decrypt the tablet every time you power it on Screen pining ‐ if turned ON, you can use screen pinning to keep the current screen in view until you unpin Show Passwords ‐ You can make password visible Location 5.8.2 Location When Location is turned ON, It allows your device to access your location info 5.9 Accounts To download applications from Google play store, you need to associate a Google account with the ...
- Page 44 5.9 Accessibility The accessibility settings allows you to do following operations: Barcode Scanner services Select to speak Talk Back Text to speech conversion Set Font Size Set Display Size Enable magnification gesture Large Mouse Pointer Invert the color Enable Auto‐rotate screen Configure Hotkeys Text to speech conversion Set delay for touch & hold Combine Channels when Playing Audio Set high Contrast text 5.10 Google Allows you to Add/View Google Account info, Security, personalization & Google services Version 1.0 ...
- Page 45 5.11 System System settings allows you to set system properties such as Language, date & time, Reset etc. as shown in FIGURE 5.37. SYSTEM SETTINGS FIGURE 5.37. SYSTEM SETTINGS 5.11.1 Language & Input The below options allows you to manage and control the language and input to your tablet Language ‐ select the language to use in your tablet from the available language list Keyboard & input methods ‐ allows you to select the keyboard type, and set preferences and text correction properties Spell checker ‐ if turned ON, you can select the language to be used and also you can enable the spell checker to use entries from contact list Personal dictionary ‐ you can maintain a personal dictionary by adding word using Add icon on top‐ right corner Gesture‐ Jump to Camera you may quickly open camera by pressing the Power button twice Mouse/ trackpad provides a scroll bar to set the pointer speed by scrolling left to right Speech ‐ allows you to select the voice input service and set text‐to‐speech conversion properties 5.11.2 Date & time You can do following operations as shown in FIGURE 5.38. DATE & TIME SETTINGS Set date and time manually Select the time zone Enable 24‐hour time format Enable automatic date & time update Enable automatic time zone selection FIGURE 5.38. DATE & TIME SETTINGS ...
- Page 46 storage including Google account, system and app data and settings, downloaded apps and other user data Version 1.0 ...
- Page 47 5.11.6 About Tablet You can see the following information about your tablet in this option as shown in Figure 5.39, About Tablet Status ‐ shows battery and network related information, such as charging status, remaining battery, IP address, Wi‐Fi MAC address, Bluetooth address, Unit serial number, Serial number, Up time Legal information ‐ shows open source licenses, Google legal information and wallpapers providers information Model number Android version Android Security Patch Level Baseband Version Processor Info CPU Temp Kernel version Build number Figure 5.39, About Tablet Version 1.0 ...
- Page 48 5.11.7 User Configurable Hotkeys The Algiz RT10 includes two user configurable hotkeys. Each hotkey can be configured for the following functions: Android Back Key Android Home Key Launch an Application Deactivated Hotkey configurations is access from the Settings application, under "Accessibility". Each hotkeys can be configured independently, as shown in FIGURE 5.40. HOTKEY CONFIGURATION. If you select to launch an application, then another dialog will be presented, where you will need to select the application to launch. Once selected, the change is effective immediately. FIGURE 5.40. HOTKEY CONFIGURATION FIGURE 5.41. CHOOSE THE APPLICATION TO LAUNCH ...
- Page 49 If you go to Se ngs → Storage → Internal storage it shows the details such as total space allowed, available space and space used by different applications as shown in FIGURE 5.26, “INTERNAL STORAGE SETTINGS”. To view the data stored under internal storage use the File Explorer app. When you connect the tablet to computer, you can see a drive named "Internal storage". If you click the drive, it displays different folders contains the categorized data. 6.2 SD card To use SD card as secondary storage, insert SD card into tablet's Micro SDXC slot as shown in SECTION 3.2, "SD CARD". Once SD card mounted, you can view the files in SD card using File Explorer application. When you connect the tablet to computer, you can see a drive named "SD card". If you click the drive, it displays different folders contains the categorized data. You can remove the content in SD card and unmount by using options in Storage Settings shown in FIGURE 5.27, “SD STORAGE SETTINGS”. 6.3 USB Storage To use USB storage connect the device to tablet as shown in FIGURE 6.1. USB STORAGE. If a USB storage device is connected, then you can see the available space, erase all data and unmount it by using options in USB storage settings shown in FIGURE 5.34. USB STORAGE SETTINGS. Such devices must be formatted with a single FAT partition; NTFS partitions are not supported. Only one USB storage device may be used at any time. To prevent data loss, it is always advisable to unmount the USB storage using "Unmount USB storage" option in Settings, prior to disconnecting it. FIGURE 6.1. USB STORAGE To view the files stored in connected USB device, use the File Explorer app. Version 1.0 ...
- Page 50 7 INPUT 7.1 Touch Screen The touch‐screen features an anti‐glare coating. Ten point Multi touch is supported. Common gestures like pinch‐zoom can be used. Supports Rain, Glove and Pen Mode. 7.2 Changing the Touchscreen modes The tablet’s advanced capacitive touchscreen has 3 built‐in operating modes, for users to choose under different usage scenarios: Mode 7.3 Usage Scenario Hand/Rain Mode The Hand/Rain mode is the default operating mode of the touchscreen. Under this mode, the touchscreen is set to have the ability to reject false touch inputs while liquid is present on the touchscreen. Once the liquid is removed from the touchscreen, touch inputs from bare fingertips will continue to operate. Stylus Mode Under the Stylus mode, the touchscreen is set to have the ability to pick up touch inputs from the fine‐tip passive capacitive stylus that is shipped with the tablet. Glove Mode Under the Glove mode, the touchscreen is set to have the ability to pick up touch inputs while the user is operating the touchscreen with gloves on. Touch inputs from bare fingertips will also continue to operate. 7.6 USB Input devices You can use USB keyboard or USB mouse as USB input device. To use USB Input device follow below steps as mentioned in Chapter 12, USB. Connect the device to the tablet through the USB host port Select "USB Host" option in Settings Now, the connected input device is ready to use. If you connected a keyboard, then the on‐screen soft keyboard will get disabled automatically. If you connected a mouse, then you will see a pointer on the screen. Moving the mouse will move the pointer. Most applications treat the left click as a touch at the pointer location. When you do not want to continue using connected input device, disconnect it from the tablet, and turn off the USB host mode. 7.7 Bluetooth Input devices Bluetooth input devices (keyboards and mice) can be used with the tablet. Pair them to ...
- Page 51 8 COMMUNICATION 8.1 Ethernet 100/1G Ethernet port on the device allows you to connect to Ethernet. The Ethernet port is located on the right side of the device, in the port cluster shown in figure 8.1, “Ethernet Port”. Insert The Ethernet cable as shown in figure 8.2, Ethernet Cable Insertion. To enable Ethernet and set static IP see SECTION 5.1.4, “ETHERNET”. NOTE: It is recommended to use Ethernet cables with length less than 3 meters. Figure 8.1. ETHERNET PORT FIGURE 8.2. ETHERNET CABLE INSERTION Once tablet is connected to Ethernet cable, the connection status is shown on the status bar: A “<‐‐>” icon means that the tablet is connected to the Ethernet network A “<‐‐>!” icon means that Ethernet is enabled, but the Ethernet network link is down. To achieve a connection, you need to ensure that both ends of the Ethernet cable are properly connected to the respective ports 8.2 Wireless Communication 8.2.1 Bluetooth This tablet supports Bluetooth communication 10m and 100m. To do Bluetooth communication with other device, you need to pair it with this tablet see section “Bluetooth” Version 1.0 ...
- Page 52 Bluetooth file transfer To transfer a file to paired device using Bluetooth: Turn ON Bluetooth Select the file Touch the Bluetooth icon Select the device to transfer file Once the connection is successful, it starts transferring the file. You can see the file sending notification on screen. If the file transfer is successful, you can see the file listed under outbound transfers shown in FIGURE 8.3, “BLUETOOTH OUTBOUND TRANSFERS” by touching the notification. When there is an incoming file from paired Bluetooth device, the tablet pops up a message as shown in FIGURE 8.4 “ACCEPT FILE REQUEST” which shows the details such as sending device name, file name and size. You can either accept or decline the incoming file. Touch “Accept” on accept incoming file message to receive the file. The received file will be listed under inbound transfers as shown in FIGURE 8.5, “BLUETOOTH INBOUND TRANSFERS”. Received file stores in internal storage Bluetooth folder. You can use File Explorer application to see all files received from Bluetooth devices as shown in Figure 8.6,”BLUETOOTH FILE” FIGURE 8.3 BLUETOOTH OUTBOUND TRANSFERS FIGURE 8.4 ACCEPT FILE REQUEST FIGURE 8.5 BLUETOOTH INBOUND TRANSFERS FIGURE 8.6 BLUETOOTH FILES Version 1.0 ...
- Page 53 8.2.2 Wi‐ Fi This tablet supports Wi‐Fi 802.11 b/g/n. To use any available Wi‐Fi network, setup Wi‐Fi as shown in Section “Wifi”. Sometimes, you may want to know the MAC address of the Wi‐Fi interface. This is available from Se ngs → System → About Tablet → Status → Wi‐Fi MAC address 9. LOCATION Location may use Sources like GPS, Wifi, mobile networks and sensors to help estimate your device location. Google may collect location data periodically and use this data to improve location accuracy and location based services. Under Location, Advanced Setting Option include App Level Permissions and Scanning. In App Level Permission you can change the location Permission. Scanning include Wifi Scanning and Bluetooth Scanning. FIGURE 9.1. Use Location NFC You can use NFC (Near Field Communication) to exchange data when your tablet touches another device. Enable NFC option in Wireless & networks settings as shown in figure 10.1, “Enabling NFC”. To exchange data using NFC Turn ON NFC and Android beam on both devices Go to screen which contains information to exchange Move your tablet towards back of other device One a connection is established, you will hear a sound Touch screen to transfer the data FIGURE. 10.1, “ENABLING NFC” BARCODE SCANNER The red & White LED aimer turns ON shortly after the Barcode key is pressed. The ...
- Page 54 The barcode scanner supports a variety of symbologies: 1D, 2D and Postal codes. User may restrict the barcode symbologies that are decoded from Section, 5.2.5,”Barcode”. Version 1.0 ...
- Page 55 11 USB A dedicated A‐type USB host port is available on the device. The following types of USB devices may be connected to it. USB storage devices like disk drives & pen drives USB keyboard or USB mouse The user need to connect the USB peripherals through USB host port in right side panel shown in Figure 12.1,”USB Host Port”. FIGURE 12.1. USB HOST PORT Once USB peripheral is connected, the user needs to enable the USB host mode to use USB peripherals. REPLACING HOT SWAPPABLE BATTERY The ALGIZ RT10 supports hot‐swapping of batteries, meaning the tablet doesn’t need to be powered off in order to replace the main battery. To support such mechanism, there is a backup battery inside the tablet that is charged up with the main battery. This backup battery cannot be removed, and needs to have adequate power for hot swapping of main battery to be done without issue. When the backup battery is fully charged, it can sustain up to 2 minutes of runtime to allow for battery hot‐swapping. Perform the following to hot swap the batteries: . Remove the Battery cover 2. Red LED Starts Blinking Indicating that the Hotswap Mode is turned ON 3. Once LED Turned into Solid RED then remove the main battery 4. Insert a new charged up removable battery into the battery compartment 5. Now Close the Battery cover and Use the Tablet. Version 1.0 ...
Need help?
Do you have a question about the ALGIZ RT10 and is the answer not in the manual?
Questions and answers