Table of Contents
Advertisement
Advertisement
Table of Contents

Related Manuals for HandHeld ALGIZ RT7


Summary of Contents for HandHeld ALGIZ RT7
- Page 1 ALGIZ RT7 MANUAL...
- Page 2 FEDERAL COMMUNICATIONS COMMISSION This equipment has been tested and found to comply with the limits for a Class B digital device, pursuant to Part15 of the FCC Rules. These limits are designed to provide reasonable protection against harmful interference in a residential installation. This equipment generates, uses and can radiate radio frequency energy and, if not installed and used in accordance with the instructions, may cause harmful interference to radio communications.
-
Page 3: Table Of Contents
CONTENTS 1. Introduction ................................. 6 2. Regulatory ................................7 2.1. Device Specification ............................. 8 2.1.1. Barcode Scanner ..........................11 2.2. Accessories ..............................12 2.3. Physical Layout ............................13 2.3.1. Bottom Panel ............................14 3. Device Setup ..............................15 3.1. SIM Card Insertion ............................15 3.2. - Page 4 5.1.2. Bluetooth .............................. 25 5.1.3. SIM cards ............................. 30 5.1.4. Ethernet ..............................30 5.1.5. Network Selection Policy ........................33 5.1.6. Tethering .............................. 33 5.2. Device ................................. 33 5.2.1. Display ..............................34 5.2.2. Sound & notification ..........................35 5.2.3. Storage ..............................36 5.2.4.
- Page 5 10.2. Arcontia RFID Module (eTicket version only) .................... 56 11. Barcode Scanner ............................. 58 12. USB ................................. 59 Ver 1.2...
-
Page 6: Introduction
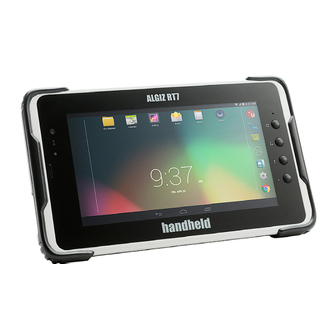
This guide covers the Algiz RT7 tablet, and optional accessories. The Algiz RT7 is a rugged tablet, designed for use by field personnel in demanding conditions. It integrates best- in-class connectivity with efficient computing and multimedia features. The tablet runs Android Lollipop (5.1.1) operating system, and comes pre-installed with many Google applications, including Google Play. -
Page 7: Regulatory
2. REGULATORY The 15.203 antenna requirements 1) An intentional radiator shall be designed to ensure that no antenna other than that furnished by the responsible party shall be used with the device. Adherence - In our design we are using customized antenna made of a carrier and conductive part (pogo spring pins) which makes contact with the antenna pads of PCB. -
Page 8: Device Specification
2.1. Device Specification The base specifications of the Algiz RT7 tablet are below: Physical Dimensions 216.1 mm x 132.3 mm x 23.8 mm (including the shock bumpers) Weight 650 grams (including battery) Storage Environment Temperature range -40 to 70 C... - Page 9 FM player Battery 6000 mAh lithium polymer rechargeable battery, with Fuel Gauge Battery Charging Fast charging via dedicated DC jack The following optional modules are supported by the Algiz RT7: Barcode Scanner module RFID module. The Reader is based on the 13.56 MHz contactless technology platform and is designed for increased reliability, security and high speed communication.
- Page 10 Ver 1.2...
-
Page 11: Barcode Scanner
2.1.1. Barcode Scanner The Barcode scanner module, based on the Motorola SE4710 engine, provides robust support for a wide variety of 1D/2D barcodes, as well as postal codes. Detailed specifications are below: Scanner Engine Motorola SE4710 Imager Resolution 1280x800 pixels Field of View Horizontal 42 degree, Vertical 28 degrees Skew Tolerance... -
Page 12: Accessories
As shown in the specifications, barcode scanning is tolerant to a wide range of orientations. Figure 2.1, that tolerance for skew and pitch is reduced at the extreme ends of the working range. FIGURE 2.1. DECODING SKEW 2.2. Accessories The Algiz RT7 comes with the following accessories: 5Vdc 2A USB Wall charger ... -
Page 13: Physical Layout
2.3. Physical Layout consists of: Front Camera Light/Proximity Sensor RGB LED Earpiece Display and Touch panel 4x Hotkeys FIGURE 2.2. FRONT PANEL Flash LED Rear Camera Speaker Battery Pack Kensington Lock FIGURE 2.3. BACK PANEL Ver 1.2... -
Page 14: Bottom Panel
If the device is configured with the optional barcode scanner module, then that can be seen on the left panel, as FIGURE 2.4. LEFT SIDE PANEL ports: Ethernet port USB A port Micro USB port Audio port DC charger port FIGURE 2.5. -
Page 15: Device Setup
3. DEVICE SETUP 3.1. SIM Card Insertion This tablet supports two SIM cards. There are two slots on back side of tablet as shown in Figure The device supports the dual SIM dual standby configuration. Both the SIM cards can be used. However, only one of them can used for phone calls at any time. -
Page 16: Sd Card
3.2. SD Card This tablet supports a single microSD card for secondary storage. SD card slot is on back side of tablet, under FIGURE 3.2. SD CARD SLOT Once SD card inserted successfully, you can check its details in Settings → Device → Storage → SD card 3.3. -
Page 17: Basic Usage Instructions
4. BASIC USAGE INSTRUCTIONS The Algiz RT7 runs Android Lollipop (5.1.1). The Algiz RT7 is packed with the same features you would expect in a feature-rich tablet/smartphone. The device provides the intuitive Android user interface with no modifications. If you are already familiar with any Android device, then you will feel right at home using this device. -
Page 18: Initial Startup
4.3. Initial Startup When the device is first powered on, it boots into the startup interface. This interface guides you step by step through the device setup process. You can configure the language of usage, time zone, date & time settings. At this time, the tablet also connects to the internet using any available data network via the SIM cards. -
Page 19: Navigation Bar
4.4.1. Navigation Bar At the bottom of the screen, you will find the Navigation Bar with three soft buttons. The three buttons, in order are: Back Button. Touching this generally takes you to the previous screen. The exact behavior may depend on the active application. -
Page 20: Lock Screen
4.6. Lock Screen The default lock screen of the device sleep, this screen becomes visible. FIGURE 4.4. LOCK SCREEN For ready reference, the lock screen shows the status of the SIM cards on the top. Ver 1.2... -
Page 21: Quick Settings
4.7. Quick Settings Common settings may be quickly accessing using "Quick Settings". To access Quick Settings, simply swipe down from the top of the screen. From Quick Settings screen brightness, connect to Wi-Fi networks, Bluetooth devices and SIM networks, as well as control automatic screen rotation. -
Page 22: Make A Phone Call/Sms
Please use the Google Play application to install applications from the Google Play store. Note that a Google account is required for this. 4.12. Configure Hotkeys The Algiz RT7 has four user configurable hot keys. Each of the keys may be independently mapped to various functions. Please see Section 5.5, 4.13. Notifications Android applications use notifications to indicate to the user that some action is required. -
Page 23: Factory Reset
4.16. Factory Reset To reset the device to the default state, you may use the Factory Reset functionality. Note that this will remove all installed apps and data. The factory reset option is available from Settings | Backup and Reset. This tablet includes a safety feature known as "factory reset permission". -
Page 24: Wi-Fi
5.1.1. Wi-Fi To perform Wi-Fi related settings select the "Wi-Fi" option under Wireless & network group in settings as shown When the tablet is powered ON for the first time Wi-Fi will be OFF as shown in connect to Wi-Fi network: Turn ON Wi-Fi. -
Page 25: Bluetooth
FIGURE 5.5. PASSWORD TO CONNECT FIGURE 5.6. WIFI CONNECTED STATUS 5.1.2. Bluetooth Bluetooth related settings are under the "Bluetooth" option under "Wireless & network settings" group, as shown Prior to using a Bluetooth device, you need to pair the device with the tablet, as follows: Turn on Bluetooth. - Page 26 FIGURE 5.7. BLUETOOTH SETTINGS FIGURE 5.8. BLUETOOTH OFF FIGURE 5.9. AVAILABLE DEVICE LIST FIGURE 5.10. PAIR REQUEST Ver 1.2...
- Page 27 Figure 5.11. Paired devices list FIGURE 5.12. BLUETOOTH SETTINGS MENU Ver 1.2...
- Page 28 Configurable Bluetooth Power Class The Bluetooth interface on the Algiz RT7 may be configured to run at two power levels: Class 2 operation. This is the default, and provides a short range of operation. Class 1 operation. This is a high power mode, providing a longer range of operation.
- Page 29 FIGURE 5.14. SELECT POWER CLASS FIGURE 5.15. BLUETOOTH STATUS Ver 1.2...
-
Page 30: Sim Cards
5.1.3. SIM cards The Algiz RT7 supports up to two SIM cards in a Dual SIM, Dual Standby (DSDS) configuration. The SIM cards screen (see allows you to configure your preferences for the inserted SIM cards. Either SIM card may be individually enabled/disabled, you may also configure preferred SIM to use for data or voice calls. - Page 31 To configure the static IP: Change "Ethernet IP Assignment" option to "Static IP". Select "Static IP Settings" as shown in Enter the values in Static IP configuration dialog as shown You can see the information about the Ethernet port by selecting "properties" option in menu at the top-right corner.
- Page 32 FIGURE 5.19. STATIC IP CONFIGURATION DIALOG FIGURE 5.20. ETHERNET PROPERTIES Ver 1.2...
-
Page 33: Network Selection Policy
5.1.5. Network Selection Policy The data networks on the tablet, in order of priority, are Ethernet (highest) Wi-Fi SIM based networks (lowest) Only one data network may be active on the tablet at a time. When a connection to any network of higher priority is available, then the lower priority networks are disabled automatically. -
Page 34: Display
5.2.1. Display The "Display" option under Device settings allows you to set below display properties for your tablet (shown in Brightness level - Adjust the slider to set the brightness level (see Adaptive brightness - Enabling this option sets the brightness level of the screen appropriately for the available light. -
Page 35: Sound & Notification
FIGURE 5.24. SLEEP TIME OPTIONS 5.2.2. Sound & notification This option allows you to control below sound and notification properties for your tablet (shown in Figure 5.25, 1. Sound Media volume - to set volume for media file such as videos, audio songs etc. by scrolling from left to right. -
Page 36: Storage
FIGURE 5.25. SOUND & NOTIFICATION SETTINGS 5.2.3. Storage It displays total space allowed to store under internal storage, currently available space and list of all applications using internal storage with space used as shown in FIGURE 5.26. INTERNAL STORAGE SETTINGS It displays total space allowed to use, currently available space in SD card. - Page 37 Unmount SD card - to unmount the SD card before removing it, to avoid data loss. Erase SD card - to remove all the data stored in the SD card. FIGURE 5.27. SDCARD STORAGE SETTINGS It displays total space allowed to use, currently available space in USB storage. Unmount USB storage - to unmount the USB device before removing it, to avoid data loss.
-
Page 38: Battery
5.2.4. Battery This option allows you to view the current battery status and usage as shown in It also shows the percentage of battery used by screen and other applications since last full charge. You can do refresh for the current battery status using REFRESH option on top-right corner. You can enable "Battery saver"... -
Page 39: Barcode
FIGURE 5.30. USB HOST SETTINGS FIGURE 5.31. ENABLE USB PORT 5.2.6. Barcode The barcode settings option allows you to enable/disable list of symbologies supported by barcode scanner. These may be individually enabled as shown All supported symbologies are enabled by default. FIGURE 5.32. -
Page 40: Apps
5.2.7. Apps By using Apps settings you can view and manage applications. Here you can view all the applications installed in your tablet. To view category vise like Downloaded, On SD card, running scroll from right to left. You can do following operations on a selected application as shown in ... -
Page 41: Personal
FIGURE 5.35. APPLICATIONS RAM USAGE 5.3. Personal You can set language, location, security, backup for your tablet and add Google account details using options shown in FIGURE 5.36. PERSONAL SETTINGS 5.3.1. Location When Location is turned ON, you can select the following option in location mode as shown in Figure 5.37, ... - Page 42 FIGURE 5.37. LOCATION MODE To enable u-Blox GPS module: Turn Off Location. Touch "GPS Device" option and select "uBlox". Go to Location mode, then select the u-Blox platform model under Enhanced location as shown in Selecting uBlox platform model gives uBlox module a hint about the mobility of the user. Appropriate value can enable the module to generate better location.
-
Page 43: Security
5.3.2. Security You can use below options to manage the security on your tablet: Screen Security - provides options to set security to touch screen. ◦ Screen lock - you can set Swipe, Pattern, PIN or Password to unlock the screen. ◦... -
Page 44: System
5.4. System System settings allows you to set system properties such as date & time, accessibility etc. as shown in Figure FIGURE 5.39. SYSTEM SETTINGS 5.4.1. Date & time You can do following operations as shown in Set date and time manually ... -
Page 45: Accessibility
5.4.3. Accessibility The accessibility settings allows you to do following operations: Configure the hot keys Set captions Enable magnification gesture Set large text Set High contrast text Enable power button ends call Enable Auto-rotate screen ... -
Page 46: User Configurable Hotkeys
FIGURE 5.41. ABOUT TABLET 5.5. User Configurable Hotkeys The Algiz RT7 includes four user configurable hotkeys. Each hotkey can be configured for the following functions: Android Back Key Android Home Key Scan barcode (using the barcode scanner) ... - Page 47 FIGURE 5.42. HOTKEY CONFIGURATION If you select to launch an application, then another dialog will be presented, where you will need to select the application to launch. Once selected, the change is effective immediately. FIGURE 5.43. CHOOSE THE APPLICATION TO LAUNCH Ver 1.2...
-
Page 48: Applications
5.6. Applications Your tablet is pre-installed with several useful applications: Calculator for simple calculations on the go. Clock to keep a tab on time and setup alarms. Calendar to maintain your calendar, and keep it synced online. ... -
Page 49: Storage
6. STORAGE Storage is a place where your data, applications, media files etc are stored. This tablet comes with an internal storage and supports external storage through SD card and USB drive. 6.1. Internal Storage This tablet comes with 16 GB internal storage capacity, in which the operating system and built-in applications are stored. -
Page 50: Input
To view the files stored in connected USB device, use the File Explorer app. 7. INPUT 7.1. Touch Screen The touch-screen features an anti-glare coating. Five point touch is supported. Common gestures like pinch-zoom can be used. 7.2. USB Input devices You can use USB keyboard or USB mouse as USB input device. -
Page 51: Communication
8. COMMUNICATION 8.1. Ethernet 10/100 Ethernet port on the device allows you to connect to Ethernet. The Ethernet port is located on the right It is recommended to use Ethernet cables with length less than 3 meters. FIGURE 8.1. ETHERNET PORT FIGURE 8.2. -
Page 52: Wireless Communication
8.2. Wireless Communication 8.2.1. Bluetooth This tablet supports Bluetooth communication 10m and 100m. To do Bluetooth communication with other device, you need to pair it with this tablet ( Ver 1.2... - Page 53 Bluetooth file transfer To transfer a file to paired device using Bluetooth: Turn ON Bluetooth. Select the file to transfer. Touch the Bluetooth icon on top- Once the connection is successful, it starts transferring the file. You can see the file sending notification on screen.
-
Page 54: Wi-Fi
FIGURE 8.6. ACCEPT FILE REQUEST FIGURE 8.7. BLUETOOTH INBOUND TRANSFERS FIGURE 8.8. BLUETOOTH FILES 8.2.2. Wi-Fi This tablet supports Wi-Fi 802.11 b/g/n. To use any available Wi-Fi network, setup Wi-Fi as shown in Section Sometimes, you may want to know the MAC address of the Wi-Fi interface. This is available from Settings → About Tablet →... -
Page 55: Location
9. LOCATION 9.1. Internal GPS The device uses the Qualcomm iZat GPS by default. The currently enabled GPS can be checked, using the "GPS Device" option under Settings | Location. shows the currently enabled GPS module. 9.2. u-Blox GPS Module The u-Blox GPS module can be enabled when needed, as mentioned in FIGURE 9.1. -
Page 56: Rfid
10. RFID 10.1. NFC You can use NFC (Near Field Communication) to exchange data when your tablet touches another device. Enable NFC option in Wireless & networks settings as shown To exchange data using NFC: Turn ON NFC and Android beam on both devices. ... -
Page 57: Arcontia Rfid Module (Eticket Version Only)
10.2. Arcontia RFID Module (eTicket version only) The eTicket version of Algiz RT7 is equipped with an Arcontia RFID reader. This can be tested using the included "RFID test" application, as shown in Figure 10.2. FIGURE 10.2. RFID TEST APPLICATION... -
Page 58: Barcode Scanner
11. BARCODE SCANNER If any of the hotkeys is mapped to scan a barcode, then the barcode scanner can be activated on a touch of that hotkey. The red LED aimer turns ON shortly after the hotkey is pressed. The user needs to keep the hotkey pressed for the duration of the scanning. - Page 59 12. USB A dedicated A-type USB host port is available on the device. The following types of USB devices may be connected to it USB storage devices like disk drives & pen drives. USB keyboard or USB mouse. The user need to connect the USB peripherals through USB host port in right side panel shown in Figure 12.1, FIGURE 12.1.
Need help?
Do you have a question about the ALGIZ RT7 and is the answer not in the manual?
Questions and answers