HandHeld ALGIZ 10X User Manual
Rugged tablet
Hide thumbs
Also See for ALGIZ 10X:
- Manual (37 pages) ,
- Quick start manual (5 pages) ,
- Quick start manual (2 pages)
Table of Contents
Advertisement
Advertisement
Table of Contents

Related Manuals for HandHeld ALGIZ 10X


Summary of Contents for HandHeld ALGIZ 10X
- Page 1 ALGIZ 10X User’s Manual ALGIZ 10X User’s Manual V1.0...
- Page 2 ALGIZ 10X User’s Manual Accessory Item Description Note Default Packing Accessories 1 piece of 2 Cell Li-Ion Battery Pack 1 piece of 12V Adapter w/ Standard Power Cord. Euro / U.S. Std type, 1.8M With Windows 7 Ultimate 1 piece of Windows 7 Recovery User’s embedded Guide.
- Page 3 ALGIZ 10X User’s Manual Copyright Notice Copyright © 2012 Handheld Inc., ALL RIGHTS RESERVED. No part of this document may be reproduced, copied, translated, or transmitted in any form or by any electronic or mechanical means, for any purposes without the permission of the original manufacturer in advance.
- Page 4 Please feel free to call or e-mail us. Manufacturer:Handheld Inc. Address:Handheld Group AB, Kinnegatan 17 A, S-531 33, Linkoping, Sweden TEL:+46 (0) 510-54 71 70 FAX:+46 (0) 510-282 05...
- Page 5 UL-60950 and CAN/CSA C22.2 No. 601.1. Power Supply Announcement The Handheld Rugged Tablet PC Power is supplied by Power Adapter and Battery Pack, the power rating announcement and manufacturer information are listed as below.
- Page 6 ALGIZ 10X User’s Manual Power Notice! Please notice that the power code of adapter needs to be connected to the ground (earth). Please push the power button for at least 4 seconds to enter sleep mode (See Chapter 2.1 Starting and Stopping the Tablet PC).
-
Page 7: Rf Exposure Warning
ALGIZ 10X User’s Manual FEDERAL COMMUNICATIONS COMMISSION This equipment has been tested and found to comply with the limits for a Class B digital device, pursuant to Part 15 of the FCC Rules. These limits are designed to provide reasonable protection against harmful interference in a residential installation. - Page 8 ALGIZ 10X User’s Manual RF exposure information (SAR) This Rugged Tablet PC meets the government's requirements for exposure to radio waves. This Rugged Tablet PC is designed and manufactured not to exceed the emission limits for exposure to radio frequency (RF) energy set by the Federal Communications Commission of the U.S.
-
Page 9: Table Of Contents
ALGIZ 10X User’s Manual Index Chapter 1 Specification ................. 5 System Specification ................6 Chapter 2 ..................7 Identifying Hardware Components ............7 TOP Side ....................8 Left and Right Side ................9 Bottom side ..................10 Chapter 3 ..................11 Buttons and Indicators ............... - Page 10 ALGIZ 10X User’s Manual Wireless LAN Driver Installation ............50 Bluetooth Driver Installation............... 54 3G Module Driver Installations ............57 10. AirCard Watcher Installations ............. 59 GPS Driver Installations ..............61 12. U-Center Installations ................ 65 Chapter 6 ..................68 Caring Your Tablet PC .................
-
Page 11: Chapter 1 Specification
ALGIZ 10X User’s Manual Chapter 1 Specification... -
Page 12: System Specification
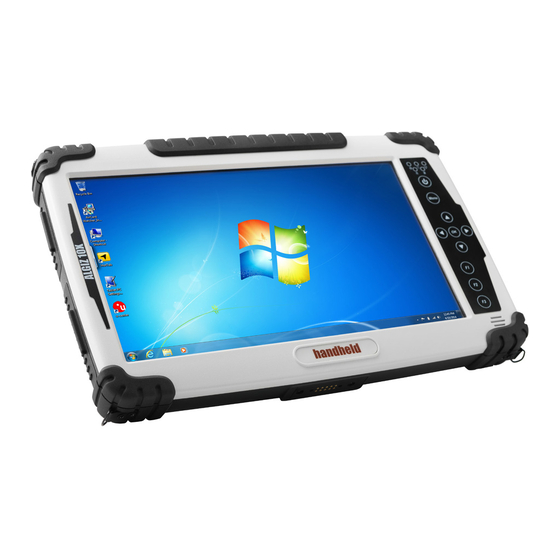
ALGIZ 10X is a rugged Tablet PC designed for the use in various challenging environments, e.g., field work, outdoor activities and construction site. With its rugged design, ALGIZ 10X is able to sustain shock, vibration, high humidity as well as high/ low temperatures. -
Page 13: Chapter 2
ALGIZ 10X User’s Manual Chapter 2 Identifying Hardware Components... -
Page 14: Top Side
ALGIZ 10X User’s Manual 1. TOP Side ○ ○ ○ ○ Ref. Item Description LED Display The Tablet PC uses a high brightness LED TFT LCD. Use a soft cloth without chemical liquids to clean the display panel. Front Microphone Receives sound and voice to record voice. -
Page 15: Left And Right Side
ALGIZ 10X User’s Manual 2. Left and Right Side ○ ○ ○ ○ ○ ○ ○ ○ ○ Ref. Item Description DC Power Jack Plug in DC plug to input the power to the device For connection with external displays devices such as monitors and projectors USB 2.0 Port x 1... -
Page 16: Bottom Side
ALGIZ 10X User’s Manual 3. Bottom side ○ ○ Ref. Item Description Docking Connector Connects to the Docking Station . Service Window Unscrew to install and uninstall 3G/ module and SIM card... -
Page 17: Chapter 3
ALGIZ 10X User’s Manual Chapter 3 Buttons and Indicators... -
Page 18: Function Keys
ALGIZ 10X User’s Manual 1. Function Keys Components Function Description See Other Intro. Power On Button PUSH 4 seconds to turn on the tablet LED Indicator Shows the Power Status, HDD Status, RF Device Status, Battery Status, and GPS Status... -
Page 19: Led Indicators
ALGIZ 10X User’s Manual 2. LED Indicators Function Icon Description Power Status Green light – Power on Orange light – Sleep mode HDD Status Green light – System is accessing the hard disk drive RF Status Green light – When RF radio is on. -
Page 20: Chapter 4
ALGIZ 10X User’s Manual Chapter 4 Getting Your Device Ready... -
Page 21: Plug In The Ac Power
Make sure that your device is either connected to AC power or a battery that still has power. Press the power button to turn on your ALGIZ 10X. 1. Plug in the AC Power The Tablet PC power is comprised of two parts, the power adapter and the battery. -
Page 22: Using Battery Power
ALGIZ 10X User’s Manual 2. Using Battery Power The Tablet PC is designed to work with a removable battery pack. The battery pack consists of a set of battery cells housed together. A fully charged pack will provide several hours of battery life. - Page 23 To remove the battery pack Caution Before you use your ALGIZ 10X, you will have to charge the battery packs as soon as ALGIZ 10X is connected with the external power source. Please fully charge the battery in advance of operating ALGIZ 10X .The new battery packs must be 100% charged before ALGIZ 10X is disconnected from the external power source.
-
Page 24: Installing 3G Module
ALGIZ 10X User’s Manual 3. Installing 3G Module. Plug in the 3G module to mini PCIe slot and screw the module onto the motherboard Please insert the SIM card before start to use the WWAN Internet Connection. -
Page 25: How To Use The Wireless Network
4. How to use the Wireless Network We apply IEEE 802.11 b/g/n WiFi + Bluetooth 4.0 HS Standard(Class I)Half mini card for default function of the ALGIZ 10X. The WLAN features include: Support Peer-to-Peer (Ad-Hoc) and Access Point (Infrastructure) modes. - Page 26 ALGIZ 10X User’s Manual 2. Click the Wireless Network icon on the taskbar. (An orange light in the icon indicates connections are available.) 3. You can also do some detail setting from the device manager.
-
Page 27: How To Use The Bluetooth
ALGIZ 10X User’s Manual 5. How to use the Bluetooth Depending on your application, the Bluetooth module can give you capability for short-range wireless communications between devices without requiring a cable connection. The transmission can go through walls, pockets and briefcases as long as two devices are within range around 10 meters. - Page 28 ALGIZ 10X User’s Manual 3. Choose the bluetooth device you want to connect, and left click to choose “Connect”. Then the device will be connected to the module.
- Page 29 ALGIZ 10X User’s Manual 4. When under connecting, you can choose “Send” to send a data to the pair device. connection.
-
Page 30: How To Use The 3G Feature
6. How to use the 3G Feature ※Please insert SIM card before power on. The ALGIZ 10X can apply a built-in Mini PCIe 3G module to perform the 3G function. Depending on your application, the 3G module can datacard and host PC software combination deliver multiband HSPA/UMTS , EDGE/GPRS , WCDMA/GSM connectivity in a single hardware configuration. -
Page 31: How To Use The Gps Feature
ALGIZ 10X User’s Manual 7. How to use the GPS Feature We apply an on board GPS module for default function of the ALGIZ 10X. 1. Press the Menu button on your Tablet PC to open the Hottab menu. Click the “GPS”... - Page 32 ALGIZ 10X User’s Manual 3. Setting the Receiver Port to COM3 4. Setting the Receiver Baudrate to 9600...
- Page 33 ALGIZ 10X User’s Manual 5. GPS Module will start Cold Start. When the positioning is complete, the Fix Mode will appear as DR 6. You can choose coldstart, warmstart or Hotstart from Receiver Action...
-
Page 34: How To Use The Camera Feature
ALGIZ 10X User’s Manual 8. How to use the Camera Feature The ALGIZ 10X applies a internal 5M Pixels Camera with microphone module for default function . 1. Press the Menu button on your Tablet PC to open the Hottab menu. Click the “Camera”... - Page 35 ALGIZ 10X User’s Manual 3. Setting the image pre-view resolution. 4. When you set the pre-view resolution to 640*480,the final picture resolution is also 640*480..
-
Page 36: How To Use The External Antenna
ALGIZ 10X User’s Manual 9. How to use the external antenna. 1. Press the Menu button on your Tablet PC to open the Hottab menu. Click the “3G Antenna(Auto)”and “GPS Antenna(Auto) to switch the internal and external 3G/GPS Antenna. 2. If you choose these two items and plug the tablet pc to the Vehicle Docking. It... -
Page 37: How To Adjust The Lcd Brightness
ALGIZ 10X User’s Manual 10. How to adjust the LCD brightness 1. Press the Menu button on your Tablet PC to open the Hottab menu. 2. Allows you to use the left and right arrow keys to adjust the LCD brightness. -
Page 38: How To Adjust The Speaker Volume
ALGIZ 10X User’s Manual 11. How to adjust the speaker volume. 1. Press the Menu button twice on your Tablet PC to open the Hottab menu. 2. Allows you to use the left and right arrow keys to adjust the speaker volume. -
Page 39: Show The Battery Information
ALGIZ 10X User’s Manual 12. Show the battery information.. 1. Press the Menu button third times on your Tablet PC to open the Hottab menu. 13. Show the system information.. -
Page 40: Chapter 5
Installing the Device Driver Through Chapter 5 to go further for ALGIZ 10X driver installation guide, you can easily install all related drivers if without operation system by yourself. The default system will include operation system and you do need to install any of... -
Page 41: Chipset Driver Installation
ALGIZ 10X User’s Manual drivers at first time use. 1. Chipset Driver Installation 1. Open the file document “Chipset” from C:\drivers folder. 2. Click on “infinst_ auto” to install driver. - Page 42 ALGIZ 10X User’s Manual 3. Click on “Next“ to install driver. 4. Click on “Yes “ to agree License...
- Page 43 ALGIZ 10X User’s Manual 5. Click on “Next“ to install driver.
- Page 44 ALGIZ 10X User’s Manual 6. Click on “Yes, I want to restart this computer now“ to go on.
-
Page 45: Graphic Driver Installation
ALGIZ 10X User’s Manual Graphic Driver Installation The system is equipped with Intel NM10 Chipset. The Intel Graphic Drivers should be installed first, and it will enable “Video Controller (VGA compatible). Follow the instructions below to complete the installation. You will quickly complete the installation. - Page 46 ALGIZ 10X User’s Manual 3. Click on “Next “to install Driver.
- Page 47 ALGIZ 10X User’s Manual 4. Click on “Yes, I want to restart this computer now“ to go on.
-
Page 48: Audio Driver Installation
ALGIZ 10X User’s Manual Audio Driver Installation The system is equipped with the Realtek ALC886 HD Audio Codec designed for PC multimedia systems, including host/soft audio and AMR/CNR-based designs. 1. Open the file document “Audio” and click on “Vista_Win7_R260.exe” from... - Page 49 ALGIZ 10X User’s Manual 2. Click on “Next“ to install driver.
- Page 50 ALGIZ 10X User’s Manual 3. Click on “Yes, to continue the installation and then click on” Yes, I want to restart my computer now” to finish installation.
-
Page 51: Lan Driver Installation
ALGIZ 10X User’s Manual LAN Driver Installation Follow the steps below to complete the installation of the LAN drivers. You will quickly complete the installation. 1. In the Device Manager menu, select LAN device, and right click select update driver... - Page 52 ALGIZ 10X User’s Manual 2. Open the file document “LAN”. 3. Select the correct file in the document and click on open to execute the setup.
-
Page 53: Hottab Utility Installation
ALGIZ 10X User’s Manual HotTab Utility Installation With our HotTab software application utility, user can very easy to control and program their usual hotkey for help their job. 1. Open the file document “Hot TAB” from C:\drivers folder. Press the Setup.exe to execute the installation program. - Page 54 ALGIZ 10X User’s Manual 3. Click “Close” to finish the installation.
-
Page 55: Hottab Driver Installation
ALGIZ 10X User’s Manual 6. HotTab Driver Installation Following the step by step to finish the driver installation 1. Open the file document Win IO Driver” from C:\drivers folder. Press the Install.bat to execute the installation program. 2. Press any key to complete the driver installation. -
Page 56: Wireless Lan Driver Installation
ALGIZ 10X User’s Manual 7. Wireless LAN Driver Installation Following the step by step to finish the driver installation 1. Open the file document “Wireless” from C:\drivers folder to execute the installation program. - Page 57 ALGIZ 10X User’s Manual 2. Click “Next” to start the driver installation. 3. Choice Setup Language.
- Page 58 ALGIZ 10X User’s Manual 4. Follow the step by step and click “Next” to finish the driver installation.
- Page 59 ALGIZ 10X User’s Manual 5. Click “Finish” to complete the installation.
-
Page 60: Bluetooth Driver Installation
ALGIZ 10X User’s Manual 8. Bluetooth Driver Installation. Following the step by step to finish the driver installation 1. Open the file document “Bluetooth” from C:\drivers folder. Press “Setup” to execute the installation program. - Page 61 ALGIZ 10X User’s Manual 2. Click “Next” to go to installation 3. Follow the step by step and click “Next” to start the driver installation.
- Page 62 ALGIZ 10X User’s Manual...
-
Page 63: G Module Driver Installations
ALGIZ 10X User’s Manual 9. 3G Module Driver Installations Following the step by step to finish the driver installation 1. Open the file document “3G” from C:\drivers folder. Press “SWIQMISetup.exe” to execute the installation program. - Page 64 ALGIZ 10X User’s Manual 2. Press “Finish” to complete the installation...
-
Page 65: Aircard Watcher Installations
ALGIZ 10X User’s Manual 10. AirCard Watcher Installations Following the step by step to finish the Aircard Watcher installation 1. Open the file document “Watcher_GobiAnywhere” from C:\drivers folder. Press “Watcher_Generic.msi” to execute the installation program. 2. Select the “Next” to next step. - Page 66 ALGIZ 10X User’s Manual 3. Press “Next’ to install the driver. 4. Click “Finish” to complete the installation.
-
Page 67: Gps Driver Installations
ALGIZ 10X User’s Manual 11. GPS Driver Installations Following the step by step to finish the driver installation 1. Open the file document “GPS”. Press “ublox_A4_U5_USB_drv3264win7_install_UI.exe” to execute the installation program. 2. Select the “English” and click the “ok” to next step. - Page 68 ALGIZ 10X User’s Manual 3. Press “Next’ to install the driver. 4. Press “I Agree” to install the driver.
- Page 69 ALGIZ 10X User’s Manual...
- Page 70 ALGIZ 10X User’s Manual 5. Click “Finish” to complete the installation.
-
Page 71: U-Center Installations
ALGIZ 10X User’s Manual 12. U-Center Installations Following the step by step to finish the U-Center installation 1. Open the file document “/GPS/u-center 7.00”. Press “u-center.msi” to execute the installation program. 2. Press “Next’ to install the program. - Page 72 ALGIZ 10X User’s Manual...
- Page 73 ALGIZ 10X User’s Manual 3. Click “Finish” to complete the installation.
-
Page 74: Chapter 6
ALGIZ 10X User’s Manual Chapter 6 Caring Your Tablet... -
Page 75: Battery Protection Tips
ALGIZ 10X User’s Manual 1. Battery Protection Tips It is recommended temperature range for charging the battery pack between -5℃ ~ 35 ℃. To avoid harm to the battery, recharge the battery pack when it is nearly discharged. When recharging, make sure that the battery pack is fully charged. -
Page 76: Touch Screen Protection Tips
ALGIZ 10X User’s Manual 2. Touch screen Protection Tips Avoid using excessive force to the display, when use the finger or the included touch screen stylus pen on the display, the recommended force can not over 200gf. Besides the included stylus, using a sharp or metallic object may ... -
Page 77: Trouble Shooting From A To L
ALGIZ 10X User’s Manual 3. Trouble shooting from A to L A. Battery Problem Condition Check Point The battery does not charge Make sure that the AC adapter is properly (Battery Charge indicator connected. does not light orange. Make sure that the battery is not too hot or cold. - Page 78 ALGIZ 10X User’s Manual time you turn on the tablet PC, the RTC (Real-Time Clock) battery is at the end of its life. Call an authorized dealer to replace the RTC battery. E. SSD Problem Condition Check Point The SSD error message The SSD has defects.
- Page 79 ALGIZ 10X User’s Manual F. LAN Problem Condition Check Point I cannot access the network. Make sure that the LAN cable is properly connected to the RJ-45 connector and the network hub. Make sure that the network configuration is ...
- Page 80 ALGIZ 10X User’s Manual When you turn on the Tablet Restart your Tablet PC. PC, it stops after POST. I. Sound Problems Condition Check Point No sound is produced. Make sure that the volume control is not set too ...
- Page 81 ALGIZ 10X User’s Manual J. Wireless LAN Problem Condition Check Point I cannot use the wireless LAN Make sure that the wireless LAN feature is feature. turned on. Transmission quality is poor. Your Tablet PC may be in an out-of-range situation.
- Page 82 ALGIZ 10X User’s Manual Reconfigure and reset the Access Point. I cannot access the network. Make sure that the network configuration is appropriate. Make sure that the user name or password is correct. You have moved out of range of the network.
-
Page 83: Appendix
ALGIZ 10X User’s Manual 4. Appendix A.COM PORT Define...
Need help?
Do you have a question about the ALGIZ 10X and is the answer not in the manual?
Questions and answers