Table of Contents
Advertisement
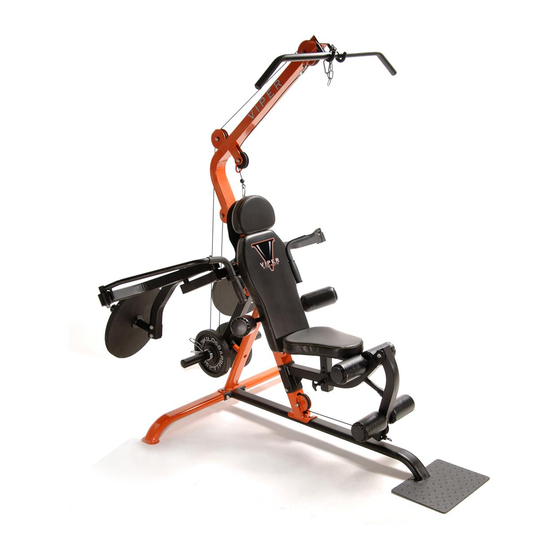
Workout
Manual
This Product is
Manufactured
Exclusively by
* Actual product may vary
300 lbs user weight limit
slightly from pictured.
Please read this manual thoroughly before using your Viper® VG1500™
Leverage System.
Retain this manual for future reference.
CAUTION: Before starting any exercise program, it is recommended that you consult your physician.
2007© Stamina Products, Inc. All Rights Reserved.
Advertisement
Table of Contents

Related Manuals for Stamina Viper VG1500


Summary of Contents for Stamina Viper VG1500
- Page 1 Please read this manual thoroughly before using your Viper® VG1500™ Leverage System. Retain this manual for future reference. CAUTION: Before starting any exercise program, it is recommended that you consult your physician. 2007© Stamina Products, Inc. All Rights Reserved.
- Page 2 Our customer service staff is here to help you with questions you may have concerning parts, assembly and warranty. 1-800-375-7520 cust-srvc@staminaproducts.com Monday through Thursday from: 7:30 A.M. to 5:00 P.M. Central Standard Time. Friday 8:00 A.M. to 3:00 P.M. Central Standard Time. Often just one call can clear up any assembly and parts questions.
-
Page 3: Table Of Contents
Table Of Contents Important Safety Instructions Things To Remember Training Tips Seat Adjustments Leg Extension Standing Hip Adduction Standing Hip Abduction Lat Pulldown Straight Arm Pullover Upright Row Standing Row Seated Row Bench Press Chest Fly Front Shoulder Raise Lateral Shoulder Raise Standing Biceps Curl Triceps Pressdown with Lat Bar Single Arm Triceps Pressdown... -
Page 4: Important Safety Instructions
Important Safety Instructions WARNING: To reduce risk of serious injury, read and follow the Safety Instructions before using your Viper® VG1500™ Leverage System. NOTICE: Perform all exercises slowly and carefully. Omit any movement that causes pain. Until you become stronger, perform all exercises with small, smooth and precise movements. - Page 5 10. Inspect the VG1500™ Leverage System for worn or loose com- ponents prior to use. Tighten/replace any loose or worn components prior to using the VG1500™ Leverage System. Make sure that all bolts and nuts are tight. 11. Do not use the lat bar as a chin-up bar when it is resting in its stor- age hooks. Failure to comply with this warning may result in injury and/or damage to the machine.
- Page 6 WARNING: Before starting any exercise or conditioning pro- gram you should consult with your personal physician to see if you require a complete physical exam. This is especially impor- tant if you are over the age of 35, have never exercised before, are pregnant or suffer from any illness.
-
Page 7: Things To Remember
Please Read Prior to Starting Any Exercise Program All exercise carries some element of risk. To reduce risk please consult with your personal physician to see if you require a complete physical exam. This is especially important if you’re over 35 years of age, have never exercised before, are pregnant, have a chronic illness, a history of high blood pressure, heart disease, diabetes, prior chest discomfort, under the care of a physician and taking prescrip-... -
Page 8: Training Tips
Training Tips 1 Always warm up for a minimum of 15 minutes before doing resistance training. 2 On your first set of exercises keep the resistance light. 3 Stretching is recommended after the warm up and at the end of the workout. 4 Repetitions for training effects: Muscular Endurance - 12 to 25 repetitions with light resistance. -
Page 9: Leg Extension
Leg Extension 1 Adjust the amount of resis- tance by adding plates to or removing plates from the high/ low pulley weight carriage. 2 Adjust the seatback to a comfortable position. 3 Sit on the seat facing for- ward. 4 Place the back of your legs over the upper foam rollers and place your shins against the back of the lower foam rollers. -
Page 10: Standing Hip Adduction
Standing Hip Adduction 1 Adjust the amount of resis- tance by adding plates to or removing plates from the high/ low pulley weight carriage. 2 Stand facing one side of the machine. Place the foot clos- est to the rear of the machine into the ankle cuff/handle. -
Page 11: Standing Hip Abduction
Standing Hip Abduction 1 Adjust the amount of resis- tance by adding plates to or removing plates from the high/ low pulley weight carriage. 2 Stand facing one side of the machine. Place the foot clos- est to the front of the machine into the ankle cuff/handle. -
Page 12: Lat Pulldown
Lat Pulldown 1 Adjust the amount of resis- tance by adding plates to or removing plates from the high/ low pulley weight carriage. 2 Return to the front of the machine and remove the lat bar from the storage hook. Sit on the seat facing the lat bar and tower. -
Page 13: Straight Arm Pullover
Straight Arm Pullover 1 Adjust the amount of resis- tance by adding plates to or removing plates from the high/ low pulley weight carriage. 2 Return to the front of the machine and remove the lat bar from the storage hook. Sit on the seat facing forward. -
Page 14: Upright Row
Upright Row 1 Adjust the amount of resis- tance by adding plates to or removing plates from the high/ low pulley weight carriage. 2 Attach the straight bar han- dle with a clip to the cable at the lower end of the leg assembly arm. -
Page 15: Standing Row
Standing Row 1 Adjust the amount of resis- tance by adding plates to or removing plates from the lever- age arm weight carriages. 2 Stand straddling the seat and facing towards the rear of the machine. 3 Grasp the press arm han- dles as shown. -
Page 16: Seated Row
Seated Row 1 Adjust the amount of resis- tance by adding plates to or removing plates from the high/ low pulley weight carriage. 2 Attach the straight bar han- dle with a clip to the cable at the lower end of the leg assembly arm. -
Page 17: Bench Press
Bench Press 1 Adjust the amount of resis- tance by adding plates to or removing plates from the lever- age arm weight carriages. 2 Adjust the seatback to a comfortable position. 3 Sit on the seat facing for- ward. 4 Reach to your sides and grab the bent arm handles on the horizontal section as shown. -
Page 18: Chest Fly
Chest Fly 1 Adjust the amount of resis- tance by adding plates to or removing plates from the lever- age arm weight carriages. 2 Adjust the seatback to a comfortable position. 3 Sit on the seat facing for- ward. 4 Reach to your sides and grab the vertical sections of the bent arm handles. -
Page 19: Front Shoulder Raise
Front Shoulder Raise 1 Adjust the amount of resis- tance by adding plates to or removing plates from the high/ low pulley weight carriage. 2 Attach the straight bar han- dle with a clip and chain to the cable at the lower end of the leg assembly arm. -
Page 20: Lateral Shoulder Raise
Lateral Shoulder Raise 1 Adjust the amount of resis- tance by adding plates to or removing plates from the high/ low pulley weight carriage. 2 Attach the straight bar han- dle with a clip and chain to the cable at the lower end of the leg assembly arm. -
Page 21: Standing Biceps Curl
Standing Biceps Curl 1 Adjust the amount of resis- tance by adding plates to or removing plates from the high/ low pulley weight carriage. 2 Attach the straight bar han- dle with a clip and chain to the cable at the lower end of the leg assembly arm. -
Page 22: Triceps Pressdown With Lat Bar
Triceps Pressdown with Lat Bar 1 Adjust the amount of resis- tance by adding plates to or removing plates from the high/ low pulley weight carriage. 2 Stand on the treadplate as shown and face towards the rear of the machine. 3 Reach up and grab the lat bar as shown. -
Page 23: Single Arm Triceps Pressdown
Single Arm Triceps Pressdown 1 Remove the lat bar and attach an ankle cuff/handle to the lat bar cable. 2 Adjust the amount of resis- tance by adding plates to or removing plates from the high/ low pulley weight carriage. 3 Stand on the treadplate as shown and face toward the rear of the machine. -
Page 24: Overhead Triceps Extension
Overhead Triceps Extension 1 Adjust the amount of resis- tance by adding plates to or removing plates from the high/ low pulley weight carriage. 2 Sit on the seat facing for- ward. 3 Grab the ab curl strap and hold them over your head while bending forward as shown. -
Page 25: Abdominal Crunch With Handles
Abdominal Crunch with Handles 1 Adjust the amount of resis- tance by adding plates to or removing plates from the high/ low pulley weight carriage. 2 Sit on the seat facing for- ward. 3 Grab the ab curl strap and pull them down to your shoulder/ upper chest area as shown. -
Page 26: Cool-Down & Stretching
Cool-Down and Stretching Here are some great cool-down stretches to help you remove toxins from your muscles and gain greater flexibility. It’s important to do a cool down with stretches after each workout. Hold each stretch for at least 10-15 seconds. - Page 27 Cool-Down and Stretching Chest/Biceps Stretch Interlace fingers behind back. Slowly turn elbows inward while straightening arms, then slowly lift arms and keep chin in. Hold stretch for 10-15 seconds. Shoulder Stretch Stand with feet shoulder width apart and knees slightly bent, straighten arm across chest and hold forearm with opposite hand, gently pull arm towards chest.
-
Page 28: Notes
Notes... - Page 29 Notes...
- Page 30 Notes...
- Page 31 Notes...
- Page 32 To the best knowledge of Stamina Products, Inc., the specifications, descriptions and illustrative material contained herein are accurate as of the printing of this brochure. Stamina Products, Inc. reserves the right without prior notice to discontinue at any time at its discretion any of the items herein or change specifications or designs without incurring any obligation to the customer.
Need help?
Do you have a question about the Viper VG1500 and is the answer not in the manual?
Questions and answers