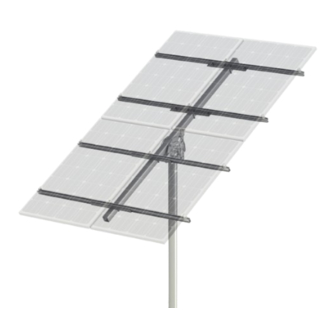
Clenergy PV-ezRack PostMount 4-A Code-Compliant Planning And Installation Manual
With eco rail
Hide thumbs
Also See for PV-ezRack PostMount 4-A:
- Installation manual (20 pages) ,
- Installation manual (13 pages)
Advertisement
Quick Links
Advertisement

Summary of Contents for Clenergy PV-ezRack PostMount 4-A
- Page 1 PV-ezRack PostMount 4-A with ECO Rail Code-Compliant Planning and Installation Guide V2.0...
- Page 2 Introduction 1. Introduction Clenergy PV-ezRack PostMount 4-A is a The PV-ezRack PostMount 4-A parts, when ground mounting system suitable for large installed in accordance with this guide, will be scale commercial and utility scale installations. structurally adequate and meet the GB50009-...
- Page 3 Rectangular Tube- Inter Clamp Master×1 Landscape×2 Standardx2 ER-EC-ST End ClampStandard x4 Installation Guide_PV-ezRack_PostMount 4-A_V2.0 (September 2020) page of 10 Unit 1, 10 Duerdin St, Clayton VIC 3168, Australia Tel: +61 3 9239 8088 Fax: +61 3 9239 8024 E-mail: tech@clenergy.com.au www.clenergy.com.au...
- Page 4 ⑥ Rectangular Tube-Master ⑦ Angle Bracket ⑧ ECO Rail ⑨ U bolt for Tube110 Side view drawing of PV-ezRack PostMount 4-A is shown below. The panels tilt angle and embedment depth below are for reference only. Installation Guide_PV-ezRack_PostMount 4-A_V2.0 (September 2020) page...
- Page 5 (2) Apply lubricant (grease or 40# engine oil) to fasteners prior to tightening to avoid galling or seizing in the threads. Installation Guide_PV-ezRack_PostMount 4-A_V2.0 (September 2020) page of 10 Unit 1, 10 Duerdin St, Clayton VIC 3168, Australia Tel: +61 3 9239 8088 Fax: +61 3 9239 8024 E-mail: tech@clenergy.com.au www.clenergy.com.au...
- Page 6 Please refer to safe torques defined in this guide as shown in the figure below. If power tools are required, Clenergy recommends the use of low speed only. High speed and impact drivers increase the risk of bolt galling (deadlock). If deadlock occurs and you need to cut fasteners, please make sure that there is no load on the fastener before you cut it.
- Page 7 1. Do not fasten the M14*110 Bolt prior to complete the assembly of PM4-A Rectangular Tube-Master. 2. Keep all the Bolt head aligned. Installation Guide_PV-ezRack_PostMount 4-A_V2.0 (September 2020) page of 10 Unit 1, 10 Duerdin St, Clayton VIC 3168, Australia Tel: +61 3 9239 8088 Fax: +61 3 9239 8024 E-mail: tech@clenergy.com.au www.clenergy.com.au...
- Page 8 2. Using the adjustable washer to avoid the gap between the Rectangular Tube-Master and the Adjustable Tube. Unreliable connection is forbidden. Installation Guide_PV-ezRack_PostMount 4-A_V2.0 (September 2020) page of 10 Unit 1, 10 Duerdin St, Clayton VIC 3168, Australia Tel: +61 3 9239 8088 Fax: +61 3 9239 8024 E-mail: tech@clenergy.com.au www.clenergy.com.au...
- Page 9 Note : Do not tighten the nut until all the Angle Bracket aligned. Installation Guide_PV-ezRack_PostMount 4-A_V2.0 (September 2020) page of 10 Unit 1, 10 Duerdin St, Clayton VIC 3168, Australia Tel: +61 3 9239 8088 Fax: +61 3 9239 8024 E-mail: tech@clenergy.com.au www.clenergy.com.au...
- Page 10 4.6.1 Fix the PV panel to ECO Rail, via Inter Clamps and End Clamps step by step until all the panels complete. Recommended torque for M8 bolts is 18~20 N·m Installation Guide_PV-ezRack_PostMount 4-A_V2.0 (September 2020) page of 10 Unit 1, 10 Duerdin St, Clayton VIC 3168, Australia Tel: +61 3 9239 8088 Fax: +61 3 9239 8024 E-mail: tech@clenergy.com.au www.clenergy.com.au...
- Page 11 Tel: +81 45 228 8226 Fax: +81 45 228 8316 E-mail: sales@clenergy.co.jp Worldwide Network www.clenergy.jp Clenergy Philippines 145 Yakal St., San Antonio village, Makati City, Philippines Tel: +63 977 8407240 E-mail: sales_ph@clenergy.com www.clenergy.ph Germany Japan South Korea China Thailand Philippines Vietnam Singapore Australia Clenergy Installation Guide_PV-ezRack_PostMount 4-A_V2.0 (September 2020)


Need help?
Do you have a question about the PV-ezRack PostMount 4-A and is the answer not in the manual?
Questions and answers