
Related Manuals for HTP Invertig 221 AC/DC


Summary of Contents for HTP Invertig 221 AC/DC
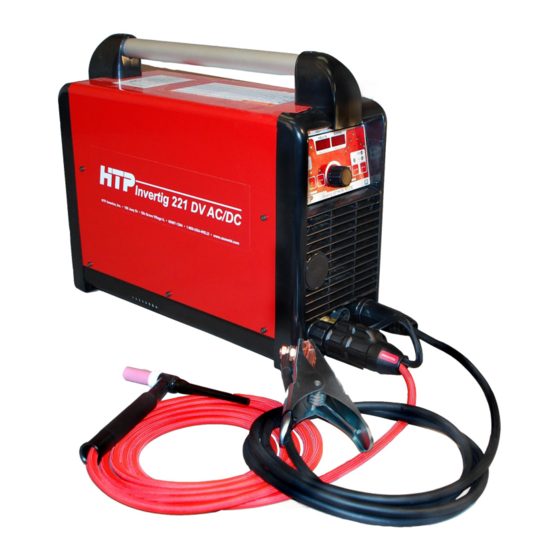
- Page 1 Invertig 221 AC/DC Invertig 221DV AC/DC Owner’s Manual 180 Joey Drive · Elk Grove Village, IL 60007 · Ph: 847-357-0700 · Fax: 847-357-0744 · Web: www.usaweld.com...
- Page 2 TIG Torch Consumables 19-23 Specialty TIG Torch Necks Invertig 221 AC/DC (Single Voltage) Parts Diagram & List Invertig 221 AC/DC (Single Voltage) Wiring Diagram Invertig 221DV AC/DC (Dual Voltage) Parts Diagram & List Invertig 221DV AC/DC (Dual Voltage) Wiring Diagram...
- Page 3 HTP America, Inc. has reserved the right to make change in design or add any improvements to its products at any time without incurring any obligation to install same on equipment. This warranty is void unless warranty card is sent to HTP America, Inc. within 15 days from date of purchase.
- Page 4 7. OSHA Standard 29 CFR, Part 1910, Subpart Q WELDING, CUTTING AND BRAZING. Electrical Connection Your Invertig 221 AC/DC operates on single-phase, 230 volt On 230 volts, the machine draws 26 amps out of the wall power (+/- 15%). The machine is shipped with a plug. The when operating at a welding output of 220 amps in the TIG input power cord has 3 wires.
- Page 5 15 and 30 cubic feet per hour (CFH). he 7-pin connection is where your remote amperage control Use a gas regulator such as HTP Part #12020 which is would connect to your 221. This is also where you would con- nect a momentary contact switch.
- Page 6 2a 2b 2c 2d 2e 2f 2g Front Panel Controls The front panel controls will be split into 2 sections – the welding mode section and the welding parameter section. The welding mode section covers the different welding modes – such as Stick Welding, TIG 2T welding and so on.
- Page 7 Figure 5 Figure 7 - Depressing the function button (2) until the - Depressing the function button (2) 2E – Slope Down 2B - Starting Current “slope down” light (2E) is illuminated will allow you to adjust until the “starting current” light (2B) is illuminated will allow the slope down setting.
- Page 8 2G – Post Gas – Depressing the function button (2) until the AC Frequency “post gas” light (2G) is illuminated will allow you to adjust the post-gas flow. As shown in Fig 10, the post gas light (2G) is illuminated and the amps display will flash “PrG”. While the display is flashing, the post gas time will be displayed in the “AMPS”...
- Page 9 AC Balance Chart 12d If you remember from the front panel connections, the ground Figure 12b cable is in the positive output receptacle and the torch is in the Figure 12B negative. Chart 12D shows the AC balance set to 10%. For 10% of the time, the torch is negative and the electrons flow Depress the “SET AC”...
- Page 10 electrode negative aC amperage adjustment electrode Positive aC amperage adjustment Fig 14 Figure 14 Figure 13 Depress the “SET AC” button (4) once, release, then press Depress the “SET AC” button (4) once, release, then press again again and hold. As shown in Fig 14, the balance light (4B) and hold.
- Page 11 Welding Current Indicator Lamp will be illuminated. If your Invertig 221 AC/DC is in the stick-welding mode, the Figure 16 welding current indicator lamp will be illuminated all the time.
- Page 12 When you depress the trigger on the torch, your Invertig 221 D2) TIG 2T Mode – From the Stick Mode, depressing the provides pre-gas flow for as long as the trigger is depressed. welding mode button (D) once will put you in the “2T” Mode. When the trigger is released, it will slope up to the welding This mode will be used when welding with a remote amperage amperage that has been selected.
- Page 13 On your Invertig 221, in the AC mode, the high frequency is REPEAT– D5) TIG From the TIG Spot Mode, depressing the only used to start the arc, unlike conventional transformer welding mode (D) button once will put you in the “TIG Reset” welders which must have the high frequency on all the time Mode.
- Page 14 Welding Volts - Digital Display The Welding Volts Digital Display is a multi-function display. When you are welding, this displays the welding voltage. Pressing other touch pad buttons will display other parameters in the “VOLTS” display. Those displays will be covered in the section covering those touch pad buttons.
- Page 15 Storing Welding Programs – Your Invertig 221 will store 64 Recalling Welding Programs – to recall welding programs, separate welding programs which you can recall for specific enter the job mode by depressing the function button (2) first welding jobs. You will see under the “FUNCTION” button (2) and then AC Mode button (3) second, and keep both buttons and the “AC MODE”...
- Page 16 A 2 % Ceriated tungsten is the best tungsten selection for both Amperage - AC 20-30 30-80 60-130 120-200 AC and DC welding with your new HTP Invertig 221. Amperage - DC 15-50 50-120 80-150 130-250 HTP offers the following premium quality tungsten ground to a high quality finish.
- Page 17 General Welding Parameters Quick Set Up Following are some “rule of thumb” welding parameters, 1) Welding Mode in 2T for foot pedal or hand control. tungsten diameters, and amperage settings for welding 2) Steel welding AC off – Aluminum Welding AC on different thicknesses of aluminum and steel.
- Page 18 1/8" and less. Use a 3/32" diameter rod for 1/8" and thicker. The above Filler Rod is available from HTP in 2 lb. tubes which are tightly sealed to prevent oxidation. Use 308 for most grades of stainless steel.
- Page 19 17 Series Air-Cooled TIG Torch Parts Breakdown Tungsten Diameter Illus # Description 0.040" 1/16" 3/32" 1/8" Standard Configuration Alumina Nozzle 10N49 10N48 10N47 10N46 Collet Body 10N30 10N31 10N32 10N28 Collet 10N22 10N23 10N24 10N25 Gas Lens Configuration (optional) Alumina Nozzle 54N17 54N16 54N15...
- Page 20 20 Series Water Cooled TIG Torch Parts Breakdown Tungsten Diameter Illus # Description 0.040" 1/16" 3/32" 1/8" Gas Lens Configuration (optional) Alumina Nozzle 53N59 53N60 53N61 53N61S Gas Lens Collet Body 45V42 45V43 45V44 45V45 Collet 13N21 13N22 13N23 13N24 Standard Configuration Alumina Nozzle 13N08...
- Page 21 Pyrex Cup Kits Nothing makes welding easier than being able to see what you are doing. HTP’s Pyrex Cup kits do just that! The clear Pyrex cup gives you unparalleled visibility of the arc and work. The Pyrex Cup kit also comes standard with our special gas saver gas lens kit.
- Page 22 Pyrex Cup Parts Tungsten Diameter Illus # Description 0.040" 1/16" 3/32" 1/8" For 9 and 20 TIG Torches Pyrex Cup PYR8S PYR8S PYR8S PYR8S Tungsten Adapter PYR040TA PYR116TA PYR332TA PYR18TA Collet Body PYR20CB PYR20CB PYR20CB PYR20CB Wedge Collet PYR20C040 PYR20C116 PYR20C332 PYR20C18 Heat Shield...
- Page 23 FUPA & BBW Flared Cup Kits Essential tools for serious fabricators, the large diameter FUPA12C Ceramic Cup Kit, FUPA12 Pyrex Cup Kit, and BBW16 Pyrex Cup kit offer superb gas coverage—a necessity when making critical welds on exotic materials including Titanium, Chrome Moly, and Stainless Steel.
- Page 24 Need to change the angle of your TIG torch to get into that tight area? Trouble is, with a standard TIG torch you can’t. Well, HTP has the answer: our Flex Neck TIG Torch. This unique torch lets you bend the end of your TIG torch into virtually any position, allowing you quick, easy access to practically any tight, cramped or out-of-the-way spot.
- Page 25 Invertig 221 AC/DC (Single Voltage) Parts Diagram & List Pos. Description Part# Pos. Description Part# Cover 620148 Shunt 612644 Handle Support 660752 612556 Screw Cover 660754 Power Transformer 612039 Handle 620212 Resistance 612145 NTC (Preassembled) 611076 Front PCB Support 620242 Copper Bar (“L”...
- Page 26 Invertig 221 AC/DC (Single Voltage) Wiring Diagram...
- Page 27 Invertig 221DV AC/DC (Dual Voltage) Parts Diagram & List Pos. Description Part# Pos. Description Part# Cover 620148 Support Plate (Front Panel Connections) 620209 Handle Support 660752 Shunt 612644 Screw Cover 660754 612556 Handle 620212 Power Transformer 612169 NTC (Preassembled) 611076 Resistance 612145 Copper Bar (“L”...
- Page 28 Invertig 221DV AC/DC (Dual Voltage) Wiring Diagram...
Need help?
Do you have a question about the Invertig 221 AC/DC and is the answer not in the manual?
Questions and answers