
Related Manuals for Gasmate GM160-014


Summary of Contents for Gasmate GM160-014
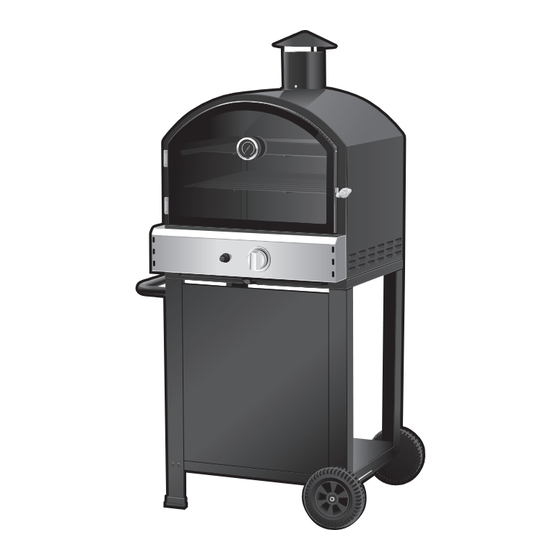
- Page 1 Pizza Oven with Light Model No. GM160-014 FOR OUTDOOR USE ONLY - OPERATES ON LPG Retain these instructions for future use. Important: The installer or seller must leave these instructions with the consumer. 4297-09/15...
-
Page 2: Table Of Contents
GENERAL INFORMATION Contents Specifications Appliance specifications can be found on the data label Section Page attached to the base panel. Gas Cylinder Use & Safety General Information This is a low pressure appliance and must only be used General Assembly with the hose and regulator supplied. -
Page 3: General Information
GENERAL INFORMATION GENERAL ASSEMBLY Location of your Appliance Connecting & Disconnecting to Gas Source DO NOT use your appliance in garages, porches, sheds, breezeways, or other enclosed areas. Your appliance is to be used OUTDOORS. The appliance is not intended to be IMPORTANT: installed in or on recreational vehicles and/or boats and Before connecting and disconnecting appliance to gas... -
Page 4: Lighting Procedure
GENERAL ASSEMBLY LIGHTING PROCEDURE Before lighting your appliance for the first time, read the Regulator Safety Feature instructions fully to ensure the appliance is assembled All QCC regulators (the part that attaches to the gas correctly and is ready for use. cylinder to regulate the flow of gas) have a safety feature Remove all point-of-sale material from the appliance. - Page 5 Burner Operation & Ignition System Check Problem Possible Reason Solution Valve on cylinder is closed Open valve on cylinder Burner will not ignite Control knob is closed Turn knob to high when lighting Electronic igniter is faulty Use a long barbecue match Burner has gone out Check that the gas cylinder is not empty and re-ignite the burner...
- Page 6 EXPLODED DIAGRAM...
-
Page 7: Assembly Instructions
PARTS LIST Part Name Part Name Chimney Leg Plug Oven Door Hinge Cart Leg (Left) Heat Spacer Drip Tray Knob Light Drip Tray Light Enclosure Cart Handle Back Heat-Shield Glass Door Handle Back Panel Control Knob Body Exterior Knob Bezel Body Interior Assembly Temperature Gauge Door Latch... - Page 8 ASSEMBLY INSTRUCTIONS Step 1 Use screw M6*10×16 pcs and nut M6×16pcs to fix the 4pcs Leg (21 & 23) to the Cart Bottom Plate (17) as shown. Note: 2pcs leg with plug please fix on the Cart Bottom Plate left (23), 2pcs Leg without plug please fix on the Cart Bottom Plate right (21).
- Page 9 ASSEMBLY INSTRUCTIONS Step 3 Use M6*10×6 pcs and nut M6×6pcs to assemble the Cart Front Panel (20) to Cart Legs. Step 4 Use M6*10×4 pcs and nut M6×4pcs to assemble the handle (26) to the Cart as shown.
- Page 10 ASSEMBLY INSTRUCTIONS Step 5 Use M4*12×3 pcs to assemble the chimney (1) as shown. Step 6 Insert the Control Knob (28) as shown. Place the Battery in the Igniter, ensure the “-” is inserted first.
- Page 11 ASSEMBLY INSTRUCTIONS Step 7 Use screw M5*30×4 pcs and Heat Spacer (3) to fix the back Heat Shield (6) onto the back panel of the oven as shown. Step 8 Use M6*10×4 pcs to attach the Body and the Cart as shown, use bolt to tighten.
- Page 12 ASSEMBLY INSTRUCTIONS Step 9 Put the Flame Tamer (40) into the oven as shown. Step 10 Use M5*8×2 pcs and nut M5×2pcs to assemble the Battery Case (19) to the Cart Right Leg as shown, use bolt to tighten.
- Page 13 ASSEMBLY INSTRUCTIONS Step 11 Open the Battery Case Cover and insert 4 x AA batteries as shown. Close the cover and put the Battery Case into the Case Frame. Connect the cable to the Battery, check that the case switch is in the ON position. Press the control panel button to ON position, then the inside light will come on.
- Page 14 ASSEMBLY INSTRUCTIONS Step 12 Step 13 Step 14 Offer the hose assembly up to Attach the regulator to your gas Turn on the gas cylinder the connection point on the cylinder. ensuring that all of the controls Pizza Oven. Tighten the on the Pizza Oven are turned connection nut clockwise with OFF at this point.
-
Page 15: Bulb Replacement
BULB REPLACEMENT WARNING Bulb is hot when in use. 1. Turn off light and allow to cool before replacing bulb. 2. Do not touch hot bulb or enclosure. 3. Keep bulb away from materials that may burn. 4. Use only with a 10-watt or smaller bulb. 5. - Page 16 A properly cooked, fresh pizza is one of life’s true pleasures. wait until the appliance has cooled, then clean the burner Using the Gasmate Pizza Oven you can enjoy fresh cooked tubes and burner ports. pizza in your own back yard.
- Page 17 figures - the same principles apply to any other shaped area. Gasmate Gasmate ® is a registered trademark of: ® is a registered trademark of: Sitro Group Australia Pty Ltd www.gasmate.com.au Sitro Group Australia Pty Ltd www.gasmate.com.au Aber, Hamilton, N.Z. www.gasmate.co.nz Aber, Hamilton, N.Z. www.gasmate.co.nz...
- Page 19 This page has been left intentionaly blank...
- Page 20 This page has been left intentionaly blank...
Need help?
Do you have a question about the GM160-014 and is the answer not in the manual?
Questions and answers