Canon TS9500 Series Online Manual
Hide thumbs
Also See for TS9500 Series:
- Getting started (44 pages) ,
- Online manual (436 pages) ,
- Getting started (101 pages)
Table of Contents
Advertisement
Advertisement
Table of Contents

Related Manuals for Canon TS9500 Series


Summary of Contents for Canon TS9500 Series
- Page 1 TS9500 series Online Manual English...
-
Page 2: Table Of Contents
Canon IJ Network Device Setup Utility Screen........ - Page 3 Loading Paper............Paper Sources.
- Page 4 Cleaning............. . 173 Cleaning Paper Feed Rollers.
- Page 5 Changing Settings from Operation Panel......... . . 232 Setting Items on Operation Panel.
- Page 6 Canon IJ Status Monitor Description........
- Page 7 Scanning Easily (Auto Scan)........... . . 378 Scanning Documents and Photos.
- Page 8 Cannot Find Printer on Check Printer Settings Screen During Wired LAN Setup (Windows)- Checking PC Network Connection..........Cannot Find Printer on Check Printer Settings Screen During Wired LAN Setup (Windows)- Checking Printer's Wired LAN Settings.
- Page 9 Mechanical Problems........... . 489 Printer Does Not Turn On.
- Page 10 5012..............535 5100.
-
Page 11: Using Online Manual
Using Online Manual Operating Environment Symbols Used in This Document Touch-enabled Device Users (Windows) Printing Online Manual Trademarks and Licenses Screenshots in This Manual... -
Page 12: Symbols Used In This Document
Symbols Used in This Document Warning Instructions that, if ignored, could result in death, serious personal injury, or property damage caused by incorrect operation of the equipment. These must be observed for safe operation. Caution Instructions that, if ignored, could result in personal injury or property damage caused by incorrect operation of the equipment. -
Page 13: Touch-Enabled Device Users (Windows)
Touch-enabled Device Users (Windows) For touch actions, you need to replace "right-click" in this document with the action set on the operating system. For example, if the action is set to "press and hold" on your operating system, replace "right-click" with "press and hold."... -
Page 14: Trademarks And Licenses
(1998) are either registered trademarks or trademarks of Adobe Systems Incorporated in the United States and/or other countries. • Bluetooth is a trademark of Bluetooth SIG, Inc., U.S.A. and licensed to Canon Inc. • Autodesk and AutoCAD are registered trademarks or trademarks of Autodesk, Inc., and/or its subsidiaries and/or affiliates in the USA and/or other countries. - Page 15 Apache License Version 2.0, January 2004 http://www.apache.org/licenses/ TERMS AND CONDITIONS FOR USE, REPRODUCTION, AND DISTRIBUTION 1. Definitions. "License" shall mean the terms and conditions for use, reproduction, and distribution as defined by Sections 1 through 9 of this document. "Licensor" shall mean the copyright owner or entity authorized by the copyright owner that is granting the License.
- Page 16 2. Grant of Copyright License. Subject to the terms and conditions of this License, each Contributor hereby grants to You a perpetual, worldwide, non-exclusive, no-charge, royalty-free, irrevocable copyright license to reproduce, prepare Derivative Works of, publicly display, publicly perform, sublicense, and distribute the Work and such Derivative Works in Source or Object form. 3.
- Page 17 7. Disclaimer of Warranty. Unless required by applicable law or agreed to in writing, Licensor provides the Work (and each Contributor provides its Contributions) on an "AS IS" BASIS, WITHOUT WARRANTIES OR CONDITIONS OF ANY KIND, either express or implied, including, without limitation, any warranties or conditions of TITLE, NON-INFRINGEMENT, MERCHANTABILITY, or FITNESS FOR A PARTICULAR PURPOSE.
- Page 18 Redistribution and use in source and binary forms, with or without modification, are permitted provided that the following conditions are met: * Redistributions of source code must retain the above copyright notice, this list of conditions and the following disclaimer. * Redistributions in binary form must reproduce the above copyright notice, this list of conditions and the following disclaimer in the documentation and/or other materials provided with the distribution.
- Page 19 Use is subject to license terms below. This distribution may include materials developed by third parties. Sun, Sun Microsystems, the Sun logo and Solaris are trademarks or registered trademarks of Sun Microsystems, Inc. in the U.S. and other countries. Redistribution and use in source and binary forms, with or without modification, are permitted provided that the following conditions are met: * Redistributions of source code must retain the above copyright notice, this list of conditions and the following disclaimer.
- Page 20 TORT (INCLUDING NEGLIGENCE OR OTHERWISE) ARISING IN ANY WAY OUT OF THE USE OF THIS SOFTWARE, EVEN IF ADVISED OF THE POSSIBILITY OF SUCH DAMAGE. ---- Part 6: Cisco/BUPTNIC copyright notice (BSD) ----- Copyright (c) 2004, Cisco, Inc and Information Network Center of Beijing University of Posts and Telecommunications.
- Page 21 SPECIAL, EXEMPLARY, OR CONSEQUENTIAL DAMAGES (INCLUDING, BUT NOT LIMITED TO, PROCUREMENT OF SUBSTITUTE GOODS OR SERVICES; LOSS OF USE, DATA, OR PROFITS; OR BUSINESS INTERRUPTION) HOWEVER CAUSED AND ON ANY THEORY OF LIABILITY, WHETHER IN CONTRACT, STRICT LIABILITY, OR TORT (INCLUDING NEGLIGENCE OR OTHERWISE) ARISING IN ANY WAY OUT OF THE USE OF THIS SOFTWARE, EVEN IF ADVISED OF THE POSSIBILITY OF SUCH DAMAGE.
- Page 22 FOR ANY DIRECT, INDIRECT, INCIDENTAL, SPECIAL, EXEMPLARY, OR CONSEQUENTIAL DAMAGES (INCLUDING, BUT NOT LIMITED TO, PROCUREMENT OF SUBSTITUTE GOODS OR SERVICES; LOSS OF USE, DATA, OR PROFITS; OR BUSINESS INTERRUPTION) HOWEVER CAUSED AND ON ANY THEORY OF LIABILITY, WHETHER IN CONTRACT, STRICT LIABILITY, OR TORT (INCLUDING NEGLIGENCE OR OTHERWISE) ARISING IN ANY WAY OUT OF THE USE OF THIS SOFTWARE, EVEN IF ADVISED OF THE POSSIBILITY OF SUCH DAMAGE.
- Page 23 MIT License Copyright (c) 1998, 1999, 2000 Thai Open Source Software Center Ltd Permission is hereby granted, free of charge, to any person obtaining a copy of this software and associated documentation files (the "Software"), to deal in the Software without restriction, including without limitation the rights to use, copy, modify, merge, publish, distribute, sublicense, and/or sell copies of the Software, and to permit persons to whom the Software is furnished to do so, subject to the following conditions:...
- Page 24 CONCERNING THE MERCHANTABILITY OF THIS SOFTWARE OR ITS FITNESS FOR ANY PARTICULAR PURPOSE. (1) Red Hat Incorporated Copyright (c) 1994-2009 Red Hat, Inc. All rights reserved. This copyrighted material is made available to anyone wishing to use, modify, copy, or redistribute it subject to the terms and conditions of the BSD License.
- Page 25 The FreeType Project is distributed in several archive packages; some of them may contain, in addition to the FreeType font engine, various tools and contributions which rely on, or relate to, the FreeType Project. This license applies to all files found in such packages, and which do not fall under their own explicit license.
- Page 26 The FreeType Project is copyright (C) 1996-2000 by David Turner, Robert Wilhelm, and Werner Lemberg. All rights reserved except as specified below. 1. No Warranty -------------- THE FREETYPE PROJECT IS PROVIDED `AS IS' WITHOUT WARRANTY OF ANY KIND, EITHER EXPRESS OR IMPLIED, INCLUDING, BUT NOT LIMITED TO, WARRANTIES OF MERCHANTABILITY AND FITNESS FOR A PARTICULAR PURPOSE.
- Page 27 Discusses general use and applications of FreeType, as well as future and wanted additions to the library and distribution. If you are looking for support, start in this list if you haven't found anything to help you in the documentation. o freetype-devel@nongnu.org Discusses bugs, as well as engine internals, design issues, specific licenses, porting, etc.
- Page 28 THIS SOFTWARE IS PROVIDED BY THE COPYRIGHT HOLDERS AND CONTRIBUTORS "AS IS," AND ANY EXPRESS OR IMPLIED WARRANTIES, INCLUDING, BUT NOT LIMITED TO, THE IMPLIED WARRANTIES OF MERCHANTABILITY AND FITNESS FOR A PARTICULAR PURPOSE, ARE DISCLAIMED. IN NO EVENT SHALL THE COPYRIGHT HOLDER OR CONTRIBUTORS BE LIABLE FOR ANY DIRECT, INDIRECT, INCIDENTAL, SPECIAL, EXEMPLARY, OR CONSEQUENTIAL DAMAGES (INCLUDING, BUT NOT LIMITED TO, PROCUREMENT OF SUBSTITUTE GOODS OR SERVICES;...
-
Page 29: Basic Operation
Basic Operation Printing Photos from a Computer Printing Photos from a Smartphone/Tablet Copying Printing Photos from Memory Card Printing a Disc Label from a Computer Copying a Disc Label... -
Page 30: Printing Photos From A Computer
Printing Photos from a Computer This section describes how to print photos with Easy-PhotoPrint Editor. 1. Open rear tray cover (A). Pull straight up and fold back paper support (B). 2. Open the feed slot cover (C). 3. Slide right paper guide (D) to open both paper guides. 4. - Page 31 5. Slide right paper guide (D) to align with both sides of paper stack. 6. Close feed slot cover (C) gently. After closing the feed slot cover, the paper setting confirmation screen for the rear tray appears on the touch screen.
- Page 32 From the Start menu, select (All apps >) Canon Utilities > Easy-PhotoPrint Editor. For macOS: From the Go menu in Finder, select Application and double-click the Canon Utilities folder, the Easy- PhotoPrint Editor folder, and then the Easy-PhotoPrint Editor icon.
- Page 33 11. Click Browse (I) in From computer: and select folder with photos you want to print. 12. Click photos (J) you want to print and select Open (K). For Windows: To select two or more photos at a time, click photos while pressing the Ctrl key. For macOS: To select two or more photos at a time, click photos while pressing the command key.
- Page 34 For Windows: Specify the number of copies, your model name, the paper size, and other options. For macOS: Specify the number of copies, the paper size, and other options. Note • Selecting Same No. of each photo enables you to specify the number of copies for all photos with a single setting.
-
Page 35: Printing Photos From A Smartphone/Tablet
Printing Photos from a Smartphone/Tablet This section describes how to print photos with Canon PRINT Inkjet/SELPHY. For details on how to download Canon PRINT Inkjet/SELPHY, see below. Print Easily from a Smartphone or Tablet with Canon PRINT Inkjet/SELPHY 1. Open rear tray cover (A). Pull straight up and fold back paper support (B). - Page 36 5. Slide right paper guide (D) to align with both sides of paper stack. 6. Close feed slot cover (C) gently. After closing the feed slot cover, the paper setting confirmation screen for the rear tray appears on the touch screen.
- Page 37 9. Start (Canon PRINT Inkjet/SELPHY) from your smartphone/tablet. 10. Select Photo Print on Canon PRINT Inkjet/SELPHY. The list of photos saved on your smartphone/tablet is displayed. 11. Select a photo. You can also select multiple photos at once.
- Page 38 13. Select Print.
-
Page 39: Copying
Copying This section describes how to load originals and copy them to plain paper loaded in the cassette. 1. Pull out the cassette (A) from the printer. 2. Slide paper guides (B) in front and (C) on right to open guides. 3. - Page 40 5. Insert cassette into printer. After inserting the cassette into the printer, the paper setting confirmation screen for the cassette appears on the touch screen. 6. If page size on touch screen matches size of paper loaded in cassette, select Yes. If not, select Change to change the setting in accordance with the size of the loaded paper.
- Page 41 7. Open operation panel (D), and then pull out paper output tray (E) and paper output support (F). Be sure to open the operation panel before printing. If the operation panel is close, the printer does not start printing. 8. Select Copy (G) on HOME screen.
- Page 42 Note • To copy two or more documents continuously, load them in the ADF (Auto Document Feeder). Loading Documents in the ADF (Auto Document Feeder) 12. Close the document cover. 13. Check paper settings and tap Black (J) or Color (K).
- Page 43 Important • Do not open the document cover until copying is complete. Note • Your printer is equipped with many other convenient copy features. Copying...
-
Page 44: Printing Photos From Memory Card
Printing Photos from Memory Card This section describes how to print photos on a memory card. 1. Open rear tray cover (A). Pull straight up and fold back paper support (B). 2. Open the feed slot cover (C). 3. Slide right paper guide (D) to open both paper guides. 4. - Page 45 5. Slide right paper guide (D) to align with both sides of paper stack. 6. Close feed slot cover (C) gently. After closing the feed slot cover, the paper setting confirmation screen for the rear tray appears on the touch screen.
- Page 46 7. If page size and media type on touch screen match size and type of paper loaded in rear tray, select Yes. If not, select Change to change the settings in accordance with the size and type of the loaded paper. 8.
- Page 47 Note • For details on inserting memory cards other than SD/SDHC/SDXC, see below. Inserting the Memory Card 10. Flick right and left through the photos (H) and select one. 11. Check paper settings and tap Color (I). Important • Do not remove the memory card during printing. Data on the memory card may be damaged. Note •...
-
Page 48: Printing A Disc Label From A Computer
From the Start menu, select (All apps >) Canon Utilities > Easy-PhotoPrint Editor. For macOS: From the Go menu in Finder, select Application and double-click the Canon Utilities folder, the Easy- PhotoPrint Editor folder, and then the Easy-PhotoPrint Editor icon. - Page 49 5. Click Browse (E) in From computer: and select folder with photos you want to print. 6. Click photos (F) you want to print and select Open (G). 7. Edit disc label and select Next (H). You can change the background or add texts. Easy-PhotoPrint Editor Guide...
- Page 50 8. Open operation panel (I) until horizontal. 9. Specify number of copies and other options under Print Settings (J). For Windows: Specify the number of copies, your printer name, and other options. For macOS: Specify the number of copies and other options. 10.
- Page 51 11. When message prompting you to load printable disc appears on printer's touch screen, remove cassette from printer and then detach multi-purpose tray from back of cassette. Insert the removed cassette back into the printer.
- Page 52 12. Open multi-purpose tray guide (L) and completely press it down. 13. Place printable disc on multi-purpose tray. 1. WITH PRINT SIDE FACING UP, place printable disc, and press it against lock (M) at bottom. 2. While pressing down lock with printable disc, insert top of printable disc into slits (N).
- Page 53 14. Place multi-purpose tray on multi-purpose tray guide. 15. Insert multi-purpose tray straight in in horizontal direction until arrow ( ) on multi-purpose tray guide is approximately aligned with arrow ( ) on multi-purpose tray. 16. Select OK on printer's touch screen. The multi-purpose tray is drawn into the printer and printing will start.
- Page 54 18. While pressing down lock (M), take out printable disc from slits (N) on multi-purpose tray, and remove it. Note • Easy-PhotoPrint Editor enables you to print photos onto the disc label with various layouts. Easy-PhotoPrint Editor Guide...
-
Page 55: Copying A Disc Label
Copying a Disc Label This section describes how to copy the label of an existing disc (BD/DVD/CD, etc.) and print it onto a printable disc. 1. Select Copy (A) on the HOME screen. 2. Select Disc label (B). 3. Check message and select OK. 4. - Page 56 5. Specify the amount of ink (E). If the print result is blurry, select Bleed-proof. Blurring may be reduced by printing with less ink. 6. Open the document cover (F). 7. Load copy source (BD/DVD/CD, etc.) WITH ITS LABEL SIDE DOWN on platen. 8.
- Page 57 11. Tap Black (H) or Color (I). A message prompting you to load the printable disc is displayed. 12. Remove cassette from printer and then detach multi-purpose tray from back of cassette. Insert the removed cassette back into the printer.
- Page 58 13. Open multi-purpose tray guide (J) and completely press it down. 14. Place printable disc on multi-purpose tray. 1. WITH PRINT SIDE FACING UP, place printable disc, and press it against lock (K) at bottom. 2. While pressing down lock with printable disc, insert top of printable disc into slits (L).
- Page 59 15. Place multi-purpose tray on multi-purpose tray guide. 16. Insert multi-purpose tray straight in in horizontal direction until arrow ( ) on multi-purpose tray guide is approximately aligned with arrow ( ) on multi-purpose tray. 17. Select OK on the touch screen. The multi-purpose tray is drawn into the printer and copying will start.
- Page 60 19. While pressing down lock (K), take out printable disc from slits (L) on multi-purpose tray, and remove it. Note • Your printer is equipped with many other disc label print features. Disc Label Printing...
-
Page 61: Network
Network Available Connection Methods The following connection methods are available on the printer. • Wireless Connection Connect the printer and devices (e.g. computer/smartphone/tablet) using a wireless router. If you have a wireless router, we recommend you use one for wireless connection. ◦... - Page 62 Note • You can connect the printer and computer using a USB cable (USB connection). Prepare a USB cable. For details, see Connects to Another Computer via LAN/Changes from USB to LAN Connection. Network Connection Settings/Setup Perform connection setup for the printer and computer/smartphone/tablet. For more on setup procedure, click here.
- Page 63 Notice/Restriction See below for details. • Restrictions on network settings: Restrictions • Notices when printing using web service: Notice for Web Service Printing...
-
Page 64: Restrictions
Restrictions When connecting another device while a device (such as a computer) is already connected to the printer, connect it using the same connection method as the connected device. If you connect using a different connection method, the connection to the device in use will be disabled. Connection Using a Wired Network cannot be performed on printers that do not support a wired connection. - Page 65 • If you connect a device and the printer using Wireless Direct, Internet connection may become unavailable depending on your environment. In that case, web services for the printer cannot be used. • In Wireless Direct mode, you can connect up to five devices at the same time. If you try to connect a sixth device while five devices are already connected, an error will appear.
-
Page 66: Network Connection Tips
Network Connection Tips Default Network Settings Detect Same Printer Name Connects to Another Computer via LAN/Changes from USB to LAN Connection Printing Network Settings Reconfiguration Method of LAN Connection/Reconfiguration Method of Wi-Fi Connection... -
Page 67: Default Network Settings
XXXXXXXXXXXX Enable/disable IPv6 Enable Enable/disable WSD Enable Timeout setting 15 minutes Enable/disable Bonjour Enable Service name Canon TS9500 series LPR protocol setting Enable RAW protocol Enable LLMNR Enable PictBridge communication Enable Wired LAN DRX setting Enable ("XX" represents alphanumeric characters.) * Default value depends on printer. - Page 68 *1 "ab" is specified at random and "XX" represents last two digits of printer's MAC address. (The value is specified when the printer is turned on for the first time.) *2 The password is specified automatically when the printer is turned on for the first time.
-
Page 69: Detect Same Printer Name
Detect Same Printer Name When the printer is detected during setup, plural printers with the same name may appear on the results screen. Select a printer with checking the printer settings against those on detection result screen. • For Windows: Check the printer's MAC address or serial to select the correct printer from the results. -
Page 70: Connects To Another Computer Via Lan/Changes From Usb To Lan Connection
Connects to Another Computer via LAN/Changes from USB to LAN Connection For Windows: For macOS: For Windows: To add a computer to connect to the printer on a LAN or to change from USB to LAN connection, perform setup using the Setup CD-ROM or from the web page. For macOS: To connect an additional computer to the printer via LAN, or to change from USB to LAN connection, perform setup from the web page. -
Page 71: Printing Network Settings
Product information – Product Name Product name XXXXXXXX ROM Version ROM version XXXXXXXX Serial Number Serial number XXXXXXXX Network Diagnostics Network diagnostics ― Diagnostic Result Diagnostic result XXXXXXXX Result Codes Result codes XXXXXXXX Result Code Details Result code details http://canon.com/ijnwt... - Page 72 Wireless LAN Wireless LAN Enable/Disable Infrastructure Infrastructure Enable/Disable 3-2-1 Signal Strength Signal strength 0 to 100 [%] 3-2-2 Link Quality Link quality 0 to 100 [%] 3-2-3 Frequency Frequency XX (GHz) 3-2-4 MAC Address MAC address XX:XX:XX:XX:XX:XX 3-2-5 Connection Connection status Active/Inactive 3-2-6 SSID...
- Page 73 3-2-23 Stateless Prefix Stateless prefix length Length3 3-2-24 Stateless Address4 Stateless address 4 XXXX:XXXX:XXXX:XXXX XXXX:XXXX:XXXX:XXXX 3-2-25 Stateless Prefix Stateless prefix length Length4 3-2-26 Default Gateway1 Default gateway 1 XXXX:XXXX:XXXX:XXXX XXXX:XXXX:XXXX:XXXX 3-2-27 Default Gateway2 Default gateway 2 XXXX:XXXX:XXXX:XXXX XXXX:XXXX:XXXX:XXXX 3-2-28 Default Gateway3 Default gateway 3 XXXX:XXXX:XXXX:XXXX XXXX:XXXX:XXXX:XXXX...
- Page 74 3-3-14 Link Local Prefix Link local prefix length Length 3-3-15 IPsec IPsec setting Active 3-3-16 Security Protocol Security method – Wired LAN Wired LAN Enable/Disable MAC Address MAC address XX:XX:XX:XX:XX:XX Connection Wired LAN status Active/Inactive TCP/IPv4 TCP/IPv4 Enable IP Address IP address XXX.XXX.XXX.XXX Subnet Mask...
- Page 75 XXXX:XXXX:XXXX:XXXX 4-19 Default Gateway2 Default gateway 2 XXXX:XXXX:XXXX:XXXX XXXX:XXXX:XXXX:XXXX 4-20 Default Gateway3 Default gateway 3 XXXX:XXXX:XXXX:XXXX XXXX:XXXX:XXXX:XXXX 4-21 Default Gateway4 Default gateway 4 XXXX:XXXX:XXXX:XXXX XXXX:XXXX:XXXX:XXXX 4-25 IPsec IPsec setting Active 4-26 Security Protocol Security method ESP/ESP & AH/AH 4-27 Wired LAN DRX Discontinuous recep- Enable/Disable tion (wired LAN)
- Page 76 5-19 Proxy Port Proxy port specification 1 to 65535 5-20 Cert. Fingerprt(SHA-1) Certificate finger- xxxxxxxx xxxxxxxx xxxxxxxx print(SHA-1) xxxxxxxx xxxxxxxx 5-21 Cert. Fin- Certificate finger- xxxxxxxx xxxxxxxx xxxxxxxx xxxxxxxx gerprt(SHA-256) print(SHA-256) xxxxxxxx xxxxxxxx xxxxxxxx xxxxxxxx Bluetooth Bluetooth settings ― Bluetooth Setting Bluetooth Enable/Disable Bluetooth Device Ad-...
-
Page 77: Reconfiguration Method Of Lan Connection/Reconfiguration Method Of Wi-Fi Connection
Reconfiguration Method of LAN Connection/Reconfiguration Method of Wi-Fi Connection Reconfiguration Method of LAN Connection Reconfiguration Method of Wi-Fi Connection Reconfiguration Method of LAN Connection Follow either procedure below to change LAN connection method (wired or Wi-Fi). • For Windows: ◦ Redo setup using the Setup CD-ROM or from the web page. ◦... - Page 78 4. If message saying setup is completed appears, select OK. • For macOS: Redo setup from the web page.
-
Page 79: Ij Network Device Setup Utility (Windows)
IJ Network Device Setup Utility (Windows) IJ Network Device Setup Utility Starting Up IJ Network Device Setup Utility Diagnosing and Repairing Network Settings Performing/Changing Network Settings List of Models Which Does Not Support Diagnosis and Repair Function... -
Page 80: Ij Network Device Setup Utility
IJ Network Device Setup Utility IJ Network Device Setup Utility allows you to diagnose or repair the network status, and to perform printer settings on network. Use IJ Network Device Setup Utility for: • Searching printers on network and performing initial network setup for detected printers •... -
Page 81: Starting Up Ij Network Device Setup Utility
Start up IJ Network Device Setup Utility as shown below. • In Windows 10, select Start > (All apps > ) > Canon Utilities > IJ Network Device Setup Utility. • In Windows 8.1 or Windows 8, select IJ Network Device Setup Utility on the Start screen to start IJ Network Device Setup Utility. -
Page 82: Diagnosing And Repairing Network Settings
Diagnosing and Repairing Network Settings IJ Network Device Setup Utility diagnoses and repairs computer settings or connection between the computer and printer when a problem (e.g. cannot print from a printer on the network) occurs. Important • Some models do not support diagnosis and repair function. For details: List of Models Which Does Not Support Diagnosis and Repair Function Follow the procedure below. -
Page 83: Performing/Changing Network Settings
Performing/Changing Network Settings Canon IJ Network Device Setup Utility Screen Performing Network Settings... -
Page 84: Canon Ij Network Device Setup Utility Screen
Items on Canon IJ Network Device Setup Utility Screen Menus on Canon IJ Network Device Setup Utility Screen Items on Canon IJ Network Device Setup Utility Screen Toolbar Items on Canon IJ Network Device Setup Utility Screen The screen below appears when you start up IJ Network Device Setup Utility and select Printer Network Setup. - Page 85 Appears after performing network setup and clicking Set to close the window. • Requires Setup Indicates the printer is required to perform Wi-Fi setup. Performing/Changing Wi-Fi Settings • Not Set Indicates the printer cannot be used on network, or IPv6 is disabled. Specify an IP address or enable IPv6 on Network Settings..
- Page 86 Selecting a printer from the printer list displays its current status and what to do next. Menus on Canon IJ Network Device Setup Utility Screen This section describes menus on Canon IJ Network Device Setup Utility screen. A: Printer Settings menu...
- Page 87 D: Help menu Help Menu Items on Canon IJ Network Device Setup Utility Screen Toolbar This section describes items on Canon IJ Network Device Setup Utility Screen toolbar. A: Perform wired or Wi-Fi setup. Note • This item has the same function as Network Settings... in the Printer Settings menu.
-
Page 88: Performing Network Settings
Performing Network Settings Performing/Changing Wired LAN Connection (Ethernet Cable) Settings Performing/Changing Wi-Fi Settings Assigning Printer Information... -
Page 89: Performing/Changing Wired Lan Connection (Ethernet Cable) Settings
Performing/Changing Wired LAN Connection (Ethernet Cable) Settings Follow the procedure below to perform/change wired LAN settings. Note • For some models, you can perform network setup for a USB connected printer using IJ Network Device Setup Utility. Select USB on Switch View under the View menu to display printers for which you can perform setup. - Page 90 7. Perform/change settings. You can switch the screen between IPv4 and IPv6. Click the tab to switch the protocol. • IPv4 settings A: Use IPv4 address Always selected. (displayed in a gray out state) B: Get IP address automatically Select this option to use an IP address automatically assigned by a DHCP server. DHCP server functionality must be enabled on your router.
- Page 91 A: Use IPv6 address Select when you use the printer with IPv6 environment. B: Use Stateless Address: Select when you use an IP address assigned automatically. Use a router compatible with IPv6. Note • This setting item is not available depending on the printer you are using. C: Use Manual Address: Select this option if no DHCP server functionality is available in your setup where you use the printer, or you want to use a fixed IP address.
-
Page 92: Performing/Changing Wi-Fi Settings
Performing/Changing Wi-Fi Settings Follow the procedure below to perform/change Wi-Fi settings. Important • Enable Easy wireless connect (Cableless setup) before performing printer setup. (Not required if you change the IP address.) For details, search for "NR049" on your printer's online manual and see the page shown. - Page 93 Select Wi-Fi and click OK. 6. Enter password and click OK. The Network Settings screen appears. 7. Perform/change settings. You can switch the screen between IPv4 and IPv6. Click the tab to switch the protocol. • IPv4/IPv6 settings A: Network Type: Select the Wi-Fi mode.
- Page 94 C: Search... The Detected Wireless Routers screen is displayed to select a wireless router to connect to. For a wireless router already connected to the computer, Available is displayed on Communication Status. If you select a wireless router with Not Connected on Communication Status from the list, clicking Set displays the WPA/WPA2 or WEP setting screen for a wireless router.
- Page 95 • IPv6 settings Note • If USB is selected from the pulldown menu on the toolbar, you cannot perform IPv6 settings. • The setting items below are available only when Infrastructure is selected for Network Type:. If Direct is selected, all items are displayed in a gray out status and you cannot perform any settings.
- Page 96 Note • This setting item is not available depending on the printer you are using. 8. Click Set.
-
Page 97: Assigning Printer Information
Assigning Printer Information Follow the procedure below to assign/change printer location name or device name. The names appear on Device Name: and Location: on the Canon IJ Network Device Setup Utility screen. Note • If USB is selected from the pulldown menu on the toolbar, this setting item is not available. -
Page 98: List Of Models Which Does Not Support Diagnosis And Repair Function
List of Models Which Does Not Support Diagnosis and Repair Function The following models does not support "Diagnose and Repair" function of IJ Network Device Setup Utility. • G4000 series • PRO-500 series • PRO-1000 series • MB2100 series • MB2700 series •... -
Page 99: Handling Paper, Originals, Ink Tanks, Multi-Purpose Tray, Memory Card, Etc
Handling Paper, Originals, Ink Tanks, Multi-purpose Tray, Memory Card, etc. Loading Paper Placing Multi-purpose Tray Loading Originals Inserting the Memory Card Replacing Ink Tanks... -
Page 100: Loading Paper
Loading Paper Paper Sources Loading Paper in the Rear Tray Loading Paper in the Cassette Loading Envelopes in Rear Tray... -
Page 101: Paper Sources
Paper Sources The printer has two paper sources for feeding paper, the rear tray (A) and cassette (B). You can load all supported paper on the rear tray. Supported Media Types You can load A4, B5, A5, or Letter-sized plain paper in the cassette. Note •... -
Page 102: Loading Paper In The Rear Tray
For details on the Canon genuine paper, see Supported Media Types. • You can use general copy paper or Canon Red Label Superior WOP111/Canon Océ Office Colour Paper SAT213. For the page size and paper weight you can use for this printer, see Supported Media Types. - Page 103 3. Open the feed slot cover (C). 4. Slide right paper guide (D) to open both paper guides. 5. Load paper stack in portrait orientation WITH PRINT SIDE FACING UP.
- Page 104 6. Slide right paper guide (D) to align with both sides of paper stack. Do not slide the paper guides too hard against the paper. The paper may not be fed properly. Important • Always load paper in portrait orientation (E). Loading paper in landscape orientation (F) can cause paper jams.
- Page 105 Important • If the feed slot cover is open, paper cannot be fed. Be sure to close the feed slot cover. After closing the feed slot cover, the paper setting confirmation screen for the rear tray appears on the touch screen. 8.
- Page 106 Note • There are various types of paper, such as paper with a special surface coating for printing photos at optimal quality and paper suitable for documents. Each media type has specific preset settings (how ink is used and sprayed, distance from nozzles, etc.), that allow you to print to that type with optimal image quality.
-
Page 107: Loading Paper In The Cassette
Note • In the cassette, be sure to load only plain paper. • You can use general copy paper or Canon Red Label Superior WOP111/Canon Océ Office Colour Paper SAT213. For the page size and paper weight you can use for this printer, see Supported Media Types. - Page 108 4. Load paper stack in portrait orientation WITH PRINT SIDE FACING DOWN, and place it in center of cassette. Important • Always load paper in portrait orientation (D). Loading paper in landscape orientation (E) can cause paper jams. Note • Align the paper stack with the edge of the cassette as shown in the figure below. If the paper stack is in contact with the protrusion (F), the paper may not be fed properly.
- Page 109 5. Slide front paper guide (B) to align it with paper stack. Align paper guide with where it clicks into place. 6. Slide right paper guide (C) to align it with paper stack. Do not slide the paper guide too hard against the paper. The paper may not be fed properly. Note •...
- Page 110 7. Insert cassette into printer. Push the cassette into the printer until it stops. After inserting the cassette into the printer, the paper setting confirmation screen for the cassette appears on the touch screen. 8. If page size on touch screen matches size of paper loaded in cassette, select Yes. If not, select Change to change the setting in accordance with the size of the loaded paper.
- Page 111 Be sure to open the operation panel before printing. If the operation panel is close, the printer does not start printing. Note • To prevent incorrect printing, this printer has a function that detects whether the settings for the paper loaded in the cassette matches the paper settings.
-
Page 112: Loading Envelopes In Rear Tray
Loading Envelopes in Rear Tray You can load Envelope DL and Envelope Com 10 on the rear tray. The address is automatically rotated and printed according to the envelope's direction by specifying with the printer driver properly. Important • Printing of envelopes from the operation panel or from a PictBridge (Wi-Fi) compliant device is not supported. - Page 113 3. Open the feed slot cover (C). 4. Slide right paper guide (D) to open both paper guides. 5. Load envelopes in portrait orientation WITH PRINT SIDE FACING UP. Up to 10 envelopes can be loaded at once. Fold flap of the envelope and load the envelope in portrait orientation with the address side facing up. 6.
- Page 114 Note • Do not load envelopes higher than the load limit mark (E). 7. Close feed slot cover (C) gently. Important • If the feed slot cover is open, paper cannot be fed. Be sure to close the feed slot cover.
- Page 115 After closing the feed slot cover, the paper setting confirmation screen for the rear tray appears on the touch screen. 8. If page size and media type shown on touch screen match size and type of envelopes loaded in rear tray, select Yes. If not, select Change to change the settings in accordance with the size and type of the loaded envelopes.
- Page 116 Note • To prevent incorrect printing, this printer has a function that detects whether the settings for the paper loaded on the rear tray matches the paper settings. Before printing, make print settings in accordance with the paper settings. When this function is enabled, an error message is displayed if these settings do not match to prevent incorrect printing.
-
Page 117: Placing Multi-Purpose Tray
Placing Multi-purpose Tray Cautions When Printing with Multi-purpose Tray Placing a Printable Disc How to Detach / Attach Multi-purpose Tray... -
Page 118: Cautions When Printing With Multi-Purpose Tray
Cautions When Printing with Multi-purpose Tray Cautions Common to using Multi-purpose Tray • Be sure to use the multi-purpose tray supplied with this printer. • Do not mount the multi-purpose tray while the printer is in operation. • Do not remove the multi-purpose tray while the printer is in operation. Doing so may damage the printer, the multi-purpose tray, or the media. -
Page 119: Placing A Printable Disc
Placing a Printable Disc Before Placing a Printable Disc Placing a Printable Disc Removing a Printable Disc... -
Page 120: Before Placing A Printable Disc
Before Placing a Printable Disc A printable disc differs from regular disc (BD/DVD/CD, etc.) in that its label surface has been specially processed or printing by an inkjet printer. The following items are needed to print onto the printable disc. •... -
Page 121: Placing A Printable Disc
Placing a Printable Disc To print onto a printable disc, place it on the supplied multi-purpose tray, and then insert it into the printer. This procedure also applies to printing from a computer. Important • Do not mount the multi-purpose tray until the message prompting you to load the printable disc appears. - Page 122 Note • After inserting the cassette into the printer, if a message appears on the screen, select Yes. 2. Open multi-purpose tray guide (A) and completely press it down. 3. Place printable disc on multi-purpose tray. Important • Check that there is no dirt on the multi-purpose tray before placing a printable disc on it. •...
- Page 123 2. While pressing down lock with printable disc, insert top of printable disc into slits (D). 4. Place multi-purpose tray on multi-purpose tray guide. 5. Insert multi-purpose tray straight in in horizontal direction until arrow ( ) on multi-purpose tray guide is approximately aligned with arrow ( ) on multi-purpose tray.
- Page 124 Note • The multi-purpose tray may be ejected after a certain amount of time passes. In such a case, follow the on-screen instructions to place the multi-purpose tray again.
-
Page 125: Removing A Printable Disc
Removing a Printable Disc 1. Pull out multi-purpose tray. 2. While pressing down lock (A), take out printable disc from slits (B) on multi-purpose tray, and remove it. Important • Do not touch the printing surface when removing the disc from the multi-purpose tray. Note •... - Page 126 Important • When the multi-purpose tray guide is open, you cannot print onto regular printing paper. Be sure to close the multi-purpose tray guide. 4. Store multi-purpose tray under cassette. How to Detach / Attach Multi-purpose Tray...
-
Page 127: How To Detach / Attach Multi-Purpose Tray
How to Detach / Attach Multi-purpose Tray Detaching Multi-purpose Tray 1. Take cassette out of printer. Be sure to remove any paper. 2. Turn cassette over and remove multi-purpose tray. Slide the multi-purpose tray, take it out of the six tabs (A), and then lift it. Important •... - Page 128 Attaching Multi-purpose Tray 1. Take cassette out of printer. Be sure to remove any paper. 2. Turn cassette over and attach multi-purpose tray to it. Turn the multi-purpose tray so that its underside faces up, align it with the six tabs (A) in the orientation shown in the figure below, and then slide to attach.
-
Page 129: Loading Originals
Loading Originals Where to Load Originals Loading Originals on Platen Loading Documents in the ADF (Auto Document Feeder) Loading Based on Use Supported Originals... -
Page 130: Where To Load Originals
Where to Load Originals The printer has two positions to load originals: platen and ADF (Auto Document Feeder). Select the position to load the original according to the size, type, or usage. Note • For details on the supported originals, see below. Supported Originals Loading Documents, Photos, or Book on Platen Loading Two or More Sheets of Document of the Same Size and... -
Page 131: Loading Originals On Platen
Loading Originals on Platen 1. Open the document cover. 2. Load original WITH SIDE TO SCAN FACING DOWN on platen. Loading Based on Use Supported Originals Important • Be sure to observe the following when loading the original on the platen. Failure to observe the following may cause the scanner to malfunction or the platen glass to break. - Page 132 Important • After loading the original on the platen, be sure to close the document cover before starting to copy or scan.
-
Page 133: Loading Documents In The Adf (Auto Document Feeder)
Loading Documents in the ADF (Auto Document Feeder) Note • To scan a document at optimum quality, load it on the platen. 1. Make sure any original has been removed from platen. 2. Open document tray (A). 3. Slide the paper guides (B) all the way out. 4. -
Page 135: Loading Based On Use
Loading Based on Use Load the original in the correct position according to the function to use. If you do not load the original correctly, it may not be scanned properly. Originals Function How to Load Magazines, Newspapers, and Copying Loading the Original to Be Documents Aligned with the alignment mark... - Page 136 Loading the Original to Be Aligned with the alignment mark Place the original WITH THE SIDE TO SCAN FACING DOWN on the platen and align it with the alignment mark . Portions placed on the diagonally striped area cannot be scanned. Important •...
- Page 137 Loading Two or More Originals on Platen Place the originals WITH THE SIDE TO SCAN FACING DOWN. Allow 0.40 inch (1 cm) or more space between the edges (diagonally striped area) of the platen and the originals, and between the originals. Portions placed on the diagonally striped area cannot be scanned.
-
Page 138: Supported Originals
Supported Originals Platen Item Details Types of originals • Text document, magazine, or newspaper • Printed photo, postcard, business card, or disc (BD/DVD/CD, etc.) • Documents that are not suitable for the ADF Size (width x height) Max. 8.5 x 11.7 inches (216 x 297 mm) Quantity One or more sheets* Thickness... - Page 139 • Documents on carbon paper • Documents on coated paper • Documents on onion skin or other thin paper • Photos or excessively thick documents...
-
Page 140: Inserting The Memory Card
Inserting the Memory Card Before Inserting the Memory Card Inserting the Memory Card Removing the Memory Card... -
Page 141: Before Inserting The Memory Card
Before Inserting the Memory Card The following types of memory cards and image data are compatible with the printer. Important • If you took and saved photos on a type of memory card that does not guarantee the operation on your PictBridge (Wi-Fi) compliant device, the image data may be unreadable on the printer or damaged. - Page 142 Printable Image Data • This printer accepts images taken with a camera compliant with the Design rule for Camera File system (Exif 2.2/2.21/2.3 compliant), TIFF (Exif 2.2/2.21/2.3 compliant). Other image or movie types such as RAW images cannot be printed. •...
-
Page 143: Inserting The Memory Card
Inserting the Memory Card Important • When a memory card is inserted into the card slot, the Access lamp is lit. When the Access lamp is flashing, the printer is accessing the memory card. In this case, do not touch the area around the card slot. - Page 144 Important • Part of the memory card will protrude from the card slot, but do not force it into the slot any further. This can damage the printer or the memory card. • Make sure that the memory card is correctly oriented before inserting it into the card slot. If you force the memory card into the card slot in the wrong orientation, the memory card or the printer can be damaged.
-
Page 145: Removing The Memory Card
Removing the Memory Card Important • If you used the card slot as the memory card drive of a computer, you must perform the "safe removal" operation on your computer before physically removing the memory card from the printer. Setting Up Card Slot as Memory Card Drive of Computer 1. -
Page 146: Replacing Ink Tanks
Replacing Ink Tanks Replacing Ink Tanks Checking Ink Status on the Touch Screen Ink Tips... -
Page 147: Replacing Ink Tanks
Replacing Ink Tanks When remaining ink cautions or errors occur, the message will appear on the touch screen to inform you of the error. In this state, the printer cannot print or scan. Take appropriate action according to the message. An Error Occurs Note •... - Page 148 Important • Do not touch other parts besides the ink tanks. • Handle the ink tank carefully to avoid staining of clothing or the surrounding area. • Discard the empty ink tank according to the local laws and regulations regarding disposal of consumables.
- Page 149 5. Hold the ink tank with the orange protective cap (E) pointing up while being careful not to block the Y-shape air hole (D). 6. Lift up the tab on the orange protective cap (E) to remove it off GENTLY. Important •...
- Page 150 8. Press on the top of the ink tank until the ink tank snaps firmly into place. Important • You cannot print if the ink tank is installed in the wrong position. Be sure to install the ink tank in the correct position according to the label on the print head holder.
- Page 151 Note • If the error message appears after the scanning unit / cover is closed, take appropriate action. An Error Occurs • When you start printing after replacing the ink tank, the printer starts cleaning the print head automatically. Do not perform any other operations until the printer completes the cleaning of the print head.
-
Page 152: Checking Ink Status On The Touch Screen
Checking Ink Status on the Touch Screen 1. Make sure that the power is turned on, and display the HOME screen. If the HOME screen is not displayed, tap (HOME) to display it. 2. Select (Hint) on HOME screen. Using the Operation Panel The hint menu screen will appear. -
Page 153: Ink Tips
Ink may be used for purposes other than printing. When you use the Canon printer for the first time after you install the bundled ink tanks, the printer consumes a small amount of ink in the amount to enable printing by filling the nozzles of the Print Head with ink. -
Page 154: If Printing Is Faint Or Uneven
If Printing Is Faint or Uneven Maintenance Procedure Printing the Nozzle Check Pattern Examining the Nozzle Check Pattern Cleaning the Print Head Deep Print Head Cleaning Aligning the Print Head Aligning the Print Head Manually... -
Page 155: Maintenance Procedure
Maintenance Procedure If print results are blurred, colors are not printed correctly, or print results are unsatisfactory (e.g. misaligned printed ruled lines), perform the maintenance procedure below. Important • Do not rinse or wipe the print head and ink tank. This can cause trouble with the print head and ink tank. - Page 156 • When you have performed the procedure until step 4 and the problem has not been resolved, turn off the power and clean the print head deeply again after 24 hours. If the problem is still not resolved, the print head may be damaged. Contact your nearest Canon service center to request a repair.
- Page 157 Adjusting Print Head Position...
-
Page 158: Printing The Nozzle Check Pattern
Printing the Nozzle Check Pattern Print the nozzle check pattern to determine whether the ink ejects properly from the print head nozzle. Note • If the remaining ink level is low, the nozzle check pattern will not be printed correctly. Replace the ink tank whose ink is low. - Page 159 The confirmation screen will appear. 7. Select Yes. The nozzle check pattern will be printed and two pattern confirmation screens will appear on the touch screen. Examine the nozzle check pattern.
-
Page 160: Examining The Nozzle Check Pattern
Examining the Nozzle Check Pattern Examine the nozzle check pattern, and clean the print head if necessary. 1. Check if there are missing lines in the pattern C or horizontal white streaks in the pattern D. A: No missing lines/No horizontal white streaks B: Lines are missing/Horizontal white streaks are present 2. - Page 161 For A (no missing lines or no horizontal white streaks) in both the pattern C and pattern D: The cleaning is not required. Select All A, confirm the message, then select OK. The screen will return to the Maintenance screen. For B (lines are missing or horizontal white streaks are present) in the pattern C or pattern D, or in both patterns: The cleaning is required.
-
Page 162: Cleaning The Print Head
Cleaning the Print Head Clean the print head if lines are missing or if horizontal white streaks are present in the printed nozzle check pattern. Cleaning unclogs the nozzles and restores the print head condition. Cleaning the print head consumes ink, so clean the print head only when necessary. You need to prepare: a sheet of A4 or Letter-sized plain paper Check that printer is turned on. - Page 163 The confirmation screen will appear. 7. Select Yes. The printer starts cleaning the print head. Do not perform any other operations until the printer completes the cleaning of the print head. This takes about 1 minute. The pattern print confirmation screen will appear. 8.
-
Page 164: Deep Print Head Cleaning
Deep Print Head Cleaning If print quality does not improve by the standard cleaning of the print head, clean the print head deeply. Cleaning the print head deeply consumes more ink than the standard cleaning of the print head, so clean the print head deeply only when necessary. - Page 165 If the problem is not resolved, turn off the power and clean the print head deeply again after 24 hours. If the problem is still not resolved, the print head may be damaged. Contact your nearest Canon service center to request a repair.
-
Page 166: Aligning The Print Head
Aligning the Print Head If printed ruled lines are misaligned or print results are otherwise unsatisfactory, adjust the print head position. Note • If the remaining ink level is low, the print head alignment sheet will not be printed correctly. Replace the ink tank whose ink is low. - Page 167 5. Select Maintenance. The Maintenance screen will appear. 6. Select Auto head alignment. The confirmation screen will appear. 7. Confirm the message, then select Yes. The print head alignment sheet is printed, and the print head is aligned automatically. This takes about 3 to 4 minutes. Note •...
-
Page 168: Aligning The Print Head Manually
Aligning the Print Head Manually Try aligning the print head manually after automatic print head alignment if printing results are not as expected, as when printed ruled lines are misaligned. Note • For details on automatic print head alignment, see Aligning the Print Head. - Page 169 6. Select Manual head alignment. The confirmation screen will appear. Note • To print and check the current head position alignment values, select Print the head alignment value. 7. Check message and select Yes. The print head alignment pattern will be printed. 8.
- Page 170 Note • If all patterns look different, choose the pattern in which vertical streaks are least noticeable. Subtle vertical streaks Noticeable vertical streaks • If all patterns look different, choose the pattern in which horizontal streaks are least noticeable. Subtle horizontal streaks Noticeable horizontal streaks 11.
- Page 171 Note • If all patterns look different, choose the pattern in which vertical streaks are least noticeable. Subtle vertical streaks Noticeable vertical streaks 14. Repeat these steps until you have finished entering pattern numbers for columns J to P, and then select OK. 15.
- Page 172 Note • If all patterns look different, choose the pattern in which horizontal stripes are least noticeable. Subtle horizontal stripes Noticeable horizontal stripes 17. Repeat these steps until you have finished entering pattern numbers for columns b to h, and then select OK. 18.
-
Page 173: Cleaning
Cleaning Cleaning Exterior Surfaces Cleaning Platen and Document Cover Cleaning the ADF (Auto Document Feeder) Cleaning Paper Feed Rollers Cleaning Inside the Printer (Bottom Plate Cleaning) Cleaning Cassette Pads... -
Page 174: Cleaning Paper Feed Rollers
Cleaning Paper Feed Rollers If the paper feed roller is dirty or paper powder is attached to it, paper may not be fed properly. In this case, clean the paper feed roller. Cleaning will wear out the paper feed roller, so perform this only when necessary. - Page 175 The printer starts cleaning. The cleaning will be complete when the paper is ejected. 12. When the completion message appears, select OK. If the problem is not resolved after cleaning the paper feed roller, contact your nearest Canon service center to request a repair.
-
Page 176: Cleaning Inside The Printer (Bottom Plate Cleaning)
Cleaning Inside the Printer (Bottom Plate Cleaning) Remove stains from the inside of the printer. If the inside of the printer becomes dirty, printed paper may get dirty, so we recommend performing cleaning regularly. You need to prepare: a sheet of A4 or Letter-sized plain paper* * Be sure to use a new piece of paper. - Page 177 9. Load only this sheet of paper in the cassette with the ridges of the creases facing up and the edge of the half with no crease facing to the far side. 10. Insert cassette into printer. 11. Open operation panel and pull out paper output tray. 12.
- Page 178 If the problem is not resolved after performing cleaning again, the protrusions inside the printer may be stained. Wipe off any ink from the protrusions using a cotton swab or the like. Important • Be sure to turn off the power and unplug the power cord before cleaning the printer.
-
Page 179: Overview
Overview Safety Safety Precautions Regulatory Information WEEE (EU & EEA) Handling Precautions Canceling Print Jobs Legal Restrictions on Scanning/Copying Transporting Your Printer When Repairing, Lending, or Disposing of the Printer Keeping Print Quality High Main Components and Their Use Main Components Power Supply Using the Operation Panel Changing Settings... -
Page 180: Safety
Safety Safety Precautions Regulatory Information WEEE (EU&EEA) -
Page 181: Safety Precautions
Safety Precautions Safety Precautions • This manual contains important notices and safety precautions about your printer. Do not use the printer in ways other than described in the accompanying manuals, as this may result in fire, electric shock or other unexpected accidents. Safety standard marks and declarations are only valid for the supported voltages and frequencies in the applicable countries or regions. - Page 182 • In case ink gets in contact with eyes, rinse with water immediately. In case ink gets in contact with skin, wash with soap and water immediately. If irritation to eyes or skin persists, obtain medical advice immediately. • Moving the printer •...
- Page 183 • Do not place anything on top of the printer. Be especially careful to avoid metal objects such as paper clips and staples, and containers holding flammable liquids such as alcohol or thinner. • Do not apply excessive pressure when placing large objects on the platen glass. •...
-
Page 184: Regulatory Information
20cm between the radiator and persons body (excluding extremities: hands, wrists, feet and ankles) and must not be colocated or operated with any other antenna or transmitter. Canon U.S.A., Inc. One Canon Park Melville, New York 11747... - Page 185 Interference Do not use the printer around medical equipment or other electronic devices. Signals from the printer may interfere with the correct operation of these devices.
-
Page 186: Weee (Eu&Eea)
For more information about where you can drop off your waste equipment for recycling, please contact your local city office, waste authority, approved WEEE scheme or your household waste disposal service. For more information regarding return and recycling of WEEE products, please visit www.canon- europe.com/weee. - Page 187 U kunt ook het schema voor de afvoer van afgedankte elektrische en elektronische apparatuur (AEEA) raadplegen. Ga voor meer informatie over het inzamelen en recyclen van afgedankte elektrische en elektronische apparatuur naar www.canon- europe.com/weee.
- Page 188 RAEE autorizado o con el servicio de recogida de basuras doméstico. Si desea más información acerca de la devolución y reciclado de RAEE, visite la web www.canon-europe.com/weee. Només per a la Unió Europea i a l’Espai Econòmic Europeu (Noruega, Islàndia i Liechtenstein)
- Page 189 Yderligere oplysninger om, hvor du kan bortskaffe dit elektronikaffald med henblik på genanvendelse, får du hos de kommunale renovationsmyndigheder. Yderligere oplysninger om returnering og genanvendelse af affald af elektrisk og elektronisk udstyr får du ved at besøge www.canon- europe.com/weee.
- Page 190 Du kan få mer informasjon om hvor du kan avhende utrangert utstyr til resirkulering ved å kontakte lokale myndigheter, et godkjent WEEE-program eller husholdningens renovasjonsselskap. Du finner mer informasjon om retur og resirkulering av WEEE-produkter på www.canon-europe.com/weee. Vain Euroopan unionin sekä ETA:n (Norja, Islanti ja Liechtenstein) alueelle.
- Page 191 Lisätietoja sähkö- ja elektroniikkalaiteromun keräyksestä ja kierrätyksestä on osoitteessa www.canon-europe.com/weee. Endast för Europeiska unionen och EES (Norge, Island och Liechtenstein) Den här symbolen visar att produkten enligt WEEE-direktivet (2012/19/EU) och nationell lagstiftning inte får sorteras och slängas som hushållsavfall. Den här produkten ska lämnas in på en därför avsedd insamlingsplats, t.ex.
- Page 192 WEEE lub skontaktować się z przedsiębiorstwem zajmującym się wywozem odpadów domowych. Więcej informacji o zwracaniu i recyklingu zużytego sprzętu elektrycznego i elektronicznego znajduje się w witrynie www.canon-europe.com/weee. Platí len pre štáty Európskej únie a EHP (Nórsko, Island a Lichtenštajnsko)
- Page 193 EEIA struktūru vai sadzīves atkritumu apsaimniekošanas iestādi. Lai saņemtu plašāku informāciju par elektrisko un elektronisko iekārtu nodošanu pārstrādei, apmeklējiet tīmekļa vietni www.canon-europe.com/weee. Tik Europos Sąjungai ir EEE (Norvegijai, Islandijai ir Lichtenšteinui) Šis ženklas reiškia, kad gaminio negalima išmesti su buitinėmis atliekomis, kaip yra nustatyta Direktyvoje...
- Page 194 į savo miesto valdžios institucijas, atliekų tvarkymo organizacijas, patvirtintų EEĮ atliekų sistemų arba jūsų buitinių atliekų tvarkymo įstaigų atstovus. Išsamesnės informacijos apie EEĮ atliekų grąžinimo ir perdirbimo tvarką galite rasti apsilankę tinklalapyje www.canon- europe.com/weee. Samo za Evropsko unijo in EGP (Norveška, Islandija in Lihtenštajn) Ta simbol pomeni, da tega izdelka v skladu z direktivo OEEO (2012/19/EU) in državno zakonodajo ne...
- Page 195 DEEE aprobată sau serviciul de colectare a deşeurilor menajere. Pentru mai multe informaţii privind returnarea şi reciclarea produselor DEEE, vizitaţi www.canon-europe.com/ weee. Samo za Europsku uniju i EEZ (Norveška, Island i Lihtenštajn) Ovaj simbol pokazuje da se ovaj proizvod ne smije odlagati s kućnim otpadom sukladno WEEE Direktivi...
- Page 196 će doprineti efikasnom korišćenju prirodnih resursa. Za više informacija o tome gde možete da predate vašu staru opremu radi recikliranje, vas molimo, da kontaktirate lokalne gradske vlasti, komunalne službe, odobreni plan reciklaže ili Gradsku čistoću. Za više informacija o vraćanju i recikliranju WEEE proizvoda, posetite stranicu www.canon-europe.com/weee.
-
Page 197: Handling Precautions
Handling Precautions Canceling Print Jobs Legal Restrictions on Scanning/Copying Transporting Your Printer When Repairing, Lending, or Disposing of the Printer Keeping Print Quality High... -
Page 198: Legal Restrictions On Scanning/Copying
Legal Restrictions on Scanning/Copying Scanning, printing, copying, or modifying copies of the following may be punishable under law. This list is non-exhaustive. When in doubt, check with a local legal representative. • Paper money • Money orders • Certificates of deposit •... -
Page 199: Transporting Your Printer
Transporting Your Printer When relocating the printer for changing your living place or repairing it, make sure of the following. Important • Pack the printer in a sturdy box so that it is placed with its bottom facing down, using sufficient protective material to ensure safe transport. -
Page 200: When Repairing, Lending, Or Disposing Of The Printer
When Repairing, Lending, or Disposing of the Printer If you have entered personal data, passwords and/or other security settings on the printer, such information may be stored in the printer. When sending the printer for repair, lending or transferring the printer to another person, or disposing of the printer, please be sure to follow the steps below in order to delete such information and prevent third parties from accessing it. -
Page 201: Keeping Print Quality High
Keeping Print Quality High The key to printing with the optimal printing quality is to prevent the print head from drying or clogging. Always observe the following rules for optimal printing quality. Note • Depending on the type of paper, ink may blur if you trace the printed area with a highlight pen or paint- stick, or bleed if water or sweat comes in contact with the printed area. -
Page 202: Main Components And Their Use
Main Components and Their Use Main Components Power Supply Using the Operation Panel... -
Page 203: Main Components
Main Components Front View Rear View Inside View Operation Panel... -
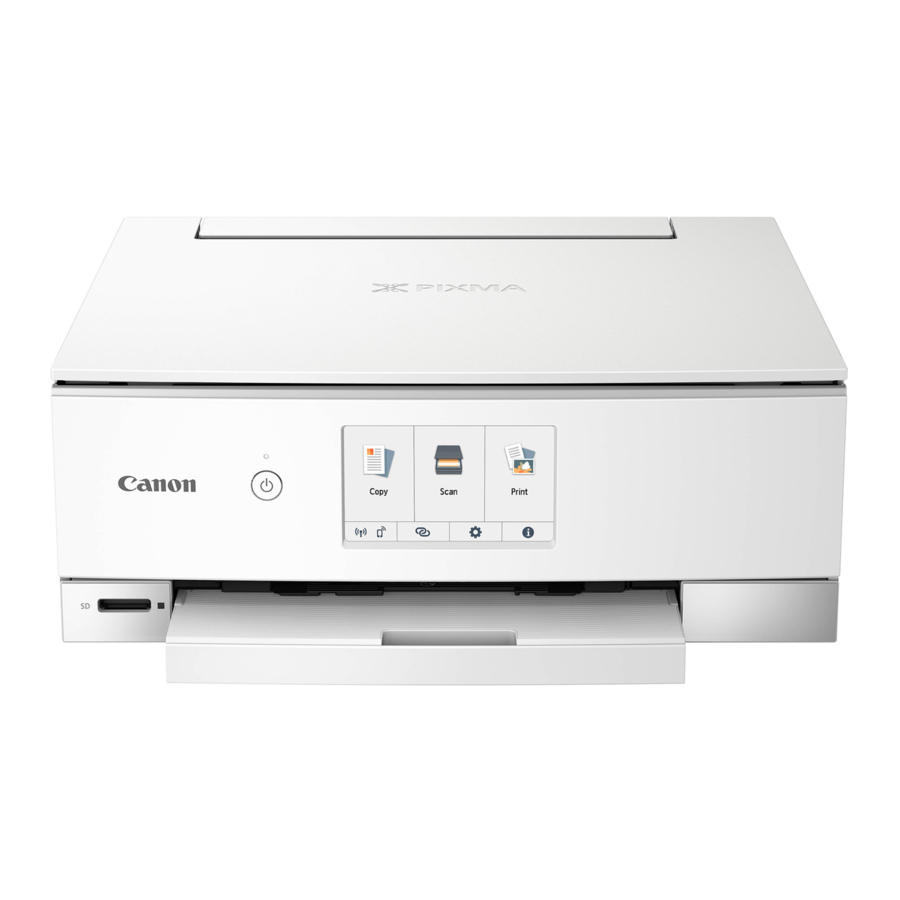
Page 204: Front View
Front View A: Operation Panel Use to change the settings of the printer or to operate it. Before printing starts, this automatically opens. Operation Panel B: Platen Load an original here. C: Document Cover Open to load an original on the platen. D: Cassette Load A4, B5, A5, or Letter-sized plain paper into the cassette, and insert it into the printer. - Page 205 I: Card Slot Insert a memory card. Before Inserting the Memory Card J: Access lamp Lights or flashes to indicate the memory card status. Inserting the Memory Card K: Multi-purpose Tray Guide Place the multi-purpose tray here. L: ADF (Auto Document Feeder) Load a document here.
- Page 206 Loading Envelopes in Rear Tray O: Paper Support Extend to load paper in the rear tray. P: Rear Tray Cover Open to load paper in the rear tray. Q: Feed Slot Cover Prevents anything from falling into the feed slot. Open it to slide the paper guides, and close it before printing.
-
Page 207: Rear View
Rear View A: Wired LAN Connector Plug in the LAN cable to connect the printer to a LAN. B: USB Port Plug in the USB cable to connect the printer with a computer. C: Power Cord Connector Plug in the supplied power cord. D: Transport Unit Cover Open when removing jammed paper. -
Page 208: Inside View
Inside View A: Scanning Unit / Cover Scans originals. Also, lift and open it to replace an ink tank or to remove jammed paper inside the printer. B: Print Head Holder The print head is pre-installed. Note • For details on replacing an ink tank, see Replacing Ink Tanks. -
Page 209: Operation Panel
Operation Panel A: ON button/ON lamp Turns the power on or off. Lights after flashing when the power is turned on. Before turning on the power, make sure that the document cover is closed. B: Touch Screen Displays messages, menu items, and the operational status. Directly touch the screen lightly with your finger tip to select a menu item or displayed button. -
Page 210: Power Supply
Power Supply Checking that Power Is On Turning the Printer On and Off Checking the Power Plug/Power Cord Unplugging the Printer... -
Page 211: Checking That Power Is On
Checking that Power Is On The ON lamp is lit when the printer is turned on. Even if the touch screen is off, if the ON lamp is lit, the printer is on. Note • It may take a while for the printer to start printing immediately after you turn on the printer. •... -
Page 212: Turning The Printer On And Off
Turning the Printer On and Off Turning on the printer 1. Press the ON button to turn on the printer. The ON lamp flashes and then remains lit. Confirming that the Power Is On Note • It may take a while for the printer to start printing immediately after you turn on the printer. •... - Page 213 Important • When you unplug the power cord after turning off the printer, be sure to confirm that the ON lamp is off. Note • When pressing the ON button, a confirmation screen to retract the paper output tray on the touch screen.
-
Page 214: Checking The Power Plug/Power Cord
Checking the Power Plug/Power Cord Unplug the power cord once a month to confirm that the power plug/power cord does not have anything unusual described below. • The power plug/power cord is hot. • The power plug/power cord is rusty. •... -
Page 215: Unplugging The Printer
Unplugging the Printer To unplug the power cord, follow the procedure below. Important • When you unplug the power cord, press the ON button, then confirm that the ON lamp is off. Unplugging the power cord while the ON lamp is lit or flashing may cause drying or clogging of the print head and print quality may be reduced. -
Page 216: Using The Operation Panel
Using the Operation Panel The operation panel consists of the ON button (A) and touch screen (B). Touch the HOME screen on the touch screen with your finger tip to select menus for copying, scanning, and other functions. Operations on the HOME Screen A: ON button B: Touch Screen Basic Operation of the touch screen... - Page 217 Touch Touch lightly with your finger tip. To move forward (or go back) menus or photos continuously, keep touching the forward (or back) mark. Flick Flick your finger on the screen up, down, left, or right. Use to switch menus or move forward or backward through photos. Drag While lightly touching the screen, move your finger up, down, left, or right.
- Page 218 Operations on the HOME Screen Display the menu screen or the settings screen from the HOME screen. C: Basic menu Select to copy or scan using the operation panel. After selecting a basic menu, the particular menus are displayed. D: Network Displays the current network status.
- Page 219 (Signal strength: 50 % or less): The problem such as the printer cannot print may occur. Place the printer near the wireless router. Wi-Fi is enabled but the printer is not connected to the wireless router. Wired LAN is enabled. Wireless Direct is enabled.
- Page 220 (HOME) Displays the HOME screen. (Back) Returns the touch screen to the previous screen. Black Starts black & white copying, scanning, etc. Color Starts color copying, scanning, etc. Stop Cancels operation when print, copy, or scan job is in progress.
-
Page 221: Changing Settings
Changing Settings Changing Printer Settings from Your Computer (Windows) Changing Printer Settings from Your Computer (macOS) Changing Settings from Operation Panel... -
Page 222: Changing Printer Settings From Your Computer (Windows)
Changing Printer Settings from Your Computer (Windows) Changing the Print Options Registering a Frequently Used Printing Profile Setting the Ink Tank to be Used Managing the Printer Power Changing the Printer Operation Mode... -
Page 223: Changing The Print Options
Changing the Print Options You can change the detailed printer driver settings for print data that is sent from an application software. Check this check box if part of the image data is cut off, the paper source during printing differs from the driver settings, or printing fails. -
Page 224: Registering A Frequently Used Printing Profile
Registering a Frequently Used Printing Profile You can register the frequently used printing profile to Commonly Used Settings on the Quick Setup tab. Unnecessary printing profiles can be deleted at any time. Registering a Printing Profile 1. Open the printer driver setup window 2. - Page 225 Quick Setup tab. The name and icon are displayed in Commonly Used Settings. Important • To save the page size, orientation, and number of copies that was set in each sheet, click Options..., and check each item. Note • When you re-install the printer driver or upgrade the printer driver version, the print settings that are already registered will be deleted from Commonly Used Settings.
-
Page 226: Setting The Ink Tank To Be Used
Setting the Ink Tank to be Used This feature enables you to specify the most appropriate ink tank among installed ink tanks according to an intended use. 1. Open the printer driver setup window 2. Click Print Options... on the Page Setup tab The Print Options dialog box appears. -
Page 227: Managing The Printer Power
Managing the Printer Power This function allows you to manage the printer power from the Canon IJ Printer Assistant Tool. Power Off The Power Off function turns off the printer. When you use this function, you will not be able to turn the printer on from the Canon IJ Printer Assistant Tool. - Page 228 Note • When the printer is turned off, the Canon IJ Status Monitor message varies depending on the Auto Power On setting. When the setting is Enable, "Printer is standing by" is displayed. When the setting is Disable,...
-
Page 229: Changing The Printer Operation Mode
Check this check box to prevent paper abrasion. Align heads manually Usually, the Print Head Alignment function in the Canon IJ Printer Assistant Tool is set to automatic head alignment, but you can change it to manual head alignment. If the printing results of automatic print head alignment are not satisfactory, perform manual head alignment. - Page 230 Important • When this function is used, it takes longer to print to A3 plain paper. Also the print quality may deteriorate. Rotate 90 degrees left when orientation is [Landscape] On the Page Setup tab, you can change the rotation direction of the Landscape in the Orientation.
-
Page 231: Changing Settings From Operation Panel
Changing Settings from Operation Panel Changing Settings from Operation Panel Setting Items on Operation Panel Print settings LAN settings Bluetooth settings PictBridge settings Other device settings Language selection Firmware update Reset setting Feed settings Web service setup ECO settings Quiet setting System information... -
Page 232: Changing Settings From Operation Panel
Changing Settings from Operation Panel This section describes the procedure to change the settings in the Device settings screen, taking the steps to specify Extended copy amount as an example. Check that printer is turned on. 2. Select (Setup) on the HOME screen. Using the Operation Panel 3. - Page 233 For more on setting items on the operation panel: Setting Items on Operation Panel...
-
Page 234: Setting Items On Operation Panel
Setting Items on Operation Panel Items for Printer Other device settings Language selection Web service setup ECO settings Quiet setting Items for Paper/Printing Print settings Bluetooth settings PictBridge settings Feed settings Items for Maintenance/Management LAN settings Firmware update Reset setting System information... -
Page 235: Print Settings
Print settings • Prevent paper abrasion Use this setting only if the print surface becomes smudged. Important • Be sure to set this back to OFF after printing since it may result in lower printing speed or lower print quality. •... -
Page 236: Lan Settings
LAN settings Wi-Fi Wireless Direct Wired LAN Wi-Fi When Wi-Fi is selected in the LAN settings screen, the network settings information of the printer when it is connected by Wi-Fi appears in the Wi-Fi setting list screen. To print the LAN settings, select Print details in the LAN settings screen and select Yes. Printing Network Settings Important •... - Page 237 • Wi-Fi setup Selects the setup method for Wi-Fi connection. ◦ Easy wireless connect Select if you specify the settings of the access point information to the printer directly from a device (e.g. smartphone, or tablet) without operating the wireless router. Follow the on-screen instructions of the connecting device for the setup procedure.
- Page 238 Network (SSID)/device name DIRECT-XXXX-TS9500series Password XXXXXXXXXX (10 characters) Wi-Fi security WPA2-PSK(AES) No. of devices connected now XX/XX IPv4 address XXX. XXX. XXX. XXX (12 characters) IPv4 subnet mask XXX. XXX. XXX. XXX (12 characters) IPv4 default gateway XXX. XXX. XXX. XXX (12 characters) IPv6 link-local address XXXX: XXXX: XXXX: XXXX: XXXX: XXXX: XXXX: XXXX (32 characters)
- Page 239 Important • The network settings printout contains important information about your network. Handle it with care. The following setting items are displayed. (Some setting items are not displayed depending on the printer settings.) Items Setting Connection Enabled (connected)/Enabled (disconnected)/Disabled IPv4 address XXX.
- Page 240 ◦ Enable/disable WSD Selects whether WSD is enabled or disabled. Note • When this setting is enabled, the printer icon is displayed on the Network Explorer in Windows. ◦ Optimize inbound WSD Selecting Enable allows you to receive the WSD printing data faster. ◦...
- Page 241 ◦ Enable/disable communication Selecting Enable allows you to print from a PictBridge (Wi-Fi) compliant device. ◦ Timeout setting Specifies the timeout length. • Wired LAN DRX setting Selecting Enable allows you to activate discontinuous reception when the printer is connected to a device compatible with wired LAN.
-
Page 242: Other Device Settings
Other device settings • Date display format Changes the display format of dates when printed. Note • When ON is selected for Print date on the print settings screen in printing from a memory card, the date is printed in the date display format you selected. Setting Items for Photo Printing Using Operation Panel •... - Page 243 Note • You can also select this setting by selecting (Setup) on the HOME screen, selecting ECO, and then selecting Energy saving settings. ECO settings • Document removal reminder Selects whether the printer will display the reminder screen in case you forget to remove the original from the platen after scanning.
-
Page 244: Language Selection
Language selection Changes the language for the messages and menus on the touch screen. -
Page 245: Firmware Update
Firmware update You can update the firmware of the printer, check the firmware version, or perform settings of a notification screen, a DNS server and a proxy server. Important • When you use this function, make sure the printer is connected to the Internet. Note •... -
Page 246: Reset Setting
Reset setting You can set the settings back to the default. • Web service setup only Sets the Web service settings back to the default. • LAN settings only Sets the LAN settings back to the default. • Settings only Sets the settings such as the paper size or media type back to the default. -
Page 247: Feed Settings
Feed settings By registering the paper size and the media type loaded on the rear tray or in the cassette, you can prevent the printer from misprinting by displaying the message before printing starts when the paper size or the media type of the loaded paper differs from the print settings. -
Page 248: Web Service Setup
◦ IJ Cloud Printing Center setup Registers/Deletes the printer to/from Canon Inkjet Cloud Printing Center. ◦ Check Web service setup Make sure whether the printer is registered to Google Cloud Print or Canon Inkjet Cloud Printing Center. • DNS server setup Performs settings for a DNS server. -
Page 249: Eco Settings
ECO settings This setting allows you to use automatic duplex printing as a default to save paper and to turn on/off the printer automatically to save electricity. Using Power Saving Function Using Duplex Printing Using Power Saving Function Follow the procedure below to use power saving function. Check that printer is turned on. - Page 250 Check that printer is turned on. 2. Select (Setup) on the HOME screen. Using the Operation Panel 3. Select ECO. 4. Select Two-sided printing setting. 5. Specify settings as necessary. A: Select two-sided copying as a default. B: Select two-sided printing of template forms on the printer as a default. Note •...
-
Page 251: Quiet Setting
Quiet setting Enables this function on the printer if you want to reduce the operating noise, such as when printing at night. Follow the procedure below to perform setting. Check that printer is turned on. 2. Select (Setup) on the HOME screen. Using the Operation Panel 3. -
Page 252: System Information
System information To display this menu, select System information in (Hint). • Current version Displays the current firmware version. • Printer name Displays the printer name currently specified. • Serial number Displays the printer serial number. • MAC address (Wi-Fi) Displays the MAC address for Wi-Fi. -
Page 253: Specifications
Specifications General Specifications Printing resolution (dpi) 4800* (horizontal) x 1200 (vertical) * Ink droplets can be placed with a pitch of 1/4800 inch at minimum. Interface USB Port: Hi-Speed USB * LAN Port: Wired LAN: 100BASE-TX / 10BASE-T Wi-Fi: IEEE802.11n / IEEE802.11g / IEEE802.11b Card Slot: * A computer that complies with Hi-Speed USB standard is required. - Page 254 ◦ Square 5" x 5" 13 x 13 cm: 0.24 inch (6.0 mm) ◦ Other sizes: 0.14 inch (3.4 mm) * For printable area of envelope, see below. Envelopes Auto duplex printing: • Top margin: 0.20 inch (5.0 mm) • Bottom margin: 0.20 inch (5.0 mm) •...
- Page 255 ADF capacity A4 or Letter size: max. 20 sheets (20 lb/75 g /m paper), up to 0.08 inch/2 mm in height Legal size: max. 5 sheets (20 lb/75 g /m paper), up to 0.02 inch/0.5 mm in height Copy Specifications Multiple copy max.
- Page 256 XGA 1024 x 768 Other Supported OS iOS, Android, Windows 10 Mobile Some functions may not be available with the supported OS. Refer to the Canon web site for details. Mobile Printing Capability Apple AirPrint Google Cloud Print PIXMA Cloud Link...
- Page 257 • Internet connection is required to use Easy-WebPrint EX and/or Easy-PhotoPrint Editor and all the user's guide. • Easy-WebPrint EX: Internet Explorer 8, 9, 10 and 11 (for Windows) is required. • Windows: Some functions may not be available with Windows Media Center. •...
-
Page 258: Information About Paper
Information about Paper Supported Media Types Paper Load Limit Unsupported Media Types Handling Paper... -
Page 259: Supported Media Types
• For details on page sizes and media types, access the Canon website. • Genuine Canon paper is not available in some countries or regions. Note that in the United States, Canon paper is not sold by model number. Instead, purchase paper by name. - Page 260 Note • When printing photos saved on a PictBridge (Wi-Fi) compliant device, you must specify the page size and media type. Printing from Digital Camera Page Sizes You can use the following page sizes. Note • Page sizes and media types the printer supports differ depending on the OS you are using. Standard sizes: •...
- Page 261 ◦ Minimum size: 5.83 x 8.27 inches (148.0 x 210.0 mm) Maximum size: 8.50 x 11.69 inches (215.9 x 297.0 mm) Paper Weight You can use paper in the following weight range. • 17 to 28 lb (64 to 105 g /m ) (plain paper other than genuine Canon paper)
-
Page 262: Paper Load Limit
Rear Tray Cassette Tray Canon Red Label Superior <WOP111> Approx. 100 sheets Approx. 100 sheets Approx. 50 sheets Canon Océ Office Colour Paper <SAT213> Approx. 80 sheets Approx. 80 sheets Approx. 50 sheets High Resolution Paper <HR-101N>*1 Approx. 80 sheets (B4: Approx. - Page 263 Paper other than Genuine Canon Paper Paper Output Common Name Rear Tray Cassette Tray Plain Paper (including recycled paper)*1 Approx. 100 sheets Approx. 100 sheets Approx. 50 (Legal, 11" x 17" (28 x sheets (Legal, 43 cm), A3, B4: 50 11"...
-
Page 264: Unsupported Media Types
• Paper that is too thin (weighing less than 17 lb (64 g /m • Paper that is too thick (plain paper weighing more than 28 lb (105 g /m ), except for Canon genuine paper) • Paper thinner than a postcard, including plain paper or notepad paper cut to a small size (when printing on paper smaller than A5) •... -
Page 265: Handling Paper
Handling Paper • Be careful not to rub or scratch the surfaces of any types of paper when handling. • Hold the paper as closely as possible to its edges and try not to touch the printing surface. The print quality may be degraded if the printing surface is smudged with sweat or oil that comes from your hands. -
Page 266: Printing
Printing Printing from Computer Printing from Smartphone/Tablet Printing Using Operation Panel Printing from Digital Camera Paper Settings... -
Page 267: Printing From Computer
Printing from Computer Printing from Application Software (Windows Printer Driver) Printing from Application Software (macOS AirPrint) Printing Using Canon Application Software Printing Using a Web Service... -
Page 268: Printing From Application Software (Windows Printer Driver)
Printing from Application Software (Windows Printer Driver) Basic Printing Setup Basic Various Printing Methods Changing the Print Quality and Correcting Image Data Overview of the Printer Driver Printer Driver Description Updating the MP Drivers... -
Page 269: Basic Printing Setup
Basic Printing Setup This section describes settings on the Quick Setup tab used for basic printing. Basic Printing Setup Check that printer is turned on Load paper in printer 3. Open printer driver's setup screen 4. Select frequently used settings On the Quick Setup tab, use Commonly Used Settings to select from predefined print settings. - Page 270 Important • The print quality selections will differ depending on which print setting you select. 6. Select paper source For Paper Source, select Automatically Select, Rear Tray, or Cassette, whichever matches your purpose. Important • The paper source settings that can be selected may differ depending on the paper type and size.
- Page 271 7. Click OK The printer will now print using these settings. Important • When you select Always Print with Current Settings, the settings on the Quick Setup, Main, and Page Setup tabs are saved, and those settings are used in subsequent printings. •...
- Page 272 From Paper Source, check the setting or select a new paper source. The current printer settings appear in Media Type and Page Size. 4. Apply settings To apply the printer settings to the printer driver, click Set. Note • If the Type on the printer is set to Ink Jet Hagaki, Hagaki K, or Hagaki, or if the Page size on the printer is set to 2L/5"x7"(13x18), click Set to display the dialog box.
-
Page 273: Paper Settings On The Printer Driver And The Printer (Media Type)
Canon Red Label Superior <WOP111> Plain Paper Plain paper Canon Océ Office Colour Paper <SAT213> Plain Paper Plain paper Canon genuine papers (Photo Printing) Paper information registered Media name <Model No.> Media Type in the printer driver on the printer Photo Paper Plus Glossy II <PP-201/PP-301>... - Page 274 Envelopes Envelope Envelope T-Shirt Transfers T-Shirt Transfers Others Greeting Cards Inkjet Greeting Card Others Card stock Card stock Card stock...
-
Page 275: Paper Settings On The Printer Driver And The Printer (Paper Size)
Paper Settings on the Printer Driver and the Printer (Paper Size) When you use this printer, selecting a paper size that matches the print purpose will help you achieve the best print results. You can use the following paper sizes on this printer. Printer Paper Size in the printer driver Cassette paper information registered on the printer Letter 8.5"x11"... - Page 276 Nagagata 4 3.54"x8.07" Nagagata 4 Yougata 4 4.13"x9.25" Yougata 4 Yougata 6 3.86"x7.48" Yougata 6 Card 2.17"x3.58" 55x91mm Card 2.17"x3.58" Custom Size Others...
-
Page 277: Various Printing Methods
Various Printing Methods Setting a Page Size and Orientation Setting the Number of Copies and Printing Order Execute Borderless Printing Scaled Printing Page Layout Printing Tiling/Poster Printing Duplex Printing Setting Up Envelope Printing Printing on Postcards... -
Page 278: Setting A Page Size And Orientation
Setting a Page Size and Orientation The paper size and orientation are essentially determined by the application software. When the page size and orientation set for Page Size and Orientation on the Page Setup tab are same as those set with the application software, you do not need to select them on the Page Setup tab. -
Page 279: Setting The Number Of Copies And Printing Order
Setting the Number of Copies and Printing Order You can also set the number of copies on the Quick Setup tab. 1. Open the printer driver setup window 2. Specify the number of copies to be printed For Copies on the Page Setup tab, specify the number of copies to be printed. 3. - Page 280 • Print from Last Page: /Collate: • Print from Last Page: /Collate: 4. Click OK When you execute print, the specified number of copies will be printed with the specified printing order. Important • When the application software that you used to create the document has the same function, specify the settings on the printer driver.
-
Page 281: Execute Borderless Printing
Execute Borderless Printing The borderless printing function allows you to print data without any margin by enlarging the data so that it extends slightly off the paper. In standard printing, margins are created around the document area. However, in borderless printing function, these margins are not created. When you want to print data such as a photo without providing any margin around it, set borderless printing. - Page 282 3. Check the paper size Check the Page Size list. When you want to change it, select another page size from the list. The list displays only sizes that can be used for borderless printing. 4. Adjust the amount of extension from the paper If necessary, adjust the amount of extension using the Amount of Extension slider.
- Page 283 Important • When the amount of extension is decreased, an unexpected margin may be produced on the print, depending on the size of the paper. Note • When the Amount of Extension slider is set to the leftmost position, image data will be printed in the full size.
-
Page 284: Scaled Printing
Scaled Printing 1. Open the printer driver setup window 2. Set scaled printing Select Scaled from the Page Layout list on the Page Setup tab. 3. Select the paper size of the document Using Page Size, select the page size that is set with your application software. 4. - Page 285 • Specify a scaling factor Directly type in a value into the Scaling box. The current settings are displayed in the settings preview on the left side of the printer driver. 5. Click OK When you execute print, the document will be printed with the specified scale. Important •...
- Page 286 Note • Selecting Scaled changes the printable area of the document.
-
Page 287: Page Layout Printing
Page Layout Printing The page layout printing function allows you to print more than one page image on a single sheet of paper. 1. Open the printer driver setup window 2. Set page layout printing Select Page Layout from the Page Layout list on the Page Setup tab. The current settings are displayed in the settings preview on the left side of the printer driver. - Page 288 Page Layout To change the number of pages to be printed on a single sheet of paper, select the number of pages from the list. Page Order To change the page arrangement order, select a placement method from the list. Page Border To print a page border around each document page, check this check box.
-
Page 289: Tiling/Poster Printing
Tiling/Poster Printing The tiling/poster printing function allows you to enlarge image data, divide it into several pages, and print these pages on separate sheets of paper. You can also paste the pages together to create a large print like a poster. Setting Tiling/Poster Printing 1. - Page 290 4. Set the number of image divisions and the pages to be printed If necessary, click Specify..., specify the following settings in the Tiling/Poster Printing dialog box, and then click OK. Image Divisions Select the number of divisions (vertical x horizontal). As the number of divisions increases, the number of sheets used for printing increases.
- Page 291 In the settings preview on the left of the Page Setup tab, click the pages that do not need to be printed. The pages that were clicked are deleted, and only the pages to be printed are displayed. Note • Click the deleted pages to display them again. •...
-
Page 292: Duplex Printing
Duplex Printing You can also set duplex printing in Additional Features on the Quick Setup tab. Performing Automatic Duplex Printing You can perform the duplex printing without having to turn over the paper. 1. Open the printer driver setup window 2. - Page 293 Use normal-size printing Print without reducing the page. Use reduced printing Reduce the page slightly during printing. 5. Specify the side to be stapled The best Stapling Side is selected automatically from the Orientation and Page Layout settings. To change the setting, select another stapling side from the list. 6.
- Page 294 3. Select the layout Select Normal-size, Fit-to-Page, Scaled, or Page Layout from the Page Layout list. 4. Specify the side to be stapled The best Stapling Side is selected automatically from the Orientation and Page Layout settings. To change the setting, select another stapling side from the list. 5.
- Page 295 (Operation stops temporarily). Do not touch the paper during this time. You can change the ink drying wait time at Custom Settings in the Canon IJ Printer Assistant Tool. • When you use the automatic duplex printing function to print a postcard, print the address side first and then print the message side.
-
Page 296: Setting Up Envelope Printing
• If Envelope Com 10, Envelope DL, Yougata 4 4.13"x9.25", or Yougata 6 3.86"x7.48" is selected for Printer Paper Size, the printer rotates the paper 90 degrees to the left to print, regardless of the Rotate 90 degrees left when orientation is [Landscape] setting for Custom Settings in the Canon IJ Printer Assistant Tool. - Page 297 To hide the guide messages, check the Do not show this message again check box. To show the guide again, click the View Printer Status button on the Maintenance tab, and start the Canon IJ Status Monitor. Then click Envelope Printing from Display Guide Message of the Option menu to enable the setting.
-
Page 298: Printing On Postcards
Printing on Postcards Load postcard on the printer 2. Open the printer driver setup window 3. Select commonly used settings Display the Quick Setup tab, and for Commonly Used Settings, select Standard. 4. Select the media type For Media Type, select Ink Jet Hagaki (A), Ink Jet Hagaki, Hagaki K (A), Hagaki K, Hagaki (A), or Hagaki. - Page 299 • If you want to display a guide message when performing postcard printing, open the Maintenance tab and click View Printer Status to start the Canon IJ Status Monitor. On the Option menu, choose Display Guide Message and click Hagaki Printing to enable the setting.
-
Page 300: Overview Of The Printer Driver
Overview of the Printer Driver Canon IJ Printer Driver Opening Printer Driver's Setup Screen Canon IJ Status Monitor Checking Ink Status from Your Computer Instructions for Use (Printer Driver) -
Page 301: Canon Ij Printer Driver
Canon IJ Printer Driver The Canon IJ printer driver (simply called printer driver below) is software that you install onto your computer so that it can communicate with the printer. The printer driver converts the print data created by your application software into data that your printer can understand, and sends the converted data to the printer. -
Page 302: Opening Printer Driver's Setup Screen
Opening Printer Driver's Setup Screen You can display the printer driver's setup screen from your application software or by clicking the printer icon. Displaying the Printer Driver's Setup Screen from Your Application Software Perform this procedure to set up the print settings during printing. 1. -
Page 303: Canon Ij Status Monitor
Canon IJ Status Monitor The Canon IJ Status Monitor is an application software that shows the status of the printer and the progress of printing. You will know the status of the printer with graphics, icons, and messages. Launching the Canon IJ Status Monitor The Canon IJ Status Monitor launches automatically when print data is sent to the printer. - Page 304 In such cases, take the appropriate action as described.
-
Page 305: Checking Ink Status From Your Computer
Ink status is displayed as an illustration. Note • The information displayed on the Canon IJ Status Monitor may differ depending on the country or region where you are using your printer. • When you print on A3 paper or larger paper sizes, the ink may run out before printing is finished... -
Page 306: Instructions For Use (Printer Driver)
Instructions for Use (Printer Driver) This printer driver is subject to the following restrictions. Keep the following points in mind when using the printer driver. Restrictions on the Printer Driver • Depending on the document type to be printed, the paper feed method specified in the printer driver may not operate correctly. - Page 307 2. Open the printer driver setup window, and on the Page Setup tab, set Page Size to the same paper size that you specified in Word. 3. Set the Page Layout that you want, and then click OK to close the window. 4.
-
Page 308: Printer Driver Description
Printer Driver Description Quick Setup Tab Description Main Tab Description Page Setup Tab Description Maintenance Tab Description Canon IJ Status Monitor Description... -
Page 309: Quick Setup Tab Description
Quick Setup Tab Description The Quick Setup tab is for registering commonly used print settings. When you select a registered setting, the printer automatically switches to the preset items. Commonly Used Settings The names and icons of frequently used printing profiles are registered. When you select a printing profile according to the purpose of the document, settings that match the purpose are applied. - Page 310 If Page Size, Orientation, and Copies were set from the application software, those settings have priority. Envelope If you select this setting for printing an envelope, Media Type is set automatically to Envelope. In the Envelope Size Setting dialog box, select the size of the envelope to be used. Greeting Card When selected for printing a greeting card, the Media Type is automatically set to Inkjet Greeting Card.
- Page 311 and click Specify..Then in the Page Layout Printing dialog box that appears, specify the Page Order. 4-on-1 Printing Prints four pages of the document, side by side, on one sheet of paper. To change the page sequence, click the Page Setup tab, select Page Layout for Page Layout, and click Specify..
- Page 312 Prints the document by rotating it 90 degrees relative to the paper feed direction. You can change the rotation direction by going to the Canon IJ Printer Assistant Tool, opening the Custom Settings dialog box, and then using Rotate 90 degrees left when orientation is [Landscape] check box.
- Page 313 Always Print with Current Settings Prints documents with the current settings starting from the next print execution. When you select this function and then close the printer driver setup window, the information that you set on the Quick Setup, Main, and Page Setup tabs are saved and printing with the same settings is possible starting from the next print execution.
- Page 314 Save the orientation setting Saves the Orientation to the printing profile in Commonly Used Settings. To apply the saved print orientation when the printing profile is selected, check this check box. If this check box is unchecked, the print orientation is not saved, and consequently the Orientation setting is not applied when the printing profile is selected.
- Page 315 Switching the Paper Source to Match the Purpose Displaying the Print Results Before Printing Setting Paper Dimensions (Custom Size) Printing a Color Document in Monochrome Specifying Color Correction Adjusting Color Balance Adjusting Brightness Adjusting Contrast Registering a Frequently Used Printing Profile...
-
Page 316: Main Tab Description
Main Tab Description The Main tab allows you to create a basic print setup in accordance with the media type. Unless special printing is required, normal printing can be performed just by setting the items on this tab. Settings Preview The paper illustration shows how the original will be laid out on a sheet of paper. - Page 317 Print Quality Selects your desired printing quality. Select one of the following to set the print quality level that is appropriate for the purpose. Important • Depending on the Media Type settings, the same print results may be produced even if the Print Quality is changed.
- Page 318 Custom dialog box Set the quality level, and select the desired print quality. Quality You can use the slider bar to adjust the print quality level. Important • Certain print quality levels cannot be selected depending on the settings of Media Type. Note •...
- Page 319 • When Grayscale Printing is checked on the Main tab, Color Correction appears grayed out and is unavailable. Driver Matching With Canon Digital Photo Color, you can print sRGB data with color tints that most people prefer. Adjusts the colors by using an ICC profile when printing. Important •...
-
Page 320: Page Setup Tab Description
Prints the document by rotating it 90 degrees relative to the paper feed direction. You can change the rotation direction by going to the Canon IJ Printer Assistant Tool, opening the Custom Settings dialog box, and then using Rotate 90 degrees left when orientation is... - Page 321 To rotate the document 90 degrees to the left when printing, select the Rotate 90 degrees left when orientation is [Landscape] check box. Rotate 180 degrees Prints the document by rotating it 180 degrees against the paper feed direction. The width of print area and the amount of extension that are configured in other application software will be reversed vertically and horizontally.
- Page 322 Page Layout Multiple pages of document can be printed on one sheet of paper. Specify... Opens the Page Layout Printing dialog box. Click this button to set details on page layout printing. Tiling/Poster This function enables you to enlarge the image data and divide the enlarged data into several pages to be printed.
- Page 323 Important • If the application used to create your document has a similar function, specify the number of copies with the application without specifying it here. Print from Last Page Check this check box when you want to print from the last page in order. If you do this, you do not need to sort the pages into their correct order after printing.
- Page 324 Preview Icon Shows the settings made on the Page Layout Printing dialog box. You can check what the print result will look like before you actually print the data. Page Layout Specifies the number of document pages to fit on one sheet. Page Order Specifies the document orientation to be printed on a sheet of paper.
- Page 325 Booklet Printing dialog box This dialog box allows you to set how to bind the document as a booklet. Printing only on one side and printing a page border, can also be set in this dialog box. The settings specified in this dialog box can be confirmed in the settings preview on the printer driver. Preview Icon Shows the settings made on the Booklet Printing dialog box.
- Page 326 In this case, check this function. Important • When this function is enabled, normally the paper feeding method cannot be changed from the Canon IJ Preview. Ungroup Papers Sets the display method of Media Type, Page Size, and Printer Paper Size.
- Page 327 Print after creating print data by page The print data is created in page units, and printing starts after the processing of one page of print data is complete. If a printed document contains unintended results such as streaks, selecting this check box may improve the results.
- Page 328 Define Stamp... Opens the Stamp Settings dialog box. You can check the details of a selected stamp or save a new stamp. Place stamp over text Sets how the stamp is to be printed over the document. Check the Stamp check box to enable this. Check this check box to print a stamp over the printed document page.
- Page 329 For Date/Time/User Name, the creation date/time and user name of the printed object are displayed in Stamp Text. Important • Stamp Text appears grayed out and is unavailable if Date/Time/User Name is selected. TrueType Font Selects the font for the stamp text string. Style Selects the font style for the stamp text string.
- Page 330 Position Specifies the stamp position on the page. Selecting Custom from the list allows you to enter values for the X-Position and Y-Position coordinates directly. Orientation Specifies the angle of rotation for the stamp. The angle can be set by entering the number of degrees.
- Page 331 Select File... Opens the dialog box to open a file. Click this button to select a bitmap file (.bmp) to be used as the background. Layout Method Specifies how the background image is to be placed on the paper. When Custom is selected, you can set coordinates for X-Position and Y-Position. Intensity Adjusts the intensity of the bitmap to be used as a background.
-
Page 332: Maintenance Tab Description
Maintenance Tab Description The Maintenance tab allows you to start the Canon IJ Printer Assistant Tool or check the status of the printer. Maintenance and Preferences Canon IJ Printer Assistant Tool is started. You can perform printer maintenance or change the settings of the printer. - Page 333 Important • If the font for displaying the language of your choice is not installed in your system, the characters will be garbled.
-
Page 334: Canon Ij Status Monitor Description
Overview of the Canon IJ Status Monitor The Canon IJ Status Monitor uses images and messages to display the printer status and the ink status. During printing, you can check information about the document being printed and the print progress. - Page 335 Ink Model Number You can look up the correct ink tank for your printer. Option Menu If a printer message appears, select Enable Status Monitor to start the Canon IJ Status Monitor. Select Enable Status Monitor to use the following commands: Always Display Current Job Displays the Canon IJ Status Monitor whenever a document is being printed.
- Page 336 Display Warning Automatically When a Low Ink Warning Occurs Starts the Canon IJ Status Monitor window automatically and displays it in front of the other windows when a low ink warning occurs. Start when Windows is Started Automatically starts the Canon IJ Status Monitor when Windows is started.
-
Page 337: Installing The Mp Drivers
Installing the MP Drivers You can access our web site through the Internet and download the latest MP Drivers for your model. 1. Turn off the printer 2. Start the installer Double-click the icon of the downloaded file. The installation program starts. Important •... -
Page 338: Printing Using Canon Application Software
Printing Using Canon Application Software Easy-PhotoPrint Editor Guide... -
Page 339: Printing Using A Web Service
Printing Using a Web Service Using PIXMA/MAXIFY Cloud Link Printing with Google Cloud Print... -
Page 340: Printing From Smartphone/Tablet
Printing from Smartphone/Tablet Printing from iPhone/iPad/iPod touch (iOS) Printing from Smartphone/Tablet (Android) Printing from Windows 10 Mobile Device Printing/Scanning with Wireless Direct... -
Page 341: Printing/Scanning With Wireless Direct
Printing/Scanning with Wireless Direct You can connect devices (e.g. smartphone, or tablet) to the printer by two methods below. • Wireless connection (connecting devices via a wireless router) • Direct wireless connection (connecting devices using Wireless Direct) This section describes Wireless Direct, which allows you to print or scan by connecting the devices to the printer directly. - Page 342 8. Select ON. The Wireless Direct is enabled and a device can be connected to the printer wirelessly. Note • To show the password, select Show password. To hide the password, select Hide password. • The Wireless Direct setting list screen shows settings for when using the printer with Wireless Direct.
- Page 343 • For more on printing or scanning from a device via Wi-Fi, refer to the device's or application's instruction manual. • You can print/scan from your smartphone or tablet by installing Canon PRINT Inkjet/SELPHY. Download it from App Store and Google Play.
- Page 344 6. Select Settings. 7. Select a setting item. • Change SSID/device name Change the identifier (SSID) for Wireless Direct. The identifier (SSID) is the printer's name (device name) displayed on a Wi-Fi Direct compatible device. Follow the procedure below to change the identifier (SSID). 1.
- Page 345 If you want the printer to display the screen to inform you a Wi-Fi Direct compatible device is connecting to the printer, select Yes. Important • To prevent an unauthorized access, we recommend you should not change the setting from the default.
-
Page 346: Printing Photo Data
Printing Photo Data Printing Photographs Saved on Memory Card Basic Setting Items for Photo Printing Using Operation Panel... -
Page 347: Printing Photographs Saved On Memory Card
Printing Photographs Saved on Memory Card You can print the photograph saved on the memory card easily. This section describes the procedure to print the photograph in Select photo print. Check that printer is turned on. Load photo paper. 3. Select Print on the HOME screen. - Page 348 You can print a copy of the displayed photo by tapping Color. • To change the display method, the number of copies, or the print settings: near the bottom of the displayed photo to display menus. A: Total number of copies is displayed When tapping, the Check total no.
- Page 349 Note • You can specify the number of copies for each photo. Display the photo you want to print and specify the number of copies when the desired photo is displayed. C: Select to switch the photo group. For details: Using Useful Display Functions D: Select to display the Settings screen.
- Page 350 F: Select to zoom in on the photo. For details: Using Useful Display Functions G: Select display photo with specifying the date (last modified date of data). For details: Using Useful Display Functions H: Select to display the multiple photos at once. For more on the display method: Using Useful Display Functions 8.
- Page 351 • While processing the print job, you can add the print job (Reserve photo print). Adding Print Job Adding Print Job You can add the print job (Reserve photo print) while printing photos. Follow the procedure below to add the print job. 1.
-
Page 352: Setting Items For Photo Printing Using Operation Panel
Setting Items for Photo Printing Using Operation Panel You can specify the setting of page size, media type, photo fix and so on to print the photos saved on the memory card. Print Settings Screen How to display the print settings screen varies with the print menu. •... - Page 353 on the touch screen. In this case, select on the upper left on the touch screen to check the message and change the setting. • The settings of the page size, media type, etc. are retained even if another print menu is selected or the printer is turned off.
- Page 354 Other device settings...
-
Page 355: Disc Label Printing
Disc Label Printing Copying Label Side of Disc Basic Printing Photo from Memory Card onto Disc Label... -
Page 356: Copying Label Side Of Disc
Copying Label Side of Disc You can copy the label of an existing BD/DVD/CD and print it on a printable disc. Important • You cannot print on 3.15 inches / 8 cm printable discs. • Do not mount the multi-purpose tray until the message prompting you to load the printable disc appears. - Page 357 If the print result is blurry, select Bleed-proof. Blurring may be reduced by printing with less ink. 7. Follow on-screen instructions to load copy source BD/DVD/CD on platen and select OK. The print setting confirmation screen is displayed. Important • Be sure to load the copy source BD/DVD/CD with its label side down on the center of the platen. If you load it near the edge of the platen, part of the image may be cut off.
- Page 358 Note • You can see the procedure to set the printable disc by selecting How to set. • For more on setting the printable disc: Placing a Printable Disc 11. Select OK. The printer starts copying. Note • Tap Stop to cancel copying. •...
-
Page 359: Printing Photo From Memory Card Onto Disc Label
Printing Photo from Memory Card onto Disc Label You can print a photograph saved on a memory card onto the disc label of the printable disc. Important • You cannot print on 3.15 inches / 8 cm printable discs. • Do not mount the multi-purpose tray until the message prompting you to load the printable disc appears. - Page 360 A: Specify the outer circle. B: Specify the inner circle. Note • Measure the outer and inner diameters of the printing surface of the printable disc and make sure you set a value smaller than the measured value for the outer diameter, and a value larger than the measured value for the inner diameter.
- Page 361 12. Check message and tap Color. 13. Follow on-screen instructions to set printable disc. Note • You can see the procedure to set the printable disc by selecting How to set. • For more on setting the printable disc: Placing a Printable Disc 14.
-
Page 362: Paper Settings
Paper Settings By registering the paper size and the media type loaded on the rear tray or in the cassette, you can prevent the printer from misprinting by displaying the message before printing starts when the paper size or the media type of the loaded paper differs from the print settings. - Page 363 • When you insert the cassette: The screen to register the cassette paper information is displayed. If the page size on the touch screen matches the size of the paper loaded in the cassette, select Yes. If not, select Change to change the setting in accordance with the size of the loaded paper. * You can load only plain paper in the cassette.
- Page 364 When you start printing/copying, a message is displayed and the paper setting specified for printing/ copying is shown under the message. Check the message and select Next. When the screen to select the operation is displayed, select one of the operations below. Note •...
- Page 365 Note • If you do not know what paper information to register to the printer, tap (Back) when the screen to select the operation is displayed. • For more on the proper combination of paper settings you can specify by the printer driver (Windows) or on the touch screen: Paper Settings on the Printer Driver and the Printer (Media Type) Paper Settings on the Printer Driver and the Printer (Paper Size)
-
Page 366: Copying
Copying Reducing/Enlarging Copies Making Copies Basics Two-Sided Copying Collated Copying Special Copy Menu Copying Using Smartphone or Tablet... -
Page 367: Making Copies
Making Copies This section describes the procedure to copy with Standard copy. Check that printer is turned on. Load paper. 3. Select Copy on the HOME screen. Using the Operation Panel 4. Select Standard copy. The Copy standby screen is displayed. Load original document on platen or in ADF (Auto Document Feeder). - Page 368 to specify the number of copies. If you keep touching here, the number scrolls by 10. You can also flick the number to specify. C: Display the print setting items. For more on the setting items: Setting Items for Copying D: Specify the page size and the media type.
- Page 369 Load the original on the platen and tap the same button (Color or Black) as the one which you previously tapped. Important • When you load the original on the platen, move the document cover gently. Note • When Print qlty (print quality) is set High, you cannot add the copying job. •...
-
Page 370: Setting Items For Copying
Setting Items for Copying You can change the copy settings such as magnification and intensity. Print Settings Screen Note • For more on the print settings screen or the setting item for Photo copy, see Copying Photos. The following screen is displayed by selecting Settings in the Copy standby screen. Example in Standard copy: Preview When Preview is displayed on the print settings screen, selecting Preview allows you to preview an... - Page 371 Note • Depending on the copy menu, some setting items cannot be selected. This section describes the setting items in Standard copy. The setting item which cannot be selected is displayed grayed out. For more on the setting items for Photo copy, see Copying Photos. •...
- Page 372 • Page size Select the page size of the loaded paper. • Type (Media type) Select the media type of the loaded paper. • Print qlty (Print quality) Adjust print quality according to the original. Important • If you use Draft with Type set to Plain paper and the quality is not as good as expected, select Standard or High for Print qlty and try copying again.
-
Page 373: Scanning
Scanning Scanning from Computer (macOS) Scanning from Computer (Windows) Scanning from Operation Panel Scanning Using Smartphone/Tablet... -
Page 374: Scanning From Computer (Windows)
Scanning from Computer (Windows) Scanning According to Item Type or Purpose (IJ Scan Utility) IJ Scan Utility Features Scanning Easily (Auto Scan) Basics Scanning Documents and Photos Creating/Editing PDF Files Setting Passwords for PDF Files Editing Password-Protected PDF Files Scanning Using Application Software (ScanGear) Scanning Tips Positioning Originals (Scanning from Computer) Network Scan Settings... -
Page 375: Scanning According To Item Type Or Purpose (Ij Scan Utility)
Scanning According to Item Type or Purpose (IJ Scan Utility) IJ Scan Utility Features Scanning Easily (Auto Scan) Basics Scanning Documents and Photos Creating/Editing PDF Files Setting Passwords for PDF Files Editing Password-Protected PDF Files... -
Page 376: Ij Scan Utility Features
IJ Scan Utility Features Use IJ Scan Utility to scan and save documents, photos, or other items at one time by simply clicking the corresponding icon. Multiple Scanning Modes Auto allows for one click scanning with default settings for various items. Document will sharpen text in a document or magazine for better readability, and Photo is best suited for scanning photos. - Page 377 Note • To set the applications to integrate with, see Settings Dialog Box.
-
Page 378: Scanning Easily (Auto Scan)
Scanning Easily (Auto Scan) Auto Scan allows for automatic detection of the type of the item placed on the platen or ADF (Auto Document Feeder). Important • The following types of items may not be scanned correctly. In that case, adjust the cropping frames (scan areas) in whole image view of ScanGear (scanner driver), and then scan again. -
Page 379: Scanning Documents And Photos
Scanning Documents and Photos Scan items placed on the platen with settings suitable for documents or photos. Save documents in formats such as PDF and JPEG, and photos in formats such as JPEG and TIFF. 1. Place the Item on the Platen Positioning Originals (Scanning from Computer) 2. -
Page 380: Creating/Editing Pdf Files
Creating/Editing PDF Files You can create PDF files by scanning items placed on the platen or ADF (Auto Document Feeder). Add, delete, rearrange pages or make other edits in the created PDF files. Important • You can create or edit up to 100 pages of a PDF file at one time. •... - Page 381 5. Click (Scan) on Toolbar. Scanning starts. Note • To open a file saved on the computer, click Open... from the File menu, and then select the file you want to edit. • You can switch the view with the Toolbar buttons. For details, see PDF Edit Screen. 6.
- Page 382 When deleting pages: Click the page you want to delete, and then click (Delete Page) on the Toolbar. Note • These buttons appear when two or more pages have been created. 8. Select Save As... in File menu. The Save dialog box appears. 9.
-
Page 383: Scanning Using Application Software (Scangear)
Scanning Using Application Software (ScanGear) What Is ScanGear (Scanner Driver)? Starting ScanGear (Scanner Driver) Scanning in Basic Mode ScanGear (Scanner Driver) Screens General Notes (Scanner Driver) Important • Available functions and settings vary depending on your scanner or printer. -
Page 384: What Is Scangear (Scanner Driver)
What Is ScanGear (Scanner Driver)? ScanGear (scanner driver) is software required for scanning documents. Use the software to specify the output size, image corrections, and other settings. ScanGear can be started from IJ Scan Utility or applications that are compatible with the standard TWAIN interface. - Page 385 Advanced Mode Use the Advanced Mode tab to scan by specifying the color mode, output resolution, image brightness, color tone, and other settings.
-
Page 386: Starting Scangear (Scanner Driver)
Starting ScanGear (Scanner Driver) Use ScanGear (scanner driver) to make image corrections and color adjustments when scanning. Start ScanGear from IJ Scan Utility or other applications. Note • If you have more than one scanner or have a network compatible model and changed the connection from USB connection to network connection, set up the network environment. -
Page 387: Scanning In Basic Mode
Scanning in Basic Mode Use the Basic Mode tab to scan easily by following these simple on-screen steps. To scan multiple documents at one time from the Platen, see Scanning Multiple Documents at One Time with ScanGear (Scanner Driver). When scanning from the ADF (Auto Document Feeder), preview is not available. Important •... - Page 388 Important • Some applications do not support continuous scanning from the ADF. For details, see the application's manual. Note • To scan magazines containing many color photos, select Magazine (Color). 3. Click Preview. Preview image appears in the Preview area. Important •...
- Page 389 7. Set Image corrections as needed. 8. Click Scan. Scanning starts. Note • Click (Information) to display a dialog box showing the document type and other details of the current scan settings. • How ScanGear behaves after scanning is complete can be set from Status of ScanGear dialog after scanning on the Scan tab of the Preferences dialog box.
-
Page 390: Scangear (Scanner Driver) Screens
ScanGear (Scanner Driver) Screens Basic Mode Tab Advanced Mode Tab... -
Page 391: Basic Mode Tab
Basic Mode Tab Use the Basic Mode tab to scan easily by following these simple on-screen steps. This section describes the settings and functions available on the Basic Mode tab. (1) Settings and Operation Buttons (2) Toolbar (3) Preview Area Note •... - Page 392 Document (Color) ADF Duplex (only for models supporting ADF duplex scanning) Scan both sides of documents from the ADF in color. Document (Grayscale) ADF Duplex (only for models supporting ADF duplex scanning) Scan both sides of documents from the ADF in black and white. Important •...
- Page 393 "OCR software" is software that converts text scanned as an image into text data that can be edited in word processors and other programs. Output Size Select an output size. Output size options vary by the item selected in Destination. Flexible Adjust the cropping frames (scan areas) freely.
- Page 394 Deleting: Select the output size you want to delete in Output Size List, and then click Delete. Click Save to save the items listed in Output Size List. Important • Predefined output sizes such as A4 and 1024 x 768 pixels cannot be deleted. Note •...
- Page 395 Reduce gutter shadow Corrects shadows that appear between pages when scanning open booklets. Important • Be sure to see Gutter Shadow Correction for precautions and other information on using this function. Color Pattern... Adjust the image's overall color. Correct colors that have faded due to colorcast or other reasons and reproduce natural colors while previewing color changes.
- Page 396 • The image returns to its original state when you preview again. (Rotate Right) Rotates the preview image 90 degrees clockwise. • The result will be reflected in the scanned image. • The image returns to its original state when you preview again. (Auto Crop) Displays and adjusts the cropping frame automatically to the size of the document displayed in the Preview area.
- Page 397 When (Thumbnail) is displayed on Toolbar: Cropping frames are specified according to the document size, and thumbnails of scanned images appear. Only the images with the checkbox selected will be scanned. Note • When multiple images are previewed, different outlines indicate different selection status. •...
- Page 398 Note • Create cropping frame(s) on the displayed image. In thumbnail view, one cropping frame can be created per image. In whole image view, multiple cropping frames can be created. Adjusting Cropping Frames (ScanGear) Related Topic Scanning in Basic Mode...
-
Page 399: Advanced Mode Tab
Advanced Mode Tab This mode allows you to make advanced scan settings such as the color mode, output resolution, image brightness, and color tone. This section describes the settings and functions available on the Advanced Mode tab. (1) Settings and Operation Buttons (2) Toolbar (3) Preview Area Important... - Page 400 Enter Setting Name and click Add; the name appears in Favorite Settings List. When you click Save, the item appears in the Favorite Settings list and can be selected, along with the predefined items. To delete an item, select it in Favorite Settings List and click Delete. Click Save to save the settings displayed in Favorite Settings List.
- Page 401 Note • Zoom rescans the document and displays high-resolution image in Preview. • (Enlarge/Reduce) on the Toolbar zooms in on the preview image quickly. However, the resolution of the displayed image will be low. Preview Performs a trial scan. Scan Starts scanning.
- Page 402 In thumbnail view: In whole image view: (Thumbnail) / (Whole Image) Switches the view in the Preview area. (3) Preview Area (Clear) Deletes the preview image from the Preview area. It also resets the Toolbar and color adjustment settings. (Crop) Allows you to specify the scan area by dragging the mouse.
- Page 403 (Uncheck All Frames) Available when two or more frames are displayed. Deselects the checkboxes of the images in thumbnail view. (Select All Frames) Available when two or more frames are displayed. Selects the images in thumbnail view and outlines them in blue. (Select All Cropping Frames) Available when two or more cropping frames are specified.
- Page 404 Note • When multiple images are previewed, different outlines indicate different selection status. • Focus Frame (thick blue outline): The displayed settings will be applied. • Selected Frame (thin blue outline): The settings will be applied to the Focus Frame and Selected Frames simultaneously.
-
Page 405: General Notes (Scanner Driver)
General Notes (Scanner Driver) ScanGear (scanner driver) is subject to the following restrictions. Keep these points in mind when using it. Scanner Driver Restrictions • When using the NTFS file system, the TWAIN data source may not be invoked. This is because the TWAIN module cannot be written to the winnt folder for security reasons. - Page 406 • When scanning Platen size images into Microsoft Office 2003 (Word, Excel, PowerPoint, etc.), click Custom Insert in the Insert Picture from Scanner or Camera screen. Otherwise, images may not be scanned correctly. • When scanning images into Microsoft Office 2007/Microsoft Office 2010 (Word, Excel, PowerPoint, etc.), use Microsoft Clip Organizer.
-
Page 407: Scanning Tips
Scanning Tips Positioning Originals (Scanning from Computer) Network Scan Settings IJ Network Scanner Selector EX2 Menu and Setting Screen... -
Page 408: Positioning Originals (Scanning From Computer)
Positioning Originals (Scanning from Computer) This section describes how to load originals on the platen or ADF (Auto Document Feeder) for scanning. If items are not placed correctly they may not be scanned correctly. Important • Be sure to observe the following when loading the original on the platen. Failure to observe the following may cause the scanner to malfunction or the platen glass to break. - Page 409 Important Important • Large items (such as A4 size photos) that cannot be • For the portions in which items cannot be scan- placed away from the edges/arrow (alignment mark) of ned, see Loading Originals. the platen may be saved as PDF files. To save in a for- mat other than PDF, scan by specifying the data format.
- Page 410 2. Open document tray (A). 3. Slide the paper guides (B) all the way out. 4. Load document with side to scan facing up in document tray. Insert the document until it stops. 5. Adjust document guide (B) to match width of document. Do not slide the document guide too hard against the document.
-
Page 411: Network Scan Settings
• If the icon is not displayed in the notification area on the desktop, follow the procedure below to start. • Windows 10: From the Start menu, click (All apps >) Canon Utilities > IJ Network Scanner Selector EX2. • Windows 8.1:... - Page 412 Search charm, then search for "IJ Network Scanner Selector EX2". • Windows 7: From the Start menu, click All Programs > Canon Utilities > IJ Network Scanner Selector EX2 > IJ Network Scanner Selector EX2. The icon appears in the notification area on the desktop, and the Scan-from-PC Settings screen appears.
- Page 413 • If the icon is not displayed in the notification area on the desktop, follow the procedure below to start. • Windows 10: From the Start menu, click (All apps >) Canon Utilities > IJ Network Scanner Selector EX2. • Windows 8.1: Click IJ Network Scanner Selector EX2 on the Start screen.
- Page 414 4. Select your scanner or printer from Scanners and click OK. Select the MAC address of your scanner or printer. Note • When multiple scanners are connected via a network, you can select up to three scanners. 5. In the Scan-from-PC Settings screen, click OK. Note •...
-
Page 415: Scanning Using Smartphone/Tablet
Scanning Using Smartphone/Tablet Using PIXMA/MAXIFY Cloud Link Printing/Scanning with Wireless Direct... -
Page 416: Frequently Asked Questions
Frequently Asked Questions Cannot Find Printer on Network Cannot Find Printer while Using Wi-Fi Network Key (Password) Unknown Network Cannot Print or Connect For other questions about network, click here. Printer Does Not Print Printouts Are Blank/Blurry or Fuzzy/Inaccurate or Bleeding Colors/Streaks or Lines Printout Results Are Unsatisfactory Print List of Support Code for Error (Paper Jams) - Page 417 Scanning Problems (Windows) Scanning Problems (macOS) Scan Results Are Unsatisfactory (Windows) Scan Results Are Unsatisfactory (macOS) Cannot Print/Scan from Smartphone/Tablet Cannot Set Correctly (Network) Cannot Find Printer on Check Printer Settings Screen During Setup (Windows) Cannot Find Printer while Using Wi-Fi Cannot Find Printer while Using Wired LAN Printer Suddenly Stopped Working for Some Reason Network Key (Password) Unknown...
-
Page 418: Network Settings And Common Problems
Network Settings and Common Problems Here are frequently asked questions on network. Select a connection method you are using, or you want to use. Wireless LAN Wireless Direct Wired LAN Wireless LAN Cannot Find Printer Cannot Find Printer while Using Wi-Fi Cannot Find Printer on Check Printer Settings Screen During Setup (Windows) Cannot Proceed beyond Printer Connection Screen Printer Is Not Found by Printer Find Screen of Setup... - Page 419 Checking Wireless Router Network Name (SSID) for Smartphone/Tablet Setting Up Using Smartphone/Tablet Cannot Print/Scan from Smartphone/Tablet Cannot Find Printer from Smartphone/Tablet while Using Bluetooth Downloading Canon PRINT Inkjet/SELPHY Problems while Using Printer Message Appears on Computer During Setup Printer Prints Slowly...
- Page 420 Cannot Find Printer while Using Wired LAN Detect Same Printer Name Cannot Print or Connect Printer Suddenly Stopped Working for Some Reason Cannot Print or Connect LAN Setting Tips/Changing LAN Settings Forgot Administrator Password of Printer Checking Network Information Restoring to Factory Defaults Default Network Settings Connects to Another Computer via LAN/Changes from USB to LAN Connection Printing Network Settings...
-
Page 421: Network Communication Problems
Network Communication Problems Cannot Find Printer on Network Network Connection Problems Other Network Problems... -
Page 422: Cannot Find Printer On Network
Cannot Find Printer on Network While performing printer setup: Cannot Find Printer on Check Printer Settings Screen During Setup (Windows) Cannot Proceed beyond Printer Connection Screen While using printer: Cannot Find Printer while Using Wi-Fi Note • You cannot use the wireless LAN and the wired LAN at the same time. -
Page 423: Cannot Find Printer On Check Printer Settings Screen During Setup (Windows)
Cannot Find Printer on Check Printer Settings Screen During Setup (Windows) If the printer cannot be found and the Check Printer Settings screen appears after searching the printer by Automatic search on the Search for Printers screen, click Redetect and search for the printer again by the IP address on the Search for Printers screen. - Page 424 Cannot Find Printer on Check Printer Settings Screen During Wired LAN Setup (Windows)- Checking Security Software Settings Cannot Find Printer on Check Printer Settings Screen During Wired LAN Setup (Windows)- Checking Router Settings...
-
Page 425: Power Status
Cannot Find Printer on Check Printer Settings Screen During Wi-Fi Setup (Windows)-Checking Power Status Are printer and network device (router, etc.) turned on? Make sure the printer is turned on. Checking that Power Is On Make sure network device (router, etc.) is turned on. If printer or network device is off: Turn on printer or network device. -
Page 426: Pc Network Connection
Cannot Find Printer on Check Printer Settings Screen During Wi-Fi Setup (Windows)-Checking PC Network Connection Can you view any web pages on your computer? Make sure the computer and network device (router, etc.) are configured and the computer is connected to the network. - Page 427 Cannot Find Printer on Check Printer Settings Screen During Wi-Fi Setup (Windows)-Checking Printer's Wi-Fi Settings Is printer set to allow wireless communication? Make sure the icon is displayed on the touch screen. If icon is not displayed: The printer is not set to allow wireless communication. Turn on wireless communication on the printer. If icon is displayed: Cannot Find Printer on Check Printer Settings Screen During Wi-Fi Setup (Windows)-Checking Wi-Fi Environment...
-
Page 428: Wi-Fi Environment
Cannot Find Printer on Check Printer Settings Screen During Wi-Fi Setup (Windows)-Checking Wi-Fi Environment Is the printer connected to the wireless router? Use the icon on the touch screen to make sure the printer is connected to the wireless router. is displayed: •... - Page 429 Important • Note that some wireless routers distinguish network names (SSIDs) by the last alphanumeric character according to their bandwidth (2.4 GHz or 5 GHz) or purpose (for computer or game machine). Check the network name (SSID) of the wireless router for the printer on the touch screen. Select (Setup) icon, Device settings, LAN settings, and Wi-Fi, and then check Network name (SSID).
- Page 430 Cannot Find Printer on Check Printer Settings Screen During Wi-Fi Setup (Windows)-Checking Printer's IP Address Is printer's IP address specified correctly? If printer's IP address is not specified correctly, the printer may not be found. Make sure whether printer's IP address is not used for another device. To check the printer's IP address, print out the network settings information or use the operation panel to display it.
-
Page 431: Security Software Settings
• If no message appears: Cancel the setup, and then set the security software to allow Canon software to access the network. The file Setup.exe or Setup64.exe in the win > Driver > DrvSetup folder on the Setup CD-ROM After setting the security software, redo the network communication setup from the beginning. -
Page 432: Wireless Router Settings
Cannot Find Printer on Check Printer Settings Screen During Wi-Fi Setup (Windows)-Checking Wireless Router Settings Check wireless router settings. Check wireless router network connection settings, such as IP address filtering, MAC address filtering, encryption key, and DHCP function. Make sure the same radio channel is assigned to the printer and the wireless router. To check the settings of the wireless router, see the instruction manual supplied with the wireless router or contact the manufacturer. -
Page 433: Checking Lan Cable And Router
Cannot Find Printer on Check Printer Settings Screen During Wired LAN Setup (Windows)-Checking LAN Cable and Router Is LAN cable connected, and are printer and router on? Make sure the LAN cable is connected. Make sure the printer is turned on. Checking that Power Is On Make sure the router is turned on. -
Page 434: Checking Pc Network Connection
Cannot Find Printer on Check Printer Settings Screen During Wired LAN Setup (Windows)-Checking PC Network Connection Can you view any web pages on your computer? Make sure the computer and network device (router, etc.) are configured and the computer is connected to the network. -
Page 435: Cannot Find Printer On Check Printer Settings Screen During Wired Lan Setup (Windows)-Checking Printer's Wired Lan Settings
Cannot Find Printer on Check Printer Settings Screen During Wired LAN Setup (Windows)-Checking Printer's Wired LAN Settings Is printer set to allow wired communication? Make sure the icon is displayed on the touch screen. If icon is not displayed: The printer is not set to allow wired communication. Turn on wired communication on the printer. Once you have turned on wired communication, redo the network communication setup from the beginning. -
Page 436: Checking Printer's Ip Address
Cannot Find Printer on Check Printer Settings Screen During Wired LAN Setup (Windows)-Checking Printer's IP Address Is printer's IP address specified correctly? If printer's IP address is not specified correctly, the printer may not be found. Make sure whether printer's IP address is not used for another device. -
Page 437: Cannot Find Printer On Check Printer Settings Screen During Wired Lan Setup (Windows)-Checking Security Software Settings
• If no message appears: Cancel the setup, and then set the security software to allow Canon software below to access the network. The file Setup.exe or Setup64.exe in the win > Driver > DrvSetup folder on the Setup CD-ROM After setting the security software, redo the network communication setup from the beginning. -
Page 438: Checking Router Settings
Cannot Find Printer on Check Printer Settings Screen During Wired LAN Setup (Windows)-Checking Router Settings Check router settings. Check router network connection settings such as IP address filtering, MAC address filtering, and DHCP function. For more on checking the settings of the router, refer to the instruction manual supplied with the router or contact its manufacturer. -
Page 439: Cannot Proceed Beyond Printer Connection Screen
Cannot Proceed beyond Printer Connection Screen If you cannot proceed beyond the Printer Connection screen, check the following. Make sure USB cable is securely plugged in to printer and computer. Check1 Connect the printer and the computer using a USB cable as the illustration below. The USB port is located at the back of the printer. - Page 440 4. Turn off printer. 5. Restart computer. 6. Make sure you have no application software running. 7. Perform setup on web page. Note • You can use the Setup CD-ROM to redo setup. • For macOS: 1. Click Next. The screen telling you that installation has not been completed appears. 2.
-
Page 441: Cannot Find Printer While Using Wi-Fi
Cannot Find Printer while Using Wi-Fi Make sure printer is turned on. Check1 If not, make sure the printer is securely plugged in and press ON button to turn on. The ON lamp flashes while the printer is initializing. Wait until the ON lamp stops flashing and remains lit. Check the (Network status) icon on the touch screen. - Page 442 Note • Use 2.4 GHz frequency band to connect to a wireless router. Match the network name (SSID) set for the printer with that for 2.4 GHz frequency band of the wireless router. To check the network name (SSID) set for the printer, print out the network setting information. Printing Network Settings Note •...
- Page 443 Make sure security software's firewall is off. Check9 If your security software's firewall is on, a message may appear warning you that Canon software is attempting to access the network. If this warning message appears, set security software to always allow access.
-
Page 444: Network Connection Problems
Network Connection Problems Printer Suddenly Stopped Working for Some Reason Network Key (Password) Unknown Printer Cannot Be Used After Replacing Wireless Router or Changed Router Settings... -
Page 445: Printer Suddenly Stopped Working For Some Reason
Printer Suddenly Stopped Working for Some Reason Cannot Connect to a Printer after Network Configuration Changes Cannot Connect to a Printer via Wireless LAN (Wi-Fi) Cannot Connect to a Printer through Wireless Direct Cannot Connect to a Printer via Wired LAN Cannot Print/Scan through Network Cannot Connect to a Printer after Network Configuration Changes It may take a while for the computer to obtain an IP address, or you may need to restart your computer. - Page 446 To check the settings of the wireless router, refer to the instruction manual provided with it or contact its manufacturer. Note • Use 2.4 GHz frequency band to connect to a wireless router. Match the network name (SSID) set for the printer with that for 2.4 GHz frequency band of the wireless router.
- Page 447 Make sure security software's firewall is off. Check9 If your security software's firewall is on, a message may appear warning you that Canon software is attempting to access the network. If this warning message appears, set security software to always allow access.
- Page 448 Turn on the printer or devices. If the power is already turned on, cycle the power switch. Is the icon displayed on the touch screen? Check2 If not, Wireless Direct is disabled. Turn on Wireless Direct. Check the settings of your device (smartphone/tablet). Check3 Make sure Wi-Fi is enabled on your device.
- Page 449 If MP Drivers are not installed, install them. (Windows) Check2 Install the MP Drivers using the Setup CD-ROM or install them from the Canon website. When using Wi-Fi, make sure wireless router does not restrict which Check3 computers can access it.
-
Page 450: Network Key (Password) Unknown
Network Key (Password) Unknown WPA/WPA2 or WEP Key Set for Wireless Router Unknown, Cannot Connect Setting an Encryption Key WPA/WPA2 or WEP Key Set for Wireless Router Unknown, Cannot Connect For more on setting up a wireless router, see the instruction manual provided with the wireless router or contact its manufacturer. - Page 451 Selecting WPA, WPA2, or WPA/WPA2 is recommended for security reason. If your wireless router is compatible with WPA/WPA2, you can also use WPA2 or WPA. • Using WPA/WPA2 (Windows) The authentication method, Wi-Fi password, and dynamic encryption type must be identical among the wireless router, the printer, and your computer.
-
Page 452: Printer Cannot Be Used After Replacing Wireless Router Or Changed Router Settings
Printer Cannot Be Used After Replacing Wireless Router or Changed Router Settings When you replace a wireless router, redo the network setup for the printer according to the replaced one. • For Windows: Perform setup using the Setup CD-ROM or from the web page. •... - Page 453 If filtering MAC addresses or IP addresses at wireless router, check that MAC Check2 addresses or IP addresses for computer, network device, and printer are registered. If using WPA/WPA2 key or a password, make sure encryption key for Check3 computer, network device, and printer matches key set for wireless router. The length or format of the Wi-Fi password and authentication method must be identical among the wireless router, the printer, and your computer.
-
Page 454: Other Network Problems
Other Network Problems Checking Network Information Restoring to Factory Defaults... -
Page 455: Checking Network Information
Printing Network Settings For Windows, you can check the network setting information on the computer screen. Canon IJ Network Device Setup Utility Screen Checking Computer IP Address or MAC Address To check the IP Address or MAC address of your computer, follow the instructions below. - Page 456 2. Make sure network interface used by computer is selected, and then click Advanced. When you are using Wi-Fi on your computer, make sure Wi-Fi is selected as network interface. When you are using wired LAN, make sure Ethernet is selected. 3.
- Page 457 5. Click Ping. "XXX.XXX.XXX.XXX" is the IP address of the target device. A message such as the following appears. 64 bytes from XXX.XXX.XXX.XXX: icmp_seq=0 ttl=64 time=3.394 ms 64 bytes from XXX.XXX.XXX.XXX: icmp_seq=1 ttl=64 time=1.786 ms 64 bytes from XXX.XXX.XXX.XXX: icmp_seq=2 ttl=64 time=1.739 ms --- XXX.XXX.XXX.XXX ping statistics --- 3 packets transmitted, 3 packets received, 0% packet loss If packet loss is 100%, communication is not taking place.
-
Page 458: Restoring To Factory Defaults
Restoring to Factory Defaults Important • For Windows: Initialization erases all network settings on the printer, making printing or scanning operation from a computer over a network impossible. To use the printer over a network again after restoring it to the factory defaults, redo setup using the Setup CD-ROM or from the web page. -
Page 459: Problems While Printing/Scanning From Smartphone/Tablet
Problems while Printing/Scanning from Smartphone/Tablet Cannot Print/Scan from Smartphone/Tablet... -
Page 460: Cannot Print/Scan From Smartphone/Tablet
Cannot Print/Scan from Smartphone/Tablet If you cannot print/scan from your smartphone/tablet, it is possible that your smartphone/tablet cannot communicate with the printer. Check the cause of your problem according to the connection method. Cannot Communicate with Printer over Wireless LAN Cannot Communicate with Printer while It Is in Wireless Direct Note •... - Page 461 To check the settings of the wireless router, refer to the instruction manual provided with it or contact its manufacturer. To check the current network settings of the printer, print out the network setting information. Printing Network Settings Note • IJ Network Device Setup Utility allows you to diagnose and repair the network status. Select the link below to download IJ Network Device Setup Utility and install it.
- Page 462 Note • IJ Network Device Setup Utility allows you to diagnose and repair the network status. Select the link below to download IJ Network Device Setup Utility and install it. Checking Printer Connection Status Using IJ Network Device Setup Utility See below for starting up IJ Network Device Setup Utility.
- Page 463 Printing Network Settings Have you entered the proper password specified for the Wireless Direct? Check5 To check the password specified for the printer, display it using the operation panel of the printer or print out the network setting information of the printer. •...
-
Page 464: Printing Problems
Printing Problems Printer Does Not Print Ink Does Not Come Out Paper Does Not Feed Properly/"No Paper" Error Cannot Print on the Disc Label Printout Results Are Unsatisfactory... -
Page 465: Printer Does Not Print
Printer Does Not Print Make sure printer is turned on. Check1 If not, make sure the printer is securely plugged in and press ON button to turn on. The ON lamp flashes while the printer is initializing. Wait until the ON lamp stops flashing and remains lit. Note •... - Page 466 The printer will not print properly if you are using a printer driver for a different printer. • For Windows: Make sure "Canon XXX series" (where "XXX" is your printer's name) is selected in the Print dialog box. Note • If multiple printers are registered to your computer, select Set as Default Printer for a printer to make the one selected by default.
- Page 467 • After printing is completed, select Off for Prevention of Print Data Loss. If printing from a computer, restart the computer. Check8 Restart the computer and try printing again.
-
Page 468: Ink Does Not Come Out
24 hours later. • If problem is not resolved after performing print head deep cleaning twice: If print head deep cleaning does not resolve the problem, the print head may be damaged. Contact your nearest Canon service center to request a repair. -
Page 469: Paper Does Not Feed Properly/"No Paper" Error
Paper Does Not Feed Properly/"No Paper" Error Make sure paper is loaded. Check1 Loading Paper When loading paper, consider the following. Check2 • When loading two or more sheets of paper, align the edges of the sheets before loading the paper. •... - Page 470 If the paper tears in the rear tray, see List of Support Code for Error (Paper Jams) to remove it. If there are any foreign objects in the rear tray, be sure to turn off the printer, unplug it from the power supply, then remove the foreign object.
- Page 471 Are transport unit cover and rear cover attached properly? Check9 Rear View for the positions of the transport unit cover and the rear cover. If the measures above do not solve the problem, contact your nearest Canon service center to request a repair.
-
Page 472: Cannot Print On The Disc Label
Use the multi-purpose tray supplied with this printer. For more on placing the multi-purpose tray, see Placing a Printable Disc. Unrecognizable printable disc may be placed. Check2 Canon recommends that you use printable discs specially processed to be printed on by an inkjet printer. - Page 473 Multi-Purpose Tray Jammed Pull out the multi-purpose tray gently. If the multi-purpose tray cannot be pulled out, cycle the power switch. The multi-purpose tray will automatically be ejected. When the multi-purpose tray is pulled out, place the multi-purpose tray again and retry printing. For more on placing the multi-purpose tray, see Placing a Printable Disc.
-
Page 474: Printout Results Are Unsatisfactory
PictBridge settings • Printing from your smartphone/tablet using Canon PRINT Inkjet/SELPHY Check the settings on Canon PRINT Inkjet/SELPHY. Print Easily from a Smartphone or Tablet with Canon PRINT Inkjet/SELPHY Make sure appropriate print quality is selected (see list above). Check2 Select a print quality suited to the paper and to what you are printing. - Page 475 This setting cannot be made on the PictBridge (Wi-Fi) compliant device. If problem is not resolved, check also the sections below. Check3 See also the sections below: Printouts Are Blank/Blurry or Fuzzy/Inaccurate or Bleeding Colors/Streaks or Lines Lines Are Misaligned/Distorted Paper Is Smudged / Printed Surface Is Scratched Vertical Line Next to Image Cannot Complete Printing...
-
Page 476: Printouts Are Blank/Blurry Or Fuzzy/Inaccurate Or Bleeding Colors/Streaks Or Lines
Printouts Are Blank/Blurry or Fuzzy/Inaccurate or Bleeding Colors/ Streaks or Lines Printing Is Blurry Colors Are Wrong... - Page 477 White Streaks Appear Check paper and print quality settings. Check1 Printout Results Are Unsatisfactory Check status of ink tanks. Replace ink tank if ink has run out. Check2 Replacing Ink Tanks Are the orange tape and plastic wrap still on the ink tank? Check3 Make sure all the protective plastic wrap is peeled off to expose the Y-vent area, as shown below (A).
- Page 478 • If problem is not resolved after performing print head deep cleaning twice: If print head deep cleaning does not resolve the problem, the print head may be damaged. Contact your nearest Canon service center to request a repair. When using paper with one printable surface, check the correct printable side Check5 of the paper.
-
Page 479: Lines Are Misaligned/Distorted
Lines Are Misaligned/Distorted Check paper and print quality settings. Check1 Printout Results Are Unsatisfactory Perform print head alignment. Check2 If printed lines are misaligned/distorted or print results are otherwise unsatisfactory, adjust the print head position. Aligning the Print Head Note •... -
Page 480: Paper Is Smudged / Printed Surface Is Scratched
Paper Is Smudged / Printed Surface Is Scratched Paper Is Smudged Smudged Edges Smudged Surface Printed Surface Is Scratched Check paper and print quality settings. Check1 Printout Results Are Unsatisfactory Check paper type. Check2 Make sure you are using the right paper for what you are printing. Supported Media Types Correct curl before loading paper. - Page 481 1. Roll up paper in opposite direction to paper curl as shown below. 2. Check that paper is now flat. We recommend printing curl-corrected paper one sheet at a time. Note • Depending on paper type, the paper may smudge or may not feed properly even if it is not curled inward. Follow the instructions below to curl the paper outward up to 0.1 inch / 3 mm (B) in height before printing.
- Page 482 1. Check that printer is turned on. 2. Open Canon IJ Printer Assistant Tool. Maintenance Tab Description 3. Select Select Printer... and select printer you are using from pulldown menu and select 4. Select Custom Settings. 5. Select Prevent paper abrasion check box and click OK.
- Page 483 This allows the printed surface to dry, preventing smudges and scratches. • For Windows: 1. Check that printer is turned on. 2. Open Canon IJ Printer Assistant Tool. Maintenance Tab Description 3. Select Select Printer... and select printer you are using from pulldown menu and select 4.
-
Page 484: Vertical Line Next To Image
Vertical Line Next to Image Is loaded paper size correct? Check If the loaded paper is larger than the size you specified, a vertical line may appear in the margin. Set the paper size to match the loaded paper. Printout Results Are Unsatisfactory Note •... -
Page 485: Scanning Problems (Windows)
Scanning Problems (Windows) Scanning Problems... -
Page 486: Scanning Problems
Scanning Problems Scanner Does Not Work ScanGear (Scanner Driver) Does Not Start... -
Page 487: Scanner Does Not Work
Scanner Does Not Work Make sure that your scanner or printer is turned on. Check 1 Connect the USB cable to a different USB port on the computer. Check 2 If the USB cable is connected to a USB hub, remove it from the USB hub and Check 3 connect it to a USB port on the computer. -
Page 488: Scangear (Scanner Driver) Does Not Start
ScanGear (Scanner Driver) Does Not Start Make sure MP Drivers is installed. Check 1 If not installed, install MP Drivers from the Setup CD-ROM or our website. Select your scanner or printer on the application's menu. Check 2 Important • If your scanner or printer name is displayed multiple times, select the one that does not include WIA. Note •... -
Page 489: Mechanical Problems
Mechanical Problems Printer Does Not Turn On Printer Turns Off Unexpectedly or Repeatedly USB Connection Problems Cannot Communicate with Printer via USB Wrong Language Appears in Touch Screen... -
Page 490: Printer Does Not Turn On
Make sure power plug is securely connected to printer, and then turn on again. Check2 Unplug printer, leave it for at least 2 minutes, and then plug it back in and turn Check3 on again. If this does not solve the problem, contact your nearest Canon service center to request a repair. -
Page 491: Printer Turns Off Unexpectedly Or Repeatedly
The setting is disabled. • To disable the setting from the computer: For Windows, use Canon IJ Printer Assistant Tool or ScanGear (scanner driver) to disable the setting. Follow the procedure below to disable the setting using Canon IJ Printer Assistant Tool. - Page 492 4. Select Disable for Auto Power Off. 5. Select OK. 6. Select OK on the displayed screen. The setting to shut off the power automatically is disabled. Note • Refer to below to disable the setting from ScanGear (scanner driver). Scanner Tab...
-
Page 493: Usb Connection Problems
USB Connection Problems Printing or Scanning Is Slow/Hi-Speed USB Connection Does Not Work/"This device can perform faster" Message Appears (Windows) If your system environment does not support Hi-Speed USB, the printer operates at the slower speed of USB 1.1. In this case, the printer works properly but printing or scanning speed may slow down due to the communication speed. -
Page 494: Cannot Communicate With Printer Via Usb
Cannot Communicate with Printer via USB Make sure printer is turned on. Check1 Connect USB cable properly. Check2 As the illustration below, the USB port is at the back of the printer. Important • Connect the "Type-B" terminal to the printer with the notched side facing UP. For details, refer to the instruction manual supplied with the USB cable. -
Page 495: Wrong Language Appears In Touch Screen
Wrong Language Appears in Touch Screen Follow the instructions below to select your language. 1. Press HOME button and wait a little. 2. Select (Setup) icon. Using the Operation Panel 3. Select 4. Select sixth setting item from top. 5. Select a language for touch screen. 6. -
Page 496: Installation And Download Problems
Installation and Download Problems Failed to MP Drivers Installation (Windows) Updating MP Drivers in Network Environment (Windows) -
Page 497: Failed To Mp Drivers Installation (Windows)
CD-ROM icon in the window that appears. If the contents of the CD-ROM appear, double-click MSETUP4.EXE. If you cannot install the MP Drivers with the Setup CD-ROM, install them from the Canon website. Note • If the CD-ROM icon does not appear, try the following: •... - Page 498 MP Drivers. Deleting the Unnecessary MP Drivers Reinstall the MP Drivers with the Setup CD-ROM or install them from the Canon website. Note • If the installer was stopped due to a Windows error, Windows operation may be unstable, and you...
-
Page 499: Updating Mp Drivers In Network Environment (Windows)
Updating MP Drivers in Network Environment (Windows) Download the latest MP Drivers. Download the latest MP Drivers for your model on the download page of the Canon website. Uninstall the existing MP Drivers and follow the installation instructions to install the latest MP Drivers that you downloaded. -
Page 500: Errors And Messages
Errors and Messages An Error Occurs Message (Support Code) Appears... -
Page 501: An Error Occurs
An Error Occurs If an error occurs in printing, for example if the paper runs out or jams, a troubleshooting message appears automatically. Take the appropriate action described in the message. When an error occurs, a message appears on the computer, or an error code appears on the printer. For some errors, a support code (error number) appears on the computer screen. -
Page 502: Message (Support Code) Appears
Message (Support Code) Appears This section describes some of the errors and messages that may appear. Note • A support code (error number) is displayed on the computer for some errors. For details on errors that have support code, see List of Support Code for Error. - Page 503 Check3 Uninstall the MP Drivers following the procedure described in Deleting the Unnecessary MP Drivers and reinstall them from the Setup CD-ROM or the Canon website. When printer is connected to your computer with a USB cable, check device Check4 status from your computer.
- Page 504 • "Printer driver could not be found" Uninstall the MP Drivers following the procedure described in Deleting the Unnecessary MP Drivers and reinstall them from the Setup CD-ROM or the Canon website. • "Could not print Application name - File name"...
-
Page 505: List Of Support Code For Error
List of Support Code for Error Support code appears on the touch screen and your computer screen when errors occur. A "support code" is an error number, and appears along with an error message. When an error occurs, check the support code displayed on the touch screen and computer screen and take the appropriate action in response. - Page 506 • 5000 to 5ZZZ 5011 5012 5040 5050 5100 5200 520E 5400 5700 5B00 5B01 5C02 • 6000 to 6ZZZ 6000 6001 6004 6500 6502 6800 6801 6830 6831 6832 6833 6900 6901 6902 6910 6911 6920 6921 6930 6931 6932 6933 6934 6935 6936 6937 6938 6940 6941 6942 6943 6944 6945 6946 6951 6A80 6A81 6D01...
-
Page 507: List Of Support Code For Error (Paper Jams)
List of Support Code for Error (Paper Jams) If paper jams, remove it following the appropriate procedure as shown below. • If you can see the jammed paper at the paper output slot or the rear tray: 1300 • If you cannot see the jammed paper at the paper output slot or the rear tray: ◦... - Page 508 1300 Cause Paper is jammed when feeding paper from rear tray. What to Do If the paper fed from the rear tray is jammed, remove the jammed paper from the paper output slot or from the rear tray following the instructions below. 1.
- Page 509 • We recommend using paper sizes other than A5 to print documents with photos or graphics. A5 paper may curl and jam as it leaves the printer. If the measures above do not solve the problem, contact your nearest Canon service center to request a repair.
- Page 510 1303 Cause Paper is jammed when feeding paper from cassette. What to Do 1. Remove jammed paper. • If the paper is jammed at the paper output slot: 1300 • If the paper is jammed inside the printer: Paper Is Jammed inside Printer •...
- Page 511 1304 Cause Paper is jammed when performing automatic duplex printing. What to Do 1. Remove jammed paper. • If the paper is jammed at the paper output slot: 1300 • If the paper is jammed inside the printer: Paper Is Jammed inside Printer •...
- Page 512 1313 Cause Paper is jammed as printer pulled in printed paper. What to Do If the paper is jammed as the printer pulled in the printed paper, try to remove the paper from the following locations. • Paper output slot 1300 •...
-
Page 513: Paper Is Jammed Inside Printer
Paper Is Jammed inside Printer If the jammed paper tears and you cannot remove the paper from the paper output slot, or if the jammed paper remains inside the printer, remove the paper following the instructions below. Note • If paper becomes jammed during printing and you need to turn off the printer to remove it, tap Stop to stop the printing before you turn off the printer. - Page 514 4. Hold jammed paper firmly in both hands. If the paper is rolled up, pull out it. 5. Slowly pull out paper, so as not to tear it. Pull out the paper at an angle of about 45 degrees. 6. Make sure all jammed paper is removed. If the paper tears when you pull out it, a bit of paper may remain in the printer.
- Page 515 Check the printer again for any remaining bits of paper. If the measures above do not solve the problem, contact your nearest Canon service center to request a repair.
-
Page 516: Removing Jammed Paper From Rear Side
Removing Jammed Paper from Rear Side Note • If paper becomes jammed during printing and you need to turn off the printer to remove it, tap Stop to stop the printing before you turn off the printer. 1. Rotate printer so that rear side of printer faces toward you. 2. - Page 517 4. Slowly pull out paper. Note • Do not touch the inner parts of the printer. If you were not able to remove the paper in this step, detach the transport unit cover and remove the paper by following these steps. 1.
- Page 518 2. Slowly pull out paper. Note • Do not touch the inner parts of the printer. 3. Make sure all jammed paper is removed. 4. Attach transport unit cover. Insert the transport unit cover slowly all the way into printer and take down the transport unit cover. 5.
- Page 519 If the measures above do not solve the problem, contact your nearest Canon service center to request a repair.
- Page 520 1000 Cause Possible causes include the following. • There is no paper in the rear tray. • Paper is not loaded in the rear tray properly. What to Do Take the corresponding actions below. • Load paper in the rear tray. Loading Paper in the Rear Tray •...
- Page 521 1003 Cause Possible causes include the following. • There is no paper in the cassette. • Paper is not loaded in the cassette properly. What to Do Take the corresponding actions below. • Load paper in the cassette. Loading Paper in the Cassette •...
- Page 522 1200 Cause Scanning unit / cover is open. What to Do Close the scanning unit / cover and wait for a while. Do not close it while you are replacing an ink tank.
- Page 523 1401 Cause Print head may be damaged. What to Do Turn off the printer and turn it back on. If this does not solve the problem, contact your nearest Canon service center to request a repair.
- Page 524 1600 Cause Ink may have run out. What to Do Replacing the ink tank is recommended. If printing is in progress and you want to continue printing, tap OK on the printer with the ink tank installed. Then printing can continue. Replacing the ink tank is recommended after the printing. The printer may be damaged if printing is continued under the ink out condition.
- Page 525 1660 Cause The ink tank cannot be recognized. What to Do Printing cannot be performed because the ink tank is not installed or is not compatible with this printer. Check the ink tank. If you want to cancel printing, tap Stop on the printer.
- Page 526 With this operation, disabling the function for detecting the remaining ink level is memorized. Please be advised that Canon shall not be liable for any malfunction or trouble which may be caused by continuation of printing under the ink out condition.
- Page 527 With this operation, disabling the function for detecting the remaining ink level is memorized. Please be advised that Canon shall not be liable for any malfunction or trouble caused by continuation of printing under the ink out condition or by using refilled ink tanks.
- Page 528 Cause Ink absorber is almost full. What to Do Select OK on the touch screen to continue printing. Contact your nearest Canon service center to request a repair. Note • In the case of warnings or errors caused by remaining ink levels, the printer cannot print or scan.
- Page 529 Open the scanning unit / cover and make sure the tape for securing the print head holder during transportation has been removed. If the tape is still there, remove it and close the scanning unit / cover. If this does not solve the problem, contact your nearest Canon service center to request a repair.
- Page 530 2110 Cause Paper settings for printing or copying do not match cassette paper information set on printer. Note • See below for the correct correspondence between paper settings made on the printer driver or on the touch screen. Paper Settings on the Printer Driver and the Printer (Media Type) (Windows) Paper Settings on the Printer Driver and the Printer (Paper Size) (Windows)
- Page 531 Select the appropriate action. Note • Depending on settings, some of the options below may not appear. Print with the loaded paper. Select this option to print or copy onto the paper in the cassette without changing the paper settings. For example, if the print or copy paper setting is A5, and cassette paper information is set to A4, the A5 size setting is used to print or copy onto the paper in the cassette.
- Page 532 • To change the message view setting when printing or copying using the operation panel of the printer: Feed settings • To change the message view setting when printing using the printer driver: Changing the Printer Operation Mode (Windows) Changing the Printer Operation Mode (macOS)
- Page 533 4103 Cause Cannot perform printing with current print settings. What to Do Tap Stop on the touch screen to cancel printing. Then change the print settings and retry printing.
- Page 534 Printer error has occurred. What to Do Turn off printer and unplug it. Plug in the printer again and turn it back on. If this does not solve the problem, contact your nearest Canon service center to request a repair.
- Page 535 Printer error has occurred. What to Do Turn off printer and unplug it. Plug in the printer again and turn it back on. If this does not solve the problem, contact your nearest Canon service center to request a repair.
- Page 536 Press ink tanks until they click into place. Turn the printer back on. If this does not solve the problem, contact your nearest Canon service center to request a repair. Important • When clearing an impediment to print head holder motion, be careful not to touch white belt (A).
- Page 537 Printer error has occurred. What to Do Turn off printer and unplug it. After a while, plug in the printer again and turn it back on. If this does not solve the problem, contact your nearest Canon service center to request a repair.
- Page 538 5B00 Cause Printer error has occurred. What to Do Contact your nearest Canon service center to request a repair. Note • In the case of warnings or errors caused by remaining ink levels, the printer cannot print or scan.
- Page 539 List of Support Code for Error (Paper Jams) Turn off printer and unplug it. Plug in the printer again and turn it back on. If this does not solve the problem, contact your nearest Canon service center to request a repair.
- Page 540 Press ink tanks until they click into place. Turn the printer back on. If this does not solve the problem, contact your nearest Canon service center to request a repair. Important • When clearing an impediment to print head holder motion, be careful not to touch white belt (A).
Need help?
Do you have a question about the TS9500 Series and is the answer not in the manual?
Questions and answers
How do. i print my recent scan
To print a recent scan on a Canon TS9500 Series printer:
1. Scan the document using the operation panel:
- Select Auto scan for "Doc.type" in the Scan menu.
- Place your original face down on the platen, aligned with the alignment mark.
2. After scanning, access the scanned file from your computer or device.
3. Open the scanned file using any image viewer or document viewer.
4. Use the print function in the viewer to send the scan to the printer.
Note: Ensure the printer is connected to your computer or device via USB, Wi-Fi, or Wireless Direct.
This answer is automatically generated
how to change from back print to front load print
To change from back (rear tray) print to front (cassette) load print on the Canon TS9500 Series, adjust the paper source setting in the printer driver:
1. Open the print dialog on your computer.
2. Select your Canon TS9500 Series printer.
3. Click on "Preferences" or "Printer Properties."
4. Go to the "Main" tab.
5. Under "Media Source," select "Cassette" instead of "Rear Tray."
6. Click OK to apply the settings and print.
Make sure the correct paper type and size are selected for the front cassette.
This answer is automatically generated