
Related Manuals for Canon PIXMA TS9120


Summary of Contents for Canon PIXMA TS9120
- Page 1 Getting Started Guía de inicio Read Safety and Important Information (addendum) first. Lea primero Información de seguridad e información importante (apéndice).
- Page 2 Installing the Printer ............page 1 Instalación de la impresora..........página 1 Connecting with Computer and Smartphone/Tablet ..page 4 Conexión con el ordenador y con el teléfono inteligente o la tableta ..............página 4 How to Hold Printer Explanatory Movies Cómo sujetar Películas explicativas la impresora...
-
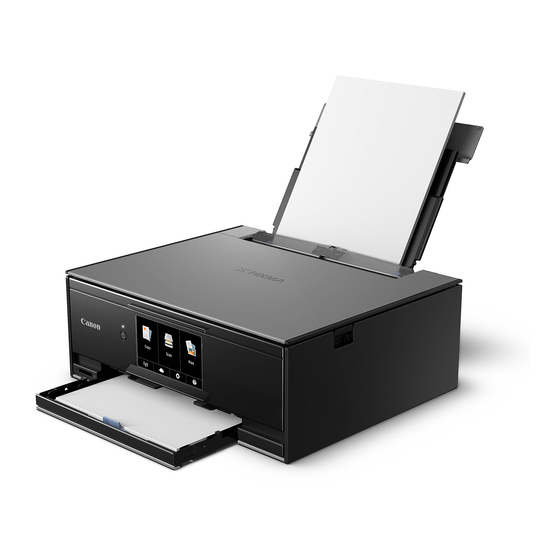
Page 3: Checking Included Items
H ook the hollows on the both sides of the printer with your fingers and open the scanning unit / cover. For details about information that is sent to Canon, b R emove the orange tape. refer to "Sending Data To Canon" in Safety and Important Information. - Page 4 LIFT UP the scanning unit / cover, and then close a C OMPLETELY remove the orange tape. b R emove the protective wrap. Hook the orange cap with your finger to remove it GENTLY. If an error message appears on the screen, make sure the ink tanks are installed correctly.
- Page 5 a L oad plain LTR or A4 size paper with the print a O pen the document cover. side facing down. b L oad the printed pattern on the platen glass. b S lide the right paper guide to align it with the side of the paper stack.
-
Page 6: Preparing For Connection
( etc.) on your computer. e Click Setup. b Input the following URL and access the Canon website. The procedures for Windows and Mac OS are shown below. If you are using a computer with an OS other than Windows or Mac OS, such as a Chrome OS, do the setup according to the on-screen instructions. - Page 7 Using Setup CD-ROM (Windows Only) a Load the Setup CD-ROM in your computer. ■ When using Windows 10 or Windows 8.1: b When the following message appears on the right When This Message Does Not Appear (or Has side of your computer screen, click it. Disappeared) 1.
- Page 8 • If you have a wireless router, connect your smartphone to the wireless router you want to connect to the printer. * For operations, refer to manuals of your smartphone and the wireless router or contact those manufacturers. Install the application software Canon PRINT Inkjet/SELPHY in your smartphone. : Search "Canon PRINT" in App Store.
- Page 9 Procedures below vary depending on iOS or Android. Select your operating system and proceed to its procedure. a Tap Settings on your smartphone's home screen, a Tap the installed application software. and tap Canon_ij_XXXX in the Wi-Fi settings. b Follow the on-screen instructions to register the printer.
-
Page 10: Loading Photo Paper
Loading Photo Paper Load photo paper in the rear tray. Open the rear tray cover and pull out the paper a L oad several sheets of photo paper with the support. print side facing up. b S lide the right paper guide to align it with the side of the paper stack. -
Page 11: Comprobación De Los Elementos Suministrados
R etire la cinta naranja. Si desea conocer qué información que se envía a Canon, consulte "Envío de datos a Canon" en Información de seguridad e información importante. Seleccione OK. LEVANTE la cubierta/unidad de escaneado y luego ciérrela. - Page 12 LEVANTE la cubierta/unidad de escaneado a R etire COMPLETAMENTE la cinta naranja. y luego ciérrela. b R etire el envoltorio protector. Sujete la tapa naranja con su dedo para quitarla SUAVEMENTE. Si aparece un mensaje de error en la pantalla, asegúrese de que los depósitos de tinta estén instalados correctamente.
- Page 13 a C argue papel normal de tamaño LTR o A4 a A bra la cubierta de documentos. con el lado de impresión hacia abajo. b C argue el patrón impreso en el cristal b D eslice la guía del papel derecha para de la platina.
-
Page 14: Conexión Con El Ordenador
Si el sistema operativo b Escriba la URL siguiente y acceda al sitio web de su ordenador no es Windows ni Mac OS (p. ej., de Canon. Chrome OS), realice la configuración siguiendo las instrucciones en pantalla. f Haga clic en Descargar y descargue el archivo de instalación. - Page 15 Uso del CD-ROM de instalación (solo para Windows) a Cargue el CD-ROM de instalación en su ordenador. Si utiliza Windows 10 o Windows 8.1: b Cuando se muestre el mensaje siguiente en el lado Si este mensaje no se muestra (o ya no aparece) derecho de la pantalla del ordenador, haga clic en él.
- Page 16 * Por cuestiones del funcionamiento, consulte los manuales de su teléfono inteligente y del router inalámbrico o póngase en contacto con los fabricantes. Instale el software de la aplicación Canon PRINT Inkjet/SELPHY en su teléfono inteligente. : Busque "Canon PRINT" en App Store.
- Page 17 Los procedimientos a continuación varían en función de iOS o Android. Seleccione su sistema operativo y continúe con el procedimiento correspondiente. a Toque Ajustes (Settings) en la pantalla de a Puntee el software de la aplicación instalado. inicio de su teléfono inteligente y después toque Canon_ij_XXXX en los ajustes de Wi-Fi.
- Page 18 Carga de papel fotográfico Cargue el papel fotográfico en la bandeja posterior. Abra la cubierta de la bandeja posterior y retire a C argue varias hojas de papel fotográfico el soporte del papel. con el lado de impresión hacia arriba. b D eslice la guía del papel derecha para alinearla con el lado de la pila de papel.
- Page 19 How-To Video Library Videoteca sobre procedimientos RMC (Regulatory Model Code): K10455...
- Page 20 Access Online Manual Acceso al Manual en línea From Web site Desde el sitio web From desktop shortcut Windows 10 Desde el acceso directo del escritorio QT6-1921-V01 XXXXXXXX © CANON INC. 2017 PRINTED IN XXXXXXXX...
Need help?
Do you have a question about the PIXMA TS9120 and is the answer not in the manual?
Questions and answers