Advertisement
60 Amp In-Line Fuse Assembly Kit
Recommended Best Practices
•
The in-line fuse must be located in an accessible location as close to the battery as possible while keeping
it from directly touching or laying on the battery.
•
The distance from the battery positive (+) terminal to the in-line fuse should be kept to a minimum and
not exceed 12.00 in. (305 mm).
•
Depending on the application, the wire from the in-line fuse to the unit's power wire may need to be
shortened to eliminate excess or coiled wire.
•
The in-line fuse should be positioned vertically to help promote water drainage.
•
Fuses mounted horizontally must have the slit in the sleeving pointing downwards.
•
If the vehicle is equipped with a battery disconnect switch, always connect the unit's power wire after the
switch. This allows power to the unit to be turned off by the battery disconnect switch.
•
The ring terminals used must be sized to match the battery power stud or lug bolt. Oversized ring
terminals can contribute to high resistance resulting in the fuse overheating and failure. Various size
terminal rings are provided in the kit - choose the correct size for your specific battery requirement.
•
All hand crimped terminals must be securely crimped, soldered and covered with heat shrink tubing.
•
The in-line fuse must be secured to the vehicle or alongside the positive battery cable with the supplied
cable ties.
•
Use harness routing that provides adequate protection against possibility of short circuit.
•
All battery/electrical connections must be clean and tight.
TK 56239-11-IM (Rev. 0, 01/16) Copyright© 2016 Thermo King Corp. Minneapolis, MN, USA
Installation Procedures
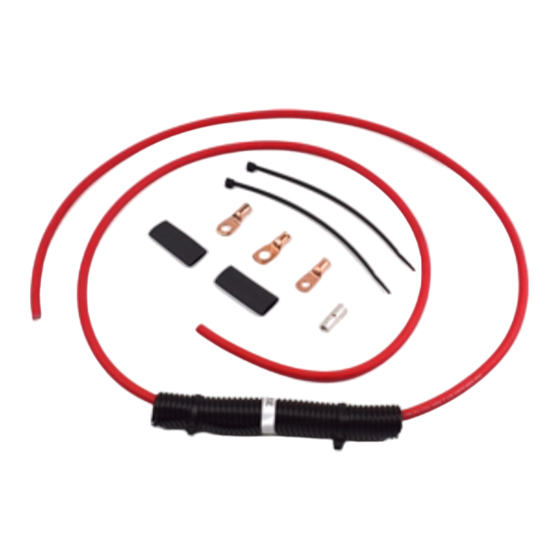
KIT 42-2499
KIT COMPONENTS
Item
P/N
1.
NSS
60 Amp In-Line Fuse Assembly
2.
413408
Butt Splice Connector
3.
418311
Ring Terminal, 3/8'' 6 AWG
4.
419797
Ring Terminal, 5/16'' 6 AWG
5.
419580
Ring Terminal, 1/4'' 6 AWG
6.
552332
Cable Ties
7.
NSS
Heat Shrink Tubing, 1-1/2'' long
8.
TK 56239 Installation Procedures
Description
Qty.
1
1
1
1
1
2
2
1
Advertisement
Table of Contents

Subscribe to Our Youtube Channel
Related Manuals for Thermo King 42-2499


Summary of Contents for Thermo King 42-2499
- Page 1 The in-line fuse must be secured to the vehicle or alongside the positive battery cable with the supplied cable ties. • Use harness routing that provides adequate protection against possibility of short circuit. • All battery/electrical connections must be clean and tight. TK 56239-11-IM (Rev. 0, 01/16) Copyright© 2016 Thermo King Corp. Minneapolis, MN, USA...
- Page 2 In-Line Fuse Installation - Self-Powered and Direct-Drive Truck Units IMPORTANT: You must read and follow the Recommended Best Practices on page 1. 1. Cut one in-line fuse wire to a maximum length of 12.00 in. (305 mm) and strip 0.50 in. (12 mm) from the end.
- Page 3 In-Line Fuse Retro-Fit Installation - Heat King Units IMPORTANT: Turn the unit power switch off and disconnect the positive (+) battery cable from the battery. 1. Locate and remove the existing maxi-fuse going from the alternator to the starter. 2. Lay the new in-line fuse assembly next to the maxi-fuse assembly. Cut the new in-line fuse wires so the overall length of the new fuse assembly is the same as the maxi-fuse.
Need help?
Do you have a question about the 42-2499 and is the answer not in the manual?
Questions and answers