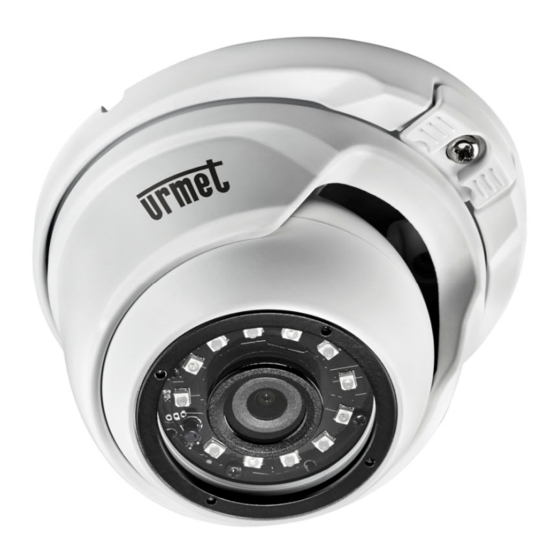
urmet domus 1092 Quick Manual
4m ahd day & night ball camera 1/3” 2,8-12mm varifocal lens with ir led
Hide thumbs
Also See for 1092:
- User manual (74 pages) ,
- Instructions manual (53 pages) ,
- Quick manual (49 pages)
Table of Contents
Advertisement
Available languages
Available languages
Quick Links
+
DS1092-538
1/3" OTTICA VARIFOCAL 2,8-12MM CON LED IR
1/3" 2,8-12MM VARIFOCAL LENS WITH IR LED
1/3" OPTIQUE VARIFOCAL 2,8-12MM A DIODES IR
1/3" ÓPTICA VARIFOCAL 2,8-12MM CON LEDS IR
BALL CAMERA AHD 4M DAY & NIGHT
4M AHD DAY & NIGHT BALL CAMERA
AHD 4M TAG & NACHT KUGELKAMERA
1/3-ZOLL 2,8-12MM-OBJEKTIV MIT IR-LEDS
CAMÉRA MINI-DÔME AHD 4M DAY & NIGHT
CÁMARA MINIDOMO AHD 4M DÍA/NOCHE
Sch./Ref./Typ/Réf. 1092/281M
GUIDA RAPIDA
SCHNELLANLEITUNG
GUIDE RAPIDE
QUICK GUIDE
GUÍA RÁPIDA
Mod.
1092
Advertisement
Table of Contents

Summary of Contents for urmet domus 1092
- Page 1 1/3-ZOLL 2,8-12MM-OBJEKTIV MIT IR-LEDS CAMÉRA MINI-DÔME AHD 4M DAY & NIGHT 1/3” OPTIQUE VARIFOCAL 2,8-12MM A DIODES IR CÁMARA MINIDOMO AHD 4M DÍA/NOCHE 1/3” ÓPTICA VARIFOCAL 2,8-12MM CON LEDS IR Sch./Ref./Typ/Réf. 1092/281M GUIDA RAPIDA QUICK GUIDE SCHNELLANLEITUNG GUIDE RAPIDE GUÍA RÁPIDA...
-
Page 2: Installazione
ITALIANO INSTALLAZIONE BASE DI FISSAGGIO CORPO TELECAMERA CALOTTA DI PROTEZIONE Prima d’iniziare l’installazione, assicurarsi che tutte le unità da collegare non siano alimentate. Allentare la vite di blocco presente sulla calotta di protezione per scorporare la telecamera come in figura. -
Page 3: Comandi E Regolazioni
Consultare la documentazione completa del prodotto sul sito Urmet per verificare la lista e le modalità d’uso dei dispositivi compatibili. UTILIZZO DEL MENU La telecamera 1092/281M utilizza un menù a più livelli che consente di abilitare/disabilitare o variare le impostazioni. DESCRIZIONE DEL SISTEMA DEI MENU Una volta impartito il comando di accesso al menu apparirà... - Page 4 ENGLISH INSTALLATION Mount fixing screw Camera body Protective dome Make sure that no units are powered before starting the installation procedure. Unscrew the fixing base from the ring lock to separate the camera, as in figure. Fix the base to the surface with 4 screws. If it is not planned an hidden installation of connection cables, use the slot present on the base to draw out the connection cables present on the camera body, without pinching them, in order to avoid malfunction.
-
Page 5: Operating Features
These controls can be used to access the OSD menu. Refer to the respective product manuals for using the controls. MENU USE The camera ref. 1092/281M uses a multi-level menu that allows to enable/disable or change camera settings. MENUS SYSTEM DESCRIPTION Once the menu access command has been performed, the access first screen will be displayed. -
Page 6: Installation
DEUTSCH INSTALLATION BEFESTIGUNGSBASIS KAMERAGEHÄUSE SCHUTZKAPPE Stellen Sie vor der Installation sicher, dass alle anzuschließenden Einheiten nicht versorgt werden. Die ein an der Schutzkappe vorhandenen Arretierschraube mit Hilfe des mitgelieferten Schlüssels lockern, um die Kamera wie in der Abbildung ersichtlich zu zerlegen. ... -
Page 7: Verwendung Des Menüs
Mit diesen Funktionen können das OSD-Menü aufgerufen werden. Informationen über die Nutzung der Funktionen finden Sie in den entsprechenden Produkthandbüchern. VERWENDUNG DES MENÜS Bei der Kamera 1092/281M kommt ein Menü mit mehreren Ebenen zur Anwendung, über das die Einstellungen aktiviert/deaktiviert oder geändert werden können. BESCHREIBUNG DES MENÜ-SYSTEMS Nachdem Sie den Befehl für den Zugriff auf das Menü... - Page 8 FRANÇAIS INSTALLATION BASE DE FIXATION CORPS CAMÉRA CALOTTE DE PROTECTION Avant de procéder à l’installation, s’assurer qu’aucune des unités à brancher n’est alimentée. Desserrer la vis de blocage présentes sur la calotte de protection en utilisant la clé fournie à cet effet, pour démonter la caméra comme indiqué...
-
Page 9: Commandes Et Réglages
Ces commandes permettent d'accéder au menu OSD. Pour l'utilisation des commandes, se reporter aux manuels des produits correspondants. UTILISATION DU MENU La caméra 1092/281M utilise un menu à plusieurs niveaux qui permet d’activer/désactiver les réglages ainsi que de les modifier. DESCRIPTION DU SYSTÈME DES MENUS Une fois la commande d’accès au menu transmise la fenêtre initiale d’accès s’affiche sur l’écran. - Page 10 ESPAÑOL INSTALACIÓN Base de fijación Cuerpo de la cámara Carcasa de protección Antes de empezar el cableado, asegurarse de que todas las unidades que se deben conectar no tengan alimentación. Afloje el tornillo presente en la carcasa de protección con la llave suministrada, para separar la cámara como muestra la figura.
-
Page 11: Características De Funcionamiento
Para el uso de los mandos, consulte los manuales de los productos correspondientes. UTILIZACIÓN DEL MENÚ La cámara Ref. 1092/281M dispone de un menú de varios niveles para habilitar, deshabilitar o cambiar la configuración de la cámara. DESCRIPCIÓN DEL SISTEMA DE MENÚS Una vez dentro el menú, se mostrará... - Page 12 DS1092-538 URMET S.p.A. Area tecnica 10154 TORINO (ITALY) servizio clienti +39. 011.23.39.810 VIA BOLOGNA 188/C http://www.urmet.com Telef. +39. 011.24.00.000 (RIC.AUT.) e-mail: info@urmet.com DS1092-538 +39. 011.24.00.300 - 323 MADE IN CHINA Prodotto in Cina su specifica URMET Made in China to URMET specification...


Need help?
Do you have a question about the 1092 and is the answer not in the manual?
Questions and answers