Advertisement
Table of Contents
- 1 Table of Contents
- 2 Safety Precautions
- 3 Specifications and Product Overview
- 4 First Use Preparation and Set-Up
- 5 Spa Set-Up
- 6 Wired Controller Operation
- 7 Water Maintenance and Chemicals
- 8 Drainage, Cleaning and Storage
- 9 Disposal and Environmental Protection
- 10 Troubleshooting
- 11 Mspa Limited Warranty Policy
- Download this manual
www.the-mspa.com
MSpa
®
Owner's Manual
P-MB049/069
P-SH069
EN
DO NOT RETURN MERCHANDISE TO YOUR DEALER STORE DIRECTLY. CALL MSPA AFTER
SALES SERVICE CENTER FOR ANY PRODUCT-RELATED QUESTIONS OR CONTACT MSPA AT
info@the-mspa.com
Due to MSpa continuous product improvement, MSpa reserves the right to change the
product appearance and specifications, which may result in updates to the instruction
manual without notice.
Where Luxury Is Affordable
Mont Blanc
Soho
P-CA049/069
P-EX049/069
Camaro
Exotic
Advertisement
Table of Contents

Related Manuals for mspa Mont Blanc


Summary of Contents for mspa Mont Blanc
- Page 1 SALES SERVICE CENTER FOR ANY PRODUCT-RELATED QUESTIONS OR CONTACT MSPA AT info@the-mspa.com Due to MSpa continuous product improvement, MSpa reserves the right to change the product appearance and specifications, which may result in updates to the instruction manual without notice.
-
Page 2: Table Of Contents
To guide you in your initial MSpa experience, we are pleased to present you with this instruction manual. Please read this manual carefully before using the product for the first time. We are delighted to welcome you to the MSpa family, and we are looking forward to sharing with you the full spectrum of our expertise. -
Page 3: Safety Precautions
SAFETY PRECAUTIONS For your own safety and that of your product, make sure to follow the safety precautions below. Failure to follow the instruction may result in serious injury, property damage, or death. Improper installation or operation will void the warranty. READ, UNDERSTAND AND FOLLOW ALL INSTRUCTIONS KEEP THE MANUAL FOR FUTURE REFERENCE DANGER... - Page 4 ● Transportable whirlpool spas with earthing must only be plugged directly into an earthed socket-outlet of the fixed wiring. ● Components containing moving parts, except parts supplied with safety extra-low voltage not exceeding 12V, must be inaccessible to occupants in the spa.
- Page 5 temperature-regulating devices varies. d) The use of alcohol, drugs, or medications before or during spa use may lead to unconsciousness with the possibility of drowning. e) The use of alcohol, drugs, or medications can greatly increase the risk of fatal hyperthermia in spas.
- Page 6 Usually, it is recommended to drain and refill the spa with clean water every 3-5 days. ● Use Mspa chemical kit for disinfection in accordance with manufacturer’s instructions. ● Do not leave or set up the spa in temperature lower than 4°C (39°F) if heater is not operating.
- Page 7 ● Do not leave the spa empty for extended period of time. Drain water inside the pool thoroughly if it is not used for a long period of time. Do not expose the spa to direct sunshine. Check regularly before each use. Put away the spa or fence it up in time after using.
- Page 8 Warning: The water protection levels of appliance at different product zones are different. See the following diagram. ( Installation regulations comply to IEC 60364-7-702) 2.5 m Zone 2 Zone 1 Zone 2 2.5 m Zone 0 Zone 0 1.5 m 2.0 m 2.0 m 1.5 m...
-
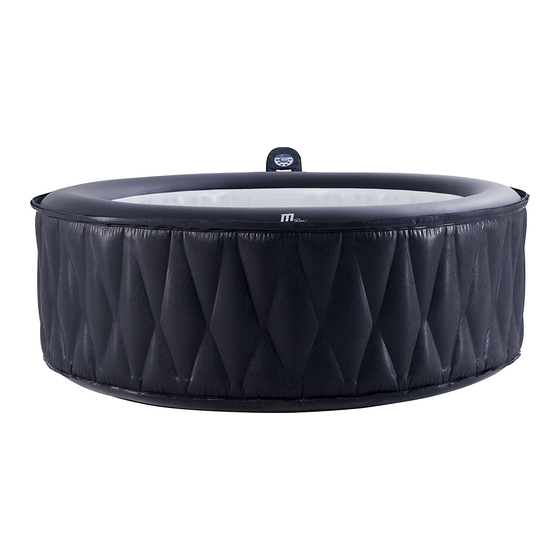
Page 9: Specifications And Product Overview
Inside Model No. Shape Dimensions Height Weight Capacity Capacity Dimensions / Code P-MB049 700Ltr 1.80m 1.40m 0.70m 31kg Round / MONT BLANC (184gal) (71”) (55”) (28”) (68.3lbs) P-MB069 930Ltr 2.04m 1.60m 0.70m 34.5kg Round / MONT BLANC (245gal) (80”) (63”) (28”) - Page 10 PRODUCT OVERVIEW Content of the package ® ® * Round or square Only for P-SH069 * Buckle spa cover * Ground mat NOTE: Drawings for illustration purpose only. The actual product may vary. Not to scale.
-
Page 11: First Use Preparation And Set-Up
REF. NO. PARTS DESCRIPTION QTY. Spa cover with aluminum foil inside (Soho P-SH069 comes with a ground mat with the cover) Spa tub Wired controller Heat preservation bubble mat (For P-MB049/069 / P-CA049/069) Heat preservation foam mat (For P-EX049/069) Digital lock (except for Soho P-SH069) Inflation hose for bladder Filter cartridge*2, cartridge base Spa drain valve adaptor... - Page 12 Additional requirements for outdoor installation ● Make sure to set up the spa on a firm, level, and smooth surface that is strong enough to support the full weight of the filled spa and the number of maximum occupants. ● Do not set up the spa on grass or directly on the ground, as this increases the amount of debris entering the spa and can damage the spa floor.
-
Page 13: Spa Set-Up
2. Lay out all the parts on the ground and make sure all parts are accounted for. Make sure the spa tub is right side up. (*For missing or damaged part, contact the MSpa Service Center) 3. Spread the Heat Preservation Ground Mat over a cleared area. Spread out the spa liner over the ground mat. - Page 14 Yellow Green White Note: Before inflation, check whether the manometer cap is screwed up tight on the valve of pool body. If not, please tighten and then inflate. After inflation, the manometer cannot be removed, otherwise the air will be released. When the Yellow section is pushed out, the Spa inflation is completed.
- Page 15 Water Filling 6.1 Check the spa mark is at the selected area and point the drain valve toward a suitable draining area before inflation. 6.2 Fill the spa tub with fresh water to a level between Minimum and Maximum line marked on the inside of the spa wall.
- Page 16 7.1.(1) 7.1.(2) 7.1.(3) ® ® ® 7.2 Square Spa Buckle Lock Operation Lock the Buckle ● Insert the buckle on the Ground Mat into the Spa cover buckle, until you hear a “Click” sound. Unlock the Buckle ● Pinch both sides of the locked buckle, and press down the round dot in center in the same time. Press down the center button and release the lock.
-
Page 17: Wired Controller Operation
WIRED CONTROLLER OPERATION Heater Button Filter Button Bubble Button Timer Button - Adjust the bubble level by pressing the button (L1:300W, L2: 500W, L3:720W) Down Button Up Button Celsius/Fahrenheit Ozonator Button Toggle Button Temperature display: press RESET on PRCD, read the current temperature on the screen. Heater Button: Press HEATER button to start or stop heating. - Page 18 Attention: The bubble function can only be activated when the inflation knob is in <OFF> position. Adjustment Buttons: Press UP or DOWN button, the screen flashes setting temperature. Re-set the temperature within 3 seconds. Otherwise the temperature setting mode will end automatically. If the other button is pressed during the setting , the setting will also stop.
-
Page 19: Water Maintenance And Chemicals
FREQUENCY ACTION Clean the filter cartridge or replace it with a Cumulative use up to 150hrs, or cleaning Filter new one.The filter cartridge may need to be reminder is activated Cartridge replaced within 150hrs for initial use. Not in used for 2~3 days or longer Use an overall cover for protection Check water quality in time and adjust to Use water treatment products to adjust... - Page 20 mandatory to completely change the spa water before any product changes. ● Do not add chemicals if the spa is occupied. This can cause skin or eye irritation. ● Do not over use the chemicals, or use concentrated Chlorine. This can damage the spa tub and cause potential hazard to your skin.
-
Page 21: Drainage, Cleaning And Storage
DRAINAGE, CLEANING AND STORAGE Spa Drainage 1. Turn off all the buttons (heater, filter and bubble) on the wired controller. 2. Connect the drain valve adapter to a garden hose and point the other end of the garden hose to a suitable draining area with local environmental regulations (Fig.1) 3. -
Page 22: Disposal And Environmental Protection
1. Clean and dry the area to be repaired thoroughly 2. Apply the glue to the PVC patch and quickly attach it onto the damaged surface. (Glue is not included) 3. Smooth the surface to remove any air bubbles and allow it dry for 5-10 minutes NOTE: Glue is not included. -
Page 23: Troubleshooting
TROUBLESHOOTING ERROR CODE CHART LED READING CAUSE SOLUTION Water temperature is lower than 0°C Change the water or contact the MSpa degree or exceeds 55°C (131°F) Service Center. Temperature sensor failure Waterflow switch failure Contact the MSpa Service Center. Filter failure Add water above the minimum line. - Page 24 Increase filtration frequency WATER NOT Dirty filter cartridge Clean or replace the filter cartridge in time CLEAN Refer to the chemical manufacture's Improper water maintenance instruction CONTACT YOUR LOCAL MSPA DEALER OR SERVICE CENTER FOR ANY PRODUCT RELATED QUESTIONS OR PROBLEMS.
-
Page 25: Mspa Limited Warranty Policy
The warranty period begins from the date of purchase and MSpa requires presentation of the original proof to purchase to ascertain the date. During the warranty period, MSpa will either repair or replace, at its discretion, any defective products. Replacement products or repaired parts will be warranted for only the unexpired portion of the original warranty.
Need help?
Do you have a question about the Mont Blanc and is the answer not in the manual?
Questions and answers