Advertisement

www.the-mspa.com
MSpa
®
Owner's Manual
D-AL04 / 06
D-SC04 / 06
D-TE06
D-AU04 / 06
EN
DO NOT RETURN MERCHANDISE TO YOUR DEALER STORE DIRECTLY.
CALL MSPA AFTER SALES SERVICE CENTER FOR PRODUCT QUESTIONS
OR CONTACT MSPA AT
Due to MSpa continuous product improvement, MSpa reserves the right to change
specifications and product appearance, which may result in updates to the instruction
manual without notice.
Where Luxury Is Affordable
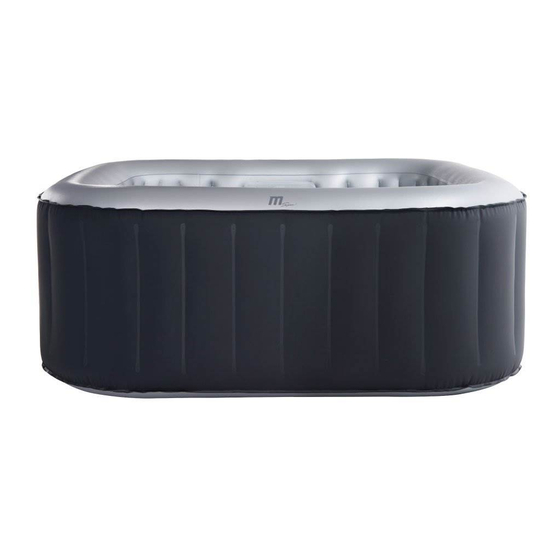
Alpine
Silver Cloud
Tekapo
Aurora
info@the-mspa.com
P-MB049 / 069
P-SH069
P-CA049 / 069
P-EX049 / 069
Mont Blanc
Soho
Camaro
Luxury Exotic
C
3127647
CM
US

Advertisement

Table of Contents
loading
Need help?

Need help?

Do you have a question about the Alpine and is the answer not in the manual?

Questions and answers

Arvid Perret
June 4, 2025

Ovners manuel to camaro spa

Subscribe to Our Youtube Channel

Summary of Contents for mspa Alpine

  • Page 1 CALL MSPA AFTER SALES SERVICE CENTER FOR PRODUCT QUESTIONS OR CONTACT MSPA AT info@the-mspa.com Due to MSpa continuous product improvement, MSpa reserves the right to change specifications and product appearance, which may result in updates to the instruction 3127647 manual without notice.
  • Page 2: Table Of Contents

    To guide you in your initial MSpa experience, we are pleased to present you with this instruction manual. Please carefully and thoroughly read this manual entirety before using the product for the first time. We are delighted to welcome you to the MSpa family, and look forward to sharing with you the full spectrum of our expertise.
  • Page 3: Safety Precautions

    IMPORTANT SAFETY INSTRUCTIONS For your own safety and that of your product, make sure to follow the safety precautions below. Fail to follow the instruction may result in serious injury, property damage or death. Improper installation or operation will void the warranty. READ AND FOLLOW ALL INSTRUCTIONS DANGER DANGER:...
  • Page 4 WARNING: The spa must be supplied by an isolating transformer or supplied through a ground-fault circuit interrupter (GFCI) having a rated residual operating current not exceeding 30mA. WARNING: GFCI must be tested before each use. WARNING: If the supply cord is damaged, it must be replaced immediately by the manufacturer, its service agent or similarly qualified person in order to avoid a hazard.
  • Page 5 WARNING: RISK OF ELECTRIC SHOCK. A wire connector is provided on this unit to connect a minimum 6 AWG solid copper conductor between this unit and any metal equipment, metal enclosures of electrical equipment, metal water pipe, or conduit within 5 feet (1.5 m) of the unit.
  • Page 6 E. Obese person and person with a history of heart disease, low or high blood pressure, circulatory system problems, or diabetes should consult a physician before use a spa... F. Person using medication should consult a physician before using a spa since some medication may induce drowsiness while other medication may affect heart rate, blood pressure, and circulation.
  • Page 7 WARNING: DO NOT USE DRUGS OR ALCOHOL BEFORE OR DURING THE USE OF A SPA OR HOT TUB TO AVOID UNCONSCIOUSNESS AND POSSIBLE DROWNING WARNING: PREGNANT OR POSSIBLY PREGNANT WOMEN SHOULD CONSULT A PHYSICIAN BEFORE USING A SPA OR HOT TUB WARNING: WATER TEMPERATURE IN EXCESS OF 100°F(38°C) MAY BE INJURIOUS TO YOUR HEALTH...
  • Page 8 Please carefully read the warning label at the first time you are going to use MSpa. Please post this warning label on where is at a distance to MSpa within 1.5m/5’, people in spa can see it clearly. Please retain this information for future reference.
  • Page 9: Specifications And Product Overview

    Verify that the equipment components represent the models that you had intended to purchase. SPECIFICATIONS MSPA PREMIUM BUBBLE SPA Model No. Seating Water Outside...
  • Page 10 MSPA DELIGHT BUBBLE SPA Seating Water Outside Inside Model No. / Code Shape Height Weight Capacity Capacity Dimensions Dimensions D-AL04 / 650 Ltr 1.58 m 1.18 m 0.68 m 26.5 Kg Square Alpine (171 Gal) (62”) (46.5”) (27”) (58.4 Lbs)
  • Page 11 PRODUCT OVERVIEW Packaging content ® ® For P-CA049/069 / P-MB049/069 * Except D-AL04/06 / For P-EX049/069 D-TE06 / P-SH069 round or square For PREMIUM Buckle spa cover Ground mat NOTE: Drawings for illustration purpose only. Actual product may vary. Not to scale.
  • Page 12: First Use And Set-Up Preparation

    REF. NO. PARTS DESCRIPTION QTY. Spa cover with aluminum foil inside (D-AL04/06; D-TE06; P-SH069 comes with a ground mat with the cover) Spa tub Wired controller Heat preservation bubble mat (for P-CA049/069 / P-MB049/069) Heat preservation foam mat (for P-EX049/069) Digital lock (D-AL04/06;...
  • Page 13 Additional requirements for indoor installation ● Verify the supporting floor can support the filled weight of spa with maximum number of occupants. Check with a qualified contractor or structural engineer to verify the requirement. ● Make sure the floor is water resistant and provides non-slip surface. Do not install the spa on a carpet of any other material that could damaged by the moisture.
  • Page 14: Spa Set-Up

    Heat Preservation Mat prevents heat loss from the bottom of the unit. NOTE: The heat preservation ground mat is not included for the MSpa DELIGHT package . We suggest to find a ground mat and put it between the ground and spa tub to help prevent scratch and heat loss.
  • Page 15 Note: Before inflation , check whether the manometer cap is screwed up tight on the valve of pool body. If not, please tighten and then inflate. After inflation, the manometer cannot be removed, otherwise the air will be released. Yellow Green White When the Yellow section is pushed out, the Spa inflation is completed.
  • Page 16 NOTE: Deflation Instruction Spa Deflation 1. Unscrew the air valve cap on the spa pool to deflate the spa. 2. Once the deflation is completed, place the cap back. Spa Bladder Deflation 1. Pull the valve cap out and squeeze the valve at its base until deflated. 2.
  • Page 17 Zipper and Buckle Operation 7.1 Digital Lock Operation Original password is “000”. Following the steps below to change the password: ● Push the button (a) in the direction of Fig. 9.1.(1) to unlock the digital lock. ● Set your preferred password in 3 digits by turning the number wheel (b), see Fig.9.1.(2). ●...
  • Page 18: Control Panel Operation

    CONTROL PANEL OPERATION °C Celsius/Fahrenheit Toggle Button Heater Button Filter Button HEATER FILTER Bubble Button Timer Button BUBBLE TIMER Up Button Down Button DOWN Temperature display: Insert the plug into the socket, the current temperature is displayed on the screen. Heater Button: Press HEATER button to start or stop heating.
  • Page 19 Adjustment Buttons: Press UP or DOWN button, the screen flashes setting temperature. Re-set the temperature within 3s. Otherwise the temperature setting mode will automatically end. If other button is pressed during the setting , the setting will also stop. The current temperature shown on the screen is confirmed.
  • Page 20: Water Maintenance And Chemicals

    ERROR CODE CHART LCD READING CAUSE SOLUTION Water temperature is lower than zero Change the water or contact the MSpa degree or too high Service Center. Temperature sensor failure Add more water to the water line. Water level is too low Water pressure switch failure Contact the MSpa Service Center.
  • Page 21 Water Treatment: ● Always follow the chemical manufacturer’s direction, and the health and hazard warning. ● Bromine tablets is highly recommended for D-TE06. ● Never mix chemicals together. Add the chemicals to the spa water separately. Thoroughly dissolve each chemical before adding one to the water. ●...
  • Page 22: Drainage, Cleaning And Storage

    DRAINAGE, CLEANING AND STROAGE Spa Drainage 1. Turn off all the buttons (heater, filter and bubble) on the control panel unit. 2. Connect the drain valve adapter to a garden hose and point the other end of the garden hose to a suitable draining area with local environmental regulations (Fig.1) 3.
  • Page 23: Disposal And Environmental Protection

    NOTE: Glue is not included. pin hole pin hole Storage and Prepare for the Next Time Use 1. Drain and clean the spa by following the “Drainage” and “Spa Cleaning” sections 2. Reserve the set up instructions to deflate and disassemble the spa tub, spa control unit and air bladder (*optional) 3.
  • Page 24: Troubleshooting

    NO DISPLAY ON section THE WIRED CONTROLLER GFCI broken Contact the MSpa Service Center Press the Reset button, Control Contact the MSpa Service Center Panel is not displayed Water level is not at the minimum Add more water to the minimum line...
  • Page 25 Increase filtration frequency WATER NOT CLEAN Dirty filter cartridge Clean or replace the filter cartridge in time Refer to the chemical manufacture's Improper water maintenance instruction CONTACT YOUR LOCAL MSPA DEALER OR SERVICE CENTER FOR ANY PRODUCT RELATED QUESTIONS OR PROBLEMS.
  • Page 26: Mspa Limited Warranty Policy

    The warranty period begins on the date of purchase and MSpa requires presentation of the original proof to purchase to ascertain the date. During the warranty period, MSpa will either repair or replace, at its discretion, any defective products. Replacement products or repaired parts will be warranted for only the unexpired portion of the original warranty.
  • Page 27 The warranty period begins on the date of purchase and MSpa requires presentation of the original proof to purchase to ascertain the date. During the warranty period, MSpa will either repair or replace, at its discretion, any defective products. Replacement products or repaired parts will be warranted for only the unexpired portion of the original warranty.

Table of Contents