mspa MONO Owner's Manual
Hide thumbs
Also See for MONO:
- Owner's manual (84 pages) ,
- Owner's manual (21 pages) ,
- Owner's manual (21 pages)
Advertisement
Table of Contents
- 1 Table of Contents
- 2 Safety Precautions
- 3 Specifications
- 4 Product Overview
- 5 First Use and Set-Up Preparation
- 6 Spa Set-Up
- 7 Controller Operation
- 8 Water Maintaince and Chemicals
- 9 Drainage, Cleaning and Storage
- 10 Disposal and Environmental Protection
- 11 Troubleshooting
- 12 MSPA Limited Warranty
- Download this manual
w w w . t h e - m s p a . c o m
Owner's Manual
EN
DO NOT RETURN MERCHANDISE TO YOUR DEALER STORE DIRECTLY.
CALL MSPA AFTER SALES SERVICE CENTER FOR PRODUCT QUESTIONS
OR CONTACT MSPA AT
Due to MSpa continuous product improvement, MSpa reserves the right to change
specifications and product appearance, which may result in updates to the
instruction manual without notice.
®
Where Luxury Is Affordable
MONO
C-MO049 / C-MO069
info@the-mspa.com
Advertisement
Table of Contents

Related Manuals for mspa MONO


Summary of Contents for mspa MONO
- Page 1 CALL MSPA AFTER SALES SERVICE CENTER FOR PRODUCT QUESTIONS OR CONTACT MSPA AT info@the-mspa.com Due to MSpa continuous product improvement, MSpa reserves the right to change specifications and product appearance, which may result in updates to the instruction manual without notice.
-
Page 2: Table Of Contents
To guide you in your initial MSpa experience, we are pleased to present you with this instruction manual. Please carefully and thoroughly read this manual entirety before using the product for the first time. We are delighted to welcome you to the MSpa family, and look forward to sharing with you the full spectrum of our expertise. -
Page 3: Safety Precautions
SAFETY PRECAUTIONS For your own safety and that of your product, make sure to follow the safety precautions below. Fail to follow the instruction may result in serious injury, property damage or death. Improper installation or operation will void the warranty. READ, UNDERSTAND AND FOLLOW ALL INSTRUCTIONS KEEP THE MANUAL FOR FUTURE REFERENCE DANGER... - Page 4 ● Parts incorporating electrical components, except remote control devices, must be located or fixed so that they cannot fall into the spa. ● Electric installation should fulfill the local requirement or standards. ● The wired controller shall be properly stored at the side pocket when not used, to protect the controller from falling or other factors.
- Page 5 several degrees above the normal body temperature 37°C(98.6°F). The symptoms of hyperthermia include an increase in the internal temperature of body, dizziness, lethargy, drowsiness, and fainting. The effect of hyperemia include failure to perceive heat; failure to recognize the need to exit spa; unawareness of impending hazard;...
- Page 6 For water already used, discharge it in time or use water chemicals for cleaning. Usually,change water every 3-5 days. ● Use Mspa chemical kit for disinfection in accordance with manufacture’s instructions. ● Do not leave or set up the spa in temperature lower than 4°C(39°F) if heater is not operating.
- Page 7 Warning: Water protection levels of appliance at different product zones are different see the following scheme. ( Installation regulations comply to IEC 60364-7-702) 2.5 m Zone 2 Zone 1 Zone 2 2.5 m Zone 0 Zone 0 1.5 m 2.0 m 2.0 m 1.5 m NOTE - The measured zone dimensions are limited by walls and fixed partitions.
-
Page 8: Specifications
Water Outside Inside Shape Height Weight Capacity Capacity Dimensions Dimensions / Code C-MO049 720 L φ1.53m φ1.43m 0.65m 34.5kg Round Mono (190 Gal) 60” 56” 26” (76lbs) C-MO069 930 L φ1.73m φ1.63m 0.65m 37kg Round Mono (245 Gal) 68” 64”... -
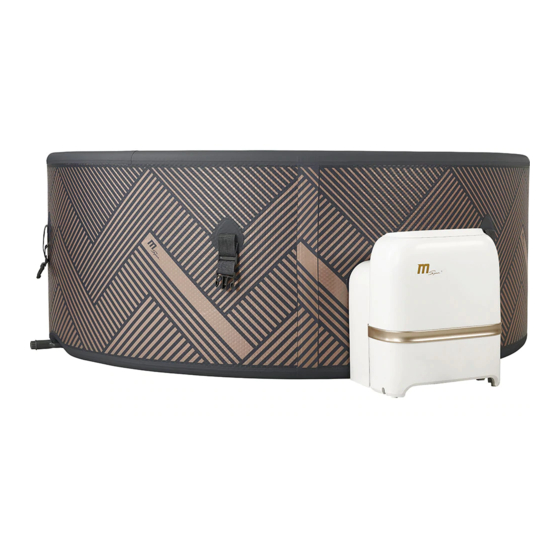
Page 9: Product Overview
PRODUCT OVERVIEW Packaging content NOTE: Drawings for illustration purpose only. Actual product may vary. Not to scale. -
Page 10: First Use And Set-Up Preparation
REF. NO. PARTS DESCRIPTION QTY. SPA cover with buckle and inflatable bladder Spa tub All-in-one Control Box 23.5” high pressure pump, inflation hose, pressure gauge, seal ring Heat preservation foam mat Filter cartridge*2, cartridge base Spa drain valve adaptor Wrench for inlet and outlet Wrench for inflation valve Repair kit NOTE: When ordering parts, be sure to quote the model number, part numbers and description. - Page 11 Additional requirements for outdoor installation ● Make sure to set up the spa on a firm, level and smooth surface that is strong enough to support the full weight of the filled spa and maximum occupants. ● Do not set up the spa on grass or dirt, as this increases the amount of debris entering the spa, and can damage the spa floor.
-
Page 12: Spa Set-Up
SPA SET-UP 1. Spread out and connect the 9 pcs foam mat at a cleared area. Heat Preservation Mat prevents heat loss from the bottom of the unit. 2. Put the pool body on the mat (note that the drain valve is in the appropriate area) 3. - Page 13 7. Water Filling 7.1 Ensure the spa liner is at the selected area and point the drain valve toward a suitable draining area before filing water. Make sure the drain valve is securely tightened. 7.2 Fill the spa tub with fresh water to a level between Minimum and Maximum line marked on the inside of the spa wall.
-
Page 14: Controller Operation
ALL-IN-ONE CONTROL PANEL Heater Button Filter Button Timer Button Bubble Button - Adjust the bubble level by pressing the button Celsius/Fahrenheit (L1:300W, L2: 500W, L3:720W) Toggle Button Ozonator Button Down Button Up Button Temperature display: press RESET on PRCD, read the current temperature on the screen. Heater Button: Press HEATER button to start or stop heating. - Page 15 Adjustment Buttons: Press UP or DOWN button, the screen flashes setting temperature. Re-set the temperature within 3 seconds. Otherwise the temperature setting mode will end automatically. If the other button is pressed during the setting , the setting will also stop. The current temperature shown on the screen is confirmed.
-
Page 16: Water Maintaince And Chemicals
IMPORTANT: The following conditions will lead to slow water heating ● The ambient temperature is lower than 10°C(50°F) ● Outdoor wind speed is above 3.5-5.4m/s(8-12mph) ● The air bubble function is activated when heater is on ● The spa is not properly covered with the spa cover when the heater is on WATER MAINTENANCE AND CHEMICALS Water Sanitation The spa owner must regularly check and keep the spa water sanitized with scheduled maintenance (daily, if... - Page 17 Maintenance of Spa Water and Cartridge Protect all the spa occupants from possible water related illness by keeping the spa water clean and sanitized. Always practice good hygiene. Ensure proper spa water quality by following these procedures: 1.1 Install clean filter cartridge to water inlet. ●...
-
Page 18: Drainage, Cleaning And Storage
DRAINAGE, CLEANING AND STORAGE Spa Drainage 1. Turn off all the buttons (heater, filter and bubble). 2. Connect the drain valve adapter to a garden hose and point the other end of the garden hose to a suitable draining area with local environmental regulations (Fig.1) 3. - Page 19 3. Smooth the surface to remove any air bubbles and allow it dry for 5-10 minutes NOTE: Glue is not included. pin hole pin hole How to fix a leaking valve A. Try to tighten the valve 1. Inflate your spa up to the max air pressure 2.
-
Page 20: Disposal And Environmental Protection
5. Ensure there are no strings from the drop stitching material 6. Note the bottom piece of the valve is not attached to anything 7. Fit the valve back into your spa 8. Align all the threads and twist to tighten 9. -
Page 21: Troubleshooting
TROUBLESHOOTING ERROR CODE CHART LED READING CAUSE SOLUTION Water temperature is lower than 0°C Change the water or contact the MSpa degree or exceeds 55°C (131°F) Service Center. Temperature sensor failure Water flow switch failure Contact the MSpa Service Center. - Page 22 Increase filtration frequency WATER NOT CLEAN Dirty filter cartridge Clean or replace the filter cartridge in time Refer to the chemical manufacture's Improper water maintenance instruction CONTACT YOUR LOCAL MSPA DEALER OR SERVICE CENTER FOR ANY PRODUCT RELATED QUESTIONS OR PROBLEMS.
-
Page 23: Mspa Limited Warranty
The warranty period begins from the date of purchase and MSpa requires presentation of the original proof to purchase to ascertain the date. During the warranty period, MSpa will either repair or replace, at its discretion, any defective products. Replacement products or repaired parts will be warranted for only the unexpired portion of the original warranty.
Need help?
Do you have a question about the MONO and is the answer not in the manual?
Questions and answers