
Related Manuals for Lippert Components SURESHADE ATF


Summary of Contents for Lippert Components SURESHADE ATF
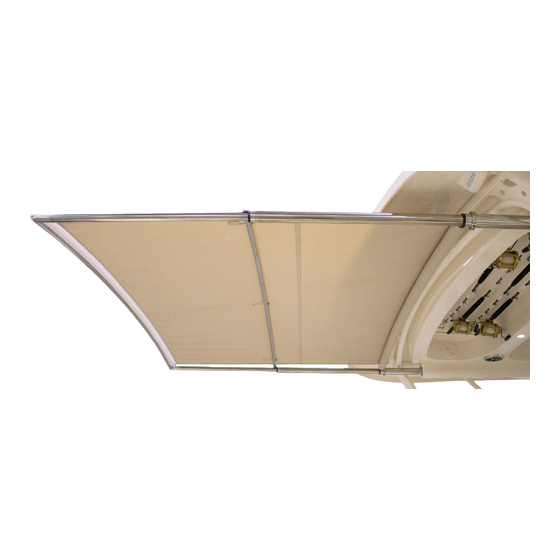
- Page 1 S U R E S H A D E T E C H N I C A L D O C U M E N T A T I O N ® Automated Boat Shade INSTALLATION INSTRUCTIONS AND OWNER'S MANUAL...
-
Page 2: Table Of Contents
TABLE OF CONTENTS GENERAL INFORMATION ....................4 Introduction .............................4 Model and Serial Number Tag Location ...................4 Contact Information ..........................4 Customer Support ...........................4 SureShade Limited Product Warranty Statement................4 SAFETY ..........................6 Safety Descriptions ..........................6 Important Safety Messages .........................6 Important Instructions ..........................7 Safety Warnings ............................7 Safety Label Locations ..........................7 SPECIFICATIONS ........................ - Page 3 Pre-loading the Canvas ........................22 Wiring the Electrical System ......................24 Electrical Wiring Diagram ......................25 Initiating the Sureshade ATF-SG Intelligent Control Box (ICB) ..........26 Initiating the Remote Key Fob ......................26 Using the Momentary Rocker Switch ..................... 26 MAINTENANCE .........................
-
Page 4: General Information
GENERAL INFORMATION INTRODUCTION Thank you for purchasing a SureShade retractable shade for your boat. ® Invented by boaters for boaters, SureShade is the new standard for shade on boats. Our automated or manual retractable shade systems are featured on over 50 boat brands as factory or aftermarket installations. SureShade is the only U.S.-made telescoping marine sunshade on the market, with patents in the U.S., Canada, Europe and China. - Page 5 GENERAL INFORMATION • Damage resulting from leaving the shade extended unattended during inclement weather. • Damage resulting from leaving shade extended in conditions that exceed the shade framework’s wind rating of 50 mph (Applies to aft facing shade only. Forward shade must be stowed at all times while boat is underway). •...
-
Page 6: Safety
SAFETY SAFETY DESCRIPTIONS The words WARNING, CAUTION and NOTICE are used throughout this manual to highlight important information. Be careful that the meanings of these alerts are known to all who install and operate this equipment. This safety alert symbol appears with most safety statements. It means attention, become alert, your safety is involved! Please read and abide by the statement that follows the safety alert symbol. -
Page 7: Important Instructions
SAFETY IMPORTANT INSTRUCTIONS • In the event of malfunction please visit https://www.sureshade.com/service/ and review applicable videos and documentation before continuing to operate the system or making any repairs. You may also submit a service request via email at service@sureshade.com. Do NOT attempt to repair shade on your own or you could risk voiding the warranty. -
Page 8: Specifications
SPECIFICATIONS TECHNICAL DATA ATF STAGE Functional Specification Extension length 5', 6' or 7' Width Up to 12' Over 12’ custom Hardware Specification Actuator material 316SS Framework material 316SS Mounting component material 316SS Actuator placement Integrated w/in bridge or hardtop Top surface-mount Underside surface-mount Roller configuration Straight or cambered spring-tension roller... -
Page 9: Preparation
PREPARATION PARTS AND QUANTITIES Many of the provided parts are pre-assembled before shipping. This helps to ensure all necessary parts are included and checked for proper fit before delivery. Ensure all assembled parts are contained in the shipping crate BEFORE starting installation (Fig.2). -
Page 10: Tools Required
PREPARATION TOOLS REQUIRED SURFACE INTEGRATED REQUIRED TOOLS (NOT INCLUDED) INSTALL INSTALL Safety glasses/goggles Ratchet and socket set Power drill Jigsaw Drill bits Phillips head screwdriver Allen wrench set (standard) Wire strippers Wire cutters Wire crimper Utility knife Assorted wire connectors Wire (8-gauge for power as per ABYC E-11, Table IX, 10% Voltage drop, 14-gauge for switch connections) Multimeter (or similar device) -
Page 11: Skill Level Of Installer
PREPARATION SKILL LEVEL OF INSTALLER Must be able to read a tape measure and be comfortable using a hand drill. For installation of shade framework - intermediate skill level: • Read tape measure • Use hand drill • Able to lift 35+ lbs Electrical installation - wiring of shade: •... -
Page 12: Installation
INSTALLATION DETERMINING THE CENTERLINE OF THE HARDTOP TO POSITION THE SHADE NOTE: Refer to the supplied shade specification drawing to determine the shade’s centerline width. Shade centerline width is determined by the centerline of the port actuator tube to the centerline of the starboard actuator tube, and is the most critical dimension in order to properly center the shade framework on the hardtop. -
Page 13: Setting The Mounting Clamps
INSTALLATION Fig.4 To verify centerline measurements, measure the distance from the port side to the starboard side at the forward and aft sections (Fig.5) to make sure marks are parallel. These measurements should be the same as the shade centerline width provided on the shade specification drawing. Fig.5 SETTING THE MOUNTING CLAMPS Disassemble the four mounting clamps, which may include spacers (Fig.6) depending on installation, by... - Page 14 INSTALLATION Fig.6 Fig.7 NOTICE Actuators should be used to finalize placement before drilling holes. Measure from port actuator centerline to starboard actuator centerline at the forward and aft sections (Fig.8) to make sure the centerline width is accurate. Refer to shade centerline width dimension located on shade specification drawing.
- Page 15 INSTALLATION actuator centerlines Fig.8 Fig.9 flat surface mount If the hardtop is curved, the mounting holes are different than the shade centerline. NOTE: When mounting on a curvature, mark one clamp and measure from the mounting hole to the actuator centerline.
- Page 16 INSTALLATION To determine mounting hole location for an underside surface mount on a hardtop with curvature, see figure 11. The mounting holes will ultimately be drilled wider than the shade centerline. VIEW A VIEW B Fig.11 curved surface mount Mark location of mounting holes with a grease pencil. Carefully remove actuator from mounting clamps.
- Page 17 INSTALLATION Fig.12 flat surface mount Fig.13 curved surface mount Fig.14 Rev: 08.11.20 877-333-8323 CCD-0003846 sureshade.com...
-
Page 18: Installing And Securing The Actuators
INSTALLATION INSTALLING AND SECURING THE ACTUATORS Place the actuators onto the installed mounting clamps. Attach the top mount to the mounting clamps using the provided hardware. Do not tighten as forward/aft adjustments may be needed. Measure from the telescoping end (Fig.15A) of the stationary actuator tube to the aft mounting clamp (Fig.15B). There should be no less than 4"... - Page 19 INSTALLATION Fig.16 Fig.17 Rev: 08.11.20 877-333-8323 CCD-0003846 sureshade.com...
-
Page 20: Securing The Crossbars
INSTALLATION SECURING THE CROSSBARS Mid-Crossbar NOTICE Do NOT remove the #10 - 32 set screws (Fig.18A) that connect the outer and mid-crossbar sleeves to the crossbars. A. Remove the two 1/4" - 20 x 1/2" socket head cap screws (Fig.18B) from the ends of the mid-crossbar. Fig.18 Attach the mid-crossbar (Fig.19A) onto actuator’s mid-crossbar tab (Fig.19B) and secure in place using two 1/4"... - Page 21 INSTALLATION Outer Crossbar A. Remove the two 10" - 32 x 3/8" button head screws (Fig.20A) from ends of the outer crossbar (Fig.20B). Fig.20 Slide the aft crossbar (Fig.21A) into the ends of actuator tubes (Fig.21B) and secure in place using the 10"...
-
Page 22: Pre-Loading The Canvas
INSTALLATION PRE-LOADING THE CANVAS NOTICE When pre-loading the roller, make sure the roller is rotated toward the crossbars, aft of the boat. Rotating the roller in the opposite direction will release the tension spring and prevent the roller from working. Go to https://www.sureshade.com/service-videos/ to view a video on how to properly pre-load the canvas. - Page 23 INSTALLATION Fig.24 Fig.25 Fig.26 Rev: 08.11.20 877-333-8323 CCD-0003846 sureshade.com...
-
Page 24: Wiring The Electrical System
INSTALLATION WIRING THE ELECTRICAL SYSTEM The electrical housing controls the retracted and extended positions as well as the synchronization of the actuators’ movement. Sensors positioned inside the actuator communicate with the electrical housing and result in synchronization. These sensors, along with the housing software, will keep the two actuators synchronized with each other during travel. -
Page 25: Electrical Wiring Diagram
INSTALLATION Electrical Wiring Diagram Rev: 08.11.20 877-333-8323 CCD-0003846 sureshade.com... -
Page 26: Initiating The Sureshade Atf-Sg Intelligent Control Box (Icb)
INITIATING THE SURESHADE ATF-SG INTELLIGENT CONTROL BOX (ICB) The SureShade ATF-SG ICB was designed for plug and play setup. It is factory-programmed to the specified extension length and ships ready to go in operation mode. This document contains the proper sequence for initiating the ICB when installing the ATF-SG shade on the boat. Make sure the actuators are properly mounted and the ICB is secured before proceeding with these steps. -
Page 27: Maintenance
MAINTENANCE SureShade recommends following basic care and maintenance of SureShade shade components to maintain peak performance and prolong the life of your sunshade system. REGULAR CLEANING We recommend using the cleaning product Nevr-Dull® Magic Wadding Polish for cleaning SureShade system components. -
Page 28: Troubleshooting
TROUBLESHOOTING TROUBLESHOOTING CHART What is happening? What is happening? Why? Why? What should be done? What should be done? Make sure boat’s batteries are 100% charged. Boat power not available Check current to control box using a multimeter. Blown fuse Inspect 5-amp fuse and make sure it is not blown. -
Page 29: Troubleshooting The Sureshade Atf-Sg Intelligent Control Box (Icb)
CONTROL BOX (ICB) The SureShade ATF-SG Intelligent Control Box (ICB) is designed so that the shade will not operate at any voltage under 10V at start-up of the shade. During operation of the shade, if the voltage drops below 9V, the shade will shut down. -
Page 30: Notes
NOTES sureshade.com 877-333-8323 CCD-0003846 Rev: 08.11.20... - Page 31 NOTES Rev: 08.11.20 877-333-8323 CCD-0003846 sureshade.com...
- Page 32 © Copyright 2020 Lippert Components, Inc. dba SureShade® Manual information may be distributed as a complete document only, unless Lippert Components provides explicit consent to distribute individual parts. All manual information is subject to change without notice. Revised editions will be available for free download at lci1.com.
Need help?
Do you have a question about the SURESHADE ATF and is the answer not in the manual?
Questions and answers