Sign In
Upload
Download
Table of Contents
Contents
Add to my manuals
Delete from my manuals
Share
URL of this page:
HTML Link:
Bookmark this page
Add
Manual will be automatically added to "My Manuals"
Print this page
×
Bookmark added
×
Added to my manuals
Manuals
Brands
HIKVISION Manuals
Digital Camera
DS-TCP045-B
User manual
HIKVISION DS-TCP045-B User Manual
Parking camera
Hide thumbs
1
2
3
4
5
Table Of Contents
6
7
8
9
10
11
12
13
14
15
16
17
18
19
20
21
22
23
24
25
26
27
28
29
30
31
32
33
34
35
36
37
38
39
40
41
42
43
44
45
46
47
48
49
50
51
52
53
54
55
56
57
58
59
60
61
62
63
64
65
66
67
68
69
70
71
72
73
74
75
76
77
78
79
80
81
82
83
84
85
86
87
88
89
90
91
92
93
page
of
93
Go
/
93
Contents
Table of Contents
Bookmarks
Table of Contents
Table of Contents
Chapter 1 Overview
Product Introduction
Features and Functions
Appearance and Structure
Chapter 2 Installation
Chapter 3 System Requirement
Chapter 4 Network Connection
Setting the Parking Camera over the Lan
Wiring over the LAN
Detecting and Changing the IP Address
Setting the Parking Camera over the Wan
Static IP Connection
Dynamic IP Connection
Chapter 5 Accessing to the Parking Camera
Accessing by Web Browsers
Accessing by Client Software
Chapter 6 Configuring Wi-Fi Settings
Configuring W I -F I Connection in Manage and a D - Hoc Modes
Easy Wi-Fi Connection with WPS Function
Ip Property Settings for Wireless Network Connection
Chapter 7 Configuring Bluetooth
Chapter 8 Live View
Chapter 9 Configuring Parking Camera
Configuring Local Parameters
Configuring Time Settings
Configuring Network Settings
Configuring TCP/IP Settings
Configuring Port Settings
Configuring Pppoe Settings
Configuring DDNS Settings
Configuring SNMP Settings
Configuring 802.1X Settings
Configuring Qos Settings
Configuring Upnp™ Settings
Email Sending Triggered by Alarm
Configuring NAT (Network Address Translation) Settings
Configuring FTP Settings
Configuring Video and Audio Settings
Configuring Video Settings
Configuring ROI Encoding
Configuring Image Parameters
Configuring Display Settings
Configuring OSD Settings
Configuring Text Overlay Settings
Configuring Privacy Mask
Configuring and Handling Alarms
Configuring Motion Detection
Configuring Handling Exception
Chapter 10 Configuring Parking Space Detection
Configuring Detection Rules
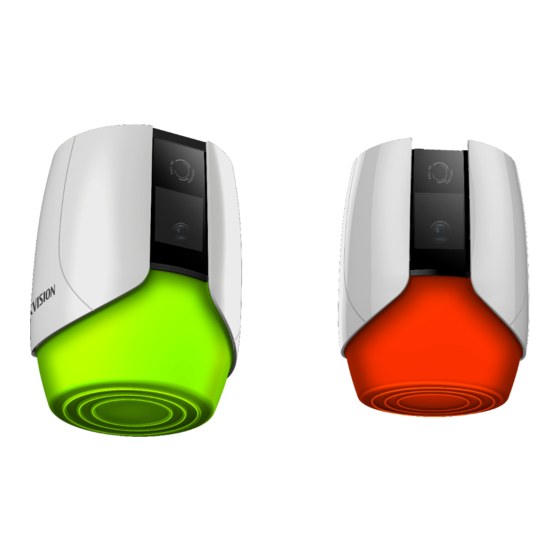
Configuring Parking Space Indicator
Uploading Pictures
Checking Parking Space Status
Typical Applications
Internal Indicator Application
Alternate Indicator Control Application
External Indicator Application
Special Parking Space Application
Chapter 11 Configuring Storage Settings
Configuring Nas Settings
Configuring Recording Schedule
Chapter 12 Playback
Chapter 13 Searching Log
Chapter 14 Others
Managing User Accounts
Configuring Rtsp Authentication
Configuring Anonymous Visit
Filtering Ip Address
Viewing Device Information
Maintenance
Rebooting the Camera
Restoring Default Settings
Exporting/Importing Configuration File
Upgrading the System
Configuring Rs-485 Settings
Configuring Service Settings
Appendix
Sadp Software Introduction
Appendix 2 Port Mapping
Advertisement
Quick Links
Download this manual
Parking Camera
User Manual
UD06243B
0
Table of
Contents
Previous
Page
Next
Page
1
2
3
4
5
Advertisement
Table of Contents
Need help?
Do you have a question about the DS-TCP045-B and is the answer not in the manual?
Ask a question
Questions and answers
Related Manuals for HIKVISION DS-TCP045-B
Digital Camera HIKVISION DS-2CZ2132PN User Manual
Color zoom camera (40 pages)
Digital Camera HIKVISION DS-7204HQHI-K1 User Manual
Power over coaxial (17 pages)
Digital Camera HIKVISION MV-CA003-30GC User Manual
Machine vision area scan gige camera (91 pages)
Digital Camera HIKVISION ColorVU DS-2CE Series User Manual
2 mp turbo hd bullet and turret cameras (20 pages)
Digital Camera HIKVISION DS-2TD1217-6/PA Quick Start Manual
Thermal & optical network turret camera (26 pages)
Digital Camera HIKVISION DS-TCG406-E User Manual
Intelligent entrance anpr camera (80 pages)
Digital Camera HIKVISION TurboHD DS-2CC5209T-AITZE User Manual
Hd 1080p ultra low-light poc camera (72 pages)
Digital Camera HIKVISION DS-2DB4236I-CWX User Manual
Explosion-proof zoom bullet camera (111 pages)
Digital Camera HIKVISION HIKMICRO CHEETAH Series Quick Start Manual
Digital night vision scope (82 pages)
Digital Camera HIKVISION Wiegand iDS-2CD7A26G0/P-IZHSY Operation Manual
(17 pages)
Digital Camera HIKVISION AE-VC143T-ITS User Manual
Vehicle-mounted camera (9 pages)
Digital Camera HIKVISION PanoVu PT Series User Manual
Target capture camera (103 pages)
Digital Camera HIKVISION Ultra Series User Manual
Body camera (39 pages)
Digital Camera HIKVISION HiLook Series User Manual
3k colorvu audio turret camera (18 pages)
Digital Camera HIKVISION DS-MCW409 Quick Start Manual
Body camera (15 pages)
Digital Camera HIKVISION UD01715B User Manual
Area scan machine vision usb 3.0 camera (61 pages)
This manual is also suitable for:
Ds-tcp145-kb
Ds-tcp345-kb
Ds-tcp345d-b
Ds-tcp045
Ds-tcp145
Ds-tcp345
...
Show all
Ds-tcp345d
Table of Contents
Print
Rename the bookmark
Delete bookmark?
Delete from my manuals?
Login
Sign In
OR
Sign in with Facebook
Sign in with Google
Upload manual
Upload from disk
Upload from URL


Need help?
Do you have a question about the DS-TCP045-B and is the answer not in the manual?
Questions and answers