Table of Contents
Advertisement
Advertisement
Table of Contents

Related Manuals for HIKVISION DS-MCW409


Summary of Contents for HIKVISION DS-MCW409
- Page 1 Body Camera Quick Start Guide...
- Page 2 Body Camera • Quick Start Guide Symbol Conventions The symbols that may be found in this document are defined as follows. Symbol Description Provides additional information to emphasize or supplement important points of the main text. Indicates a potentially hazardous situation, which if not avoided, could result in equipment damage, data loss, performance degradation, or unexpected results.
-
Page 3: Table Of Contents
Body Camera • Quick Start Guide TABLE OF CONTENTS Chapter 1 Product Introduction ....................1 Packing List................................1 Appearance ................................1 Default Information .............................. 4 Chapter 2 Installation ......................... 5 Install Shoulder Clip .............................. 5 Install SIM Card ..............................5 Charge Device ............................... -
Page 4: Chapter 1 Product Introduction
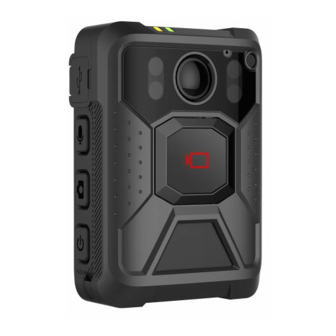
Chapter 1 Product Introduction Packing List Following objects are included in package. If something loses, contact us or our supplier. Packing List Quantity Name Body camera Shoulder clip USB data cable Power adapter USB adapter Regulatory Compliance and Safety Information Battery Appearance The appearance of the body camera is shown as below. - Page 5 Appearance Appearance Description Name Description After the device starts up, hold it to set the device as a MIC or loudspeaker to start two-way audio. After the device starts up, press it to start/stop taping. Tape During recording or taping, hold it to tag the video or audio file. Hold it again to cancel tag.
- Page 6 If you set IR as AUTO, the IR lights will be enabled automatically during recording when the illumination is insufficient. Back cover To install/uninstall the back cover. fastener USB interface Open the plug to connect to USB data cable. plug ...
-
Page 7: Default Information
Default Information The default information of the device is shown as below. ● Default user name (administrator): admin ● Default password: 123456 For your data safety, change the device password in time. -
Page 8: Chapter 2 Installation
Chapter 2 Installation Install Shoulder Clip Install the shoulder clip if you want to wear the device on your shoulder. Insert the shoulder clip down into the slot on the front panel of the device. Install Shoulder Clip Check if the clip is inserted into the slot firmly. Optional: To uninstall the shoulder clip, press the buckles on both sides of the clip inwards with your fingers, and slide the clip upwards to uninstall it. -
Page 9: Charge Device
Slide the fastener on the rear panel of the device to the left. Open the back cover by pulling the protruding handles. Take the battery out by pulling the battery handle. Insert the SIM card into the card slot with the metal side facing downward until it is installed firmly. - Page 10 Slide Fastener Open the back cover by pulling the protruding handles. Open Back Cover Take the battery out by pulling the battery handle. Change a battery. Insert the tabs on the top of the back cover into the grooves of the back case, and then press the cover downward until it snaps.
- Page 11 Install Back Cover Slide the fastener to the right to lock the back cover.
-
Page 12: Chapter 3 Basic Operation
Chapter 3 Basic Operation Storage The recorded videos, taped audios, and captured pictures will be stored in the device. You can record videos via the device. After the device starts up, press the recording button. After the recording starts, the recording icon and recorded time will appear on the upper left corner of the live view page. -
Page 13: Capture
The taping button varies with different devices. The actual device prevails. Press the taping button again to stop taping. Optional: Select File MGT on the main menu to view the taped audios. You can capture pictures via the device. After the device starts up, press the capture button. The device captures a picture. -
Page 14: Chapter 4 Detailed Configuration
Chapter 4 Detailed Configuration Scan the QR code below to get the user manual for detailed configuration. User Manual QR Code... - Page 15 UD35741B...
Need help?
Do you have a question about the DS-MCW409 and is the answer not in the manual?
Questions and answers