Table of Contents
Advertisement
Quick Links
Advertisement
Table of Contents

Related Manuals for HIKVISION DS-TCL400-E


Summary of Contents for HIKVISION DS-TCL400-E
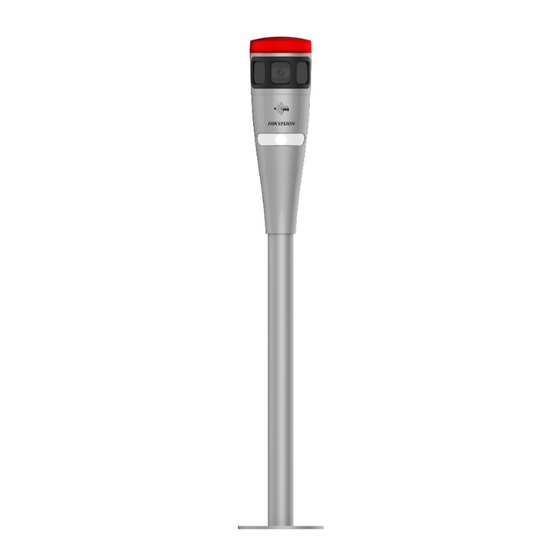
- Page 1 Smart On-Street ANPR Camera User Manual...
- Page 2 With the philosophy of "Technology for the Good", Hikvision requests that every end user of video technology and video products shall comply with all the applicable laws and regulations, as well as ethical customs, aiming to jointly create a better community.
- Page 3 Smart On-Street ANPR Camera User Manual control, selecting a suitable network environment (the Internet or Intranet) where video products are connected, establishing and constantly optimizing network security. Video products have made great contributions to the improvement of social security around the ●...
- Page 4 WITHOUT LIMITATION, MERCHANTABILITY, SATISFACTORY QUALITY, OR FITNESS FOR A PARTICULAR PURPOSE. THE USE OF THE PRODUCT BY YOU IS AT YOUR OWN RISK. IN NO EVENT WILL HIKVISION BE LIABLE TO YOU FOR ANY SPECIAL, CONSEQUENTIAL, INCIDENTAL, OR INDIRECT DAMAGES,...
- Page 5 Smart On-Street ANPR Camera User Manual DEVELOPMENT OR PRODUCTION OF WEAPONS OF MASS DESTRUCTION, THE DEVELOPMENT OR PRODUCTION OF CHEMICAL OR BIOLOGICAL WEAPONS, ANY ACTIVITIES IN THE CONTEXT RELATED TO ANY NUCLEAR EXPLOSIVE OR UNSAFE NUCLEAR FUEL-CYCLE, OR IN SUPPORT OF HUMAN RIGHTS ABUSES.
- Page 6 Smart On-Street ANPR Camera User Manual Regulatory Information FCC Information Please take attention that changes or modification not expressly approved by the party responsible for compliance could void the user's authority to operate the equipment. FCC compliance: This equipment has been tested and found to comply with the limits for a Class A digital device, pursuant to part 15 of the FCC Rules.
- Page 7 Smart On-Street ANPR Camera User Manual Industry Canada ICES-003 Compliance This device meets the CAN ICES-3 (A)/NMB-3(A) standards requirements.
- Page 8 Smart On-Street ANPR Camera User Manual Symbol Conventions The symbols that may be found in this document are defined as follows. Symbol Description Indicates a hazardous situation which, if not avoided, will or could Danger result in death or serious injury. Indicates a potentially hazardous situation which, if not avoided, could Caution result in equipment damage, data loss, performance degradation, or...
- Page 9 Smart On-Street ANPR Camera User Manual Safety Instruction Regulatory Information This is a class A product and may cause radio interference in which case the user may be required to take adequate measures. Laws and Regulations Use of the product must be in strict compliance with the local laws and regulations. Please shut down the device in prohibited area.
- Page 10 Smart On-Street ANPR Camera User Manual DO NOT touch the heat dissipation component to avoid burns. ● DO NOT expose the device to extremely hot, cold, or humidity environments. For temperature ● and humidity requirements, see device specification. No naked flame sources, such as lighted candles, should be placed on the equipment. ●...
- Page 11 Smart On-Street ANPR Camera User Manual DO NOT pierce the battery or shorten the electrodes, or it may cause explosion or fire hazard. ● DO NOT dispose of the battery into fire or a hot oven, or mechanically crush or cut the battery, ●...
-
Page 12: Table Of Contents
Smart On-Street ANPR Camera User Manual Contents Chapter 1 Introduction ....................... 1 1.1 Product Introduction ......................1 1.2 Key Feature ..........................1 Chapter 2 Activation and Login ....................2 2.1 Activation ..........................2 2.1.1 Default Information ...................... 2 2.1.2 Activate via SADP ......................2 2.1.3 Activate via Web Browser ..................... - Page 13 Smart On-Street ANPR Camera User Manual 4.1.6 Enable Digital Zoom ....................15 4.2 Local Configuration ......................15 Chapter 5 Storage ........................17 5.1 Set FTP ..........................17 5.2 Set Listening Host ......................... 18 5.3 Set Cloud Storage ......................... 18 Chapter 6 Encoding and Display ....................20 6.1 Set Video Encoding Parameters ...................
- Page 14 Smart On-Street ANPR Camera User Manual Chapter 11 Maintenance ......................39 11.1 View Device Information ....................39 11.2 Enable System Log Service ....................39 11.3 Upgrade ..........................39 11.4 Reboot ..........................40 11.5 Restore Parameters ......................40 11.6 Synchronize Time ....................... 40 11.7 Set DST ..........................
-
Page 15: Chapter 1 Introduction
Smart On-Street ANPR Camera User Manual Chapter 1 Introduction 1.1 Product Introduction Embedded with camera and radar, Smart On-Street ANPR Camera (hereinafter referred to as "device") adopts advanced deep-learning algorithm and integrates radar detection to realize the road side parking spaces capture. It supports license plate recognition and vehicle entry and exit detection. -
Page 16: Chapter 2 Activation And Login
Get the SADP software from the supplied disk or the official website ( https:// ● www.hikvision.com/ ), and install it according to the prompts. The device and the computer that runs the SADP tool should belong to the same network ●... -
Page 17: Activate Via Web Browser
Smart On-Street ANPR Camera User Manual Figure 2-1 Activate via SADP Status of the device becomes Active after successful activation. 5. Modify IP address of the device. 1) Select the device. 2) Change the device IP address to the same network segment as your computer by either modifying the IP address manually or checking Enable DHCP. -
Page 18: Login
Smart On-Street ANPR Camera User Manual Caution STRONG PASSWORD RECOMMENDED-We highly recommend you create a strong password of your own choosing (using a minimum of 8 characters, including upper case letters, lower case letters, numbers, and special characters) in order to increase the security of your product. And we recommend you reset your password regularly, especially in the high security system, resetting the password monthly or weekly can better protect your product. -
Page 19: Chapter 3 Parking Space Detection
Smart On-Street ANPR Camera User Manual Chapter 3 Parking Space Detection 3.1 Set Parking Parameters Set parking parameters to detect the parking status of the parking space, and capture license plates. Steps 1. Go to Configuration → Device Configuration → Smart Analysis . Figure 3-1 Set Parking Parameters 2. -
Page 20: Set Parking Space Indicator
Smart On-Street ANPR Camera User Manual Select the parking mode according to the actual scene. One word parallel Parallel parking. Perpendicular to the middle line Backing into a parking space or pulling in head. LED Energy Saving Mode It is used to control the supplement light. If you enable the mode, only when the vehicle is being parked into or driven out of the parking space, will the supplement light be enabled. - Page 21 Smart On-Street ANPR Camera User Manual Before You Start Connect the parking lock to the RS-485 interface of the device. ● Install the storage media, and ensure the storage status is normal. ● Steps 1. Go to Configuration → Device Configuration → Capture Parameters → Blocklist/Allowlist . 2.
-
Page 22: Set Capture Parameters
Smart On-Street ANPR Camera User Manual Search Select the search type, or enter the keywords. Click Search. The searched vehicle information will be listed in the table. Edit Select an item from the list, and click Edit. Edit the information, and click OK. Delete Select the deleting type, or enter the keywords. -
Page 23: Set Picture Composition
Smart On-Street ANPR Camera User Manual - Check Control Constant Light by Schedule when you want the constant light to be enabled during fixed time period. Set the start time and end time. Note Controlling constant light by brightness and schedule conflict with each other. 3. -
Page 24: Set Capture Overlay
Smart On-Street ANPR Camera User Manual Plate Close-up Offset The default value is 0, which is recommended to be adopted. The device can capture close-up pictures according to the set offset when no license plate is recognized. 5. Click Save. 3.4.3 Set Capture Overlay If you want to overlay information on the captured pictures, set capture overlay. -
Page 25: Set Image Encoding Parameters
Smart On-Street ANPR Camera User Manual When the overlaid number digits are smaller than the fixed digits, 0 will be overlaid before the overlaid number. E.g., the fixed digits for lane No. is 2. If the lane No. is 1, 01 will be overlaid on the picture. -
Page 26: View Real-Time Picture
Smart On-Street ANPR Camera User Manual 3.5 View Real-Time Picture You can view the real-time captured pictures and information of the captured vehicles. Steps 1. Go to Live View → Live Traffic Statistics . 2. Select the captured picture from the picture list, and you can view the capture scene picture and the captured license plate picture. - Page 27 Smart On-Street ANPR Camera User Manual - Click Measuring license plate to measure the license plate pixel. After the measurement, click Closing measurement. - Click Enable Ruler to enable ruler when measuring the license plate. After the measurement, click Disable Ruler. - Click Capture to enable manual capture.
-
Page 28: Chapter 4 Live View And Local Configuration
Smart On-Street ANPR Camera User Manual Chapter 4 Live View and Local Configuration 4.1 Live View 4.1.1 Start/Stop Live View Click to start live view. Click to stop live view. 4.1.2 Select Image Display Mode Click to display the image in 4:3/16:9/original/self-adaptive display mode. 4.1.3 Select Stream Type Click to select the stream type. -
Page 29: Enable Digital Zoom
Smart On-Street ANPR Camera User Manual 4. Optional: Click Configuration → Local Configuration to view the saving path of record files. 4.1.6 Enable Digital Zoom You can enable digital zoom to zoom in a certain part of the live view image. Steps 1. - Page 30 Smart On-Street ANPR Camera User Manual Ensures complete delivery of streaming data and better video quality, yet the real-time transmission will be affected. Provides real-time audio and video streams. Live View Performance Real-Time The video is real-time, but the video fluency may be affected. Balanced Balanced mode considers both the real time and fluency of the video.
-
Page 31: Chapter 5 Storage
Smart On-Street ANPR Camera User Manual Chapter 5 Storage 5.1 Set FTP Set FTP parameters if you want to upload the captured pictures to the FTP server. Before You Start Set the FTP server, and ensure the device can communicate normally with the server. Steps 1. -
Page 32: Set Listening Host
Smart On-Street ANPR Camera User Manual 8. Click Save. 5.2 Set Listening Host The listening host can be used to receive the uploaded information and pictures of the device arming alarm. Before You Start The listening service has been enabled for the listening host, and the network communication with the device is normal. - Page 33 Smart On-Street ANPR Camera User Manual Steps 1. Go to Configuration → Device Configuration → Encoding and Storage → Cloud Storage . Figure 5-3 Set Cloud Storage 2. Check Enable. 3. Set the server parameters. 1) Enter Server IP Address and Port No. 2) Enter User Name and Password.
-
Page 34: Chapter 6 Encoding And Display
Smart On-Street ANPR Camera User Manual Chapter 6 Encoding and Display 6.1 Set Video Encoding Parameters Set video encoding parameters to adjust the live view and recording effect. When the network signal is good and the speed is fast, you can set high resolution and bitrate to ●... -
Page 35: Set Image Parameters
Smart On-Street ANPR Camera User Manual Video Quality When bitrate type is variable, 6 levels of video quality are selectable. The higher the video quality is, the higher requirements of the network bandwidth. Encoding Complexity Under the same bitrate, the higher the encoding complexity is, the higher the image quality is, and the higher the requirement of the network bandwidth is. - Page 36 Smart On-Street ANPR Camera User Manual Figure 6-1 Set General Parameters Figure 6-2 Set Video Image Parameters 2. Adjust the parameters. Saturation It refers to the colorfulness of the image color. Sharpness It refers to the edge contrast of the image. White Balance...
- Page 37 Smart On-Street ANPR Camera User Manual It is the white rendition function of the device used to adjust the color temperature according to the environment. WDR Mode Wide Dynamic Range (WDR) can be used when there is a high contrast of the bright area and the dark area of the scene.
-
Page 38: Set Icr
Smart On-Street ANPR Camera User Manual In Normal Mode, the higher the 3D DNR Level is, the stronger the noise will be reduced. But if it is too high, the image may become fuzzy. In Expert Mode, set Spatial Intensity and Time Intensity. If the special intensity is too high, the outline of the image may become fuzzy and the details may lose. - Page 39 Smart On-Street ANPR Camera User Manual Figure 6-3 Set ROI 2. Select Stream Type. 3. Set ROI region. 1) Check Enable. 2) Select Area Code. 3) Click Draw Area. 4) Drag the mouse on the live view image to draw the fixed area. 5) Select the fixed area that needs to be adjusted and drag the mouse to adjust its position.
-
Page 40: Set Osd
Smart On-Street ANPR Camera User Manual Note The higher the ROI level is, the clearer the image of the detected area is. 5. Click Save. 6. Optional: Select other area codes and repeat the steps above if you need to draw multiple fixed areas. - Page 41 Smart On-Street ANPR Camera User Manual 6. Click Save. Result The set OSD will be displayed in live view image and recorded videos.
-
Page 42: Chapter 7 Network Configuration
Smart On-Street ANPR Camera User Manual Chapter 7 Network Configuration 7.1 Set IP Address IP address must be properly configured before you operate the device over network. IPv4 and IPv6 are both supported. Both versions can be configured simultaneously without conflicting to each other. - Page 43 Smart On-Street ANPR Camera User Manual The device automatically gets the IPv4 parameters from the network if you check Auto- Obtain. The device IP address is changed after enabling the function. You can use SADP to get the device IP address. Note The network that the device is connected to should support auto-obtain.
-
Page 44: Connect To Isup Platform
Smart On-Street ANPR Camera User Manual 7.2 Connect to ISUP Platform ISUP is a platform access protocol. The device can be remotely accessed via ISUP platform. Before You Start Create the device ID on ISUP platform. ● Ensure the device can communicate with the platform normally. ●... -
Page 45: Set Ddns
Smart On-Street ANPR Camera User Manual 7.3 Set DDNS You can use the Dynamic DNS (DDNS) for network access. The dynamic IP address of the device can be mapped to a domain name resolution server to realize the network access via domain name. Before You Start Register the domain name on the DDNS server. - Page 46 Smart On-Street ANPR Camera User Manual Caution Do not modify the default port parameters at will, otherwise the device may be inaccessible. Go to Configuration → Device Configuration → System Configuration → Port for port settings. Figure 7-4 Set Port HTTP Port It refers to the port through which the browser accesses the device.
-
Page 47: Chapter 8 Serial Port Configuration
Smart On-Street ANPR Camera User Manual Chapter 8 Serial Port Configuration 8.1 Set RS-485 Set RS-485 parameters if the device needs to be connected to other peripheral devices controlled by RS-485 serial port. Before You Start The corresponding device has been connected via the RS-485 serial port. Steps 1. - Page 48 Smart On-Street ANPR Camera User Manual Figure 8-2 Set RS-232 3. Set Baud Rate, Data Bit, Stop Bit, etc. Note The parameters should be same with those of the connected device. 4. Select Working Mode. Console Select it when you need to debug the device via RS-232 serial port. Transparent Channel Select it, and the network command can be transmitted to RS-232 control command via the RS-232 serial port.
-
Page 49: Chapter 9 Exception Alarm
Smart On-Street ANPR Camera User Manual Chapter 9 Exception Alarm Set exception alarm when the network is disconnected or the IP address is conflicted. Steps 1. Go to Configuration → Device Configuration → Exception → Exception . Figure 9-1 Set Exception Alarm 2. -
Page 50: Chapter 10 Safety Management
Smart On-Street ANPR Camera User Manual Chapter 10 Safety Management 10.1 Manage User The administrator can add, modify, or delete other accounts, and grant different permissions to different user levels. Steps 1. Go to Configuration → Device Configuration → User Management . 2. -
Page 51: Set Https
Smart On-Street ANPR Camera User Manual 3. Click Save. Result When the times you entered incorrect passwords have reached the limit, the current IP address will be locked automatically. 10.3 Set HTTPS 10.3.1 Create and Install Self-signed Certificate HTTPS is a network protocol that enables encrypted transmission and identity authentication, which improves the security of remote access. -
Page 52: Set Ssh
Smart On-Street ANPR Camera User Manual 10.4 Set SSH To raise network security, disable SSH service. The configuration is only used to debug the device for the professionals. Steps 1. Go to Configuration → Device Configuration → System Configuration → Port . 2. -
Page 53: Chapter 11 Maintenance
Smart On-Street ANPR Camera User Manual Chapter 11 Maintenance 11.1 View Device Information Basic Information and Algorithms Library Version Go to Configuration → Device Configuration → System Configuration → Device Information to view the basic information and algorithms library version of the device. You can edit Device Name and Device No. -
Page 54: Reboot
Smart On-Street ANPR Camera User Manual 4. Click OK in the popup window. Note The upgrade process will take 1 to 10 minutes. Do not cut off the power supply. Result The device will reboot automatically after upgrade. 11.4 Reboot When the device needs to be rebooted, reboot it via the software instead of cutting off the power directly. -
Page 55: Set Dst
Smart On-Street ANPR Camera User Manual Select it to synchronize the device time with that of the NTP server. Set Server Address, NTP Port, and Interval. Click NTP Test to test if the connection between the device and the server is normal. -
Page 56: Export Debug File
Smart On-Street ANPR Camera User Manual Before You Start Save the configuration file to the computer. Steps Caution Importing configuration file is only available to the devices of the same model and same version. 1. Go to Configuration → Device Configuration → System Maintenance → Import Configuration File . -
Page 57: Appendix A. Communication Matrix And Device Command
Smart On-Street ANPR Camera User Manual Appendix A. Communication Matrix and Device Command Scan the QR code below to get the communication matrix of the device. Figure A-1 Communication Matrix Scan the QR code below to get the device command. Figure A-2 Device Command... - Page 58 UD24322B...
Need help?
Do you have a question about the DS-TCL400-E and is the answer not in the manual?
Questions and answers