Advertisement
Quick Links
Advertisement

Subscribe to Our Youtube Channel
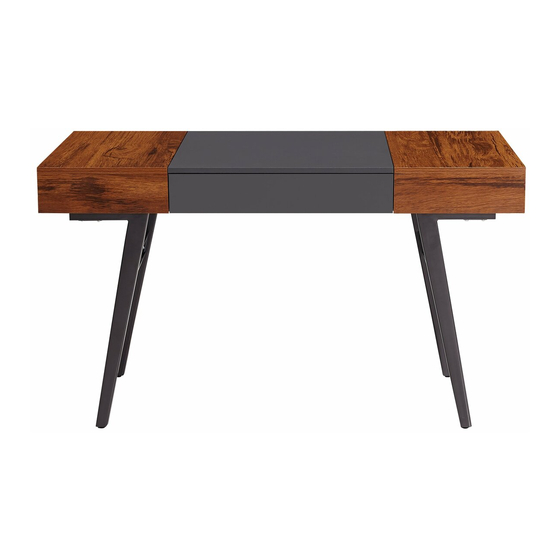
Summary of Contents for Techni Mobili RTA-1854
- Page 1 MODEL RTA-1854 ASSEMBLY INSTRUCTIONS Thank you for purchasing one of our products. Please read carefully the assembly instructions before the installation. Do not discard this manual or any of the packaging material until the unit has been completely assembled. 2 PERSONS...
-
Page 2: Main Parts List
RTA-1854 MAIN PARTS LIST Structure Studs Support Drawer Structure Front-Left and structure Connector Front-Right Back-Right and Back-Left Main structure Bottom Panel Side Panel Front/Back Panel Front/Back Front/Back Side Panel Middle Panel Front/Back Panel (Sliding) Panel (Sliding) (Sliding) Panel Top Panel... - Page 3 RTA-1854 MAIN PARTS LIST Single sliders Double Sliders Drawer Front Panel Drawer Right Drawer Bottom Panel Drawer Left Drawer Back Panel Panel Panel MAIN PARTS LOCATION ON THE UNIT...
-
Page 4: Screws List
RTA-1854 SCREWS LIST Size Figure Size Figure ☛ This unit uses cam bolts and locks. The following explains how to use them. This is not an assembly step; it is a guide for when you are actually doing the assembly using this kind of hardware. - Page 5 RTA-1854 BEFORE YOU START THE ASSEMBLY, PLEASE READ THE FOLLOWING TIPS AND WARNINGS. ☛ Do a quick inventory to make sure the product contains all the parts and hardware. ☛ Missing, damaged and defective parts can be replaced at no cost to you. Please refer to the CONTACT and the WARRANTY cards included with the product.
-
Page 6: Assembly Steps
RTA-1854 ASSEMBLY STEPS Insert the studs (4) at the bottom of the structures (1) and (2) as shown. Using screws (C) assemble the support structures (3) between the structures (1) and (2) paying attention to the orientation of the parts as shown. - Page 7 RTA-1854 Using screws (D), assemble the bottom panel (7) to the structures (1) and (2), but pay close attention to the correct orientation of the surfaces as shown. The top surface has 4 extra holes in the center but 4 less...
- Page 8 RTA-1854 Using screws (E), assemble the sliders (20) to the panels (16) y (17) as indicated below: ASSEMBLE AT THE FRONT FIRST, THEN AT THE BACK AS INDICATED BELOW. First open the sliders slowly and assemble it when the hole is visible thru the front opening as shown.
- Page 9 RTA-1854 Grab all the sliders (21) and open them completely with their small rail facing to the RIGHT. On their back side and in between the small and the middle rails there is a lever that you must push UP at the same time that you retract the small rail from the rest.
- Page 10 P.10 RTA-1854 P.10 Assemble the middle panel (10) and the panels (8), (9) and (11) to the panels (16) and (17) as shown. THE PANELS WILL HAVE THE SLIDERS ON THE OUTSIDE AND AT THE BOTTOM. Using screws (G), and from beneath the unit, assemble the panels (8), (9), (10) and (11) to the bottom panel (7)
- Page 11 P.11 RTA-1854 P.11 Using screws (E) assemble the rails (21B) to the front/back panels (13) and (14) as shown. PAY ATTENTION TO THE ORIENTATION OF THE PARTS. THE CAM LOCKS GO FACING DOWN. Using bolts (A), assemble the side panel (12) in between the front/back panels (13) and (14) as shown and as explained in page 4.
- Page 12 P.12 RTA-1854 P.12 First make sure that the ball bearings are located all the way to the front of the sliders. Then insert the drawers assembled in the previous step making sure for each drawer that the rails engage thru the plastic guides and into the ball bearings on both sides, and push the drawer slowly until it closes completely as shown.
- Page 13 P.13 RTA-1854 P.13 Insert the drawer bottom panel (25) in between the groves of panels (23), (24) and (26). Assemble the drawer front panel (22) to the drawer connectors (5) using screws (B) as shown. THE GROVE FACES DOWN. Extend the sliders completely to the front and assemble the drawer using screws (E) as shown.
-
Page 14: Weight Limits
P.14 RTA-1854 P.14 AFTER THE ASSEMBLY IS DONE, PLEASE READ CAREFULLY THE FOLLOWING CARE AND MAINTENANCE WARNINGS: WEIGHT LIMITS EXTREMELY IMPORTANT: (DO NOT EXCEED THIS LIMITS) When opening the side drawers, and if you have a lot of weight on them, hold firmly...


Need help?
Do you have a question about the RTA-1854 and is the answer not in the manual?
Questions and answers