Advertisement
Quick Links
Advertisement

Related Manuals for Techni Mobili RTA-1565


Summary of Contents for Techni Mobili RTA-1565
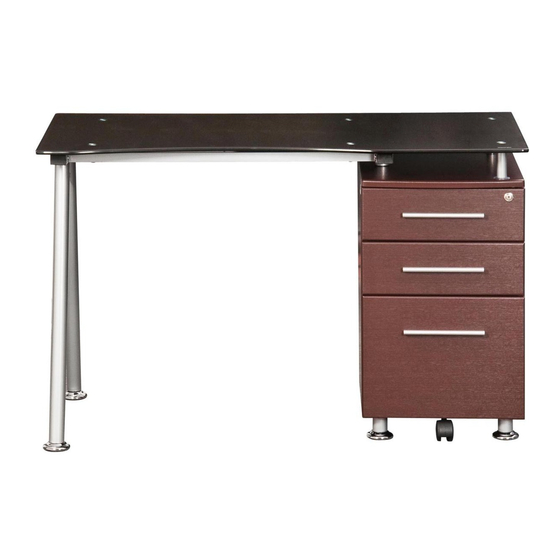
- Page 1 MODEL RTA-1565...
- Page 2 RTA-1565 DIMENSIONS Product Size: 47"W x 24"D x 30"H MAXIMUM WEIGHT CAPACITIES DO NOT exceed this limit Please use care and good judgement when placing objects on wood surface...
- Page 3 T type tube Top support tube Structure Screw stud Glass tabletop Top drawer front panel Horizontal bar Small drawer left panel Top drawer right panel Drawer bottom panel Small drawer back panel...
- Page 4 Middle drawer front panel Bracket and nut, SET Sliders Handle File drawer right panel File drawer front panel File drawer left panel File drawer back panel Locking fittings Left panel File drawer tube Right panel Middle panel Bottom panel Back panel Cabinet top panel Bottom support tube Caster...
- Page 5 HOW TO ASSEMBLE USING BOLTS AND CAM LOCKS: Cam lock Cam bolt In the other panel, insert Screw the bolt into the Turn the cam lock. and align the cam lock. corresponding panel. Join the panels. If the panel already comes with the cam lock inserted, make sure is aligned: MISALIGNED: TURN CAM LOCK CORRECT...
- Page 6 GENERAL ASSEMBLY TIPS AND TROUBLESHOOTING DURING ASSEMBLY: *Before you start assembling, make sure you have all the parts and necessary hardware by doing a quick inventory. *Follow the assembly instructions step by step, and do not skip any unless advised to do so by RTA PRODUCTS’ Customer Service. *On each step, and to avoid misalignments, always leave screws loose, and do not tighten them until all are in place.
- Page 7 Place the bar (21E) inside the channel of panel (23) with the tubes towards the top of the panel, and secure the fittings (21A) to the panel using screws (A). Insert the metal fittings into the bar (21E) in the following order: (21A)x1, (21C)x3, (21A)x1.
- Page 8 Screw the bolts (B) to the corresponding holes on the inside face of panels (22) and (23), then assemble the panels to (24), (25) and (26) by turning all the corresponding cam locks. SCREWS 6X40 MM 14PCS Screw the bolts (B) to the bottom face of panel (27), then assemble it to the cabinet by turning the corresponding...
- Page 9 Attach the studs (3) to the structure (1) using the wrench to tighten them. Then assemble the horizontal bars (5) to the structure (1) and the T type tube (4) using screws (F) as shown. DO NOT TIGHTEN THE SCREWS AFTER DONE WITH STEP #9! With the frame built in step #8 upside-down, secure the horizontal bars (5) with screws (F)
- Page 10 P.10 Place the washers (K) over the holes on the right side of the top of the cabinet, and carefully place the glass tabletop (6) over the frame and cabinet as shown. Secure the glass with screws (I) for the cabinet, and (J) for the frame.
- Page 11 P.11 Slide the bottom panels (10) thru the channels in between panels (8), (9) and (7)/(14) as shown. Make sure the panel fits inside all the channels. Assemble the back panels (11) in the between the side panels (8) and (9) using screws (C) as shown. Place the small drawers upside-down.
- Page 12 P.12 Assemble the handles (13) to the small drawers using screws (D) as shown. Assemble the lock (21D) and ring (21G) to the panel (7) of the top drawer using screws (A). IMPORTANT: The rod on the lock MUST face down, and the lock MUST turn counter-clockwise with the key.
- Page 13 P.13 Screw the bolts (B) to the inside face of panel (16) as shown. Then assemble the panels (17) and (18) by turning the cam lock. Slide the bottom panel (10) thru the channels in between panels (16), (17) and (18) as shown.
- Page 14 P.14 Assemble the handle (13) to the file drawer using screws (D) as shown. Carefully insert all the drawers starting from the bottom. Make sure the wheels from the drawers engage and roll in the middle of the sliders. FINISHED! ENJOY YOUR NEW UNIT!
-
Page 15: Warranty
CARE AND MAINTENANCE English - DO NOT EXPOSE THE SURFACES TO DIRECT SUNLIGHT, OR EXTREME ENVIRONMENTAL CONDITIONS. EXPOSURE WILL DAMAGE THE PRODUCT, WHICH IS NOT COVERED BY THE WARRANTY. - DO NOT USE SOLVENTS OVER SURFACES OR STRUCTURAL TUBES. SURFACES MUST BE CLEANED WITH A SOLUTION OF A SMOOTH SOAP AND WATER, THEN CLEARED WITH A DRY TOWEL.
Need help?
Do you have a question about the RTA-1565 and is the answer not in the manual?
Questions and answers