Advertisement
Quick Links
Thanks for purchasing one of our products.
Please read carefully the assembly instructions before the installation.
Please save this manual for future reference
WARNING:
DO NOT EXPOSE THE SURFACES TO DIRECT SUN LIGHT. EXPOSURE WILL DAMAGE
IT SURFACES, WHICH WILL NOT BE COVERED UNDER THE PRODUCT'S WARRANTY.
D06 080906
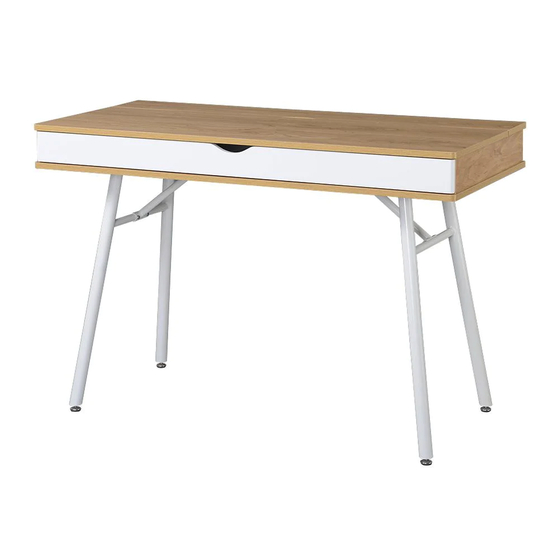
ASSEMBLY INSTRUCTIONS
MODEL RTA-1462
Advertisement

Subscribe to Our Youtube Channel
Related Manuals for Techni Mobili RTA-1462


Summary of Contents for Techni Mobili RTA-1462
- Page 1 ASSEMBLY INSTRUCTIONS MODEL RTA-1462 Thanks for purchasing one of our products. Please read carefully the assembly instructions before the installation. Please save this manual for future reference WARNING: DO NOT EXPOSE THE SURFACES TO DIRECT SUN LIGHT. EXPOSURE WILL DAMAGE IT SURFACES, WHICH WILL NOT BE COVERED UNDER THE PRODUCT'S WARRANTY.
- Page 2 21.5” 5.8” 45.25” 15.7” 30” 13.8” 24.8” 1.45” 3” 13.2” 13.7” 1.45” 13.2” 44.85” TOP WEIGHT LIMIT:50Lbs SMALL DRAWER WEIGHT LIMIT:10Lbs BIG DRAWER WEIGHT LIMIT:15Lbs DO NOT exceed this limit. Please use care and good judgment when placing objects on the product.
-
Page 3: Parts List
RTA-1462 P. 3 PARTS LIST Main structure s Supporting tube Left pane l Right panel Central panel Left back panel Right back panel Hinge s Central horizontal panel Auxiliary panel Main panel Front panel x 2SETS Sliders Large drawer back panel... - Page 4 RTA-1462 P. 4 SCREWS PART QTY . ITEM PART QTY . ITEM 3.8X35 MM WOODEN PIN 3.8X40 MM 6x40 MM CAM BOLT WOODEN PIN 6x40 MM CAM LOCK 4X12 MM ALLEN WRENCH 6X12 MM 3.5X12 MM 6X30 MM 6X15 MM...
- Page 6 RTA-1462 P. 6 Attention:Do not tighten the screws until all of them are in right positions WARNING:HOLES ON PANELS MAY BE HIDDEN UNDERNEATH PVC LAMINATE!!! STEPS Right Left...
- Page 7 RTA-1462 P. 7 STEPS Left Instructions on page 4 Right...
- Page 8 RTA-1462 P. 8 STEPS Left Right Instructions on page 4 Left Right...
- Page 9 RTA-1462 P. 9 STEPS Instructions on page 4 Instructions on page 4 Instructions on page 4 doing this step.
- Page 10 RTA-1462 P. 10 STEPS These holes are for steps 19&20 4 PCS 6X30 MM 4 PCS...
- Page 11 RTA-1462 P. 11 STEPS 4 PCS 8 PCS 6X15 MM 6X12 MM Carefully turn the table upright. Assemble the auxiliary panel (10) using screws (D) as shown. After installing the hinges, they might need fine-tuning for proper alignment and smooth closing. If adjust is necessary, loosen or tighten the 2 adjusting screws as indicated below.
- Page 12 RTA-1462 P. 12 STEPS...
Need help?
Do you have a question about the RTA-1462 and is the answer not in the manual?
Questions and answers