Table of Contents
Advertisement
Quick Links
Advertisement
Table of Contents

Subscribe to Our Youtube Channel
Related Manuals for Intellinet BGC-2010S Series


Summary of Contents for Intellinet BGC-2010S Series
- Page 1 Network Speed Dome Camera User’s Manual (Version 1.1)
- Page 2 About this User Manual This manual contains instructions for installing, configuring and using the BGC-2010S Series Speed Dome network camera. Available features and operations are different in part depending on the model. Read this manual carefully before installing and use the Network Camera properly.
- Page 3 Never place the unit near the magnetic ©2006 Intellinet-network. All right reserved. By providing this document, Intellinet-network is not making any representations regarding the correctness or completeness of its contents and reserves the right to alter this document at any...
-
Page 4: Table Of Contents
TABLE OF CONTENTS PRODUCT OVERVIEW ARDWARE NVENTORY OPERATING THE SPEED DOME CAMERA OGGING IN TO OMEPAGE BOUT IEWERS PPLET IEWER CTIVE VIEWER CONFIGURATION OF MAIN LIVE VIEW PAGE MAGE ONTROL ECTION MAGE ECTION CONFIGURING THE NETWORK SPEED DOME CAMERA CCESSING THE DMINISTRATOR OOLS VERVIEW THE... - Page 5 Event Setting Trigger Condition DVANCED Layout Security AINTENANCE System Initialization Info. and Upgrade UPPORT Get help Product Info APPENDIX ROUBLE HOOTING PING IP A ING YOUR DDRESS YMPTOMS OSSIBLE AUSES AND EMEDIAL CTIONS ERMINAL LOCK CHEMATIC IAGRAM DNS R YNAMIC EGISTRATION ECHNICAL PECIFICATIONS...
-
Page 6: Product Overview
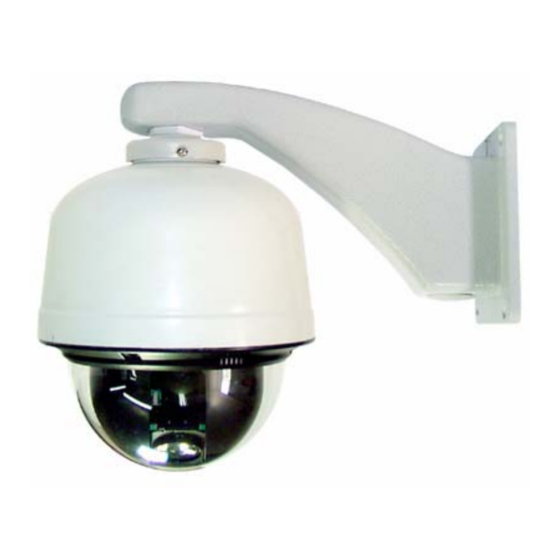
Product Overview Network Speed Dome Camera has a built-in pan/tilt/zoom camera, web server, providing full access to all features through the use of a standard Web browser. You can remotely control camera to any direction and zoom in/out the object from anywhere through internet. Up to 50 viewers can access the camera simultaneously when using MPEG4 streaming. -
Page 7: Hardware Inventory
Hardware Inventory Check the items supplied with your network speed dome camera against the following list. Item Title/Variant Notes NT Speed Dome camera BGC-2010S Printed user documentation Installation Guide CD-ROM Software / Manual 22-pol connection 24V AC, 3A Power connection I/O Cable cable connections... -
Page 8: Operating The Speed Dome Camera
Operating the Speed Dome Camera This section explains how to monitor the image from the camera using the Web browser. For setting the camera, see “Administrating the Speed Dome Camera” on Page Logging in to Homepage Start the web browser on the computer and type the IP address of the camera you want to monitor. Log in page of Camera is displayed. -
Page 9: About Viewers
When using antivirus software in the PC When you use antivirus software in your PC, the camera performance may be reduced, for example, the frame rate for displaying the image may lower. The Web page displayed of the page may be affected if you use antivirus software in your PC About Viewers You can select one of the following two viewers. -
Page 10: Active Xviewer
ActiveX viewer The ActiveX viewer operates on Internet Explorer. It displays the main viewer page using ActiveX. With this viewer, you can display images at a high frame rate and use all the functions provided with this software. When you log in the camera using Internet Explorer for the first time, the Security Warning appears. Click Yes and Install ActiveX control. -
Page 11: Configuration Of Main Live View Page
Configuration of Main Live View Page When you login, the live view page is displayed. This section briefly explains the functions of the parts and controls on the main viewer page. For a detailed explanation on each part of control, see the specified pages. Live View Page Image Control Section Live image Section... - Page 12 Record & Stop These buttons activate recording and stop recording the live image. Click record button to start recording Type the file name and specify the destination to which is recording files is to be stored, and click ‘Save’ button. (Check if the disk space is over 10MB or can’t record)) The recording file is saved in every 10MB with...
- Page 13 camera moves and the monitor image follow. Hold down the arrow button to move the direction of the camera continuously. Step button You can control the scale of pan and tilt moving using step buttons. Press “S’ for slow and “F” for fast moving.
-
Page 14: Live Image Section
Tour You can program tour setting so that the camera moves to multiple preset positions in sequence (Tour). Please see “PTZ control” on Page 21. To stop the tour, press button in the center of ptz control. Relay closed / Open This Relay button control an output directly from the Live View page. -
Page 15: Configuring The Network Speed Dome Camera
Configuring the Network Speed Dome camera This section describes how to configure the Camera and is intended for the product Administrator who has unrestricted access to all Setup tools. The camera is configured under Setup from a standard browser. Accessing the Administrator Tools Follow the instructions below to access Setup Tools from a web browser. -
Page 16: Basic
Basic This section is used for general camera setting including Network Settings, Dynamic DNS, Date and Time, video and Ptz control option. Network This section provides the menus for connecting the camera through the Ethernet. Device Name: Enter device name in your local network system. Network Address The IP address of the camera can be set automatically via DHCP, or a static IP address can be set manually. -
Page 17: Dynamic Dns
Type the port number for each server port within a limit. Service Configuration Configure the options for notification of IP address change. Click “Settings…” for configuration DHCP is a protocol for automatic IP address assignment on a network. IP address assignment Via DHCP may lead to the situation where the IP address changes and you lose contact. -
Page 18: Date And Time
Date and Time Current Camera Time Displays the date and time set on the camera. You can set the date and time using the following two methods. When you purchased the camera, be sure to check the date and time of the camra and set them if necessary. -
Page 19: Video
Video See how to set video format, image configuration, Color control Video Format The video format allows the video format on the live View page to be changed. You can select two different video formats of MPEG4 or JPEG. (The video configuration changes according to the video format) In JPEG mode, VBR is available only in image quality. - Page 20 Bit rate(CBR): Select the bit rate in CBR mode (As Bit rate is bigger, the image quality is better but frame rate decreases) Color Control You can adjust the brightness, Contrast, Saturation and Hue seeing the live image at the right. (It is highly recommended to set default value) Direct Image Access You can get the direct image from the camera with image name.
-
Page 21: Ptz Control
PTZ Control See how to store the pan, tilt and zoom positions of the camera (Preset Position) in memory and program the sequenced action and patrol of the camera (Tour and Patrol). Preset Setting You can store up to 20 setting of the pan, tilt and zoom positions (Preset Positions) of the camera in memory. Follow the steps below. -
Page 22: User Account
Check Enable to activate Tour setting. Display time It shows the display time at each preset positions. (Enter the display time from 0 to 600 seconds) Select preset name Select preset name on the drop-down list and click ‘Add’. You can select 20 preset names on the preset list. Click ‘Save’... -
Page 23: General User
General User Specify User ID, Password, Confirm and Access right for each user IDs. Access right Select the access right from each user from the list on the right. Admin can select from Alarm In/out to Listen& Talk. The rights afforded to each access right are as follows; Alarm in/out Allows monitoring of the live image and direct Alarm control on live page. -
Page 24: Event Configuration
Event Configuration This section describes how to configure the camera for alarm handling. The camera can be configured to perform actions when a defined type of events occurs. Event Server Event Servers are used for receiving uploaded image files and/or notification messages. SMTP (email) to send captured images/video Check Enabled to enter the SMTP (Simple Mail Transfer Protocol) server information to get captured images from the Speed Dome Camera. -
Page 25: Event Setting
User name/ password:: Enter FTP User name and Password Upload path: Enter the upload path to save the captured image / video data. Event Setting An Event setting is as set of parameters describing how and when the Camera is to perform certain actions. Trigger Source A Triggered event can be activated from motion detection, Input port and manual trigger. - Page 26 Action resulting from event triggering – Upload image/video This function is very useful when checking to see what happened immediately before and after a trigger, e.g. 2 seconds before and after a door has been opened. (Upload image/video is saved as .avi format) Upload image/video (by email, FTP) Set the time for pre-trigger buffer and post-trigger buffer and select upload video format.
-
Page 27: Trigger Condition
Trigger Condition You can configure the trigger condition including motion detecting, input port action and timer condition. Motion detection Motion detection is used to generate an alarm whenever movement occurs (or stops) in the video image. A total of 5 levels can be configured. - Page 28 Input port action Select the type of input port (normally open or closed) Timer Set the time to send image periodically when the event is triggered. If you set timer every 10 seconds, the captured image is uploaded to the dedicated server in every 10 seconds.
-
Page 29: Advanced
Advanced This section is used for layout option and camera security. Layout Personal settings and display configuration You can display the camera name, location on live image and also Time stamp, Frame rate and connected client number with color you want on live image. Time Stamp on live image (Encoded OSD): Display the time stamp on recorded live image. -
Page 30: Maintenance
Maintenance This section is used for system maintenance to restart, restore, reset etc. System Initialization We strongly recommend that you do not use this function unless you fully understand the consequences. Improper use may cause unexpected behavior or even cause loss of contact with the unit. Restart The unit is restarted without changing any of the settings. -
Page 31: Info. And Upgrade
Upgrade Firmware 1. Save the firmware file to your computer. The latest version of the camera firmware is available free of charge from the Intellinet Web site at http://www.networkipcamera.com/tech or from your local distributor. 2. Browse to the desired firmware file on your computer. Click Upload. -
Page 32: Support
Support If you contact Intellinet Customer Services, please help us help you resolve your problems expediently by providng a server report, log file and a brief description of the problem. Get help Frequently Asked Questions Links to the FAQ board to get an online support. -
Page 33: Appendix
Appendix Trouble Shooting This appendix provides useful information to help you to resolve any difficulty you might have with your Network IP Camera. Fault symptoms, possible causes and remedial actions are provided within a quick reference table. PINGing your IP Address By sending a packet to the specified address and waiting for a reply, the PING (Packet Internet Groper) can determine whether a specific IP address is accessible;... - Page 34 subnets, you will not be able to set the IP address. Contact your network administrator for an IP address on the same subnet as the computer you are performing the installation from. Disconnect the power from the camera. Run the Ping command (in a Command/DOS window, type ping and the IP address of the unit).
- Page 35 low performing client, use of features such as Event handling, image rotation. Too dark or light image Configuring on Video Settings Bad snapshot Display incorrectly In Display Properties, configure your display to images configured on your show at least 65000 colors, i.e. at least 16-bit, workstation Using only 16 or 256 colors on your display will produce dithering artifacts in the images...
-
Page 36: Terminal Block
Terminal Block This section describes the pin out provided by the connection module consisting of: 1 digital output I digital input RS-485 R/TX Pin NO. 1 The input/output is used in applications for, e.g. event triggering, time lapse recording, alarm notification via email, picture storage to FTP locations. -
Page 37: Schematic Diagram
Schematic Diagram You should disassemble the speed dome network camera to use terminal block. Refer to the installation guide how to disassemble the speed dome network camera. TERMINAL BLOCK [Description of network board]... -
Page 38: Dynamic Dns Registration
Dynamic DNS Registration Your internet Service Provider (ISP) provides you at least one IP address which you use to connect to the Internet. The address you get may be static, meaning it never changes, or dynamic, meaning it’s likely to change periodically. -
Page 39: Technical Specifications
Technical Specifications Item Specification Image Sensor 1/4" Interline CCD array (SONY) Auto focus with 22x optical zoom f=3.9mm wide to 85.8mm tele. F1.6 Lens Horizontal View = (0.8 x A)B A= distance from camera in meters or Field of view Formulas feet Vertical View = (0.6 x A)B B= zoom power (e.g. -
Page 40: Glossary Of Terms
- IP install Utility on CD and web-based configuration Installation, management - support for configuration backup and restore and maintenance - Support for firmware upgrades over HTTP or FTP, Firmware available at www.networkipcamera.com - Live view Web Browser - Sequence mode capability for up to 10 preset positions - Complete remote control of pan, tilt and zoom - Pentium III CPU 500MHz or higher or equivalent AMD - 128 MB RAM... - Page 41 Domain Name Service Ethernet A widely used networking standard Firewall A virtual barrier between a LAN (Local Area Network) and other networks A client-server protocol that allows a user on one computer to transfer files to and from another computer over a TCP/IP network. A markup language used to structure text and multimedia documents and to setup HTML hypertext links between documents, used extensively on the World Wide Web...
- Page 42 DISTRIBUTED BY...
Need help?
Do you have a question about the BGC-2010S Series and is the answer not in the manual?
Questions and answers